Transcription
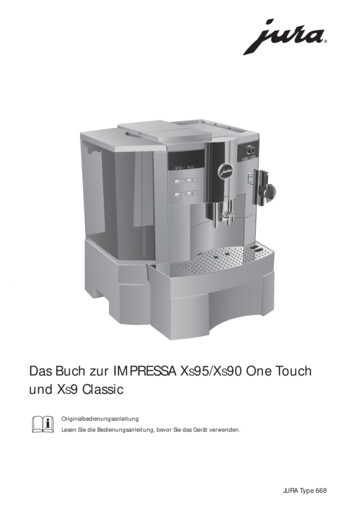
IMPRESSA S9/S7 avantgardeArt. Nr. 66813Instructions for use10/06
Legend: DISPLAY: serves as information.DISPLAY: please follow the instructions shown. Note Important TipJURA Elektroapparate AG, CH-4626 Niederbuchsiten,Internet http://www.jura.com
Fig. 1Fig. 2Fig. 3Fig. 4Fig. 5Fig. 6Fig. 7Fig. 8Fig. 12213Fig. 9Fig. 10Fig. 11Fig. 13Fig. 14Fig. 15
1617Description of the machine1815141913121110987654202122232425263272 0.21.22.23.24.25.26.27.Drip trayDrip grateProgramming doorRotary SwitchSelection key for pre-ground coffeeCoffee à la Carte key1 Coffee key2 Coffees key1 Espresso key2 Espressos keyON / OFF keyRinse keyDisplay dialog systemWater tank with handleAroma preservation coverBean tank coverLid for pre-ground coffee filler funnelHeight-adjustable coffee spoutCup trayConstant Steam keySteam Portion keyHot Water switchConnector System Professional Cappuccino FrotherHeight-adjustable hot water spoutCoffee grounds binPower switch
Contents1. Safety information .page1.1Warnings .page1.2Precautions.page2. Before you start using the IMPRESSA S9/S7avantgarde .page2.1Checking the mains voltage .page2.2Checking electrical fuse.page2.3Filling the water tank .page2.4Filling the bean tank.page2.5Adjusting the grinding gear .page2.6Power switch .page3. First use .page3.1Cup illumination.page4. Adjusting your machine to the water hardness.page5. Using a CLARIS plus filter cartridge.page5.1Installing the filter .page5.2Changing the filter .page6. Rinsing the machine.page7. Making coffee (1 espresso, 2 espressos, 1 coffee,2 coffees) .page7.1. Making coffee with pre-ground coffee powder.page8. Making coffee à la carte .page9. Making hot water.page10. Frothing milk .page10.1 Making cappuccino and hot milk with theProfessional Cappuccino Frother.page10.2 Dispensing or frothing milk for an extendedperiod (with the Professional CappuccinoFrother) .page10.3 Cleaning the Professional Cappuccino Frother .page11. Switching the IMPRESSA S9/S7 avantgarde off.page12. Programming.page12.1 Programming the filter .page12.2 Programming your machine to the correctwater hardness (only with FILTER NO) ntenance .pageProgramming the amount of powder for coffeeand espressso.page12.5 Setting the amount of water for coffee,espresso and coffee à la carte.page12.6 Programming the temperature for coffee,espresso and coffee à la carte.page12.7 Programming the water portion.page12.8 Programming the steam portion .page12.9 Economy mode.page12.10 Setting the time .page12.11 Programming the automatic switch-on time .page12.12 Programming the automatic switch-off time .page12.13 Programming the language .page12.14 Programming the display .page12.15 Information.page12.16 Resetting products to factory settings.pageMaintenance .page13.1 Filling the water tank .page13.2 Emptying the coffee grounds.page13.3 Emptying the drip tray .page13.4 Drip tray missing .page13.5 Filling the bean tank.page13.6 Removing stones from the grinding gear .page13.7 Changing the filter .page13.8 Prompt to run cleaning cycle .page13.9 Prompt to run decalcifying cycle .page13.10 Emptying the system .page13.11 General cleaning instructions .pageCleaning .pageDecalcifying.pageDisposal.pageTips for perfect coffee.pageProblems .pageLegal information .pageTechnical 62728285E
Before you begin1.2.PrecautionsCongratulations on having bought this IMPRESSA S9/S7 avantgarde! Never expose the coffee machine to weather (rain, snow, frost),never touch the machine when your hands are wet. Place the IMPRESSA on a firm, level base that is resistant to anywater that may leak. Never stand on hot or warm surfaces (ovenhobs). Keep out of the reach of children. If you intend not to use the machine for a longer time (holidays,etc.), always turn off the power switch. Always turn off the power switch before cleaning the machine. When disconnecting the mains cable, never pull on the mainscable or the machine itself. The IMPRESSA is connected to the mains supply via a mainscable. Make sure nobody can trip over the mains cable. Keep outof reach of children and pets. Never put the coffee machine or parts of it into a dishwasher. Make sure to install the machine at a place with sufficient aircirculation to prevent it from overheating.In order to ensure perfect operation of your IMPRESSA, carefullyread this operating manual and keep it for future reference.Should you need more information or meet with particular problems not specified in these operating instructions in sufficientdetail, please contact JURA Elektroapparate AG directly or yourlocal authorized dealer.You will also find useful tips on operation and maintenanceof the machine on our website at www.jura.com.Don’t forget to check out the knowledge builder – our animated operating instructions. LEO, our assistant, will takeyou through all the functions.1. Safety information1.1 Warnings Children are not aware of the dangers involved in using electricappliances. Therefore, never leave the machine unattended withunsupervised children around. The coffee machine must only be used by persons who knowhow to operate it. Never use a defective machine or a machine with a defectivemains cable. Never repair or open the coffee machine yourself. Repairs mayonly be carried out by authorized service shops using originalspare parts and accessories. Never immerse the IMPRESSA in water.62. Before you start usingthe IMPRESSA S9/S7 avantgarde2.1 Checking the mains voltageThe coffee machine is preset to the correct mains voltage. Check ifyour local mains supply voltage complies with the information given on the type plate on the underside of the coffee machine.2.2 Checking electrical fuseThe machine is designed for an electric current of 10 amperes.Check if the electrical fuse has sufficient capacity.
2.3 Filling the water tankOnly use fresh, cold water. Never fill the water tank withmilk, mineral water or other liquids. Take out the water tank and thoroughly rinse it out with cold tapwater (Fig. 1). Then fill it with water and place it back into the coffee machine.Make sure the tank is installed correctly and that it engagesproperly.2.4 Filling the bean tankTo ensure your IMPRESSA will have a long service life andto avoid repairs, please note that the grinding gear is not suitable for coffee beans that have been treated with additives(e.g. sugar) during or after roasting. Coffee blends of thistype may damage the machine’s grinding gear. Repair costsresulting from such use are not subject to the terms of guarantee. Open the cover of the bean tank (Fig. 2) and remove the aromapreservation cover (15). Remove any dirt or foreign matter from the bean tank. Fill the bean tank with coffee beans (Fig. 2), replace the aromapreservation cover (15) and close the lid.2.5 Adjusting the grinding gearYou can adjust the grinding gear to the roast of your coffee. Werecommend that you use:a finer setting for a lighter roasta coarser setting for a darker roastThe grinding degree may only be adjusted while the grindinggear is running. Open the lid of the bean tank (16). To adjust the grinding degree, turn the Rotary Switch (Fig. 2) tothe required position.The smaller the dots, the finer the grindThe larger the dots, the coarser the grindE2.6 Power switchActuate the power switch (27) on your IMPRESSA beforeusing the machine for the first time.We recommend that you switch off your IMPRESSA withthe power switch (27) if you intend not to use the machinefor longer periods of time (e.g.during holidays)3. First use Press the power switch (27) on the back (bottom left) of themachine (Fig. 3). The ON / OFF key(11) lights up to indicate that the machinehas been switched on with the power switch. Switch the machine on using the ON / OFF key(11). Thelight of the ON / OFF key goes off. Open the programming door (3). SPRACHEDEUTSCH Turn the Rotary Switch (4) until the required language is displayed. Example: LANGUAGEENGLISH Confirm your selection by pressing the Rotary Switch (4). FILL SYSTEM / PRESS STEAM7
Place a receptacle under the Professional Cappuccino Frother(24) and press one of the Steam keys. The system now fills up automatically. A little water will leakfrom the frothing jet. SYSTEM FILLING HEATING UP PRESS RINSE Place a cup under the height-adjustable coffee spout (18). Press Rinse. MACHINE RINSING Now the water lines are flushed with fresh water. A little waterwill leak from the coffee spout (18). SELECT PRODUCT You can now make a product of your choice by pressing thecorresponding key.If FILL BEANS appears on the display, press one of thecoffee product keys again. The grinder is not yet completelyfilled with coffee beans.For a perfect frothing result, adjust the height-adjustablecoffee spout (18) to the size of your cup (Fig. 4).3.1 Cup illuminationThe cup illumination puts your coffee in a good light, making it atreat for the eyes as well.When you switch on the IMPRESSA or press any key, the cup illumination is activated for 1 minute.84. Adjusting your machine to the water hardnessThe IMPRESSA heats up water. As a result, calcificationoccurs during normal use. This is indicated automatically.The IMPRESSA must therefore be adjusted to the hardnessof the water used. Use the supplied test sticks to determinethe water hardness or contact your local waterworks.1 German hardness is equivalent to 1.79 French hardness.The water hardness programming step is no longer displayedif the filter is activated.The IMPRESSA is preset to 16 dH. This setting can be changed.To do so, proceed as follows: SELECT PRODUCT Open the programming door (3). Press the Rotary Switch (4)until you hear an acoustic signal. FILTER NO Turn the Rotary Switch (4) until the following message is displayed: HARDNESS16 dH Now press the Rotary Switch (4) to start programming. 16 dH Now turn the Rotary Switch (4) until the required water hardnessis set. 20 dH (example) Confirm the selected setting by pressing the Rotary Switch (4). HARDNESS20 dH (example)
Now turn the Rotary Switch (4) until the following message isdisplayed: EXIT Now press the Rotary Switch (4) to leave the programming mode. SELECT PRODUCT5. Using a CLARIS plus filter cartridgeWhen using the CLARIS plus filter cartridge correctly, decalcifying your IMPRESSA will no longer be necessary. Formore information on the CLARIS plus filter cartridge referto the brochure “CLARIS plus. Hard on limescale. Gentle onyour coffee machine.”5.1 Installing the filter Open the programming door (3). Press the Rotary Switch (4) until you hear an acoustic signal. FILTERNO Now press the Rotary Switch (4) to start programming. Turn the Rotary Switch (4) until the following message is displayed: FILTERYES Confirm your setting by pressing the Rotary Switch (4). INSERTFILTER / PRESS STEAM Take out the water tank (14). Empty out any remaining water.Fold up the cartridge holder (Fig. 1). Attach the extension piece(contained in the Welcome Pack) to the top of the CLARIS plusfilter cartridge. Now insert the filter cartridge in the water tank,applying gentle pressure (Fig. 1) Close the cartridge holder until it engages audibly. Fill the water tank (14) with cold, fresh tap water and place itback into the machine. Place a sufficiently large receptacle (min. 0.5 litres) under theProfessional Cappuccino Frother (24) and press one of the Steamkeysto start the filter rinsing process. FILTER RINSING Filter rinsing stops automatically. SELECT PRODUCTYou have now activated the filter. The programming step foradjusting your machine to the correct water hardness istherefore no longer displayed.The water might be slightly discoloured (no hazard tohealth).5.2 Changing the filterAfter 50 litres of water the filter cartridge will need to bereplaced. The display will prompt you to change the filter.Please monitor the period of use of the CLARIS plus filtercartridge (max. 2 months) using the scale on the cartridgeholder by the water tank. SELECT PRODUCT / CHANGE FILTER The Rinse keylights up. Press Rinse. INSERT FILTER / PRESS STEAM Remove the water tank (14) from the IMPRESSA. Empty outany remaining water. Fold up the cartridge holder (Fig. 1).Attach the extension piece to the top of the CLARIS plus filtercartridge. Now insert the filter cartridge in the water tank, applying gentle pressure (Fig. 1) Close the cartridge holder until it engages audibly. Fill the water tank (14) with cold, fresh tap water and place itback into the machine.9E
Place a sufficiently large receptacle (min. 0.5 litres) under theProfessional Cappuccino Frother (24) and press one of the Steamkeysto start the filter rinsing process. FILTER RINSING Filter rinsing stops automatically. SELECT PRODUCTYou can also trigger a change of filter manually from theMaintenance menu at any point in time (only if the filter hasbeen activated) - see Chapter 13.3.6. Rinsing the machineIf the coffee machine is switched off and has cooled down,you will be prompted to start a rinsing cycle when switchingthe machine back on. The rinsing cycle starts automaticallywhen you switch the machine off. PRESS RINSE Place a cup under the coffee spout (18). Press Rinse. MACHINE RINSING SELECT PRODUCTYou can also trigger a rinsing cycle manually from the Maintenance menu at any point in time (see Chapter 13.3).7. Making coffee(1 espresso, 2 espressos, 1 coffee, 2 coffees) SELECT PRODUCT Place 1 or 2 cups (as required) under the coffee spout (18) andpress a key of your choice ,,,. The pre-brewingprocess (I.P.B.A.S. ) moistens the coffee powder, briefly interrupts the flow of hot water and then begins with the actual brewing process.10 1 ESPRESSO (example)NORMAL (example) The coffee brewing process stops automatically as soon as theset amount of water has run through. SELECT PRODUCTTo stop the brewing process prematurely, press any of theproduct keys.You can change the amount of water while the machine isbrewing coffee. Open the programming door. Turn theRotary Switch (4) until the display indicates the requiredamount (ML). The amount of water can be selected in increments of 5 ML.The amounts given in ML are approximate values and mayvary from the effective quantity.7.1. Making coffee with pre-ground coffee powderNever use water-soluble instant coffee. SELECT PRODUCT Place 1 or 2 cups (as required) under the coffee spout (18) andopen the programming door (3). Press the selection key for preground coffee. FILLPOWDER / SELECT PRODUCT Now fill 1 or 2 level scoops of pre-ground coffee into the fillerfunnel for pre-ground coffee (17). Then press a product key of your choice. 1 ESPRESSO (example)POWDER
The coffee brewing process stops automatically as soon as theset amount of water has run through. SELECT PRODUCTTo stop the brewing process prematurely, press any of theproduct keys.We recommend always using powder from fresh coffeebeans or pre-ground, vacuum-packed coffee. Never fill inmore than 2 scoops of powder. The filler funnel is no storagetank. Make sure the coffee powder you use is not too fine.This may block the system and cause the coffee only to dripout of the coffee spout.If you have pressed the selection keyunintentionally,press any of the product keys to cancel your selection.You can change the amount of water while the machine isbrewing coffee. To do so, turn the Rotary Switch (4) until thedisplay indicates the required amount (ML). The amount ofwater can be selected in increments of 5 ML.The amounts given in ML are approximate values and mayvary from the effective quantity.8. Making coffee à la carte SELECT PRODUCT Place 1 cup under the coffee spout (18) and open the programming door (3). Press the Coffee à la Carte key . A LA CARTEXMILD Turn the Rotary Switch (4) until the display indicates the desiredcoffee strength and press the Rotary Switch (4) to make the coffee. The pre-brewing process (I.P.B.A.S. ) moistens the coffeepowder, briefly interrupts the flow of hot water and then beginswith the actual brewing process. A LA CARTEXSTRONG (example) The coffee brewing process stops automatically as soon as theset amount of water has run through. SELECT PRODUCTTo stop the brewing process prematurely, press any of theproduct keys.You can change the amount of water while the machine isbrewing coffee. To do so, turn the Rotary Switch (4) until thedisplay indicates the required amount (ML). The amount ofwater can be selected in increments of 5 ML.The amounts given in ML are approximate values and mayvary from the effective quantity.9. Making hot water SELECT PRODUCT Place 1 cup or 1 glass under the hot water spout (25) and turn theHot Water switch (22) to . WATERPORTION The machine stops dispensing water automatically as soon as theset amount of water has been dispensed. CLOSE TAP Turn the switch (22) back to . SELECT PRODUCTTo stop the process prematurely, turn the switch (22) backto .11E
You can also change the amount of water set while themachine is brewing coffee. Open the programming door.Turn the Rotary Switch (4) until the display indicates therequired amount (ML). The amount of water can be selectedin increments of 5 ML.The amounts given in ML are approximate values and mayvary from the effective quantity.10. Frothing milkThe IMPRESSA is ready to froth milk when both Steam key lightslight up constantly.If the lights are off, press one of the two Steam keys.The first time you use your coffee machine, remove the protective cover from the Professional Cappuccino Frother (24).The protective cover is used only during transport as protection to prevent the ingress of contaminated materials. Now place the cup with the cappuccino froth or hot milk underthe coffee spout (18) and make a coffee of your choice.10.2 Dispensing or frothing milk for an extendedperiod (with the Professional CappuccinoFrother) Fill the milk container with milk or immerse the pipe directly into the milk. Place a cup under the Professional Cappuccino Frother. Press the Extended Steam draw-off button . DRAW OFF STEAM The frothing operation or heating of milk will continue until youpress the Extended Steam draw-off button again. For milk foam, turn the selector switch (1, Fig. 7) to area 2. For hot milk, turn the selector switch (1, Fig. 7) to area 3.10.3 Cleaning the Professional Cappuccino Frother10.1 Making cappuccino and hot milk with theProfessional Cappuccino Frother Fill the milk pitcher with milk or dip the milk hose directly intothe milk. Place a cup under the Professional Cappuccino Frother. Press the Steam Portion key . STEAM PORTION The machine will froth or heat milk according to the time youprogrammed (see “Programming the steam portion”, Chapter13.8) For cappuccino, turn the selector switch (1, Fig. 7) to (2). For hot milk, turn the selector switch (1, Fig. 7) to (3).12After heating or frothing milk, you should clean the Professional Cappuccino Frother. We recommend cleaning it on adaily basis.Your IMPRESSA will not prompt you to clean the Professional Cappuccino Frother.The Professional Cappuccino Frother is best cleaned usingthe JURA Auto-Cappuccino cleaner. Please contact an authorized dealer. We recommend cleaning these devices daily. Place a receptacle under the Professional Cappuccino Frother(24). Fill a second receptacle with 2.5 dl of fresh water and add onecapful of the Auto-Cappuccino Cleaner.
Dip the milk pipe into the second receptacle containing theAuto-Cappuccino Cleaner. Press the Extended Steam draw-off button . As soon as the liquid has flown through, press the ExtendedSteam draw-off buttonagain. Fill the receptacle with fresh water. Immerse the milk pipe in the receptacle. Press the Extended Steam draw-off button . As soon as the fresh water has flown through, press the ExtendedSteam draw-off buttonagain. The machine is ready to dispense drinks.We also recommend regularly disassembling the Frother andrinsing it under running water. Remove the Professional Cappuccino Frother from the IMPRESSA and take it apart as shown in Fig. 8. Thoroughly rinse all the parts of the Professional CappuccinoFrother under running water. Re-assemble the Professional Cappuccino Frother and attach itto your IMPRESSA.11. Switching the IMPRESSA S9/S7 avantgarde offSwitching the IMPRESSA off causes the coffee spout to be rinsedfirst. Therefore, please make sure to place a suitable receptacleunder the coffee spout (18). SELECT PRODUCT Switch the IMPRESSA off with the ON / OFF key MACHINE RINSING The coffee spout (18) is rinsed.(11).12. ProgrammingThe IMPRESSA leaves the factory with a number of defaultsettings that allow you to make coffee without having to program the machine first. You can, however, adjust variousparameters to make the coffee suit your personal taste.The following parameters can be adjusted: Filter Water hardness Rinse Powder quantity Water quantity Temperature Water portion Steam portion Economy mode Time Automatic switch-on time Automatic switch-off time Language Display Information (to be viewed only)12.1 Programming the filterPlease refer to Chapter 5 “Using the CLARIS plus filter cartridge”.12.2 Programming your machine to the correctwater hardness (only with FILTER NO)Please refer to Chapter 4 “Adjusting your machine to the waterhardness”.13E
12.3 MaintenanceYou can activate the following maintenance functions from thisprogram item:RINSE MACHINE, CLEAN MACHINE, DE-SCALE MACHINE,CHANGE FILTER.“DE-SCALE machine” is not displayed if you are using a CLARISplus filter cartridge and the filter is set to “YES”.“CHANGE FILTER” is not displayed if you are not using aCLARIS plus filter cartridge and the filter is set to “NO”. SELECT PRODUCT Open the programming door (3). Press the Rotary Switch (4)until you hear an acoustic signal. FILTERNO or YES Turn the Rotary Switch (4) until the following message is displayed: RINSE Now press the Rotary Switch (4) to start programming. RINSEMACHINE Turn the Rotary Switch (4) until the required maintenance function (for selection see above) is displayed. Press the RotarySwitch (4) to activate the function.The Maintenance menu closes automatically after 5 secondsif no function is selected.12.4 Programming the amount of powder for coffeeand espressoYou can adjust the amount of powder for coffee and espressoseparately.14 SELECT PRODUCT Open the programming door (3). Press the Rotary Switch (4)until you hear an acoustic signal. FILTERNO or YES Turn the Rotary Switch (4) until the following message is displayed: POWDERQUANTITY Now press the Rotary Switch (4) to start programming. SELECTPRODUCT Then press a product key of your choice. NORMAL (example)– Now turn the Rotary Switch (4) until the required amount ofpowder is set. STRONG (example)– Confirm the selected setting by pressing the Rotary Switch (4). POWDERQUANTITY Now turn the Rotary Switch (4) until the following message isdisplayed: EXIT Now press the Rotary Switch (4) to leave the programmingmode. SELECT PRODUCT
12.5 Setting the amount of water for coffee,espresso and coffee à la carte12.6 Programming the temperature for coffee,espresso and coffee à la carteThe system’s basic settings include pre-defined amounts of water(coffee 130 ml, espresso 60 ml, 2 coffees 260 ml, coffee à la carte145 ml). However, these can be modified as required.You can adjust the temperature for each type of coffee separately. The temperature can be set to 2 different levels(NORMAL, HIGH). SELECT PRODUCT Open the programming door (3). Press the Rotary Switch (4)until you hear an acoustic signal. FILTERNO or YES Turn the Rotary Switch (4) until the following message is displayed: WATERQUANTITY Press the Rotary Switch (4) to activate the program item. SELECTPRODUCT Press a product key of your choice. 1 ESPRESSO (example)60 ML Turn the Rotary Switch (4) to adjust the amount of water andthen confirm your setting by pressing the Rotary Switch (4). WATERQUANTITY Turn the Rotary Switch (4) until the following message is displayed: EXIT Press the Rotary Switch (4) to leave the programming mode. SELECT PRODUCT SELECT PRODUCT Open the programming door (3). Press the Rotary Switch (4)until you hear an acoustic signal. FILTERNO or YES Turn the Rotary Switch (4) until the following message is displayed: TEMP Now press the Rotary Switch (4) to start programming. SELECT PRODUCT Then press a product key of your choice. TEMPNORMAL (example) Now turn the Rotary Switch (4) until the required temperature isset. TEMPHIGH (example) Confirm the selected setting by pressing the Rotary Switch (4). TEMP Now turn the Rotary Switch (4) until the following message isdisplayed: EXIT Now press the Rotary Switch (4) to leave the programmingmode. SELECT PRODUCT15E
12.7 Programming the water portion The system’s basic settings include a pre-defined amount of water(225 ml). However, this amount can be modified as required. SELECT PRODUCT Open the programming door (3). Press the Rotary Switch (4)until you hear an acoustic signal. FILTERNO or YES Turn the Rotary Switch (4) until the following message is displayed: WATERPORTION Press the Rotary Switch (4) to activate the program item. PORTION225 ML (example) Turn the Rotary Switch (4) to adjust the amount of water andthen confirm your setting by pressing the Rotary Switch (4). WATERPORTION Turn the Rotary Switch (4) until the following message is displayed: EXIT Press the Rotary Switch (4) to leave the programming mode. SELECT PRODUCT12.8 Programming the steam portionThe system’s basic settings include a pre-defined steam portion (20sec.). However, this amount can be modified as required. SELECT PRODUCT Open the programming door (3). Press the Rotary Switch (4)until you hear an acoustic signal.16 FILTERNO or YESTurn the Rotary Switch (4) until the following message is displayed:STEAMPORTIONPress the Rotary Switch (4) to activate the program item.PORTION20 SEC (example)Turn the Rotary Switch (4) to modify the steam portion and thenconfirm your setting by pressing the Rotary Switch (4).STEAMPORTIONTurn the Rotary Switch (4) until the following message is displayed:EXITPress the Rotary Switch (4) to leave the programming mode.SELECT PRODUCT12.9 Economy modeYou can set your machine to various power saving modes. SELECT PRODUCT Open the programming door (3). Press the Rotary Switch (4)until you hear an acoustic signal. FILTERNO or YES Turn the Rotary Switch (4) until the following message is displayed: ECONOMYMODE –
Now press the Rotary Switch (4) to start programming. ECONOMYMODE Now turn the Rotary Switch (4) until the required economymode is displayed. ECONOMYMODE 2 (example) Confirm the selected setting by pressing the Rotary Switch (4). ECONOMYMODE 2 (example) Now turn the Rotary Switch (4) until the following message isdisplayed: EXIT Now press the Rotary Switch (4) to leave the programmingmode. SELECT PRODUCTEconomy mode –Selecting this level puts the IMPRESSA in constant stand-bymode.This setting allows you to make any of the products without havingto wait for the machine to heat up.Select this setting if you want to make a lot of coffees withhot or frothed milk and do not want to wait for the machineto heat up first.Economy mode 1Selecting this level puts the IMPRESSA in constant stand-by modefor making coffee. The machine is heated up separately if you needsteam for hot or frothed milk.Select this setting if you make mostly black coffees and areprepared to wait for approx. 1 minute before being able todraw steam.Economy mode 2Selecting this level does not put the IMPRESSA in stand-by mode(economy temperature). The machine heats up each time you makecoffee or need to draw steam.The I
Never immerse the IMPRESSA in water. 1.2.Precautions Never expose the coffee machine to weather (rain, snow, frost), never touch the machine when your hands are wet. Place the IMPRESSA on a firm, level base that is resistant to any water that may leak. Never stand on hot or warm