Transcription
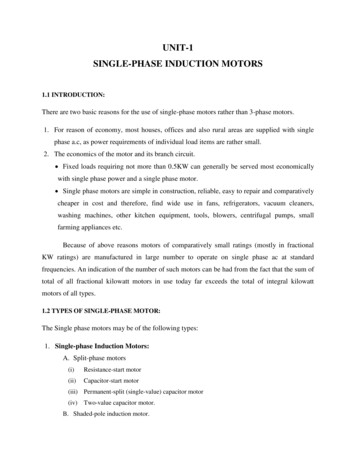
Impressa SAvantgarde SeriesFully AutomaticCoffee & Espresso Centerwith Clearyl Water Care SystemOperating Instructionsand Warranty65352Customer Service 1-800-220-5701Impressa S9 Avantgarde shown
IMPORTANT SAFEGUARDSWhen using electrical appliances, basic safety precautionsshould always be followed, including the following:1. Read all instructions.2. Do not touch hot surfaces. Use handles or knobs.3. To protect against fire, electric shock and personal injury,do not immerse cord, plugs or appliance in water orother liquids.4. Close supervision is necessary when any appliance isused by or near children.5. Unplug from outlet when not in use and before cleaning.Allow it to cool before putting on or taking off parts, andbefore cleaning the appliance.6. Do not operate any appliance with a damaged cord orplug or after the appliance malfunctions, or has beendamaged in any manner. Return appliance to the nearestauthorized service facility for examination, repair oradjustment.7. The use of accessory attachments not recommended bythe appliance manufacturer may result in fire, electricshock, or personal injury.8. Do not use outdoors.9. Do not let the cord hang over the edge of a table orcounter, or touch hot surfaces.10. Do not place on or near a hot gas or electric burner, or ina heated oven.11. Always attach plug to appliance first, then plug cord into1.wall outlet. To disconnect, turn any control to “off” thenremove plug from wall outlet.12. Do not use appliance for other than intended use.13. Use extreme caution when disposing hot steam.14. For household use only.SAVE THESE INSTRUCTIONSSPECIAL CORD SETINSTRUCTIONSRegarding your cord set:A. A short power-supply cord (or detachable power-supplycord) is to be provided to reduce risks resulting frombecoming entangled in or tripping over a longer cord.B. Longer detachable power-supply or extension cords areavailable and may be used if care is exercised in their use.C. If a long detachable power-supply cord or extension cordis used,1) The marked electrical rating of the detachable powersupply cord or extension cord should be at least asgreat as the electrical rating of the appliance,2) If the appliance is of the grounded type, the extension cord should be a rounding type 3-wire cord, and3) The longer cord should be arranged so that it will notdrape over the counter-top or table-top where it can bepulled on by children or tripped over.
Notice: Your Impressa S Avantgarde Series has a 3-pronggrounded plug. To reduce the risk of electrical shock thisplug will fit in an outlet only one way. If the plug does not fitin the outlet contact a qualified electrician. DO NOT modifythe plug in any way.CAUTIONThis appliance is for household and commercial use. Anyservicing other than cleaning and user maintenance shouldbe performed by an authorized service representative. Do not immerse base in water or try to disassemble. To reduce the risk of fire or electric shock, do not removethe base. No user serviceable parts inside. Repair shouldbe done by authorized service personnel only. Check voltage to be sure that the voltage indicated on thename plate agrees with your voltage. Never use warm or hot water to fill the water container!Use cold water only! Keep your hands and the cord away from hot parts of theappliance during operation. Never clean with scouring powders or hard implements.JURA-CAPRESSOJura was founded in 1931 in Switzerland. Capresso wasfounded in 1994 in the USA. Both companies have joinedforces in the US to bring you the finest Fully AutomaticCoffee Centers available anywhere. With innovative anduser-friendly features, high quality materials, clear instructions and superb customer service, we are sure you willexperience the best coffee, espresso, cappuccino or latteyou have ever had. We hope you will enjoy your new FullyAutomatic Coffee Center and will recommend it to yourfriends. For more information about our products visit ourwebsite www.capresso.com.Michael Kramm, PresidentCustomer Service1-800-220-5701Mon-Thu 9AM – 9PM Fri 9AM – 8PM Sat 9AM – 5PMEastern Standard Time.email: contact@capresso.comJura-Capresso LLC.81 Ruckman Road, Closter, NJ 07624201-767-3999 Fax: 201-767-9684Website: www.capresso.com2.
FIG. 110911812713614515415a*31621711819FIG. 1aabcda. Scoopb. Cleaning tabletsc. Water indicatord. Clearyl filter* frothXpress-Plus System see Fig. 15 to 17a3.1.2.3.4.5.FIG. 1bMain Power ight-Adjustable Dual Coffee SpoutOperating Display (Fig.2)Removable Water TankLow Water Flotation Device(Inside)Clearyl Water Care Cartridge(Not Installed)Lid for Water TankHolder for Clearyl Water CartridgeAroma Protection LidCover for Bean ContainerLid for Ground Coffee FunnelOpening for Ground CoffeeWarming PlateSteam System (Fig.3)Hot Water ReleaseSteam NozzleDual-Frother-Plus (Fig.14,14a, 14b)Used Coffee ContainerRemovable GridRemovable Drawer/Used Water TrayCover for Rotary Dial andA La Carte Button (Fig. 3A)
Steam & Hot Water SystemOperating DisplayFIG. 3FIG. 2ASSELECTELECTPPRODUCTRODUCTBFIG. 3AFIG. 4MNKO“Hot WaterPosition”EPCDA. Display Dialog SystemB. ON/OFF ButtonC. 1-CUP Espresso ButtonD. 1-CUP Coffee ButtonE. RINSE ButtonF. 2-CUP Espresso ButtonG. 2-CUP Coffee ButtonFChromecoverSteamNozzleLQGK. STEAM PORTION ButtonL. Selector Switch forCoffee or Hot WaterM. PERMANENT STEAMButtonN.O.P.Q.A La Carte ButtonGround Coffee ButtonRotary Dial w/push buttonService Cover(do not remove)4.
FIG. 5FIG. 9FIG. 6FIG. 10FIG. 7FIG. 11Fig. 35.FIG. 8aFIG. 12FFIG. 8bFIG. 13
FIG. 14aFIG. 14FIG. 14bFIG. 1523Frothing:downSteamingup1TipFIG. 15aSleeveFIG. 16Frothing rangefrothXpressPlusattachedDIALSteam onlyno siphoningRodFIG. 17FIG. 17aSiphoningwithflexiblehoseSteaming range6.
FIG. 18FIG. 227.FIG. 19FIG. 23FIG. 20FIG. 24FIG. 21FIG. 25
TABLE OF ant Safeguards / Jura Capresso .1-2Drawings .3-7Product Warranty Registration . 9Operating Instructions / Customer Service . 9Welcome to the Impressa S Avantgarde. 9“Crema Coffee” and Pressure Brewing . 9Different Coffee Drinks . 10Coffee Facts . 10Please Don’t / Please Do . 10Factory Settings . 11Preparing the Machine for the First Time . 11Filling the Water Tank . 11Filling the Bean Container . 11Turning the Machine On . 12Adjusting the Grinder . 12Daily Preparation . 13Brewing Coffee and Espresso. 13Overriding Cup Size . 13The A La Carte Button . 14Cappuccino and Latte. 14Using the Dual Frother Plus . 14Cleaning the Dual Frother Plus . 15Using the frothXpress Plus Systemwith Milk Container . 15Using the frothXpress Plus Systemwith Flexible Hose . 16Hot Chocolate, Café Mocha. 16Cleaning the frothXpress Plus . 16Cleaning the Milk Container . 17Using Ground Coffee . 17Using Hot Water . 17Water Care . 17PAGEClearyl Water Filter Cartridge . 18Installing and Activatingthe Clearyl Water Cartridge . 1814b. Replacing the Clearyl Water Cartridge . 1915.Water Hardness Monitor. 1915a. Changing the Water Hardness Monitor . 20Programming. 2016.16.1 Coffee Strength. 2116.2 Coffee Volume (Cup Size) . 2116.3 Temperature . 2216.4 Hot Water Volume. 2216.5 Steam Duration . 2216.6 Economy Modes . 2316.7 Actual Time . 2316.8 Auto-On. 2416.9 Auto-Off. 2416.10 Language . 2416.11 Display. 2416.12 Information . 25Care and Maintenance Messages . 2517.17.1 Manual Maintenance Cycles . 2617.2 Removing Stones etc. from the Burr Grinder . 2717.3 General Cleaning Instructions . 2717.4 Emptying the System before Transport. 2718.Automatic Cleaning Cycles . 2818.1 Cleaning with Special Tablet . 2818.2 Decalcifying . 2818.3 Decalcifying Procedure . 2919.Tips for Better Coffee. 3020.Error Messages / Troubleshooting . 3021.Supplies. 3222.Limited Warranty . 3214.14a.8.
1. PRODUCT WARRANTY REGISTRATIONPlease read the enclosed product registration form now. Fill it outand mail or fax it to us within two weeks after purchasing yourmachine or register online through our website: www.capresso.com.Important: This registration is part of your warranty (chapter 22).2. OPERATING INSTRUCTIONS / CUSTOMER SERVICEThank you for choosing this Jura-Capresso product. Please study these Operating Instructions carefully beforeusing your new machine. We highly recommend viewing theenclosed DVD. Select S Avantgarde Series. Also included is a Quick Reference Guide. Keep it next toyour machine until you are familiar with all functions. For further information please call our TOLL FREE number:1-800-220-5701, Mon-Fri 9AM – 9PM & Sat 9AM – 5PMEastern Standard Time. If you call at any other time pleaseleave a message including your telephone number and a timeyou can be reached. You can send us a FAX at: 201-767-9684or EMAIL us at contact@capresso.com.Please note: if you lose your Operating Instructions or the QuickReference Guide, you can download a printable copy from ourwebsite www.capresso.com.3. WELCOME TO THE IMPRESSA S AVANTGARDE SERIESThis fully automatic espresso coffee center is completely programmable and extremely user friendly. With two independentstainless steel Thermoblock heating systems it can switch frombrewing coffee to frothing milk without any up- or down-time. Itcan prepare 1 or 2 cups of excellent, professional quality espressoor coffee at a time with just a push of a button. The two-step9.pressure brewing system - well known in commercial applications - was adapted and refined by Jura coffee specialists and isthe trademark of each Jura-Capresso coffee center. This twostep brewing system ensures optimal coffee extraction and willfinish every cup with a rich layer of "crema" - proof for perfectlypressure brewed coffee. The built-in low-noise, commercial conical burr grinder grinds beans to the correct fineness (6 settings).A separate filler funnel lets you use pre-ground coffee. The second Thermoblock generates unlimited steam instantly. With theDual Frother Plus you can steam and froth (for cappuccino) orjust steam milk (for lattes). The unique frothXpress Plus systemsiphons, heats, steams and froths milk automatically. You canalso program a specific amount of frothed/steamed milk and themachine will always deliver the correct volume. A separate hotwater spout lets you prepare a cup of tea or any other hot beverage in seconds. With four pre-set coffee buttons, an A LaCarte button and the easy-to-use Rotary dial you can brewexactly the coffee you desire.You can re-program cup size,coffee strength and temperature. You can select from differentmaintenance set-ups. The machine will automatically remind youwhen to refill water, clean, change filter or decalcify. A specialsection lets you check how many coffees you prepared with thedifferent coffee buttons.3a. "CREMA COFFEE" AND PRESSURE BREWINGAccording to the majority of coffee experts, grinding, tampingand brewing under high pressure is the ideal extracting processfor maximum flavor and aroma. Your Jura-Capresso automaticcoffee center will always produce espresso and coffee with athick, foamy layer called "crema." The crema traps the fine
aromatics and the light gaseous flavors that register on thepalate.The high pressure and the short brewing time prevent theextraction of bitter oils and release less caffeine than any otherbrewing method. You will always make the absolute freshestand most aromatic cup of coffee. This is the reason why manyEuropean restaurants and hotels serve only fresh pressuredbrewed coffee. Experiment with your new machine and prepareyourself the best and most enjoyable cup of coffee!3b. DIFFERENT COFFEE DRINKSHere are some guidelines for the most popular coffee drinks: Ristretto: 1/2 to 1 oz. of coffee. Sweeten to taste. Espresso: 1 to 2 oz. coffee. Sweeten to taste. Double Shot: 3 to 4 oz. of coffee. Sweeten to taste. Crema Coffee: 5 to 8 oz. of coffee. Cappuccino: Espresso plus 3 to 4 oz. of hot frothed milk. Latte: Espresso plus 3-5 oz. steamed milk with little or no froth. Café Mocha: Make Espresso then add chocolate syrup to themilk before frothing/steaming.TIP: Experiment with the size of your milk based drinks. Forstronger coffee taste add more coffee, for more milk taste addmore frothed milk.3c. COFFEE FACTS Caffeine is tasteless. A "strong" coffee or espresso is mostlythe result of the amount of coffee in relation to the amount ofwater. The longer a bean is roasted, the less caffeine it has. Arabica and Robusta are two genetically different kinds ofbeans. "Arabica" beans have more flavor and a little less caffeinethan "Robusta" beans which are mostly used in lower pricedcoffees and instant coffees. Espresso is not a bean, it's the way the coffee is roasted andprepared. Typical US espresso roasts result in darker beans withan oily surface. European espresso roasts are medium brownwith no or very little oils on the surface.All Display Messages Are Shown in RED4. PLEASE, DON’T. (or you void your warranty protection): Never pull out the drawer during the brewing process. Onlypull the drawer when the display instructs you or when thedisplay shows SELECT PRODUCT. Never fill instant coffee into the bean container or ground coffeefunnel; it can damage the brewing chamber. Never fill sugar coated coffee beans into the bean container. Never fill frozen beans into the bean container. If you storebeans in the freezer, let them thaw 3 to 4 hours before fillingthem into the bean container. Never fill anything other than coffee beans into the beancontainer (no chocolate, rice, nuts, spices, etc.) Never fill anything but fresh, cold clean water into the watercontainer, except when decalcifying (chapter 29). Never use mineral or carbonated water. You can use tapwater, bottled water, spring water, distilled water and reverseosmosis water. Never repair or open the machine yourself. All repairs shouldbe performed only by an authorized service center.PLEASE, DO. Fill water tank with fresh, cold water only.10.
Remove any foreign particles (small stones) from coffee beans. Let frozen beans thaw for 3 to 4 hours before pouring theminto the bean container.5. FACTORY SETTINGSEach machine leaves the factory with the settings describedbelow. To change any of these settings (chapter 16). All coffee buttons are set to temperature HIGH. 1-CUP Espresso button (Fig. 2,C) 2 oz./ STRONG. 2-CUP Espresso button (Fig. 2,F) 2 oz. per cup / STRONG. 1-CUP Coffee button (Fig. 2,D) 5 oz./ STRONG. 2-CUP Coffee button (Fig. 2,G) 5 oz. per cup / STRONG.Other settings: Each of the four buttons above can be setfrom 1 oz. to 8 oz. of coffee per cup. A La Carte button (Fig. 3A,N) 7 oz. Hot water (WATER PORTION): 5 oz. Other settings: The hotwater release can be set from 1 oz. to 15 oz. 5-hour auto shut-off. Other settings: manual shut off, autoshut-off from 1/2 hour to 15 hours after last use. Water hardness setting: level 2.Other settings: “blank”, 1, 3, 4 Filter: FILTER NO (Clearyl Water Care Cartridge: not installed)Other Settings: FILTER YES (chapter 14a). Coffee temperature: HIGH for all coffee buttonsOther setting: NORMAL Steam portion: 14 secondsOther settings: 3 to 120 seconds in 1 second intervals Language: English.Other settings: French, Portuguese, German, Italian,Dutch, Spanish11. Display: AM/PM and OZ. Other settings 24 hour and ML(milliliters) Economy Mode: OffOther settings: Economy 1, Economy 2 Time: --. (not set)Other setting: Set a time Unit On: --. (not set)Other setting: Set a time that the unit turns on automatically.(Requires that you first set a time.)6. PREPARING THE MACHINE FOR THE FIRST TIME Make sure all accessories, literature and any other items areremoved from the bean container and the water tank. DO NOT install the Clearyl water filter now. (chapter 14) Make sure the machine sits on an even, flat surface and thedrawer and used coffee container are inserted (Fig. 1). Plug-in machine.6a. FILLING THE WATER TANKPlease note: Only use fresh, cold water. Never fill water tankwith carbonated water, milk or any other liquid. Remove the water tank, rinse and fill with fresh, cold water. Replace water tank and make sure that it engages securely.6b. FILLING THE BEAN CONTAINERPlease note: To insure that your conical burr grinder will workfor a long time, do not use it with any kind of coated or flavoredbeans (all coating and flavors contain sugar or sugar substances).Such coating can damage the burrs. Using such beans voids thewarranty. Have your coffee store grind the sugar coated beans
and use as described in the ground coffee funnel (chapter 11).Please note: If you like flavored coffees we recommend to addflavors to your coffee after brewing. This way you can use yourregular coffee beans in the bean container. Adding the flavorsafter brewing lets you control the intensity much better than withpre-flavored coffee. Your local coffee store typically carries avariety of flavors. Open the Cover Lid (Fig. 5). Remove the Aroma Protection Lid (Fig. 6). Make sure the bean container is empty and clean. Fill beansinto the bean container (Fig. 7).Frozen Beans: Thaw 3 to 4 hours before adding to beancontainer. This prevents moisture from seeping into the grinder.Oily Beans: Beans with an oily surface tend to stick together.This may prevent a continuous flow of beans from the beancontainer into the burrs. As a result the grinder does not grindenough coffee and you might get weak or no coffee at all.Stir the beans in the bean container just before grinding.Alternatively, you can also pour the beans in an open bowl andlet them sit for about 5 hours. The oils will evaporate (this willnot change the taste of your coffee). Then fill the beans into thebean grinder. Now beans will feed into the burrs more easily.6c. TURNING THE MACHINE ON Press the Main Power Switch in the back of the machine (Fig. 1b)The On/Off button in the front will illuminate (Fig. 2,B) Push the On/Off button. The display shows FILL SYSTEM /PRESS STEAM. Place a container underneath the steam nozzle (Fig. 4) andpress one of the steam buttons (Fig. 3,M). SYSTEM FILLING.The machine will dispense a little bit of water through thesteam nozzle. HEATING UP / PRESS RINSE. Place cup underneath the dual coffee spout (Fig. 8) and pressthe RINSE button (Fig. 2,E). MACHINE RINSING. Themachine will dispense a little bit of hot water through the coffeespout. SELECT PRODUCT.Please note: You can only make coffee when the display readsSELECT PRODUCT and the machine is not in programming mode. Place a cup under the coffee spout and push one of the coffeebuttons. The machine will grind and brew coffee. If the displayshows FILL BEANS push one of the coffee buttons again. Discard the first two cups of coffee.You are now ready to brew coffee.CUP ILLUMINATIONThe cup illumination adds a dramatic touch to brewing coffee.Providing the machine is plugged in, you can activate the cupillumination for 3 minutes by pressing any button.7. ADJUSTING THE GRINDERYou can adjust the grinder to the roast of your coffee.We recommend the following: Light roast: use a finer adjustment. Dark roast: use a coarser adjustment. Open the cover of the bean container (Fig. 5). To adjust grinding turn the selector switch to the desiredposition (Fig.9).You have the following possibilities: The smaller the dots, the finer the grinding.12.
The bigger the dots, the coarser the grinding.IMPORTANT: The grinding grade can only be adjusted whilethe grinder is actually grinding.ATTENTION: Oily beans tend to stick together. Stir beans justbefore grinding to ensure a proper flow of beans into the burrs.Please note: If coffee does not flow in a constant stream, turnthe grinder to a coarser setting.8. DAILY PREPARATIONWe recommend filling the water container every morning withfresh, cold water. This will enhance the taste of your coffee. Make sure the Main Power Switch is on (Fig. 1b). In this casethe On/Off button is illuminated. Push the On/Off button. The display shows HEATING UP.After approx. 2 minutes the display shows PRESS RINSE. Push the Rinse Button (Fig. 2,E). Hot water will warm up allinternal parts and pump through the coffee spouts MACHINERINSING. The water will be caught in the drawer underneath.The rinse cycle stops by itself and the display reads: SELECTPRODUCT. You are now ready to make coffee.Please note: Under normal use the machine will automaticallycomplete a rinse cycle when it is turned off (or when themachine turns off automatically). If you have not brewed anycoffee at all the machine will not run a rinse cycle when turning off.9. BREWING COFFEE AND ESPRESSOThe machine has four pre-set coffee buttons, 1 ESPRESSO,2 ESPRESSI, 1 COFFEE, 2 COFFEES (Fig. 2).All buttons are pre-set for coffee strength, coffee volume andtemperature.13. Place one or two cups underneath the Dual Coffee Spoutsand push the desired button. The machine will grind, tampand then brew the coffee. It uses a 2-step brewing process(pre-brew phase), pauses for a few seconds, and then startsthe brewing process. The display will show the name of thebutton you pushed, e.g. 1 ESPRESSO and the selected coffeestrength, e.g. STRONG.Please note: when pushing any of the two-cup buttons, the coffee strength is not displayed.Important: After the brewing stops the machine will discard theused coffee grounds. Please do not try to pull out the drawer(Fig.1,18) during this operation. It can seriously damage themachine.There is no need to pull out the drawer until the displayshows the message EMPTY TRAY or EMPTY GROUNDS.Please note: You can always stop the brewing process bypressing any of the coffee buttons.9a. OVERRIDING CUP SIZEDuring brewing you can override the cup size for any of the fourcoffee buttons as follows. When the coffee starts brewing, open the Cover for theRotary Dial (Fig. 1.19 ) and turn the Rotary Dial (Fig. 3A,P).The display will show the cup size in oz. You can change thecoffee volume from 1 to 8 oz. When you push one of the double cup buttons, the displayshows the coffee volume per cup, e.g. if it shows 6 oz., themachine will brew a total of 12 oz. of coffee.Please note: Overriding the cup size will not change the pre-setcup size. The next time you push one of the four buttons, it willautomatically brew the pre-set volume. See chapter 16 how tochange the pre-set values permanently.
9b. THE A LA CARTE BUTTONThe S Avantgarde has a fifth coffee button (Fig. 3A,N). With thisbutton you can change the coffee volume and the coffeestrength just before brewing. Push the A LA CARTE button. The display shows A LACARTE and the strengths,e.g. MILD. Turn the Rotary Dial to choose any of five strength settings(XMILD, MILD, NORMAL, STRONG, XSTRONG). Then push the Rotary Dial. The machine starts grinding. Nowyou can dial the coffee volumePlease note: If you push the A LA CARTE button and you donot push the Rotary Dial within a few seconds, the display willrevert to SELECT PRODUCT.10. CAPPUCCINO AND LATTEThe Impressa S Series can be operated with two different frothing systems:a) The Dual Frother-PLUS which is mounted on all machines.b) The frothXpress-PLUS system which is included with the S9and S7 Avantgarde.Recommendation: If you froth for only one or two cups at a time and want 100%control over the frothing/steaming process, the Dual FrotherPLUS might be the preferred equipment. Use with thePERMANENT STEAM button (Fig. 3,M). If you always want the same amount of milk and milk froth inyour cup or you make three, four, five or more cappuccinos ina row the frothXpress PLUS is definitely faster and moreconvenient to use. Ideally use the STEAM PORTION button(Fig. 3,K).Frothing (Cappuccino): Injecting hot steam into the milk to warmthe milk and create a firm layer of tiny bubbles.Steaming (Latte): Injecting hot steam to warm the milk without afrothy layer.10a. USING THE DUAL FROTHER PLUSFrothing Position: The cylinder of the frother is pushed down.Steaming Position: The cylinder is pushed up ( see Fig. 14). Fill at least 4 to 5 oz. of cold milk into a frothing pitcher. Thepitcher should have at least a 10 to 12 oz. capacity. You canalso use a larger pitcher (e.g. 20 oz.) and fill it with up to 13 oz.of milk. (Normally 3 to 5 oz. of milk is what you need for onecappuccino or one latte). Always start with cold milk. Skimmilk will produce the most froth and will let you taste more ofthe coffee. Milk with 1% and 2% fat will give you a bit less froth.Regular milk (3% fat) will produce even less froth.The machine is ready to produce steam as long as both redlights in the steam buttons are illuminated (Fig. 3,K & M). If they are off, just push either button. Both lights will startblinking for about 15 to 30 seconds and then will stayilluminated (chapter 16.6). Immerse the frother into the milk so that the tip and part of thecylinder are below the surface of the milk. The tip of thefrother should not touch the bottom of the pitcher. Now push the PERMANENT STEAM button (Fig. 3,M). Hotsteam will be injected into the milk. The display will readDRAW OFF STEAM. To stop the steam output, push either steam button again.The display shows SELECT PRODUCT.14.
Please note: The tip of the dual frother should be attachedfinger tight to the rod (Fig. 14b). The top of the rod is flexible.Make sure the rod is properly seated over the steam nozzle,touching the chrome cover (Fig. 4).Tips for steaming: Leave the sleeve in the "up" position(Fig. 14). Make sure that the milk does not start boiling. You canstop the steaming process at any time by pushing either steambutton. To continue steaming, push either steam button again.Tips for frothing: Start with the frother in the steaming position("up") for 10 to 20 seconds, depending how much milk you areworking with. This way the milk is first heated. Then push downthe cylinder. The sound will change and milk-froth will build upimmediately. This way the froth on top of your milk is also warm.If the milk is not warm enough, continue in the steaming position.Attention: When moving the sleeve of the Dual Frother up anddown, avoid touching the metal parts since they become hotduring operation.10b. CLEANING THE DUAL FROTHER PLUSThe tip and sleeve of the frother are high precision parts (Fig. 14b).Always keep those parts clean and free of any milk residue.Make sure that all openings and grooves in the tip are free ofany milk deposits. After finishing frothing, remove the Dual Frother Plus andimmerse it in a cup with warm water. This is the easiest way tokeep the milk from hardening. When replacing the frotherpush it up and make sure it covers the steam nozzle completely (Fig. 4, Fig. 14b)Cleaning the steam nozzle: The Dual Frother PLUS is off (Fig. 4). Place a cup underneath the steam nozzle and press the15.steam button. Steam will eject any milk droplets. To stop,push the steam button again after one or two seconds.Tip: if the steam nozzle is blocked by hardened milk, use a needleand loosen up the milk deposit. Then let some steam passthrough the steam nozzle.10c. USING THE FROTHXPRESS PLUS SYSTEMWITH MILK CONTAINERThe frothXpress system lets you produce hot steamed or frothedmilk right into your cup. After playing a bit with this attachmentyou will be able to get exactly the amount of frothed or steamedmilk you want in your cup (refer to the video). Remove the Dual-Frother-PLUS. Fill the milk container with cold milk. Assemble the milk container as shown in Fig. 15. Attach the frothXpress-PLUS system as shown in Fig. 15a.Important: This system siphons milk and mix
Impressa S9 Avantgarde shown 6 5 3 5 2. 1. IMPORTANT SAFEGUARDS . counter, or touch hot surfaces. 10. Do not place on or near a hot gas or electric burner, or in a heated oven. 11. Always attach plug to appliance first, then plug cord into . JURA-CAPRESSO Jura