Transcription
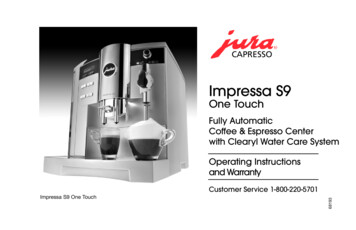
CAPRESSOImpressa S9One TouchFully AutomaticCoffee & Espresso Centerwith Clearyl Water Care SystemOperating Instructionsand Warranty68193Customer Service 1-800-220-5701Impressa S9 One Touch
IMPORTANT SAFEGUARDSwall outlet. To disconnect, turn any control to “off” thenremove plug from wall outlet.12. Do not use appliance for other than intended use.13. Use extreme caution when disposing hot steam.14. For household use only.When using electrical appliances, basic safety precautionsshould always be followed, including the following:1. Read all instructions.2. Do not touch hot surfaces. Use handles or knobs.3. To protect against fire, electric shock and personal injury,do not immerse cord, plugs or appliance in water orother liquids.4. Close supervision is necessary when any appliance isused by or near children.5. Unplug from outlet when not in use and before cleaning.Allow it to cool before putting on or taking off parts, andbefore cleaning the appliance.6. Do not operate any appliance with a damaged cord orplug or after the appliance malfunctions, or has beendamaged in any manner. Return appliance to the nearestauthorized service facility for examination, repair oradjustment.7. The use of accessory attachments not recommended bythe appliance manufacturer may result in fire, electricshock, or personal injury.8. Do not use outdoors.9. Do not let the cord hang over the edge of a table orcounter, or touch hot surfaces.10. Do not place on or near a hot gas or electric burner, or ina heated oven.11. Always attach plug to appliance first, then plug cord intoSAVE THESE INSTRUCTIONSSPECIAL CORD SETINSTRUCTIONSRegarding your cord set:A. A short power-supply cord (or detachable power-supplycord) is to be provided to reduce risks resulting frombecoming entangled in or tripping over a longer cord.B. Longer detachable power-supply or extension cords areavailable and may be used if care is exercised in their use.C. If a long detachable power-supply cord or extension cordis used,1) The marked electrical rating of the detachable powersupply cord or extension cord should be at least asgreat as the electrical rating of the appliance,2) If the appliance is of the grounded type, the extensioncord should be a rounding type 3-wire cord, and3) The longer cord should be arranged so that it will notdrape over the counter-top or table-top where it can bepulled on by children or tripped over.2.
Notice: This machine has a 3-prong grounded plug.To reduce the risk of electrical shock, this plug will fit in anoutlet only one way. If the plug does not fit in the outlet,contact a qualified electrician. DO NOT modify the plug inany way.JURA-CAPRESSOJura was founded in 1931 in Switzerland. Capresso wasfounded in 1994 in the USA. Both companies have joinedforces in the US to bring you the finest Fully AutomaticCoffee Centers available anywhere. With innovative anduser-friendly features, high quality materials, clear instructions and superb customer service, we are sure you willexperience the best coffee, espresso, cappuccino or latteyou have ever had. We hope you will enjoy your new FullyAutomatic Coffee Center and will recommend it to yourfriends. For more information about our products visit ourwebsite www.capresso.com.CAUTIONThis appliance is for household use. Any servicing other thancleaning and user maintenance should be performed by anauthorized service representative. Do not immerse base in water or try to disassemble. To reduce the risk of fire or electric shock, do not removethe base. No user serviceable parts inside. Repair shouldbe done by authorized service personnel only. Check voltage to be sure that the voltage indicated on thename plate agrees with your voltage. Never use warm or hot water to fill the water container!Use cold water only! Keep your hands and the cord away from hot parts of theappliance during operation. Never clean with scouring powders or hard implements.Customer Service1-800-220-5701Mon-Thu 9AM – 9PM Fri 9AM – 8PM Sat 9AM – 5PMEastern Standard Time.email: contact@capresso.comJura-Capresso81 Ruckman Road, Closter, NJ 07624201-767-3999 Fax: 201-767-9684Website: www.capresso.com3.
FIG. 11091181271.2.3.4.5.13614515415a31617218119FIG. 1aabcda. Scoopb. Cleaning tabletsFIG. 1bMain Power Switchc. Water indicatord. Clearyl Height-Adjustable Dual Coffee SpoutOperating Display (Fig.2)Removable Water TankLow Water Flotation Device (inside)Clearyl Water Care Cartridge(Not Installed)Lid for Water TankHolder for Clearyl Water CartridgeBean Aroma Protection LidCover for Bean ContainerLid for Ground Coffee FunnelOpening for Ground CoffeeWarming PlateAuto Cappuccino System (Fig. 3)Hot Water SpoutSteam NozzlefrothXpress system (Fig. 15 through 17a)with thermal milk container attachedUsed Coffee ContainerCup platformRemovable Drawer/Used Water TrayCover for Rotary Dial andA La Carte Button (Fig. 3A)
Auto Cappuccino SystemOperating DisplayFIG. 3FIG. 2ACSELECTOFFEEREADYPRODUCTFIG. 3A3.1BECFFIG. 4N3.2O3.33.43.53.63.7PDQGA. Display Dialog SystemB. ON/OFF ButtonC. 1-CUP Espresso ButtonD. 1-CUP Coffee ButtonE. RINSE ButtonF. 2-CUP Espresso ButtonG. 2-CUP Coffee Button3.1 Hot Water Portion symbol3.2 Milk Portion symbol3.3 Selector Dial with push button3.4 Hot Water symbol3.5 Milk symbol3.6 Cappuccino button3.7 Latte Macchiato button5.N.O.P.Q.A La Carte ButtonGround Coffee ButtonRotary Dial w/push buttonService Cover(do not remove)DualCoffeeSpoutsHotWaterSpout
FIG. 5FIG. 10FIG. 6FIG. 8FIG. 7FIG. 11FIG. 12Extension rod6.FIG. 9FIG. 13
FIG. 14aFIG. 14bFIG. 15Black fittingTransparentfittingCoffeespoutMilkhoseFIG. 16Stainless steel rodFIG. 17SiphoningwithflexiblehoseFrothing rangeDIALMilk / SteamspoutSteam onlyno siphoningSteaming range7.FIG. 17aventing tipchromeface plate
FIG. 18FIG. 22FIG. 19FIG. 20FIG. 24FIG. 238.FIG. 21FIG. 25
TABLE OF CONTENTSPAGEImportant Safeguards / Jura Capresso . 28a.PAGETurning the Machine Off / Rinsing . 16Drawings .4-89.Coffee Preparation . 16Important / Battery Back-up. 119a.Pre-warm Cups . 161.Product Warranty Registration. 119b.Brewing Coffee and Espresso . 162.Operating Instructions / Quick Reference Guide . 119c.Overriding Strength and Cup Size During Brewing . 173.Welcome to the Impressa S9 One Touch. 119d.The A La Carte Button. 173a.Bean-to-cup, “Crema Coffee” andPressure Brewing . 129e.Using Pre-Ground Coffee . 1710.Auto Cappuccino System. 183b.Different Coffee Drinks. 1210a. Preparing the Thermal Milk Container. 183c.Coffee Facts. 1210b. The Froth XPress System . 184.Please Don’t / Please Do . 125.Factory Settings / Options. 1310c. Preparing One-Touch Cappuccino,Cafe Mocha and Latte . 196.Preparing the Machine for the First Time . 1410d. Preparing One-Touch Latte Machiato. 196a.Filling the Water Tank. 1410e. Preparing Hot Milk / Hot Chocolate . 196b.Filling the Bean Container . 1410f. Overriding the Cappuccino Settings . 206c.Turning the Machine On for the First Time . 1510g. Cappuccino Rinsing. 206d.Cup Illumination . 1510h. Using Hot Water. 207.Adjusting the Grinder . 1511.Visual Programming of Beverage Portions . 218.Daily Preparation. 1512.Water Care . 219.
TABLE OF CONTENTSContinued12a.PAGEWater Hardness Monitor . 2115.PAGECare and Maintenance Messages . 2912b.Changing the Water Hardness Monitor . 2215.1Manual Maintenance Cycles . 3013.Clearyl Water Filter Cartridge. 2215.2Removing Stones etc. from the Burr Grinder . 3113a.Installing and Activating the ClearylWater Cartridge . 2315.3General Cleaning Instructions . 3115.4Emptying the System before Transport. 3113b.Automatic Clearyl Replacement. 2315.5Cleaning the frothXpress . 3113c.Manual Clearyl Replacement . 2416.Automatic Cleaning Cycles . 3213d.Do Not Let the Clearyl Filter Dry Out!. 2416.1Cleaning with Special Tablet . 3214.Programming . 2416.2Manual Tablet Cleaning . 3314.1Re-Programming Beverage Buttons . 2417.Decalcifying. 3314.2Restoring Factory Settings for Beverage Buttons . 2617.1Decalcifying Procedure . 3414.3Economy Modes . 2617.2Manual Decalcifying. 3414.4Actual Time and Weekday . 2718.Tips For Better Coffee . 3514.5Auto-On and Auto-Off Times. 2719.Error Messages / Troubleshooting. 3514.6Auto-Off. 2820.Supplies. 3614.7Rinse Settings . 2821.Limited Two-Year Warranty. 3714.8Information . 2922.Free Repair Service / Extra Repair Coverage . 3814.9Display Settings . 2914.10 Languages. 2910.
IMPORTANT / BATTERY BACK-UPThe Impressa S9 One Touch has an internal battery back-up forthe clock functions. After plugging the S9 OT in for the first time,turn the Main Power Switch in the back of the machine on (Fig. 1b;the red indicator light in the ON/OFF button (Fig. 2,B) will illuminate). Leave the main power switch on for the first 24 hours toinsure that the internal battery back-up is fully charged.1. PRODUCT WARRANTY REGISTRATIONRemove the Product Registration from the Welcome Pack, fill itout and mail or fax it to us within two weeks or register yourproduct online through our website: www.capresso.com.Important: This registration is part of your warranty (chapter 21).If your retailer sent the product registration to Jura-Capresso whenyou purchased the machine, it is not necessary to register again.2. OPERATING INSTRUCTIONSQUICK REFERENCE GUIDE / DVDThank you for choosing this Jura-Capresso product.Important: Do not try to set-up the Impressa S9 One Touchwithout following the set-up steps in chapter 6 - 8. Or use theQuick Reference Guide. Take time to study this instruction manual. It covers manyfeatures of the S9 OT and provides helpful hints andwill enhance your enjoyment with coffee beverages. We highly recommend viewing the enclosed DVD.3. WELCOME TO THE IMPRESSA S9 One TouchThis fully automatic coffee/espresso/cappuccino center iscompletely programmable and extremely user friendly. The S9OT prepares a cup of cappuccino or latte at a push of a buttonwithout moving your cup, brews one or two cups of cremacoffee or espressos at a time, produces unlimited amounts ofhot frothed and hot steamed milk and delivers up to 15 oz. hotwater – all with a push of a button.With its two independent stainless steel Thermoblock heatingsystems it switches from brewing coffee to frothing milk withoutany up- or down-time. The two-step pressure brewing system well known in commercial applications - was adapted andrefined by Jura coffee specialists and is the trademark of eachJura-Capresso coffee center. This two step brewing systemensures optimal coffee extraction and will finish every cup with arich layer of "crema" - proof for perfectly pressure brewed coffee. The adjustable, commercial conical burr grinder grindsbeans to the desired fineness (6 settings). Use pre-ground coffeewith the separate filler funnel. The second Thermoblock generates unlimited steam instantly. Program a specific amount offrothed/steamed milk and the S9 OT will always deliver your preferred cup size. A separate hot water spout prepares a cup of teaor any other hot beverage in seconds. With four pre-set coffeebuttons, four pre-set milk beverage buttons, a special A La Cartebutton and the easy-to-use Rotary Dial you can prepare thousandsof different coffee beverages with the push of a button. Overrideor re-program your favorite coffee drinks. Select from differentmaintenance set-ups. The S9 OT automatically reminds youwhen to refill water, clean, change filter or decalcify. The"Information" section lets you know how many coffees you prepared with the different coffee buttons. The beautiful housing,cup illumination and informative LED display make the S9 OTthe most versatile Super Automatic Coffee Center available today.Enjoy your Impressa S9 One Touch!11.
3a. BEAN-TO-CUP / “CREMA COFFEE" /HIGH PRESSURE BREWINGAccording to the majority of coffee experts, grinding the beansjust before brewing, tamping and brewing under high pressure isthe ideal extracting process for maximum flavor and aroma. YourS9 OT automatic coffee center will always produce espresso andcoffee with a thick, foamy layer called "crema." The crema trapsthe fine aromatics and the light gaseous flavors that register onthe palate. The high pressure and the short brewing timeprevent the extraction of bitter oils and release less caffeine thanany other brewing method.You will always make the absolutefreshest and most aromatic cup of coffee. This is the reason whymany European restaurants and hotels serve only fresh pressured brewed coffee. Experiment with your S9 OT and preparethe best and most enjoyable cup of coffee!3b. DIFFERENT COFFEE DRINKSHere are some guidelines for the most popular coffee drinks: Ristretto: 1/2 to 1 oz. of coffee. Sweeten to taste. Espresso: 1 to 2 oz. coffee. Sweeten to taste. Double Shot: 3 to 4 oz. of coffee. Sweeten to taste. Crema Coffee: 5 to 8 oz. of coffee. Cappuccino: 3 to 4 oz. of hot frothed milk plus espresso. Latte: 3 to 5 oz. steamed milk with little or no froth plus espresso. Latte Macchiato: 5 to 6 oz. of frothed/steamed milk producedwith pause*, plus one or two shots of espresso. *The pauseseparates the milk froth and the milk and allows the espressoto settle “in between” (chapter 10d). Café Mocha: Use chocolate milk then proceed as in makingcappuccino or latte.Experiment with the size of your milk based drinks. For strongercoffee taste add more coffee, for more milk taste add morefrothed/steamed milk.3c. COFFEE FACTS Caffeine is tasteless. A "strong" coffee or espresso is mostlythe result of the amount of coffee in relation to the amount ofwater. The longer a bean is roasted, the less caffeine it has.The shorter the brewing time the less caffeine in your cup. Arabica and Robusta are two genetically different kinds ofbeans. "Arabica" beans have more flavor and a little less caffeinethan "Robusta" beans which are mostly used in lower pricedcoffees and instant coffees. Espresso is not a bean! It's the way the coffee is roasted andprepared. Typical US espresso roasts result in darker beans withan oily surface. European espresso roasts are medium brownwith no or very little oils on the surface.All Display Messages Are Shown in RED4. PLEASE, DON’T. (or you void your warranty protection): Never pull out the drawer during the brewing process. Onlypull the drawer when the display instructs you or when thedisplay shows COFFEE READY. Never fill instant coffee into the bean container or ground coffeefunnel; it will damage the brewing chamber. Never fill sugar coated coffee beans into the bean container. Never fill frozen beans into the bean container. Do not keepbeans in the freezer. Store them in a dark, airtight container. Never fill anything other than coffee beans into the beancontainer (no chocolate, rice, nuts, spices, etc.).12.
Never fill anything but fresh, cold clean water into the watercontainer, except when decalcifying (chapter 17.1). Never use mineral or carbonated water. You can use tapwater, bottled water, spring water, distilled water and reverseosmosis water. Never repair or open the machine yourself. All repairs shouldbe performed only by an authorized service center. Do not place the machine on a surface which is sensitive tohot or cold water and steam. Never place the machine on anuneven surface.PLEASE, DO. Fill water tank daily with fresh, cold water. Before filling the bean container, remove any foreign particles(small stones) from coffee beans. Let frozen beans thaw for 3 to 4 hours before pouring theminto the bean container.Important: If you pull out the drawer at any time you must emptythe used coffee container and the drawer. If you do not empty thecontainer, used coffee will overflow inside the machine and cancause serious damage to the internal mechanism.5. FACTORY SETTINGS / OPTIONSThe IMPRESSA S9 One Touch can be set up in many differentways. Beverages, on/off settings, temperature, rinse cycles,water treatment, energy savings modes and display informationcan be programmed to your personal preferences.Beverage buttons can be customized with regards to volume(cup size), coffee strength (AROMA), temperature, duration ofmilk steaming/frothing.Coffee volume: All 1-cup buttons can be programmed to brew between0.5 and 8 oz. of coffee. The Hot Water Portion can be programmed to dispense up to15 oz. of hot water. All 2-cup buttons can be programmed to brew between0.5 and 8 oz. per cup, total of 16 oz. max.Tip: if you use a 12 oz. mug and program one of the 2-cupbuttons to 5 oz. the S9 OT will brew a total of 10 oz. of coffeeinto your mug.Coffee strength (AROMA): All 1-cup buttons can be set to five different coffee strengths:XMILD, MILD, NORMAL, STRONG, XSTRONG.In XMILD the conical burrs grind for approx. 5 seconds, inXSTRONG, the grinding takes about 9 seconds. When using the 2-cup buttons, the S9 OT will always grind inXSTRONG.Please note: The display indicates the five strength settings withgraphics showing from one to five coffee beans.Temperature: All coffee buttons can be set to NORMAL or HIGH. The Hot Water function can be set to LOW, NORMAL, XHIGH(XHIGH is used for pre-warming cups and for specialty teas).Steaming for milk frothing: The cappuccino and latte macchiato buttons and the milkportion can be set to produce steam from 3 to 120 seconds.Latte Macchiato Pause: The pause between milk frothing and coffee brewing can beset from 0 to 60 seconds.13.
Factory Settings for Beverage Buttons: All coffee buttons are set to temperature HIGH. The hot water function is set to XHIGH. 1-CUP Espresso button (Fig. 2,C) 2 oz./ STRONG. 2-CUP Espresso button (Fig. 2,F) 2 oz. per cup / XSTRONG. 1-CUP Coffee button (Fig. 2,D) 5 oz./ STRONG. 2-CUP Coffee button (Fig. 2,G) 5 oz. per cup / XSTRONG. A La Carte button (Fig. 3A,N) 7 oz. Cappuccino; one-touch button (Fig. 3.6) 14 seconds milk, 0seconds pause, 2 oz. coffee / NORMAL. Latte Macchiato; one-touch button (Fig. 3.7) 14 seconds milk,15 seconds pause, 2 oz. coffee / STRONG. Milk portion; Selector Dial (Fig. 3.5) 14 seconds milk, Water Portion; Selector Dial, 5 oz.; XHIGH.Other Factory Settings: 5-hour auto shut-off. Water hardness setting: 10ºdH. Filter: FILTER NO (Clearyl Water Care Cartridge: not installed) Language: English. Display: AM/PM and OZ. Economy Mode (energy saving): Off Time / Weekday: --.-- (not set) Automatic On and Off times: not set Cappuccino Rinsing: set to NOW; display showsCAPPUCCINO RINSING immediately after frothing milk.6. PREPARING THE MACHINE FOR THE FIRST TIME Make sure all accessories, literature and any other items areremoved from the bean container and the water tank. DO NOT install the Clearyl water filter now (chapter 13a). Make sure the machine sits on an even, flat surface and thedrawer and used coffee container are inserted (Fig. 1). Plug-in machine.6a. FILLING THE WATER TANKPlease note: Only use fresh, cold water. Never fill water tankwith carbonated water, milk or any other liquid. Remove the water tank, rinse and fill with fresh, cold water. Replace water tank and make sure that it engages securely.6b. FILLING THE BEAN CONTAINERPlease note: To insure that the conical burr grinder will work fora long time, do not use it with any kind of coated or flavoredbeans (all coating and flavors contain sugar or sugar substances).Such coating can damage the burrs. Using such beans voids thewarranty. Have your coffee store grind the sugar coated beansand use as described in chapter 9e.Flavored Coffee: If you like flavored coffees we recommendadding flavors to your coffee after brewing. This way you canuse your regular coffee beans in the bean container. Adding theflavors after brewing lets you control the flavor intensity muchbetter than with pre-flavored coffee. Your local coffee storetypically carries a variety of liquid flavors. Open the Cover Lid (Fig. 5). Remove the Aroma Protection Lid (Fig. 6). Make sure the bean container is empty and clean. Fill beansinto the bean container (Fig. 7).Frozen Beans: Thaw 3 to 4 hours before adding to beancontainer. This prevents moisture from seeping into the grinder.14.
Oily Beans: Beans with an oily surface tend to stick together.This may prevent a continuous flow of beans from the beancontainer into the burrs. As a result the grinder does not grindenough coffee and you might get weak or no coffee at all.Stir the beans in the bean container just before grinding.Alternatively, you can also pour the beans into an open bowl andlet them sit for about 5 hours. The oils will evaporate (this willnot change the taste of your coffee). Then fill the beans into thebean grinder. Now beans will feed into the burrs more easily.6c. TURNING THE MACHINE ON FOR THE FIRST TIME Make sure bean container and water tank are filled. Press the Main Power Switch in the back of the machine (Fig. 1b)The On/Off button illuminates (Fig. 2.B). Push the On/Off button. The display shows FILL SYSTEM /PRESS RINSE and the Rinse button (Fig. 2.E) illuminates. Place containers underneath the Auto Cappuccino Systemand the Hot Water Spout (Fig. 4) and push the Rinse button(Fig. 2.E). SYSTEM FILLING. The machine will dispense asmall amount of water. HEATING UP / PRESS RINSE. Place cup underneath the dual coffee spout (Fig. 4) and pressthe Rinse button (Fig. 2.E). MACHINE RINSING. The machinewill dispense a small amount of water. COFFEE READY.Please note: You can only make coffee when the display readsCOFFEE READY. Place a cup under the coffee spout and push one of the coffeebuttons. The machine will grind and brew coffee. If the displayshows FILL BEANS push one of the coffee buttons again. Discard the first two cups of coffee.You are now ready to brew coffee.6d. CUP ILLUMINATIONThe cup illumination adds a dramatic touch to brewing coffee.Providing the machine is plugged in, you can activate the cupillumination for 3 minutes by pressing any button.7. ADJUSTING THE GRINDERIMPORTANT: The grinding grade can only be adjusted whilethe grinder is actually grinding.Adjust the grinder to the roast of your coffee. Light roast: use a finer adjustment (smaller dots). Dark roast: use a coarser adjustment (larger dots). Open the cover of the bean container (Fig. 5). To adjust fineness, turn the grinding wheel during grinding tothe desired position (Fig. 9).ATTENTION: Oily beans tend to stick together. Stir beans justbefore grinding to ensure a proper flow of beans into the burrs.Please note: If coffee does not flow through the Dual CoffeeSpouts in a constant stream, turn the wheel to a coarser setting.8. DAILY PREPARATIONFill the water container every morning with fresh, cold water. Thiswill enhance the taste of your coffee. Make sure the Main Power Switch is on (Fig. 1b). In this casethe On/Off button is illuminated. Push the On/Off button. The display shows WELCOME TOJURA and then HEATING UP. After approx. 2 minutes thedisplay shows PRESS RINSE. Push the Rinse Button* (Fig. 2,E). Hot water will warm up allinternal parts and pump through the coffee spouts MACHINE15.
RINSING. The water will be caught in the drawer underneath.The rinse cycle stops by itself and the display reads: COFFEEREADY. You are now ready to make coffee.*Note: S9 OT can be programmed to automatically start therinsing cycle after HEATING UP is displayed (chapter 14.7).8a. TURNING THE MACHINE OFF / RINSINGBefore turning off the S9 OT, place containers under the DualCoffee Spouts and Auto Cappuccino System (Fig. 4).When the S9 OT is turned off or turns itself off it will prompt forshort cleaning cycles as follows:Only the Dual Coffee spouts were used: The S9 OT displaysMACHINE RINSING. For a few seconds hot water will bedispensed through the Dual Coffee Spouts and through thecoffee spout of the Cappuccino section. The machine and thedisplay turn off.The Auto Cappuccino Spouts and the Dual Coffee Spoutswere used: The S9 OT first displays CLEAN CAPPUCCINOand the Rinse button illuminates. If the Rinse button is notpushed within the next ten seconds, the display shows SPOUTRIGHT / PRESS RINSE. Press the Rinse button. The S9 OT willdispense some hot water through the coffee spout of theCappuccino section. It will then push some hot water throughthe Dual Coffee Spouts and turn off.Please note: When the S9 OT turns off you may hear a slighthissing noise.9. COFFEE PREPARATION9a. PRE-WARM CUPSIn the morning pre-warm your cups with hot water through theHot Water Spout. Cold cups reduce the coffee temperature by5º F to 10º F.Place a cup under the Hot Water Spout, turn the Selector Dial(Fig. 3.3) until the display shows HOT WATER and push theSelector Dial. The display shows TEMP. XHIGH and water willflow into your cup. Push the Selector Dial again to stop anddiscard the water. COFFEE READY.9b. BREWING COFFEE AND ESPRESSOThe machine has four pre-set coffee buttons, 1 ESPRESSO,2 ESPRESSI, 1 COFFEE, 2 COFFEES (Fig. 2).All buttons are pre-set for coffee strength, coffee volume andtemperature (chapter 5). Place one or two cups underneath the Dual Coffee Spoutsand push the desired button. The machine will grind, tampand then brew the coffee. It uses a 2-step brewing process(pre-brew phase), pauses for a few seconds, and then startsthe brewing process. The display will show the name of thebutton you pushed, e.g. 1 ESPRESSO and the selected coffeestrength indicated by a bean graphic, e.g. 4 beans strong.Please note: when pushing any of the two-cup buttons, thecoffee strength is not displayed.Important: After the brewing stops the machine will discard theused coffee grounds. Please do not try to pull out the drawer(Fig.1,18) during this operation. It can seriously damage themachine.There is no need to pull out the drawer until the displayshows the message EMPTY TRAY or EMPTY GROUNDS.16.
Please note: You can always stop the brewing process bypressing any of the coffee buttons.9c. OVERRIDING STRENGTH AND CUP SIZE DURINGBREWINGDuring brewing you can override the strength of the two onecup buttons (Fig. 2, C, D) and the cup size of all four coffeebuttons. When using the two-cup buttons the S9 OT automatically selects the maximum strength. Overriding will not changethe factory setting (chapter 5).Example: Open the cover for the Rotary Dial (Fig. 1.19). Push the 1-Cup Coffee Button (Fig. 2D). During grinding turn the Rotary Dial to change the strength toe.g. XSTRONG (5 bean graphic). The display shows theselected strength. When the coffee starts brewing, turn Rotary Dial until the displayshows, e.g. 7.0 OZ. The S9 OT will brew 7.0 oz of coffee.If you use the same coffee button again and do not use theRotary Dial, the S9 OT will brew a cup according to theprogrammed settings for this button.Please note: When using one of the 2-Cup buttons you canonly change the cup size. The display shows the amount percup, e.g. 6.0 OZ; the S9 OT will brew a total of 12 ounces.For re-programming see chapter 11 (cup sizes) and chapter 14.1for cup sizes, temperature and strength.9d. THE A LA CARTE BUTTONThe S9OT has a fifth coffee button (Fig. 3A,N). With this buttonyou can change the coffee volume and the coffee strength justbefore brewing. COFFEE READY. Push the A LA CARTE button (Fig. 3A.N). The display showsA LA CARTE and the strengths indicated by the bean graphice.g. 2 beans (mild). Turn the Rotary Dial to choose any of five strength settings:XMILD, MILD, NORMAL, STRONG,
Thank you for choosing this Jura-Capresso product. Important: Do not try to set-up the Impressa S9 One Touch without following the set-up steps in chapter 6 - 8. Or use the Quick Reference Guide. Take time to study this instruction manual. It covers