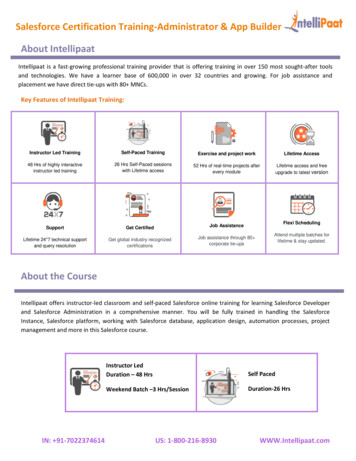
Transcription
Revised on: 4/19/2017FFT Salesforce Training Exercise/GuideSummary:This is a simulation of how you will use FFT Salesforce to track client outcomes. This exercise is designed todevelop your knowledge of the new system. You will enter a fake client and document the situations describedin the directions below to the best of your ability.If you are unsure of how to do something in this exercise, please make a note and submit your feedback tofftfocsupport@lisc.org or bring your questions to office hours.Salesforce Login information:Website: Training extension: .partial to your SF user login (email@lisc.org.partial)Password: same as your SF login passwordINTAKE:1. Begin by searching for your fake client in the database to avoid creating duplicates.2. Once you have verified your fake client is not in the database, proceed to add your client by clicking onthe “Intake” tab (make sure to select Financial Opportunity Center as the Program for enrollment).Click on NEXT.3. You will be directed to the Intake form. Choose a first name for your client and use “Fake” as the lastname.(1) Complete your client’s demographics fields and select the options to indicate your client iscurrently in school and working.(2) Enter 1/3/2015 as your enrolled date and type the name of your agency as the Home Site. (If thesystem does not automatically generate the name, then click on the magnifying glass next to the fieldand select your site on the next screen).1
Revised on: 4/19/2017(3) Lastly, add two household members for your client by clicking on the ADD ROW button andentering the applicable information. Note: Don’t forget to update your client’s household member lastnames. Click on the APPLY button to add your household member.(4) Once completed, click on the SAVE button to add your new client.4. A Case Record is automatically generated for your client, and this will be the place to enter all yourclient’s services. (Your client’s household is also automatically generated). From this page, you willenter your client’s current employment and education information.a. Click on the EDIT button and fill in the Case Record with applicable information for your client(i.e. Orientation date, FOC Assigned Staff, etc). Then click on the SAVE button.b. As part of the intake process, your client was administered the TABE, and you need todocument his/her scores. From the Case Record, hover over the Assessment link, and click onthe TABE Test button. Enter 1/1/15 as the test date, Stage as Intake/Pre-Test, reading level (D)with grade equivalency of 10.6, and math level (D) with grade equivalency of 8.8. Click on theSAVE button. Note: You may select a different test as applicable to your agency.From the Case Record,hover over theAssessment link.2
Revised on: 4/19/20175. Employment Record: Click on your client’s Case Record in the blue Recent Items box on the left offyour screen. (If you do not see your client’s case record, you can always search for your client againand click on his/her case record.)Hover over the Employment link and click on the Employment Record button. Create a new record andindicate the following for your client: has been working 20 hours/week at Best Circuit at 10.00/hoursince 10/16/14 as a cashier with no health insurance. Make sure to select Client had this job beforeenrollment for this record. Click on the SAVE button.i.Note: All companies/entities need to be created in the system prior to creating anEmployment Record. We will practice adding a new Entity later in this exercise.3
Revised on: 4/19/2017From the Case Record,hover over theEmployment link.6. Education/Training Program Record: Click on your client’s Case Record in the blue Recent Items box onthe left off your screen. (If you do not see your client’s case record, you can always search for yourclient again and click on his/her case record.)Hover over the Education link and click on the Education/Training Program button. Create a newrecord and indicate the following for your client: started at United Community College pursuing anAssociate Degree on 8/26/14. Enter the applicable information and click on the SAVE button.i. Note: All education institutions/entities need to be created in the system prior tocreating an Education/Training Program record. We will practice adding a new Entitylater in this exercise.From the Case Record,hover over theEducation link.FINANCIAL COUNSELING SERVICES:1. Document the activities below:a. 1/3/15: Click on your client’s Case Record. Hover over the Assessment link and click on each ofthe financial assessment buttons (which take the place of the Combined Financial Assessment(CFA). Complete each financial assessment for your client using made-up information. Be sureto complete all sections and click on the SAVE button when you complete each assessment.i. Financial Health: Fill in all of the information on this assessment. You will not be ableto fill in the Financial well-being score when first completing the assessment. After youclick on the SAVE button, use the Financial Well-Being Response Value to calculate theFinancial well-being score on the Financial Well-Being Scale Scoring Worksheet. Clickon the EDIT button, fill in the Financial well-being score, and click on the SAVE buttonagain.4
Revised on: 4/19/2017ii. Credit Report: Your client has a FICO credit score of 500.iii. Budget: Your client’s rent is unsubsidized, so make sure to include a rent amount onthe budget.iv. Balance Sheet: Your client owes an overdue utility bill of 500, so make sure to includethat on the balance sheet.From the Case Record,hover over theAssessment link.5
Revised on: 4/19/2017b. 1/3/15: Create an Action Plan (Vision) for your client. Click on your client’s Case Record. Hoverover the Action Plans link and click on the New Action Plan button. Ignore the Staff field (this isto be used by someone entering data on someone else’s behalf). Enter 1/3/15 as the StartDate, and write in a Vision Narrative (this used to be the Big Vision). Click on the QUICK SAVEbutton. Click on the ECM Goals tab. Click on the New ECM Goal button. Choose a Client Goaland at least one Goal Action. Fill in the Target Completion Date. Click on the SAVE button. Clickon the New ECM Goal button again and choose a second Client Goal, etc. Click on the SAVEbutton. You may create as many ECM Goals as you wish.From the Case Record,hover over the ActionPlan link.6
Revised on: 4/19/2017c. 1/10/15: Click on your client’s Case Record. Hover over the Service Entries link and click on the NewService Entry button. Click on Financial Counseling and click on the NEXT button. Your client comesinto the office to discuss his/her family’s housing situation. S/he hopes to move his/her family into anew apartment but has had trouble doing so due to poor credit. You recommend a credit builder loanwith match. You can ignore the Staff Person field, as this is to be used by people entering data onsomeone else’s behalf. Use the arrow next to the Story you want to use (Credit Builder Loan withmatch) to expand the Story to see all the fields. You may ignore the UOS field (unless you want to trackhow many minutes you spent on each story). Fill in the Name of Entity and Status fields, and check offTwin Accounts if you are recommending a Twin Accounts loan. The Stories are on two pages inFinancial Counseling, so you will need to click on the NEXT button at the bottom of the page. To recorda note, click on the ADD ROW button at the bottom of the screen. Type your note, and click on theAPPLY button. You may use the SAVE & NEW button when adding multiple Service Entries in a row,and you may click on the SAVE button when you are done entering Service Entries.From the Case Record,hover over the ServiceEntries link.2. 1/17/15: Your client calls you to tell you s/he applied for the credit builder loan with match. (Click onarrow to expand section).Twin Accounts3. 1/25/15: Your client returns to the office and tells you s/he was approved for the credit builder loanwith match.Twin Accounts7
Revised on: 4/19/20174. 7/13/15: You pull your client’s credit to check for improvements. You find that your client’s FICO scorehas improved to 550. Click on your fake client’s Case Record. Hover over the Assessment link and clickon the assessment # you need to update. On the next screen, click on the CLONE button to copy theassessment. Enter the correct date, update the necessary information, including the FICO score, andclick on the SAVE button.From the Case Record,hover over theAssessment link.Click on the Clonebutton to copy theassessment.EMPLOYMENT COUNSELING SERVICES:Document the activities below:a. 1/3/15: You meet with your client to assess his/her strengths and needs. You help him/her starthis/her search for a better job. Record a new Service Entry for Employment Counseling. You canignore the Staff Person field, as this is to be used by people entering data on someone else’sbehalf. Use the arrow next to the Story you want to use to expand the Story to see all the fields.You may ignore the UOS field (unless you want to track how many minutes you spent on eachstory).From the Case Record,hover over the ServiceEntries link.8
Revised on: 4/19/2017Note: Click on (New) to expand the section.9
Revised on: 4/19/2017b. 1/10/15: You meet with your client to finalize his/her resume.c. 1/14/15: You meet with your client to conduct a mock interview and to give him/her two newjob leads.10
Revised on: 4/19/2017d. 1/19/15: Your client calls you to tell you s/he has scheduled an interview for a new job on1/26/15.e. 2/10/15: Your client calls to say that s/he got the new job and quit his/her previous job on2/3/15.i. Terminate the current job. (Hover over the Placements link and edit the current job).Fill in the Job Termination section and click on the SAVE button.From the Case Record,hover over theEmployment link.11
Revised on: 4/19/2017ii. Add [Your name] Fake Hotel as a new Entity. Click on the Entities tab and click on theNEW button. On the next page, select Entity as the type, and click on the CONTINUEbutton. Select Employer as the Entity type, and ignore the Educational Institution Typefield. Fill in the appropriate information and click on the SAVE button.12
Revised on: 4/19/2017iii. Hover over the Placements link and click on the Employment Record button. Enteryour client’s new Employment Placement at [Your name] Fake Hotel as a conciergeworking 25 hours/week at 14.00/hour. The job started on 2/5/15. The new job willoffer health insurance after 90 days, so select Job will (eventually) OFFER HealthInsurance in the Benefit Type field. Fill in the applicable data and click on the SAVEbutton.From the Case Record,hover over theEmployment link.13
Revised on: 4/19/2017iii. Update the budget with this new information. Hover over the Assessments link, andclick on the Assessment # next to the Budget. On the next screen, click on the CLONEbutton to copy the assessment. Enter the correct date, update the necessaryinformation, including the updated wages, and click on the SAVE button.From the Case Record,hover over theAssessments link.14
Revised on: 4/19/2017i.Note: Make sure to update the date and click on the SAVE button once the updateis complete.f. 3/8/15: You call your client to see how the first month of work has gone. The client says all isgoing well. Record a retention update for your client by adding an Advancement to theEmployment record.From the Case Record,hover over theEmployment link.From the Employment Record,hover over the Advancements link.15
Revised on: 4/19/2017b. 5/7/15: You call your client to see how the first 90 days of work has gone. You leave avoicemail for your client requesting a return call with an update. Click on your client’s CaseRecord. Click on the RECORD SERVICE button, select Employment Counseling, and click on theNEXT button. Fill in the appropriate information and mark that you did not reach the personyou attempted to contact. Add a note at the bottom of the screen by clicking on the ADD ROWbutton, writing your note, and then clicking on the APPLY button. Click on the SAVE button.INCOME SUPPORTS COUNSELING SERVICES:1. Document the activities below:a. 1/3/15: You conduct a general benefits screening for your client and find that s/he is eligiblefor subsidized housing, food stamps, and utility assistance. You help him/her apply forsubsidized housing and food stamps, and you refer him/her to another agency for utilityassistance. Create a new Service Entry for Income Supports Counseling and enter thisinformation. You can ignore the Staff Person field, as this is to be used by people entering dataon someone else’s behalf. Use the arrow next to the Story you want to use to expand the Storyto see all the fields. You may ignore the UOS field (unless you want to track how many minutesyou spent on each story).From the Case Record,hover over the ServiceEntries link.16
Revised on: 4/19/2017Note: Click on arrow to expand sections.17
Revised on: 4/19/2017b. 2/15/15: Your client calls you to tell you s/he has received food stamps at 150/month andone-time utility assistance for 350.i. Enter a Service Entry to update the Food Stamps and Utility Assistance stories.From the Case Record,hover over the ServiceEntries link.ii. Update the budget with the food stamps and the balance sheet with the utilityassistance. Hover over the Assessments link, and click on the Assessment # next tothe most recent Budget. On the next screen, click on the CLONE button to copy theassessment. Enter the correct date, update the necessary information, including thefood stamps, and click on the SAVE button. Repeat these steps for the Balance Sheetto reduce the utility liability.From the Case Record,hover over theAssessment link.18
Revised on: 4/19/2017i.Note: Make sure to update the date and click on the SAVE button once the updateis complete.c. 2/25/15: Your client returns to the office and tells you s/he was approved for subsidizedhousing, which will pay 50% of his/her rent.i. Enter the Service Entry to update the Subsidized Housing story.ii.Update the budget with the subsidized housing. Hover over the Assessments link, and clickon the Assessment # next to the most recent Budget. On the next screen, click on the CLONEbutton to copy the assessment. Enter the correct date, update the necessary information,including the rent, and click on the SAVE button.From the Case Record,hover over theAssessment link.FFT is a registered mark of, and FFT templates are proprietary to, Local initiatives Support Corporation. FFT includes certain methodologythat is confidential and proprietary to Project Match-Families in Transition Association, including specifically the method by which one-timeoutcomes and over-time outcomes are distinguished, tracked, and entered (including, without limitation, the usage of the status codes such as“beginning”, “interim”, and “end” or terms that embody similar concepts). You may not disseminate information pertaining to FFT or anycomponent thereof (including without limitation third party methodologies) to unauthorized individuals nor embody any component of the FFT templates in any products or exploit the same in any way.” Local Initiatives Support Corporation 2012. This work is protected by United States copyright law. Apart from any use as permitted by the U.S.Copyright Act, no part of this document may be reproduced, distributed, transmitted, or published without the express written permission ofLocal Initiatives Support Corporation. You may not alter or remove any copyright notice or proprietary legend contained in or on this document.Local Initiatives Support Corporation does not guarantee the accuracy, completeness, or usefulness of any content in this document or its fitnessfor any particular purpose.19
FFT Salesforce Training Exercise/Guide Summary: This is a simulation of how you will use FFT Salesforce to track client outcomes. This exercise is designed to develop your knowledge of the new system. You will enter a fake client and document the situations descr