Transcription
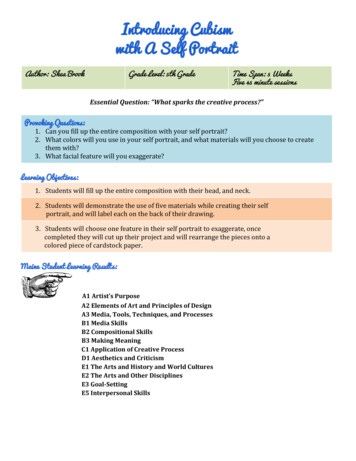
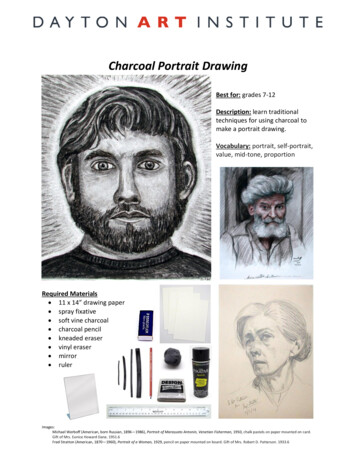
Charcoal Portrait DrawingBest for: grades 7-12Description: learn traditionaltechniques for using charcoal tomake a portrait drawing.Vocabulary: portrait, self-portrait,value, mid-tone, proportionRequired Materials 11 x 14” drawing paper spray fixative soft vine charcoal charcoal pencil kneaded eraser vinyl eraser mirror rulerImages:Michael Werboff (American, born Russian, 1896—1986), Portrait of Marassato Antonin, Venetian Fisherman, 1950, chalk pastels on paper mounted on card.Gift of Mrs. Eunice Howard Dane. 1951.6Fred Stratton (American, 1870—1960), Portrait of a Woman, 1929, pencil on paper mounted on board. Gift of Mrs. Robert D. Patterson. 1933.6
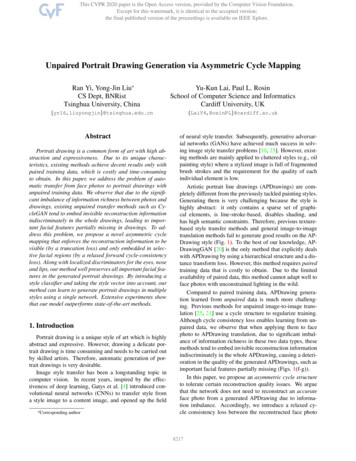
Instructions1. Charcoal is a versatile drawing medium that can getmessy. It can smudge onto your hands and maysmear onto surfaces. Simply wash off with soap andwater, and use care when working with charcoal.2. Select an image of a person, or portrait, to drawfrom or choose to draw a self-portrait using a mirror.Gently add charcoal to the background and smoothlyblend by hand or with tissue. Keep background amid-tone (medium darkness) for best results.Note: choose a portrait with subject facing straight—head is not tilted or turned.Helpful hint: use a black and white photo tobetter see all value (lights and darks).3. Draw a simple pointed oval shape for the head. Use aruler to divide head into 4 equal quadrants.Note: draw very lightly as to make correctionsmore easily as needed. Individual features maydiffer from standardized proportion guidelines.4. Draw an almond shape for an eye. Place eyenear the middle of horizontal line on right halfside of the face. This eye will now be a unit ofmeasurement for all the other features.5. Eyes half as tall as they are wide.6. Head 5 eyes wide.nose width 1 eyeNote: if head is not 5 eye lengths wide, allother measurements will not be proportional.Adjust where needed before proceeding.7. Space between eyes one full eye length.8. Tip of nose 1 ½ eye lengths from center line.9. Nose base width one full eye length.nose length 1.5 eyesThe contents of this document are copyright 2020 by the Dayton Art Institute, all rights reserved.This document has been prepared by the DAI Education Department for educational uses only, and any commercial use is prohibited.
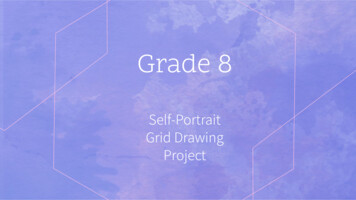
10. Space between tip of nose and top oflips ½ eye length.11. Base of lips one full eye length fromtip of the nose.12. Height of lips ½ an eye length.13. Width of lips the length betweenthe centers of both eyes (2 eyelengths).ear length approx. 2 eyestip of nose tobase of lips 1 eye length14. Top of eyebrows one full eye lengthaway from the bottom of the eye.15. Ear height length from top of theeye to tip of nose (approx. 2 eyelengths).mouth width 2 eyes16. Hairline starts approx. 2/3 up from center of face between the eyes.17. Define facial features of eyes, nose and mouth using general guidelines below. Individualfacial characteristics may differ.Eyes:Nose:Mouth:Have time for a short survey? Let us know how you’re enjoying our digital resources!
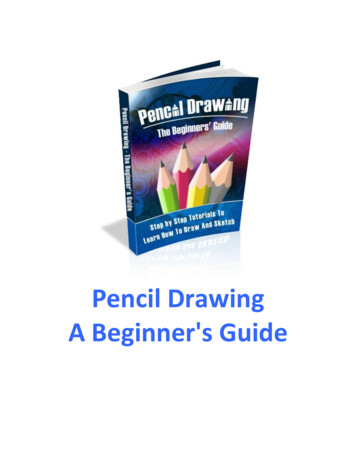
18. Draw hair, add value and sketch other details(ex: glasses, shirt, beard, freckles, etc.).Helpful hint: identify lightest and darkestvalues. Achieve mid-tones by comparingto those two extremes (ex: 2 shadeslighter than darkest tone). Drawing shouldinclude all values from white to black.Blend values with fingertips.Helpful hint: use kneaded eraser as adrawing tool for extra fine details in theeyes (ex: mold eraser into fine point forhighlights or thinly flatten eraser to drawthin white lines).Optional: use charcoal pencils for extra fine details (ex: eyelashes).Note: preserve artwork and prevent smearing with several thin coatsof final spray fixative. Only spray outdoors or in a well-ventilatedenvironment. Let dry about 5-10 minutes between coats. (No fixative?Use hairspray).The contents of this document are copyright 2020 by the Dayton Art Institute, all rights reserved.This document has been prepared by the DAI Education Department for educational uses only, and any commercial use is prohibited.
ExtensionsFor extra challenge:1. Try drawing the portrait from differing angles (ex:side view). Facial proportion guidelines will changebased on the pose of the head.2. Build the value of your portrait in reverse, startingwith adding mid- and dark-tones first, then carefullyremoving areas away with a kneaded eraser.Web ResourcesTips on drawing with charcoal from the Metropolitan Museum of ArtArtworks in charcoal at the Museum of Modern Art, New YorkHow to get started drawing in charcoalVideo: learn to draw with charcoalCharcoal portraits at the Cincinnati Art MuseumQuestions about or ideas for our programs? Email edu@daytonart.orgHave time for a short survey? Let us know how you’re enjoying our digital resources!
Try drawing the portrait from differing angles (ex: side view). Facial proportion guidelines will change based on the pose of the head. 2. Build the value of your portrait in reverse, starting with adding mid- and da