Transcription
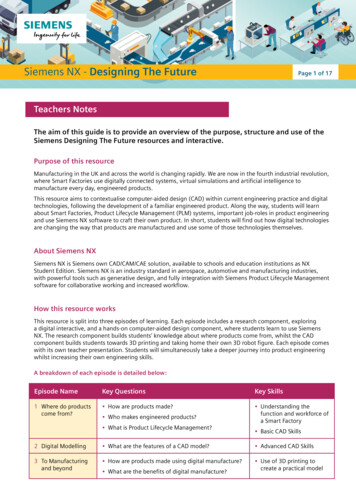
2387Siemens NX - Designing The FuturePage 1 of 17Teachers NotesThe aim of this guide is to provide an overview of the purpose, structure and use of theSiemens Designing The Future resources and interactive.Purpose of this resourceManufacturing in the UK and across the world is changing rapidly. We are now in the fourth industrial revolution,where Smart Factories use digitally connected systems, virtual simulations and artificial intelligence tomanufacture every day, engineered products.This resource aims to contextualise computer-aided design (CAD) within current engineering practice and digitaltechnologies, following the development of a familiar engineered product. Along the way, students will learnabout Smart Factories, Product Lifecycle Management (PLM) systems, important job-roles in product engineeringand use Siemens NX software to craft their own product. In short, students will find out how digital technologiesare changing the way that products are manufactured and use some of those technologies themselves.About Siemens NXSiemens NX is Siemens own CAD/CAM/CAE solution, available to schools and education institutions as NXStudent Edition. Siemens NX is an industry standard in aerospace, automotive and manufacturing industries,with powerful tools such as generative design, and fully integration with Siemens Product Lifecycle Managementsoftware for collaborative working and increased workflow.How this resource worksThis resource is split into three episodes of learning. Each episode includes a research component, exploringa digital interactive, and a hands-on computer-aided design component, where students learn to use SiemensNX. The research component builds students’ knowledge about where products come from, whilst the CADcomponent builds students towards 3D printing and taking home their own 3D robot figure. Each episode comeswith its own teacher presentation. Students will simultaneously take a deeper journey into product engineeringwhilst increasing their own engineering skills.A breakdown of each episode is detailed below:Episode NameKey QuestionsKey Skills1 Where do productscome from? How are products made? Understanding thefunction and workforce ofa Smart Factory Who makes engineered products? What is Product Lifecycle Management? Basic CAD Skills2 Digital Modelling What are the features of a CAD model? Advanced CAD Skills3 To Manufacturingand beyond How are products made using digital manufacture? Use of 3D printing tocreate a practical model What are the benefits of digital manufacture?
2387Siemens NX - Designing The FuturePage 2 of 17Using this resourceThis resource aims bring a detailed view of up-to-date product engineering to your classroom, in a concise andflexible format. There will be lots of new words and concepts for your students, and we have not shied away fromusing industry standard terminology.At the back of this guide, there is a glossary for teachers and students, and you may wish to differentiate andcustomise the resource materials and delivery depending on student ability or your own curriculum aims.You may also wish to adjust delivery depending on your availability of equipment and lesson timings. Forstudents to fully participate in each learning episode, you will require computers for each student and optionallyone or more 3D printers.You will also require web access and a Siemens NX Student Edition installation for each computer. Each learningepisode could be spread over several lessons, depending of your own timings.If you do not have access to 3D printing, you may wish to skip some aspects of Episode 3.Further information on how to download Siemens NX Student Edition can be found /Curriculum linksEach episode is applicable to and incorporates aspects of the following areas of the Design & Technology 2013programme of study:Evaluate Analyse the work of past and present professionals and others to develop and broaden their understanding Investigate new and emerging technologies Understand developments in design and technology, its impact on individuals, society and the environment,and the responsibilities of designers, engineers and technologistsMake Select from and use specialist tools, techniques, processes, equipment and machinery precisely, includingcomputer-aided manufactureExtensionsEach learning episode has an extension activity included to expand the learning. You could set these extensionsas homework or plan extra class time for their completion.
2387Siemens NX - Designing The FuturePage 3 of 17Episode 1: Where Do Products Come From?Lesson PlanIntroductionIn this episode students will tour a Smart Factory and learn how Product Life Management (PLM) systems areused to manage the engineering of a hairdryer. Students will also complete a simple computer-aided design(CAD) model using Siemens NX.Episode AimsThe aim of this lesson is for students to become familiar with the language and production processes of theproduct lifecycle – in this case of a hairdryer. Students will experience a virtual tour of a Smart Factory and caninterrogate each room in the factory to help them answer the worksheet questions. Students will then take onthe role of a product designer, with an introduction to Siemens NX CAD software. Students will learn more CADskills each week, culminating in them having design and manufactured their own robot figurine.A specific focus of this scheme of work is the relationship between manufacturing processes and digitaltechnologies, which should be emphasised throughout delivery.Learning ObjectivesThis episode is designed for students to understand: The product lifecycle of an everyday product The people involved in a product’s lifecycle How digital technologies such as Siemens NX and Product Lifecycle Management are beneficial to productdevelopmentWhat you will need Siemens NX ready installed and internet access on suitable devices Designing The Future Episode 1 presentation Designing The Future Episode 1 worksheets 3D printed robot figurine 3D printed badge Scissors Glue Blank PaperPreparationReview the interactive, presentation, worksheets and teachers guide. Decide on which content you will include inyour teaching and adjust the timings below to suit the length of teaching time. It is also advisable to familiariseyourself with the functions of Siemens NX.The example session below details how you might spread this episode over a double lesson of two hours, witha mixed ability group of year 8 students. You may wish to split the learning over two separate, shorter sessions.You could also use the CAD component of the session as a homework activity, if students have access to NX athome. In this instance you should give an introduction to NX during class time.
2387Siemens NX - Designing The FuturePage 4 of 17SequenceTime(120 mins)5 minsSlideNotesBriefly introduce the scheme of work.Explain that this topic aims to show howdigital technologies are changing the waythat products are made, and that they willlearn to use the technologies themselves.Show students the 3D printed robotfigurine and badge as the overall outcome.You may wish to pause briefly to use thelesson title as the starter question.5 minsIntroduce the learning objectives. Thislesson examines Product LifecycleManagement in the context of thedesign, manufacture and distribution ofa hairdryer. They will then design a 3Dbadge.20 minsStart students thinking about whereproducts come from and introduce thekey questions for the lesson. IntroduceChallenge 1, Students should try to workout the best order for the boxes fromChallenge 1 in pairs or individually.
2387Siemens NX - Designing The FuturePage 5 of 1720 minsStudents should now check their answersagainst the Designing the FutureInteractive. Question students on how theinteractive effected their decisions anduse the answer sheet feedback the correctorder. For higher level students, questionthe limitations of a flowchart for ProductLifecycle. Ask students to assess whetherproduct lifecycle is a linear process – theyshould be considering the iterative natureof the design, make and evaluate process.You could link this to their project work,or to everyday tasks where the aim isconstant improvement in many cycles.20 minsStudents should now explore ProductLifecycle Management more deeply usingthe Designing the Future Interactive andanswer the questions. Use the questions toinitiate discussion about how PLM softwareallows for greater collaboration betweenprofessionals, with emphasis on howTeamcentre could enable collaborationbetween teams across different companiesinternationally. Also discuss each aspect ofsustainability; economic, environmentaland social. Feedback worksheet answers.2 minsIntroduce the concept of Industry 4.0.Industry 4.0 refers to the Fourth IndustrialRevolution. This is the age where industryis highly digitized and connected, anduses IoT and AI enabled machinery, asepitomised in the Smart Factory. Discussthe benefits in terms of professionals(safety and workflow), companies(efficiency and profitability), the productuser (quality of product at a lower price),and all people due to the increasedsustainability more broadly.3 minsUse the slide to introduce Siemens NX.Students will have seen this software usedin the interactive Smart Factory.Explain the features of Siemens NX and it’sapplication in industry. Siemens NX canintegrate fully with PLM and is used acrossmany industries including automotive andaerospace. The image shows an exampleof generative modeling, where advancedgeometric models are generated digitallyusing constraint and material data, such asthe chassis of the car shown above.
2387Siemens NX - Designing The FuturePage 6 of 1740 minsIntroduce Challenge 3. This activityintroduces students to the basics of CADmodeling, including sketches, extrusionsand fillets. You will need Siemens NXeducation installed on your institutionmachines. If you have a 3D printer, youcould get students to print their badges.If you 3D print in ABS, badge pins couldeasily be attached to the back surfaceusing a cyanoacrylate adhesive, followingall safety measures detailed on theadhesive instructions.5 minsUse these questions to reflect on skillsgained when using Siemens NX. This willbe revisited next session as students’ NXskills increase.Use these plenary questions to recap onthe learning. Break each question intosub questions as you go, such as ‘Whodoes the designing? Or ‘Who plans themanufacturing’. Consider the benefitsof PLM and NX for all stakeholders – theuser, the designer, the manufacturer,the distributor and the impact onsustainability.ExtensionStudents who finish early should customise the expression on their 3D badge. Students who have already beenintroduced to 3D printing could 3D print their badge and help other students to do the same.DifferentiationEasier: Omit Challenge 2. You could also give more time to challenge 3, modelling the badge step by step fromthe board.Harder: Students to work individually on challenge 1. Students should design a badge with a different shapefrom the one shown.
2387Siemens NX - Designing The FuturePage 7 of 17Episode 1: Where do Products come from?Answers1.Research & Problem Definition, Product Design, Simulation & Prototyping, Product Verification, ProductionPlanning, Product Manufacture & Assembly, Quality Control, Finishing & Distribution, Using the Product2aAny of the following, or any other suitable answer: Design, production and sales data is instantly shared Team members can communicate easily using team centre Everyone works from the same database Teams can easily work collaboratively2bAny of the following, or any other suitable answer: Digital models are easy to update or modify Digital models can be tested easily Digital models can be prototyped using 3D printing Digital models can be shared with others easily More than one designer can work collaboratively on the same model2cAny of the following, or any other suitable answer: PLM saves time/is more efficient PLM can reduce production costs PLM allows greater collaboration between teams PLM can increase product quality PLM can increase product sustainability2dAny of the following, or any other suitable answer: PLM can increase product sustainability PLM can reduce the cost of the product for the end user PLM can increase product quality2ePLM can increase the sustainability of production processes, reducing environmental costs.Any other suitable answer.3Students to complete their 3D badge model.4Students should customise their badge. Product ideas should be marked based upon: Originality CAD Skill, such as the use of more advanced tools Aesthetic qualities
2387Siemens NX - Designing The FuturePage 8 of 17Episode 2: Digital ModellingLesson PlanIntroductionIn this session students will learn how to use Siemens NX at a more advanced level and find out how it is used byproduct designers and engineers to design products.Episode AimsThe aim of this lesson is for students to become familiar with the language and production processes used incomputer-aided design (CAD). Students will contextualise the use of CAD in a Smart Factory setting, learn usefulvocabulary for CAD modelling and work on a more advanced CAD model – a figurine of Roblet, a cute robot.Learning ObjectivesThis episode is designed for students to: Describe the common features of a CAD model Model a complex part using Siemens NX SoftwareWhat you will need Siemens NX ready installed and internet access on suitable devices Designing The Future Episode 2 presentation Designing The Future Episode 2 worksheets 3D printed robot figurinePreparationReview the interactive, presentation, worksheets and teachers guide. Decide on which content you will include inyour teaching and adjust the timings below to suit the length of teaching time. It is also advisable to familiariseyourself with the functions of Siemens NX.The example session below details how you might spread this episode over a double lesson of two hours, witha mixed ability group of year 8 students. You may wish to split the learning over two separate, shorter sessions.You could also use part of the CAD component of the session as a homework activity, if students have access toNX at home. In this instance you should give an introduction to NX during class time.
2387Siemens NX - Designing The FuturePage 9 of 17SequenceTime(120 mins)SlideNotes5 minsIntroduce the lesson title. You could use this as a starterquestion – What is a CAD model? This will form part ofyour recap from last sessions learning.5 minsIntroduce the learning objectives for the lesson. Thislesson introduces students to CAD terminology and moreadvanced modelling using Siemens NX.5 minsRemind students about last week’s learning, wherethey followed the product lifecycle of a hairdryer.Try to get them to differentiate between the roles ofdifferent people in the factory e.g. The product designer,manufacturing engineers etc. Use this to contextualiseCAD.20 minsIntroduce Challenge 2 and direct students to the onlineinteractive. The answers are found in the design studio,on one of the product designers PCs.10 minsFeedback answers to Challenge 2.
2387Siemens NX - Designing The FuturePage 10 of 175 minsExplain how CAD models can help designers to visualisetheir ideas. CAD models are quicker and more costefficient than practical models and be tested safely andunder conditions not easily replicable, simulating wearand tear over time or otherworldly conditions such as thevacuum of outer space. Introduce their challenge, usinga 3D printed Roblet figurine if you have one.60 minsIntroduce Challenge 2. This activity introduces studentsto more advanced CAD modelling. You will need SiemensNX education installed on your institution machines.Next session features the 3D printing of their models.You could start students off on the first steps to creatingtheir model. Be sure to point out the search bar in NX,where students can easily search for tools.5 minsChallenge students to reflect on their learning. TheRoblet model is a significant step up from last session, sobe heavy with the praise!5 minsPlenary Questions: Use these questions to challengestudents learning for the episode. Break each questioninto sub questions as you go. The aim of this exercise isto get students to verbalise their CAD skills.ExtensionStudents who finish early should customise their badge. Consider adding antenna, more controls or change theexpression.DifferentiationEasier: Omit Challenge 1. You could also give more time to challenge 2, modelling the badge step by step fromthe board.Harder: Students should be challenged to create their own 3D product using NX.
2387Siemens NX - Designing The FutureEpisode 2: Digital ModellingAnswers1APartA single component of an assembly or productEFaceThe flat surface of a part or bodyFVertexA cornerBChamferA flatly angled edgeDEdge BlendA rounded or radiused edge, sometimes called a filletBCDFeatureAn aspect of a form such as a hole, chamfer or filletCHoleA circular opening2Students should complete their Roblet model.3Students should customise their Roblet. Product ideas should be marked based upon: Originality CAD Skill, such as the use of more advanced tools Aesthetic qualitiesPage 11 of 17
2387Siemens NX - Designing The FuturePage 12 of 17Episode 3: To Manufacturing & BeyondLesson PlanIntroductionIn this session students will learn how digital manufacture is used in industry and to use Siemens NX and a 3Dprinter to digitally prototype a Roblet figurine.Episode AimsThe aim of this lesson is for students to become familiar with the types of digital manufacturing tools availablein schools and how they are used in industry. Students will modify their NX model of Roblet and 3D print theirfigurine.Learning ObjectivesThis episode is designed for students to: Describe range of digital manufacturing tools Explain the benefits of digital manufacture Use 3D printing to prototype a productWhat you will need Siemens NX ready installed and internet access on suitable devices Designing The Future Episode 3 presentation Designing The Future Episode 3 worksheets Access to 3D printing 3D printed robot figurine a finished Roblet .stl file.PreparationReview the interactive, presentation, worksheets and teachers guide. Decide on which content you will include inyour teaching and adjust the timings below to suit the length of teaching time. It is also advisable to familiariseyourself with the functions of Siemens NX and the software for your 3D printer.The example session below details how you might spread this episode over a double lesson of two hours, with amixed ability group of year 8 students. You may wish to split the learning over two separate, shorter sessions. Forstudents who were not present for the previous lessons, they could model the 3D badge from lesson 1. You couldalso supply them with a finished Roblet .stl file.
2387Siemens NX - Designing The FuturePage 13 of 17SequenceTime(120 mins)SlideNotes5 minsIntroduce the lesson title.5 minsIntroduce the learning objectives. This lesson introducesdigital manufacturing, culminating in students 3Dprinting a figurine.5 minsIntroduce the concept of digital manufacture. Digitalmanufacturing machines are manufacturing machinesthat are digitally connected, enabling digital simulationof processes and full integration into PLM and SmartFactory systems. Many digital manufacturing machinesuse IoT technology and require less set up and tooling forindividual jobs.15 minsIntroduce Challenge 1, Introduce each type ofmanufacturing. You may have examples of digitalmanufacturing machines such as CNC lathes or laserengravers to show students in your classroom.5 minsAsk students to decide which processes could bedescribed as additive and which ones as subtractivemanufacture. All of the processes listed apart from 3Dprinting are subtractive, as they cut or remove materialwhilst 3D printing is additive as it builds a shape fromlayers of material.
2387Siemens NX - Designing The FuturePage 14 of 1715 minsIntroduce Challenge 2. Digital manufacturing has manyadvantages for product designers. The main advantagesare speed, cost effectiveness, the ability to create complexshapes in plastic without moulds, products requirelittle finishing and can be made in a range of colours,a 3D printer can be small enough to sit on a desk. Theadvantage over traditional plastic manufacturing is thatno tooling is required which can be costly and labourintensive. If you have a 3D printer, show students itworking, and some complex printed objects.5 minsAsk students to decide which processes could bedescribed as additive and which ones as subtractivemanufacture. All of the listed processes are subtractive,as they cut or remove material, whilst 3D printing isadditive as it builds a shape from layers of material.5 minsUse this slide to discuss the answers.55 minsIn this part of the session, students will prepare and 3Dprint their Roblet model, by adding a base and exportingtheir model as an .stil file (stereolithography file). Itwill take some time to complete 3D printing, so showstudents one file being printed, and allow them to comeback to print in their own time. Students should beencouraged to customise their Roblet.5 minsUse these questions for the plenary. Challenge studentsto name all types of digital manufacture discussedand encourage students to define them as additive orsubtractive. Students should consider the advantages atdifferent scales, from the designer to the product user.Students should evaluate the qualities of their 3D printedRoblet. How long did it take? Would this manufacturingmethod be useful for mass production?
2387Siemens NX - Designing The FuturePage 15 of 17ExtensionStudents who finish early should customise their base design or add their initials to the back of their Roblet.DifferentiationEasier: Omit Challenge 2.Harder: Students are to find industrial examples of digital manufacture for Challenge 1. These could include lasersintering or concrete printing.Episode 3: To Manufacturing and BeyondAnswers1Small plastic ghost: 3D printerPlywood puzzle piece: Laser engraverSteel Gears: CNC MillAcrylic Plastic Stencils: Laser engraverElectric Guitar Body: CNC millMetal cupboard knob: CNC latheABS prosthetics: 3D printerAcrylic jewellery: Laser engraverPlywood furniture: Laser engraver, CNC mill2aAny four of the following, or any other suitable answer: Digital models can be quickly turned into practical models Digital manufacture is more cost effective than traditional plastics forming processes Digital manufacture is less time consuming than traditional plastics forming processes Designers can 3D print prototypes in their office 3D printing can produce accurate products 3D printed products require little finishing2bAny of the following, or any other suitable answer 3D printing is less time consumbing and more cost effective than traditional plastic forming processes. It can also be done on a desk, rather than in a plastics workshop.3Students should complete the stand on their Roblet model and export their design as a .stl file. Students should design their own 3D printed product. Product ideas should be marked based upon: Complexity of model Suitability for the material and manufacturing process Originality Functional application Aesthetic qualities
2387Siemens NX - Designing The FuturePage 16 of 17Glossary3D PrinterA digital manufacturing machine that forms 3D shapes in layers using meltedplastic, squirted from a nozzle.Artificial Intelligence (AI)Computer systems that can undertake complex thinking tasks.AssemblyThe joining of product components.Assembly LineA series of machines that join components together.Autonomous Mobile RobotA robot who moves products around a warehouse and loads vehicles.AxisOne of three points in Euclidian geometry, labelled as the x, y and z axes.CADComputer-Aided Design. The design of a product using models drawn using digitalsoftware.ChamferA edge that has been sloped at an angle.ComponentPart of a product.Datum PointThe starting point on a digital model, from which all other points are measured.DesignThe refining of product ideas into sketches, drawing or models towards a finishedversion.Dialog BoxA window within a software screen.DiameterThe width of a circle.Digital ManufactureManufacture using computer systems to simulate production and control roboticmachinery.DistributionThe transport of the product to the user.Edge BlendSee Fillet.Engineered ProductA complex product manufactured using multiple processes.ExportIn CAD, to output a file of a different type.ExtrusionIn CAD, The expansion of a 2D sketch (or part of a 2D sketch) into a 3D shape.FilletA rounded or smoothed edge.Final designThe design idea that has been verified for manufacture.First Industrial RevolutionThe mechanical age, where machines were operated using water and steam power.Fourth IndustrialRevolutionThe age of digitally connected machines, digital manufacture, artificial intelligenceand Smart Factories.Industry 4.0See Fourth Industrial Revolution.
2387Siemens NX - Designing The FuturePage 17 of 17Logistics ManagerSomeone who oversees and plans the distribution of a product.ManufactureThe making of a product using machinery.Manufacturing technicianSomeone who oversees the manufacture of products on the production line.MaterialThe substance that a product component is made from.ModelA real-life or digital 3D construction of an idea, used for testing.PlaneA flat surface in space.Product DesignerSomeone who designs products.Product Life Management(PLM)A digital system for managing the design, manufacture, distribution, maintenanceand disposal of a product.Product ManagerSomeone who oversees and managers the entire production of the product.Product RequirementsThe list of qualities or features that the product must have to be a success.Product ResearcherSomeone who finds out and records data to aid in the design of a successfulproduct, including user data and data from previous products.Production EngineerSomeone who designs how a product will be manufactured and plans theproduction line.Production LineA series of machines that carry out manufacturing processes.ProstheticAn artificial body part e.g. a prosthetic hand or leg.PrototypeA model of an idea or part of an idea, for testing.Quality controlThe process of testing a finished product to make sure that it is of the correctquality and to refine manufacturing processes.Second IndustrialRevolutionThe age of electricity and mass production.Siemens NXSiemens NX digital modelling package.SketchIn CAD, a 2D drawing created using lines and shapes, drawn on a plane or surface.Smart FactoryA manufacturing plant that employs digitally connected systems and machines tomanufacture engineered products.stl fileThe standard file type for 3D printing. A sterolithography file.Supply chainThe network of sources that supply materials or components for a product.Third Industrial RevolutionThe electronic age, of automated machines and computer control.UserThe person who will use the finished product.VerificationThe ensuring that a design meets the product requirements.
machines. If you have a 3D printer, you could get students to print their badges. If you 3D print in ABS, badge pins could easily be attached to the back surface using a cyanoacrylate adhesive, following all safety measures detailed on the adhesive instructions. 5 mins Use these questions to
