Transcription
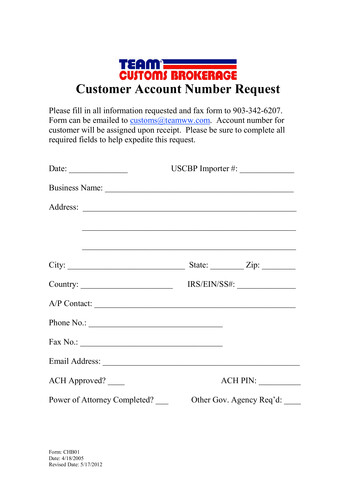
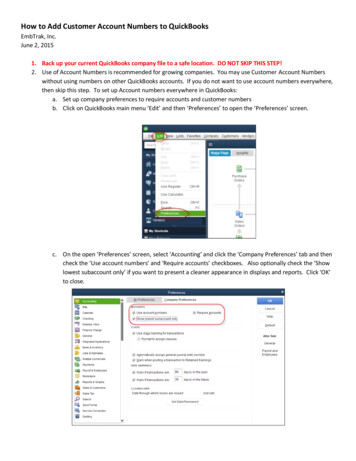
How to Add Customer Account Numbers to QuickBooksEmbTrak, Inc.June 2, 20151. Back up your current QuickBooks company file to a safe location. DO NOT SKIP THIS STEP!2. Use of Account Numbers is recommended for growing companies. You may use Customer Account Numberswithout using numbers on other QuickBooks accounts. If you do not want to use account numbers everywhere,then skip this step. To set up Account numbers everywhere in QuickBooks:a. Set up company preferences to require accounts and customer numbersb. Click on QuickBooks main menu ‘Edit’ and then ‘Preferences’ to open the ‘Preferences’ screen.c. On the open ‘Preferences’ screen, select ‘Accounting’ and click the ‘Company Preferences’ tab and thencheck the ‘Use account numbers’ and ‘Require accounts’ checkboxes. Also optionally check the ‘Showlowest subaccount only’ if you want to present a cleaner appearance in displays and reports. Click ‘OK’to close.
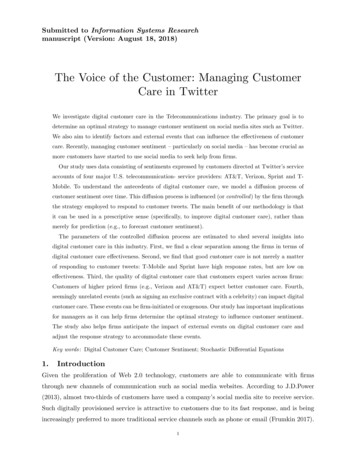
3. ADD Customer Account Numbers:a. Click on the ‘Lists’ menu on the main QuickBooks screen. Then click ‘Add/Edit Multiple List Entries’ tobring up the ‘Add/Edit Multiple List Entries’ screen.b. The ‘Add/Edit Multiple List Entries’ screen allows the user to easily edit multiple records using aspreadsheet format. As indicated by the Blue Dot numbers on the top of the screen we can see thereare three steps: 1 Select a list, 2 Customize columns to display and 3 Paste from Excel or type to add toor modify your list.i. 1 Select ‘Customers’ from the ‘List’ drop list. Also select ‘All Customers’ from the ‘View’ droplist.ii. This will bring in the default fields of all the data for all of your customers.iii. There are only two fields required to edit the ‘Customers’ list. The first of these is the ‘Name’field, which is the unique identifier used by QuickBooks to identify each account. QuickBooks
will not allow more than one Customer record to have the same value in the ‘Name’ field. Byincluding the ‘Name’ field, all changes to the Customer records can be linked back to the originalCustomer records in QuickBooks.iv. The second required field is the one that will be edited. In this case, the edited field will be the‘Account No.’ field. It is not included in the default display, so we have to 2 Customize theColumns to add it. We can also delete from the display all the other fields except Name andAccount No.v. Click the ‘Customize Columns’ button on the far right of the screen. The below picture showshow to use the ‘Customize Columns’ screen to adjust the columns to remove all but ‘Name’.vi.To add the ‘Account No.’ field so it can be edited:
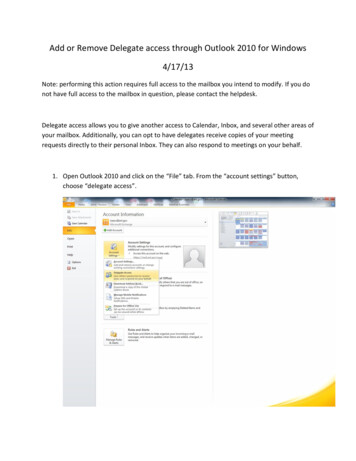
vii.The screen will now contain only two columns: ‘Name’ (as the unique identifier for thecustomer record to be edited) and ‘Account No.’ (which is blank, because customer recordshave not had Account Numbers until now. The below picture shows only three accountsbecause that is all the accounts in this demonstration QuickBooks company. Note there arethree Names and three blank Account No. fields.viii. To edit this sample with only 14 customers, it would be easy enough to simply place the mouseon each line and type in the new Account No. values. However, with thousands of customers,we need to let Excel do the work. Here’s how:1. Open an Excel spreadsheet.2. In the first column, first cell, enter the account number value that you want to startwith. In the sample below we have chosen to start with 10,001, which is a good startingpoint for most companies, since all account numbers will be between 10,001 and99,999—allowing for a lot of growth and yet limiting entry to 5 characters.
3. Use the Fill Series functionality to create a column of numbers incrementing by onefrom 10001 to whatever will be the last Account No. needed for the number ofcustomers in the list. For the above sample, the list is only three numbers long. (Takecare to create as close as possible to the correct number of Account No. numbers sinceany excess or shortage will have to be cleaned up on the ‘Add/Edit Multiple List Entries’screen before saving.)4. Highlight the entire list and type ‘Ctl C’ to copy the list.5. Go back to the QuickBooks ‘Add/Edit Multiple List Entries’ screen and position yourmouse on the first cell in the ‘Account No.’ column.
6. Type ‘Ctl V’ to paste the Excel list of account numbers into the ‘Add/Edit Multiple ListEntries’ ‘Account No.’ column.7. If the pasted numbers go below the last account ‘Name’ they must be deleted one byone before proceeding to save the changes back to the Customer list. If the list ofnumbers is too short, additional numbers will have to be entered or pasted until everyName on the list has a valid, unique matching Account No.
8. When all Names have an Account No., click the ‘Save Changes’ button in the bottomright of the ‘Add/Edit Multiple List Entries’ screen. Finally, Click ‘Close’.9. Open the Customer Center in QuickBooks to view Customer records and confirm thatthe new ‘Account No.’ values are present.
How to Add Customer Account Numbers to QuickBooks EmbTrak, Inc. June 2, 2015 1. Back up your current QuickBooks company file to a safe location.File Size: 1MBPage Count: 7