Transcription
Excerpted from:The Accidental Administrator:Linux Server Step-by-StepConfiguration GuideFirst Editionby Don R. CrawleyLinux and CCNA SecurityProvided courtesy ofSeattle, Washingtonwww.soundtraining.netSBN-10: 1-4536-8992-3ISBN-13: 978-1-4536-8992-9 2010, Don R. Crawley.All rights reserved.
Chapter Two:Linux Administration"If you want to travel around theworld and be invited to speak at alot of different places, just write aUnix operating system."--Linus Torvalds
GUI vs. CLISince the first graphical user interface (GUI) was created in the Xerox Palo Alto Research Center inthe early 1970s, those of us who work in information systems and technology have debated its meritsand liabilities.The real issue is not whether to use a GUI or a command-line interface (CLI); it is about choosing atool that works for you and helps you work most effectively. For most of us, that means thatsometimes we‟ll use a GUI and sometimes we‟ll use a CLI.I once had a student in a Linux workshop who said his nickname was “No GUI Louie”. While Iremember Louie as a very knowledgeable and capable IT pro, I have also had students who avoid theCLI because of its complexity without considering the power it affords an administrator. I think welimit ourselves when we arbitrarily limit the tools at our disposal by eliminating GUI or CLI tools.In my own work, I find that I use both the CLI and GUI, depending on the task at hand and mypersonal familiarity with the tools in question. (Okay, I use the command-line most often, but I‟mvery grateful for the GUI when performing unfamiliar tasks!)GUI ProsGUI ConsFasterFarther away from the “road”Fewer typing errorsLess controlLess minutiaJava and other issues might make GUI unavailableSafer (harder to make mistakes)Some of the names and labels it creates are strangeCan help teach you CLI commands Some people are more familiar with the CLILinux DirectoriesEverything in Linux/UNIX is based on the file system. The file system is comprised of variousdirectories (Windows calls them “folders”.) The root directory (“/”) is at the base of the file system.Some directories may be on different partitions or drives, but they are still a part of the file system.Some directories may even be on completely different computers, perhaps running a completelydifferent operating system, but they are still part of the file system. What follows is a list of some ofthe more commonly found directories in the Linux file system (all directories are not included on allsystems): / is the root directory /bin/ and /usr/bin/ store user commands. /boot/ contains files used for system startup including the kernel. /dev/ contains device files
/etc/ is where configuration files and directories are located. /home/ is the default location for users‟ home directories. /initrd/ is used to load required device modules and mount the initrd.img image file duringsystem startup. /lib/ and /usr/lib/ hold library files used by programs in /bin/ and /sbin/. /lost found/ holds orphaned files (files without names) found by fsck /mnt/ holds the mount points for file systems that were mounted after boot. /opt/ is used primarily for installation and unintallation of third-party software. Holdsoptional files and programs. /proc/ is a virtual directory (not actually stored on the disk) which holds system informationrequired by certain programs. /root/ is the home directory of the superuser “root” /sbin/ and /usr/sbin/ store system commands. /tmp/ is the system temporary directory. All users have read write access to /tmp/. /usr/ contains files related to users such as application files and related library files (“usr” isan acronym that stands for UNIX system resources). /var/ (as in “variable”) holds files and directories that are constantly changing such as printerspools and log files.The above is a brief overview of Linux/UNIX directories. For a more complete discussion ofLinux/UNIX directory structures, search on “Filesystem Hierarchy Standard” atwww.wikipedia.com.Soundthinking point: Customizing the Desktop BackgroundCustomize the Gnome or KDE background by right-clicking on the background and choosingChange Desktop Background.Starting and Stopping ServicesIn Linux, the various services that together make up the entire operating system are called daemons(pronounced DEE-muns). There are daemons for the DNS name server (named), the Web server(httpd), DHCP (dhcpd), and so on. When you see odd names ending with the letter “d”, you‟re mostlikely looking at a daemon name. Most of the daemons can be controlled through scripts located at/etc/init.d/. For example, to start the Web server from a terminal window, you would execute thecommand “/etc/init.d/httpd start”. To stop it, you would execute the command “/etc/init.d/httpdstop”.
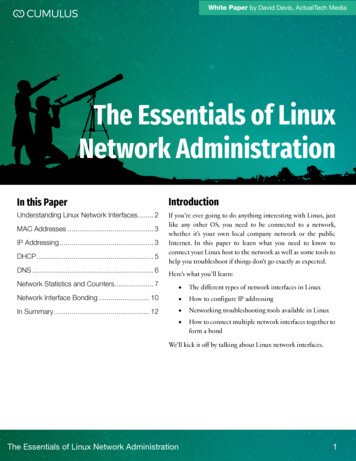
Different Linux distros might place the scripts in slightly different locations. Later in the book,you‟ll learn how to use the find command to locate such scripts as well as other files and directories.The Red Hat System-Config and System-Control UtilitiesRed Hat-based systems include the system-config and system-control utility, a text and graphicsbased utility to help you configure and manage various aspects of your system. You can see theavailable utilities by opening a terminal window and, as root, typing the following command:#systemDo not hit enter, but instead touch the tab key twice and you‟ll see a listing of options.Figure 1 The Red Hat system utilityThe ShellThe shell is the interface between the user and the operating system. It acts as a keyboardinterpreter, taking the keyboard input from the user and delivering it to the operating system. Youcan think of the shell as being the part of the operating system that allows you to interact with thekernel. The shell is the program that executes Linux or UNIX commands.There are several shells available for use in the Linux and UNIX. The one most commonly used inLinux is the bash shell (Bourne Again Shell). Other shells include sh (Bourne Shell), csh (CShell),tcsh, csh, and ksh (Korn Shell).You can change the shell by typing the shell‟s name at a command prompt.For the purpose of this document, we‟ll focus on the bash shell.The shell is not only a command interpreter, it is also a scripting language. Experienced Linuxadministrators often write scripts to automate frequently conducted system tasks.Linux, like all multi-user operating systems, has an administrator account which is used for system
configurations and operations. In Linux/UNIX, the administrator account is called “root”(equivalent to “admin”, “administrator”, or “supervisor” in other operating systems). “root” is oftenreferred to as the “superuser” because of the account‟s unrestricted access to every area of thesystem and every aspect of the system‟s configuration.When logged on as root using the bash shell, the prompt is a pound sign (#). When logged on as aregular user using the bash shell, the prompt is a dollar sign ( ).Shell commands in the Linux/UNIX world are usually case sensitive.You can see your default shell with this command:#echo SHELLLinux ProfilesThere are two types of Linux profiles: system-wide and user-specific. System-wide configurationsaffect all users, while user-specific configurations affect only a single user. Normally, you must beroot to change system-wide configurations.User-Specific ProfilesUser-specific profile settings are found in the user‟s home directory (/home/donc), but they‟rehidden by prepending a “.” to the filename. Examples of profile files include: .bashrc.bash profile.bash historyThere are many others. You can view the hidden files in any directory by using “ls -a”.System-Wide ConfigurationsSystem-wide configuration settings are almost entirely found in /etc. This is where you find files forconfiguring Apache, BIND DNS, and nearly any other aspect of Linux. For example, in DebianLinux, if you want to modify settings of your Apache web server, you would probably modify/etc/apache2/apache2.conf. If you are working with a Red Hat product, the file most likely is/etc/httpd/conf/httpd.conf. (The reason for using tentative language is because everything isconfigurable in Linux and the person who built your Linux system might have chosen to place theconfiguration files elsewhere.)Administration Tools and TechniquesWorking in TerminalMost Linux systems configured as servers are managed in a command-line interface (CLI) and manyLinux power-users prefer to manager even their desktop system in the CLI. Although the graphicaluser interface (GUI) tools available for use in many Linux distros have improved considerably overpast versions, the CLI continues to provide the greatest power and flexibility for configuring and
managing a Linux system. The other benefit to working in a CLI is that each Linux distro is muchmore similar in the CLI than in the GUI. For the purpose of this workshop, you will do most of yourconfigurations in the CLI, thus allowing you to make smoother and simpler transitions from Debianto other distros such as SuSE, Ubuntu, RedHat, Slackware, or even traditional UNIX systems.soundthinking Point: Desktop EnvironmentsThe default desktop environment in CentOS 5.x, Debian 4.0r5, and many other Linux distros isGnome. The desktop environment is what provides the buttons, backgrounds, effects, andapplications. Desktop environments will be covered later in the workshop, but for now understandthat different desktop environments may have slightly different to significantly different menulocations than those described here.Student Exercise 2.1: Commonly-Used Shell CommandsWhen you first logon to a Linux system, you may be in a GUI or in a command-lineshell. If you are in a GUI, you can open a terminal window (a command-line shell) byclicking on Applications in the menu at the top of your desktop, then mouse overAccessories, and click on Terminal. Once you are in a command-line shell, you areplaced in your home directory (/home/[username]). You can navigate to other directoriesby using the “cd” command, followed by the path to the desired destination.1. If you are not already using the root account, use the su (switch user) commandwith the “-“ switch to change to the root account and profile: su Password: p@ss56782. #cd changes the working directory. Enter the following command (bearing inmind that the “#” represents your prompt:#cd /homeNotice that the prompt changes to display the current directory (home).3. To return to your own home directory, type the following command:#cd You can also type “cd” to return to your home directory, but you should know thatthe tilde ( ) represents your home directory. The tilde is often used in pathstatements to represent your home directory.4. Now, enter the “pwd” command to print your working directory to your screen(output directed to the screen is known as standard output or stdout):
#pwd5. You can go up one level in the directory hierarchy by using the command:#cd .The “.” indicates the parent directory. All directories except for the root (/)directory have a parent.6. Once again, enter the “pwd” command to print your working directory:#pwd7. Once again, return to your own home directory. This time, simply enter “cd” withno tilde:#cd8. Now issue an “ls” command to see the contents of the current directory. “ls” liststhe contents of a directory.#lsThere are a variety of switches available for use with “ls”:Some commonly used optionswith “ls”Resultsls –aLists all files including hidden filesls –lLong listing, includes permissions, owners,groups, etc.ls –RLists sub-directories recursivelyls –shShows file size (s) in human-readableformat (h)ls -1 (the number “1”)ls –dDisplays one file per lineTells “ls” to list directory names, but nottheir contents
You can also use common shell metacharacters with “ls”: * is the string wildcard ? is the character wildcard [] encloses a character set [-] is a character range {} is a string setWhen you issue the “cd” command with no parameters, you will be returned to your home directory.#mkdir creates directories.Student Exercise 2.2: Creating Directories and FilesIn this exercise, you will create a working directory which you will use for upcomingexercises. You will work with several commands to become familiar with some of theimportant tools related to directory and file management.Student Exercise 2.2.1: Working with Directories1. Log on to your system as the regular user you created during the installationprocess.2. Click on the Applications menu, move your mouse over Accessories, and on thesubmenu that appears, click on Terminal.3. In the terminal window, enter the following commands (remember that the “ ”and the “#” are prompts and you should not type them at the beginning of thecommand): su –Password: p@ss5678#mkdir /demoYou have just created a directory called “demo” which is a subdirectory under theroot directory (/).Note: You can create multiple directories at the same time simply by separatingtheir names with a space.4. Display the contents of your working directory with the following command:
#lsNotice that /demo is not displayed. The reason is that /demo is a subdirectory ofthe room directory. You are presently in a different directory.5. Print your working directory to stdout (your screen) with the following command:#pwdNotice that you‟re in the super user root‟s home directory which is not where youcreated /demo.6. Display the contents of the root directory with the following command:#ls /Notice that you now see the demo directory, along with several other directoriesthat are all child directories under the parent /.7. Enter the following command to change your working directory to /demo:#cd /demo#pwd You should now see that /demo is your working directory.8. Enter the following commands:#mkdir demo1 demo2 demo3 You have just created three sub-directoriesin /demo called demo1, demo2, and demo3.9. Now, list the contents of /demo with the following command:#lsYou should now see the three subdirectories you just created.To remove a directory, use the command “rmdir”:10. While still in /demo, remove the three directories you just created with thefollowing command:#rmdir demo1 demo2 demo311. Use the “ls” command again to confirm that the three directories are removed:#lsThe /demo directory should be empty.12. You can also use wildcards to simplify file and directory management. Touch theup arrow on your keyboard several times. Notice that it repeats the last severalcommands. Stop when you see the command “mkdir demo1 demo2 demo3”.
With “mkdir demo1 demo2 demo3” visible, press the Enter key to recreatethe three directories.13. Use the “ls” command to verify that the three directories have been re-created.#ls14. Now, use the “*” wildcard to simplify the rmdir process:#rmdir demo*15. Use the “ls” command to verify that the three directories have been deleted.#lsStudent Exercise 2.2.2: Working with FilesMoving, Copying, and Deleting FilesThe “mv”, “cp”, and “rm” commands are commonly used commands for basic filemanagement.#mv [filename] [destination and filename] moves a file to anew location. This is also used when you want to rename a file.#mv [current filename] [new filename] renames a file.#cp [filename] [destination] copies a file to a new location.#rm [filename] deletes a file.You can use the -f option to force a move, copy, or deletion without being asked forconfirmation (Be careful when doing this!). You can use the -r option to move, copy, ordelete recursively through directories. (Be especially careful when using the -r optionwith the -f option.)The rm command is absolute and, once invoked, cannot be undone. Best practice is toalways use the -i (interactive) option with “rm” which prompts you to confirm you reallydo want to delete the file.The touch command is used to change file timestamps, but it is also a handy way tocreate empty files.1. Using the “touch” command, create three new, empty files:#touch file1 file2 file32. Now, issue an “ls” command to see the contents of the current directory.3. The “mv” command (move) is used when you want to move or rename a file.
While still in /demo, issue the following command to rename file1:#mv file1 file44. Use the “ls” command to view the contents of the directory. The former file1should now appear as file4.5. The “cp” command (copy) copies files from one location to another. While stillin /demo, issue the following command to copy file4 from /demo to /:#cp file4 ./.(The ./. tells the system to copy file4 to the parent directory (.) and use the samename on the copy as the original (/.).6. Use the “ls” command to view the contents of /demo and notice that file4 is stillin /demo. Then, use the “ls /” command to view the contents of the root directoryand you should see the copy of file4.7. The “rm” command (remove) deletes files. Use the following command toremove file4 from the root directory:#rm /file4(Notice that you are prompted to confirm the deletion.)8. Use the “ls” command with a wildcard to check the root (/) directory for any fileswhose names start with fil:#ls /fil*You should see a message stating “No such file or directory”.9. Now, use wildcards and options to remove multiple files without being prompted.While in /demo, issue the following command to remove all files whose namesstart with fil:#rm -f fil*10. Use the “ls” command with a wildcard to check /demo for any files whose namesstart with fil:#ls fil*As with the previous step, you should see a message stating “No such file ordirectory.Other Helpful Commands#su – [username] is the switch user command. The hyphen switches the present working directoryto the new user‟s home directory. When used with no parameters, the “su” command switches to“root”.
#pwd displays the present working directory‟s full path#ls lists the directory contents#cat [filename] concatenates files and prints on the standard output (usually the display screen)#less [filename] (from the man page) less is a program similar to more, but which allows backwardmovement in the file as well as forward movement. Also, less does not have to read the entire inputfile before starting.#more [filename] is a program that filters text to allow paging through a file one page at a timewhereis is a helpful command for finding configuration files and executable programs. It does notsearch through user directories.Try this:#whereis ifconfigfind is another helpful command that will search based on various criteria including file name, filesize, modification date, and permissions. The find command can only be issued by a user who haspermission to view the target files and directories.Try this:#find [filename within the current directory]There are many options available for use with find:#find / -type d -name conf will find all the directories named “conf”#find / -user donc will find all files owned by “donc”#find / -name donc will find all files with the same name as “donc”#find -name 'index.html' would search for any file named index.html in thecurrent directory and any subdirectory.#find / -name 'index.html' would search for any file named index.html in theroot directory and all subdirectories from root#find -name 'sshd*' would search for any file beginning with the text string “sshd”in the current directory and any subdirectory.#find -name '*' -size 500k would search for any file larger then 500k.locate is also a command that is useful for finding files on a Linux system. It uses a database whensearching for files, so it's faster than find.You can use locate like this:#locate [filename]
Files that have been created recently, however, may not be in the database. You can force an updateof the database like this:#updatedb or#locate -udu is a way of estimating disk usage. When used with no arguments, du reports the disk space forthe current directory. By default, disk space is printed in units of one kilobyte (1024 bytes). Forexample, to find out which directories are largest, use this command:#du -S sort -n (The “S” switch tells it to report the size of each directoryseparately, not including subdirectories. The pipe ( ) redirects the output of “du” to the “sort”utility. The “-n” switch sorts numerically.)dmesg is a program that helps users print out bootup messages:#dmesg lessThis command will pipe to “less”An alternative is to pipe the dmesg output to a file. Try this:#dmesg boot.messagesYou will find the boot.messages file in the present working directory. Try using cat, more, and lessto view the contents of the file.The “who” command displays currently logged on users:#who displays currently logged on users, their terminal, and their login times.#who -u adds idle time.#whoami displays the name of the user initiating the command.
Viewing the contents of a fileCommandSyntaxWhat it doescatcat [filename]“cat” is for “concatenate”, cat displays the contentsof file(s) named in the commandfilefile [filename]“file” identifies the type of file as directory, text,or binary.headhead [filename]“head” shows the top ten lines of the named file.You can change the number of lines shown byusing the -n option (where “n” is the number oflines you wish to display).tailtail [filename]“tail” shows the bottom ten lines of the named file.As with “head”, you can change the number oflines shown by using the -n option (where “n” isthe number of lines you wish to display).moremore [filename]“more” shows the contents of a file, one page at atime. You can see additional pages by pressing thespace bar or view additional lines, one at a time, bypressing the enter key.lessless [filename]“less” is similar to “more” in that it shows thecontents of a file, one page at a time, but “less”allows you to move forward and backward throughthe file using the arrow keys.wcwc [filename]When used with no options, “wc” displays thenumber of lines, words, and characters in thenamed file. Options are available which allow youto specify bytes, characters, lines, and words.Editing configuration filesIn addition to managing a Linux system by executing various commands in the CLI or using tools ingraphical interface, you will also need to frequently modify various configuration files.There are several text editors which are commonly used to edit the Linux configuration files. In thisdocument, we will be using “vim”, a programmers‟ text editor. “vim” is an enhanced version of“vi”. Most people use “vim”, but refer to it as “vi”. This exercise will help you become morecomfortable with “vi” (pronounced “VEE-eye”), a traditional text editor found on most Linux andUNIX systems. Although many people consider “vi” to be somewhat awkward, its wide availabilitymakes a fundamental understanding of its basic commands well worthwhile.
The traditional “vi” text editor has been replaced on most systems with “vim” (“vi” improved). Thecommand set is substantially the same for both “vi” and “vim”. On most systems, the “vi” commandhas been aliased to “vim”.To open a file with Vim, type the following command:#vim [filename]Operation within Vim is done with a variety of commands, some of which are listed here::set nu displays line numbers along the left margin:q! quits without saving:wq writes and quits (saves and quits)Arrow keys can be used to move the cursor or letter keys can be used:h to go leftj to go downk to go upl to go rightG goes to the end of the filenG (where “n” is a line number) goes to the specified line in the fileVim has many more commands and options available. Help is available by typing :help.Other Commonly Used Text EditorsEmacsEmacs is a class of text editors, known for their extensibility. Emacs has more than 1000 editingcommands. It also supports the use of macros to automate work by combining commands. Thename is based on Editor MACrosS.Development of emacs began in the mid-70s and continues actively as of this writing (early 2010).GeditGedit is the default text editor for the Gnome desktop environment. It supports syntax highlightingand is designed to be a very clean, easy-to-use editor. Gedit is available for both the Linux/Unix andthe Windows platforms.Notepad Notepad is a text editor for Windows. It is often used as a replacement for the built-in Notepadtext editor. It offers several advantages over Notepad including tabbed windows, line numbering,and syntax highlighting.
Student Exercise 2.3: Working with vim: Using the vimTutorial1. In Terminal, enter the following command to start a VIM tutorial: vimtutor2. Work at least through lesson four.There is a VIM cheat sheet on the following page. Feel free to copy it and tape it to the side of yourmonitor.
vim cheat sheetSome common vim commandsPress the ESC (escape) key to ensure you‟re in normal mode, then::q! quits without saving:wq saves and quits (write quit)x deletes individual charactersi inserts textdw deletes to the end of a word (d2w deletes two words, d3w deletes three words, etc.)d deletes to the end of a linedd deletes an entire line (2dd deletes two lines, 23dd deletes 23 lines, etc.)u undoes the last commandU fixes an entire line CTRL R redoes the commandp puts the last deletion after the cursorr replaces the character under the cursorcw is the “change word” command, that deletes the word (from the cursor to the right) and places you in “insert” modec is the “change line” command, that deletes the line (from the cursor to the right) and places you in “insert” mode CTRL g shows your location in a file SHIFT G moves to the end of the file, [number] SHIFT G moves to the line number specified in the command, forexample 1 SHIFT G moves to line #1./[search term] searches forward through a file for the search term. For example, “/apache” will search for thenext instance of the word “apache” in the file?[search term] searches backwards through a file for the search term. For example, “?apache” will search forthe last instance before the cursor of the word “apache” in the file:s/[old]/[new] will replace the next instance of “old” with “new”. For example, :s/blue/red will replace thenext instance of “blue” with “red”.:s/[old]/[new]/g will replace the every instance of “old” on the current line with “new”. For example, :s/blue/redwill replace the every instance of “blue” with “red”.:#,#s/[old]/[new]/g will replace every instance of “old” with “new” in the range of lines specified with the #sign.:! allows you to execute external commands:set nu turns on line numbering:nohlsearch turns off highlighting of search terms
Using grep“grep” is a filtering utility used in the „nix world to aid in searches. “grep” is one of the most usefultools in Information Systems and Technology.Some examples: #grep red blue will display lines of text from the blue file that contain the word “red” #rpm –qa grep smb will display all installed RPMs with “smb” in their nameHere is a handy way to use grep. Suppose you need to find a file (or files) containing a particulartext string. Use the grep with the –r and –H options to find all files containing that particular string(remember that everything in Linux is case sensitive). By default, grep only prints the text string. Ifyou‟re looking for files containing the text string, you must tell grep to print the filename, too. The –H command does that.In the following statement, -H prints the filename and –r searches recursively from the starting point(lists/) for the text string PHPMAILERHOST: grep -Hr PHPMAILERHOST lists/This is the output from the previous OST",'');You can include the option “n” in your search to display the line number in the file where the stringappears.
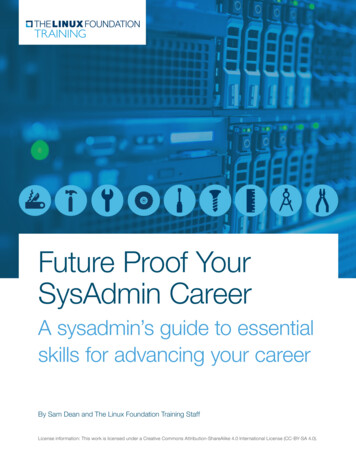
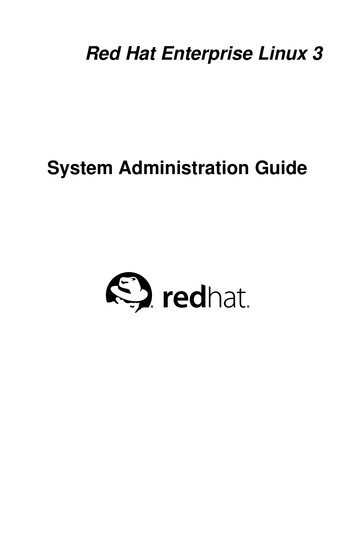
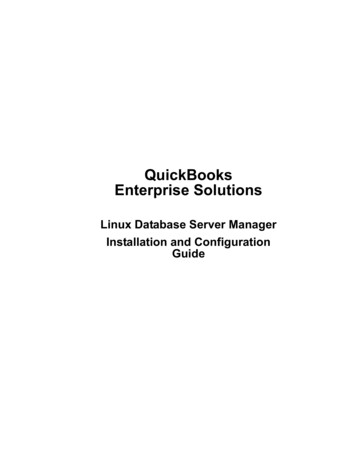
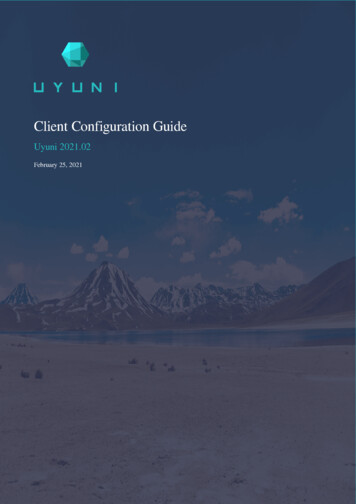
Student Exercise 2.4: Conditional SearchingIn this exercise, you will search for a unique text string within a file buried deep within adirectory tree.1. Create a deep directory tree with the following command in a terminal window:#mkdir –p /demo/demo1/demo2/demo3(The “p” switch creates parent directories when they do not already exist.)2. Using “vi”, create a file called “deepfile” in the demo4 directory:#vi /demo/demo1/demo2/demo3/deepfile3. Enter five lines of text in the file asshown in the screen capture.4. When you‟re finished, use the keycombination of ESC, then :wq to savethe file and close “vi”.5. While still in a terminal window, enter the following command to find the text string“I grok Linux”:#grep –Hr “I grok Linux” /demo6. The command should return to stout (standard output) the following response:/demo/demo1/demo2/demo3/deepfile:5:I grok Linux(In the above output, the path is displayed, followed by the line number in the filewhere the text string appears, followed by the text string.)If your results differ, check spelling, remembering that text in a Linux terminalwindow is case-sensitive.Using the alias commandThe alias command is a shell function that allows you to substitute one command for another.Aliases are also handy for assigning default arguments to commands, such as ensuring that the “-i”(interactive) option is always used with the “cp” and “mv”. The syntax for the alias command is:#alias [new command] ”[command with arguments]”#alias cps ”cp -s” would create the new alias “cps” which would always invoke the“cp” command with the symbolic link argument.You can see existing aliases by issuing the alias command with no options at a command prompt.
Aliases can be removed with the unalias command:#unalias cps will remove the “cps” alias.Making Aliases PersistentIf you simply use the alias command to create an alias, the aliases are only in effect for your currentsession. To make them persistent across logons, add them to your profile by modifying /.bashrc.In the following screen capture, you can see how three aliases were added to the file, making thempersistent across logons and system boots. Note the leading period in the filename (.bashrc) whichmakes it a hidden file in Linux.Figure 2 Creating persistent aliasesStarting ServicesAs mentioned earlier, many d
configurable in Linux and the person who built your Linux system might have chosen to place the configuration files elsewhere.) Administration Tools and Techniques Working in Terminal Most L