Transcription
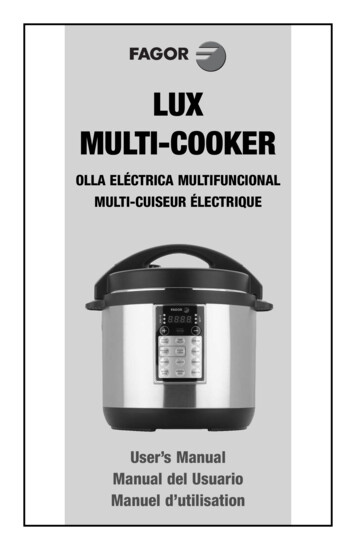
LUXMULTI-COOKEROLLA ELÉCTRICA MULTIFUNCIONALMULTI-CUISEUR ÉLECTRIQUEUser’s ManualManual del UsuarioManuel d’utilisation
Introduction . 2Important Safeguards . 3Features and Functions . 5Getting Started. 7Operating Functions . 8Pressure Cooker Program . 10Pressure Cooking Charts . 12Rice Cooking Programs. 16Slow Cooking Program. 18Yogurt Program. 19Greek Yogurt . 22Brown Function . 22Sauté Function . 23Simmer Function . 23Steam Function. 24Keep Warm Function . 24Time Delay Function . 25Cleaning and Maintenance . 26Español. 29Français . 57Limited Warranty . 841ENGLISHContents
ENGLISHIntroductionThank you for purchasing this state of the art Fagor LUX MultiCooker! The Fagor LUX can be used to steam, simmer, brown, sauté,cook white rice, brown rice, risotto, yogurt, pressure cook and slowcook foods to perfection. The user friendly electronic controls aresimple and straightforward, allowing you to set recipe times withease. Plus, the convenient TIME DELAY and KEEP WARM settingsprovide you with cooking flexibility that meets your busy schedule.This Fagor LUX Multi-Cooker user’s manual contains informationon the use and care of this product. Please read this manualcarefully before operating the Fagor LUX Multi-Cooker to ensureproper usage and maintenance of the unit. Carefully following thedirections in this manual will enable you to optimize the performanceand lifespan of the cooker.2
The product you have purchased is a state of the art appliance. It adheres toall of the latest safety and technology standards; however, as with any electricappliance, there are some potential risks. Only operate this cooker in accordancewith the instructions provided and only for its intended household use.PLEASE READ THE INSTRUCTIONS BELOW BEFORE USING THEAPPLIANCE FOR THE FIRST TIME. Read all of the instructions contained in this manual before using the appliance. This product is not intended for commercial or outdoor use; it is only forhousehold and indoor use. Do not operate the unit if the electric cord or plug is damaged. If the applianceis not working properly, has been dropped or damaged, left outdoors orsubmerged in water, discontinue use immediately and contact our customerservice department at 1-800-207-0806. The Multi-cooker has a polarized AC (Alternating Current) plug, one blade iswider than the other. It will only fit in a polarized outlet one way as a safetyfeature. Reverse the plug if the plug does not fit fully in the outlet. If it still doesnot fit in the outlet, contact a qualified electrician. Do not attempt to overridethis safety feature. Do not let the electric cord hang over the edge of the table or counter. Do not let the electric cord touch hot surfaces. If using an extension cord to connect the Multi-cooker, please note that adamaged extension cord can cause the unit to malfunction. Always checkyour extension cord for damage and be sure it is compliant with the requiredvoltage. Be sure not to place the cord where someone can trip over it. Do not place the Multi-cooker near heat-emitting devices such as heaters, gascooktops or electric burners. Do not place the cooker in a heated oven. Always use the Multi-cooker in a well-ventilated area. Using accessories or replacement parts that are not recommended or sold bythe manufacturer may cause damage to the Multi-cooker or personal injury. Children need close adult supervision at all times when they are in or aroundthe kitchen. Keep this appliance out of the reach of children. This appliance is not intended for use by persons (including children) withreduced physical, sensory or mental capabilities, or lack of experience andknowledge, unless they have been given supervision or instruction concerninguse of the appliance by a person responsible for their safety. While in operation, do not cover the appliance or position it near flammablematerials including curtains, draperies, walls, and fabric upholstered furniture.3ENGLISHIMPORTANT SAFEGUARDS
ENGLISH Do not open the pressure cooker until the unit has cooled and all internalpressure has been released. If the handles are difficult to push apart, thisindicates that the cooker is still pressurized – do not force it open. Any pressurein the cooker can be hazardous. Always cook in the removable cooking pot of the Multi-cooker. Cooking withoutthe removable cooking pot may cause an electric shock or damage to the unit. Never deep fry or pressure fry in the cooker. It is dangerous and may cause afire and serious damage. Never cover or block the pressure valve with anything. This may cause overpressurizing and lead to serious accidents. While you’re cooking, the lid and the outer stainless steel surface of the cookermight get hot. Handle with care and carry or move the cooker using only theside handles. Be very cautious when moving any appliance containing hot foodor liquids. Keep hands and face away from pressure regulator knob when releasingpressure from the cooker to avoid being scalded by hot steam. After cooking, use extreme caution when removing the lid. Serious burns canresult from residual steam escaping from inside the unit. Lift the lid facingaway from you and allow the drops of water to trickle back from the lid into thecooker. Always unplug and let cool before cleaning and removing parts. Never attemptto unplug the unit by pulling on the power cable. Keep unplugged when not inuse. To reduce the risk of an electric shock, never immerse the plug, power cableor housing in water or any other liquid. Only the removable cooking pot can beplaced in the dishwasher. Only qualified experts may repair and perform maintenance work on the electricMulti-cooker using authentic FAGOR replacement and accessory parts. Neverattempt to dissemble and repair the Multi-cooker yourself. This appliance cooks under pressure. Improper use may result in scaldinginjury. Make certain unit is properly closed before operating. See “PressureCooker Program”. Do not fill the unit over 2/3 full. When cooking with foods that expand such asrice or dried vegetables, do not fill the removable cooking pot more than 1/2full. Over filling may cause a risk of clogging the vent pipe and you will not haveenough room for proper building of pressure. See “Operating Functions”. The following foods tend to foam, froth and/or sputter: applesauce, cranberries,pearl barley, oatmeal, split peas, noodles/pasta or rhubarb. These items mayblock the pressure valve if filled too high in the removable cooking pot. Pleasebe sure when pressure cooking these items to not fill the removable cookingpot more than half way. Always check the pressure release devices for clogging before use.SAVE THESE INSTRUCTIONS4
Features and FunctionsENGLISHTop of the lidPressure regulating knob (1)(2) Self- Locking pinCool-touch handle (3)Bottom of the lid(13) Inner Cover(4) Floating valve(5) Silicone gasketBody of Multi-cooker(14) Inner Cover Holder(7) Anti-blocking case(pull up to remove)(6) Safety Pressure ValveCondensation reservoir (8)(can be removed)Stationary pot (11)(cannot be removed)(3) Cool-touch handleControl panel (12)(9) Temperature sensor(9) Heating element(10) Removable cooking pot5
ENGLISH1. Pressure Regulating Knob: Turn the regulating knob to the “Pressure”position when cooking under pressure or when using any of the rice cookingfunctions. Turn the knob to the “Steam” position to release the pressure afterpressure cooking or rice cooking and when using the STEAM function. Whenusing the SLOW COOKER or KEEP WARM functions, be sure to turn thepressure regulating knob to the “Steam” position and not to the “Pressure”position.2. Self-Locking Pin: The lid will lock automatically when the lid is properlyaligned and closed. While cooking under pressure you will not be able to openthe lid until all of the pressure is released.3. Cool-Touch Handles: The cool to the touch handles of the Multi-cookerallows for easy handling and opening of the lid.4. Floating Valve: The safety-floating valve controls the amount of pressureinside the cooker by allowing excess pressure to be released.5. Silicone Gasket: Creates an airtight seal needed for the cooker to build uppressure. Check the silicone gasket for any tears or cracks before using thepressure cooking, slow cooking, or any of the rice cooking functions. To ordera new gasket, please contact a Fagor Representative at 1-800-207-0806 orpurchase it directly on the Fagor website at www.fagoramerica.com.6. Safety Pressure Valve: The safety pressure valve allows excess pressure toescape from the cooker when it is being used for pressure cooking. It worksindependently of the floating valve.7. Anti-Blocking Case: Pull it towards yourself to release the pressure regulatorknob for cleaning.8. Condensation Reservoir: Collects excess condensation during cooking. Ifthere is some liquid in the reservoir after cooking, simply empty it.9. Heating Element and Temperature Sensor: Both elements regulate thecooking temperature inside the pot.10. Removable Cooking Pot: Ceramic pot with non-stick coating; dishwashersafe pot, but hand washing is always recommended.11. Stationary Pot: This pot cannot be removed from the electric multi-cookerand should NEVER be used for cooking. Before cooking, make sure to placethe removable cooking pot into the stationary pot first. All ingredients shouldbe placed into the removable cooking pot ONLY.12. Control Panel: The easy to use controls allow you to select the differentprograms available with a touch of a finger. Available for selection are: twopressure cooking settings, two slow cooking settings, white rice, brown rice,risotto, brown, sauté, simmer, steam, yogurt, keep warm, time delay, start/stop and a plus and minus button to adjust cooking time and time delay. Also,on the control panel you will find the HIGH and LOW indicator lights which willblink while pressure or temperature is building. These three lights will go solidonce the unit has reached proper pressure or temperature.13. Inner Cover: Remove the inner cover by lifting it upward until it releases fromthe lid.14. Inner Cover Holder: Keeps the inner cover in place once the inner cover isreattached.6
Getting Started: Before First Use1. Remove all packing materials and literature from within the Fagor LUX MultiCooker. Lift out the removable cooking pot and remove any pieces of paperfrom under it. Remove the plastic protection from the control panel and anystickers from the lid or stainless steel housing.2. Wash all removable parts in warm soapy water. Rinse and dry all partsthoroughly. Wipe the stainless steel outer housing with a clean damp cloth.NEVER submerge the stainless steel outer housing in water or any otherliquid. Only the removable cooking pot is dishwasher safe.3. To clean the pressure regulator knob, gently push the pressure regulator knobdown and at the same time turn the pressure regulator knob counterclockwisepast STEAM to CLEAN setting. Once the white dot on CLEAN is aligned withthe white dot on the base of the pressure regulator, you can lift the pressureregulator up and off the lid. Look through the holes of the pressure regulator tomake sure there is nothing obstructing, and then clean the pressure regulatorknob with warm soapy water, allowing the water to run through the pressureregulator to remove all particles.4. To put the pressure regulator back onto the lid, simply align the CLEAN settingwith the white dot on the base, gently push down on the pressure regulatorand turn the knob clockwise until it slides back into place.5. Make sure the silicone gasket is seated properly inside the lid or else thecooker will not function properly.6. After thorough drying, place the removable cooking pot back into the Multicooker before cooking.7ENGLISHRead the safety instructions found in this manual before plugging in and operatingthe unit. Before using the Multi-cooker for the first time, follow these steps:
ENGLISHOperating Functions:Panel Programs and FunctionsTemperature/Timer ChartCooking Function:Temperature:Preset Time:Timer:Keep Warm165 F30 minutesSteam212 F5 minutesBrown356 F30 minutesSauté284 F30 minutesSimmer200 F30 minutesHigh Pressure240 F-248 F1 minuteLow Pressure226 F-230 F1 minuteHigh Slow Cooker212 F2 hoursLow Slow Cooker190 F2 hoursYogurt104 F-109 F8 hoursWhite Rice226 F-230 F10 minutesBrown Rice240 F-248 F20 minutesRisotto240 F-248 F6 minutesUp to 12 hours,30 minute increments1-99 minutes,1 minute increments1-30 minutes,1 minute increments1-30 minutes,1 minute increments1-120 minutes,1 minute increments1-99 minutes,1 minute increments1-99 minutes,1 minute increments30 minutes - 10 hours,30 minute increments30 minutes - 10 hours,30 minute incrementsUp to 24 hours,30 minute increments1-99 minutes,1 minute increments1-99 minutes,1 minute increments1-99 minutes,1 minute increments8
9ENGLISH1. Keep Warm: Used to reheat or keep cooked food warm until ready to serve.2. Steam: This function is used to steam meals such as vegetables and fish.Simply add at least a half a cup of water into the bottom of your removablecooking pot and insert the Fagor Stainless Steel Steamer Basket and Trivet.Make sure that the steamer basket is positioned above the water. The FagorStainless Steel Steamer Basket and Trivet can be purchased separately onthe Fagor website at www.fagoramerica.com.3. Brown: This function is used to seal in flavor and juice by giving the food agolden brown exterior.4. Sauté: This function is used when cooking small pieces of food by preparingthem with very little oil at a high heat before using the pressure cooking orslow cooking function.5. Simmer: This function is used to make soup, stew, sauce or other entreesthat need to be cooked at a lower heat setting. This function is much gentlerthan the boiling point of water and will make meat and vegetables very tender.6. Pressure Cooking: HIGH-Use this function to cook at high pressure, 9 psi(pounds per square inch). This pressure setting is more suitable to cooktougher meats and vegetables or other foods that are not so delicate. LOWUse this function to cook at a low pressure, 5 psi. This pressure setting ismore suitable to cook delicate foods such as tender vegetables and certaintypes of fish.7. Slow Cooking: This program cooks food slowly for up to 10 hours attemperatures of 190 F (LOW) or 212 F (HIGH). Slow cooking helps food retainmaximum flavor and tenderness.8. Yogurt: This function is perfect for making traditional homemade yogurt andGreek yogurt.9. White Rice: This function uses low pressure and gives you a preset time of 10minutes to cook different types of white rice.10. Brown Rice: This function uses high pressure and gives you a preset time of20 minutes to cook a variety of different rices.11. Risotto: This function uses high pressure and gives you a preset time of 6minutes to create a gourmet risotto dish.12. Start/Stop: To be used after a cooking selection has been made to begin thecooking process or if you would like to cancel the cooking function.13. Time Delay: Allows you to delay cooking time up to 6 hours. Simply push thetime delay button, which will increase by 30 minute increments until you reachthe 6 hour maximum time.
ENGLISHPressure Cooking ProgramThis program will allow food to cook faster under pressure by reducing cookingtime up to 70% compared to traditional cooking methods. Pressure cooking isfast, easy, safe and healthy!1. Before every use, make sure the silicone gasket and the pressure regulatingvalves are clean and are properly placed within the cooker.2. Plug the cord into a wall outlet.3. Place the removable cooking pot into the cooker, and add the ingredientsfollowing the recipe. When cooking foods under pressure, a minimum of 1 cup(8 oz.) of liquid is required.NOTE: Do not fill the pot more than 2/3 full with food and liquid. Do not fill theunit more than ½ full when cooking foods that expand during cooking.NOTE: The following foods tend to foam, froth and/or sputter: applesauce,cranberries, pearl barley, oatmeal, split peas, noodles/pasta or rhubarb.These items may block the pressure valve if filled too high in the removablecooking pot. Please be sure when pressure cooking these items to not fill theremovable cooking pot more than half way.4. Place the lid on the cooker; aligning the protruding pin on the handle withthe condensation cup that shows the unlocked symbol, and turn your lidcounterclockwise until it locks into place. You will know when this unit hasbeen locked once you hear the pin click into place.5. Turn the pressure regulator knob to PRESSURE.6. Choose the desired cooking mode by pressing the PRESSURE COOK buttononce for HIGH pressure and twice for LOW pressure.7. Set the desired cooking time by pressing the or - buttons once for eachadditional minute or to fast advance, hold the button down until you reach thedesired time. The maximum pressure cooking time is 99 minutes.8. To set the delay timer, select the TIME DELAY button and use the or –buttons to adjust when cooking should begin. The delay time goes up in 1/2hour increments.9. Press the START/STOP button to begin cooking. The indicator light on thePRESSURE COOK button will flash when the unit has begun to build pressure.If you forget to select a desired cooking time or forget to press the START/STOP button, the unit will beep twice and the digital display will read --:-after 30 seconds.10. As the pressure is building, the three circles next to the chosen pressuresetting will light up one at a time. The PRESSURE COOK button will also flashuntil it has reached full pressure. Once pressure has been reached, all threecircles will turn solid red, the pressure cooker button indicator light will alsoturn solid red and then the unit will beep. This is when your cook time begins.11. The unit will then begin to count down in minutes once the appropriatepressure has been reached. The floating valve which is located in the lid willalso rise when pressure has been reached.10
WARNING: NEVER DEEP FRY OR PRESSURE FRY IN THE MULTI-COOKER.IT IS DANGEROUS AND MAY CAUSE A FIRE AND SERIOUS DAMAGE.12. The cooker will beep once the cooking time ends. It will turn the automaticKEEP WARM function on and this function will blink until you press the START/STOP button to cancel the program. After pressing the START/STOP button,release the pressure. You have two options for releasing the pressure:a. Quick Release Method: Release the pressure immediately by turning thepressure regulator knob to STEAM.CAUTION: THE STEAM COMING OUT OF THE COOKER WILL BE HOT,AND MIGHT CONTAIN DROPLETS OF HOT LIQUID. ALWAYS TURN THEJET OF STEAM AWAY FROM YOUR FACE AND HANDS. BE SURE TO USEPOTHOLDERS WHEN RELEASING PRESSURE.b. Natural Release Method: Allows the pressure to drop naturally withoutturning the pressure regulator knob to STEAM. This will take severalminutes, during which the food inside will continue cooking. Some recipes(such as risotto) benefit from this extra cooking time. You will know whenthe pressure has been released because the floating valve will drop and youwill be able to open the lid.NOTE: If you do not press the START/STOP button at the end of the cookingtime, the Multi-cooker will switch to KEEP WARM and will beep periodically toremind you that cooking has ended.13. Once all the pressure is released, remove the lid by turning it clockwise,lifting it up and tilting the lid away from you to avoid being scalded by someremaining steam or hot water condensation dripping from the inner portion ofthe lid.WARNING: AFTER COOKING, THE REMOVABLE COOKING POT WILL BEHOT. USE POTHOLDERS TO HANDLE IT OR LET IT COOL DOWN BEFOREREMOVING.11ENGLISHWARNING: NEVER TRY TO FORCE THE LID OPEN WHILE YOU ARECOOKING UNDER PRESSURE. THIS CAN RESULT IN A SERIOUS ACCIDENT.
ENGLISHPressure Cooking ChartsPressure cooking times are approximate times. Use these cooking times as ageneral guideline. Size and variety will alter cooking times.Pressure Cooking Vegetables (Fresh & Frozen): To achieve best results whenpressure cooking fresh or frozen vegetables, please refer to the below tips andhints:1. Use the STEAM function when making steamed vegetable dishes.2. Use the quick release method when pressure cooking vegetables so they donot overcook.3. Use a minimum of 1 cup of liquid when cooking vegetables.4. When steaming vegetables, use the Fagor Stainless Steel Steamer Basket andTrivet, which can be purchased at the Fagor website at www.fagoramerica.com or by calling a Fagor Representative at 1-800-207-0806.Vegetable Pressure Cooking Chart:VegetableFresh(Cooking Time)Frozen(Cooking Time)Acorn Squash, chunks6-7 minutes8-9 minutesArtichoke, 4 medium – large8-10 minutes10-12 minutesAsparagus1-2 minutes2-3 minutes20-25 minutes25-30 minutesBroccoli, Florets2-3 minutes3-4 minutesBrussel Sprouts3-4 minutes4-5 minutesButternut Squash, chunks8-10 minutes10-13 minutesWhole Beets, medium – largeCabbage, Quartered3-4 minutes4-5 minutesCarrots, whole or chunk2-3 minutes3-4 minutesCauliflower, florets2-4 minutes3-5 minutesCelery, chunks2 minutes3 minutesCollard Greens4-5 minutes5-6 minutesCorn on the Cob3-5 minutes4-6 minutesEdamame, in pod4-5 minutes5-6 minutesEggplant2 minutes3 minutesEndive1-2 minutes2-3 minutesKale, coarsely chopped1-2 minutes2-3 minutesLeeks2-4 minutes3-5 minutesOnions, sliced2 minutes3 minutesPotatoes, whole, small5-8 minutes6-9 minutesPotatoes, whole, large10-12 minutes11-13 minutesPotatoes, sliced or cubed5-8 minutes6-9 minutesPumpkin, chunks4-8 minutes6-12 minutesSpinach1-2 minutes3-5 minutes12
7-9 minutes9-11 minutesSweet Potatoes, whole10-15 minutes12-19 minutesTomatoes, quartered2 minutes4 minutesZucchini2 minutes3 minutesPressure Cooking Fresh or Dried Fruits: To achieve best results when pressurecooking dried or fresh fruit, please refer to the below tips and hints:1. Quick release method is recommended when pressure cooking fruit to preventfrom overcooking.2. One half cup of water is sufficient for cooking any quantity of fruit because thecooking time is very short.3. Add sugar to fruit only after it is cooked, not before.Fruit Pressure Cooking Chart:Fresh(Cooking Time)Dried(Cooking Time)Apples (Slices or Chunks)2 minutes3 minutesApples (Whole)3 minutes4 minutesApricots, whole or halved2-3 minutes3-4 minutesPeaches2-3 minutes4-5 minutesPears2-4 minutes3-5 minutesPlums/Prunes2-4 minutes3-5 minutesGrapes/Raisins1-2 minutes4-5 minutesFruitPressure Cooking Beans/Legumes (Dry & Soaked): To achieve best resultswhen cooking with dried or soaked beans/legumes, please refer to the below tipsand hints:1. Rinse dried beans/legumes under cold water and drain; discard any pebblesor other debris in batch.2. Do not fill cooker more than half full to allow for beans/legumes to expand insize.3. Use enough liquid to cover the beans/legumes4. Do not salt beans/legumes. Using salt while cooking the beans/legumes willprevent them from cooking properly.5. Add 1-2 tablespoons of oil to beans/legumes to minimize frothing.6. Release pressure when cooking dried beans/legumes by using the naturalrelease method for best results.13ENGLISHSweet Potatoes, cubed
ENGLISHBeans/Legumes Pressure Cooking Chart:Beans/LegumesCooking Time(Dried 180ml Cups)Cooking Time(Soaked Overnight)Adzuki Beans20-25 minutes10-15 minutesBlack Beans20-25 minutes10-15 minutesBlack-Eyed Peas20-25 minutes10-15 minutesCannellini Beans35-40 minutes20-25 minutesChestnuts, pierced7-10 minutes5-7 minutesChickpeas (Garbanzo Beans)34-40 minutes20-25 minutesGreat Northern Beans28-30 minutes23-25 minutesKidney Beans25-30 minutes20-25 minutesLentils (Brown)15-20 minutesN/ALentils (Green)15-20 minutesN/ALentils (Red)15-17 minutesN/ALima Beans20-24 minutes10-15 minutesNavy Beans25-30 minutes20-25 minutesPinto Beans25-30 minutes20-25 minutesRed Beans25-30 minutes20-25 minutesSoybeans25-30 minutes20-25 minutesSplit Peas (Green)15-20 minutes10-15 minutesSplit Peas (Yellow)15-20 minutes10-15 minutesPressure Cooking Rice/Grains: To achieve best results when pressure cookingrice/grains, please refer to the below tips and hints:1. Add 1-2 tablespoons of oil to the dried grains to minimize frothing.2. Do not fill removable cooking pot more than half way to allow rice/grain toexpand in size.3. Do not use the quick release method to release pressure; Use the naturalrelease method instead to release pressure from the cooker.4. Pearl Barley tends to froth, foam and sputter which may block the pressurevalve if filled too high in the removable cooking pot. Please be sure to not fillthe removable cooking pot more than half way.Rice/Grain Pressure Cooking Chart:Rice/GrainGrain : Water Ratio(180ml Cups)Cooking Function & Cooking TimesArborio1:3Risotto, 6 minutesBarley1:3 – 1:4Brown, 25-30 minutesBasmati1:1½White, 6-9 minutesBrown1:1¼Brown, 25-30 minutesCouscous1:2Brown, 5-8 minutesJasmine1:1White, 8-9 minutes14
Long GrainPearl BarleyQuick Cooking OatsQuinoa1:1½White, 10 minutes2:3Brown, 10-12 minutes1:4Risotto, 25-30 minutes1:1 2 3Risotto, 5-6 minutes1:2Brown, 8-10 minutesShort Grain Rice1:1½White, 8-9 minutesSteel Cut Oats1:1 2 3Risotto, 10 minutesSushi Rice1:1½White, 9 minutesWheat Berries1:3Brown, 25-30 minutesWild Rice1:3Brown, 25-30 minutesPressure Cooking Meat/Poultry: To achieve best results when cooking meat/poultry, please refer to the below tips and hints:1. Cut meat/poultry into pieces of uniform size for even cooking.2. When mixing meats, cut those that cook more quickly into larger pieces andthose that cook more slowly into smaller pieces.3. Brown meat in small batches – overcrowding the cooker can result in themeat becoming tough and flavorless.Meat/Poultry Pressure Cooking Chart:Meat/PoultryBeef Brisket, wholePressure SettingCooking TimeHigh40-50 minutesOxtailHigh40-50 minutesBeef Short RibsHigh35-40 minutesBoneless Chicken StripsHigh10-12 minutesChicken BreastHigh8-10 minutesChicken LegsHigh10-12 minutesChicken WingsHigh10-12 minutesChicken (Whole)High20-25 minutesCornish HenHigh10-15 minutesDuck (Whole)High25-30 minutesHam (Uncooked)High26-30 minutesLamb, CubesHigh10-13 minutesPork SpareribsHigh20-25 minutesPork ChopsHigh8-10 minuetsPork (Baby Back Ribs)High19-24 minutesPork LoinHigh45-50 minutesPork ShoulderHigh45-50 minutesTurkey (Drumsticks)High15-20 minutesVeal ChopsHigh5-8 minutesBeef CubesHigh18-23 minutesChicken CubesHigh10-12 minutes15ENGLISHMillet
ENGLISHPressure Cooking Seafood: To achieve best results when cooking seafood,please refer to the below tips and hints:1. Always leave at least 2 inches from the top rim to prevent overflowing.2. Smaller types of seafood, such as clams and shrimp, do not take long tocook, therefore, it’s best to add these types of seafood to a dish during thelast few minutes of cooking.Seafood Pressure Cooking Chart:Pressure SettingCooking Time(Fresh)Cooking Time(Frozen)Fish, wholeLow5-6 minutes7-10 minutesFish FiletLow2-3 minutes3-4 minutesFish SteakLow3-4 minutes4-6 minutesCrab LegsLow3-4 minutes5-6 minutesLobster TailLow2-3 minutes3-4 minutesLobster (Whole)Low3-4 minutes4-6 minutesMusselsLow2-3 minutes4-5 minutesScallops (Small)Low1 minute2 minutesScallops (Large)Low2 minutes3 minutesShrimp, shellLow2-3 minutes3-4 minutesShrimp (Med/Large)Low1-2 minutes2-3 minutesShrimp (Jumbo)Low2-3 minutes3-4 minutesFish/ShellFishRice Cooking ProgramsWhite Rice: Cook rice to perfection every time with the WHITE RICE function.This function is programmable to ensure rice is soft and composed of just theright cooking temperatures. Rice will be fluffy and delicious while eliminating anycooking hassle.1. Place the removable cooking pot into the Multi-cooker.2. Place about 1-2 tablespoons of oil into the removable cooking pot.3. Add the water and rice ratios needed and any other desired ingredients intothe removable cooking pot.4. Close and lock the lid of the Multi-cooker by properly aligning the handles andturning the lid counterclockwise. Set pressure regulator
pressure cooking, slow cooking, or any of the rice cooking functions. To order a new gasket, please contact a Fagor Representative at 1-800-207-0806 or purchase it directly on the Fagor website at www.fagoramerica.com. 6. Safety Pressure V
