Transcription
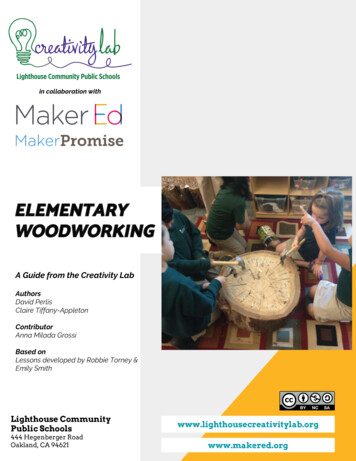
in collaboration withELEMENTARYWOODWORKINGA Guide from the Creativity LabAuthorsDavid PerlisClaire Tiffany-AppletonContributorAnna Milada GrossiBased onLessons developed by Robbie Torney &Emily SmithLighthouse CommunityPublic Schools444 Hegenberger RoadOakland, CA rg1
About This ProjectKindergarten woodworking is a series of basiccarpentry exercises designed to give youngstudents the know-how to safely use sandpaper,files, hammers, screwdrivers, hot glue guns, drills,clamps, and saws. After an introduction to eachtool, students will have the year to practice theircrafts, and bring their imaginations to life. Theseexercises encourage creative and critical thinking,and facilitate agency at a young age.This project is structured such that teachersprovide minimal instruction, and students learnthrough the process of design, test, and redesign.We encourage you to customize this project tothe needs of your class, but maintain the ideal ofstudents learning through exploring.The lessons were developed by Emily Smith andRobbie Torney at Lighthouse Community CharterSchool. This guide begins with an overview ofkinder making at Lighthouse, then goes into depthfor specific tools and activities.Our StoryAt Lighthouse, kinder making happens year-roundwithin the classrooms themselves. Makinghappens once a week for roughly an hour, andstudents have the option of further making everyafternoon during their free-choice time.New tools are introduced during the first twoquarters. Students have the opportunity tocontinue exploring these tools throughout the restof the year.Quarter 1 (8 Weeks)Quarter 2 (10 Weeks) Wood Foam Files Screwdrivers Sandpaper Drills Hammers Hot glue SawsAt Lodestar, all elementary students participate ina quarter of woodworking in their Making, Art, &Design classes. They begin learning about thetools and techniques; the culminating project forthe past year was a “speedform”, where studentsbrainstormed and designed a figure that was“speedy” to them.Materials & ToolsMATERIALS TOOLS Learning Targets I can look closely.I can explore complexity.I can use tools safely and correctlyI can be strategic in my project planning.I can produce prototypes of potentialdesign solutions.TIME: semester-long overviewMiter BoxHandsawGlassesClampGloves2
Context: Before we make The following ideas have been helpful for facilitating elementary making at Lighthouse, though you shouldnot feel limited or confined by them. The key to a successful makerspace is the continuous process ofcustomizing and refining it to your own needs: Let students participate in organizing and developing their space. Do making within the classroom itself. Have as many tools and materials as possible available for students. Give students plenty of work space. At Lighthouse, students work at their normal tables. Pegboards are good for storing tools while also keeping them visible. Extra storage/display space allows students to work on the same project over an extended period,rather than start a new project every class.Material Management Contact a local lumberyard for scrap wood. Document your students’ making to share with them as athank you.Students will naturally develop making projects on their own. Storage space for completed andin-progress projects is important.How to Introduce New Tools & Tech SAFELYSit your students in a circle and let them pass the day’s new tools around. As they pass the tools, offer themexploration questions for considering how to safely and correctly use each tool. Possible explorationquestions are provided in subsequent sections. Model how to use the new tools, then give students their owntools and wood to work with at their individual tables. At the end of the work period, come back together andrevisit the exploration questions. What new ideas do students have?Students should always wear safety goggles. When using saws, they should wear gloves. Make this aclassroom norm.For specific tools and materials, follow these guides: Demonstrate how to start a nail with light taps while holding it, thenremove your hand to hammer with force. Use an exaggerated gesturewhen removing your hand, even putting it behind your back. Don’t pass the saws around. Instead, walk the circle with a saw, andhave students make Observations. Students should always wear eyeprotection and gloves when sawing. Show students how to use clamps, then let them do it for themselves.Check their work, but offer minimal instruction. Let students plug their own hot glue guns into the outlets, but remindthem of the dangers involved—never stick anything but a plug into anoutlet.3
Looking CloselyClass FacilitationWhen students are working at their own tables, avoid over-instructing. This is the time for them to exploreand discover on their own. Some additional facilitation tips include: After introducing students to new tools, give them the chance to go back and further explore priortools. Encourage students to try all tools, but give them the ultimate say in what they do or do not use. Once students have practiced with new tools, come back together to revisit exploration questions. If possible, store tools & materials in such a way that students can access them freely. Let students’discoveries lead to natural discussions.Hot Glue GunsExploration Questions What techniques allow me to glue without burning myself? When will things stick? When won’t they?Project Idea Have students design and build toys for each other. This project shouldspan several weeks, and include students interviewing each other tolearn one another’s likes and dislikes. Make sure students are designingtheir toys based on their friend’s likes, and not their own. This is a designthinking exercise, as it considers the needs and wants of “users.”Files & SandpaperExploration Questions How do files & sandpaper change wood? How do they make wood smooth or rough? How does one sandpaper differ from another? What’s the best way to hold & use these tools? How do we take care of our tools & each other? Have students color their wood with crayon, then sand the wood. Howdoes sandpaper affect the crayon?Hammers & NailsExploration Questions How do hammers work? How can you hold a hammer & nail at the sametime? What are ways I could hurt myself with these tools?Facilitation Tips Have a couple of stumps available in the classroom for students topractice hammering in nails.4
Looking CloselySaws & ClampsExploration Questions How do saws work? How can we be safe with a saw? What is the mosteffective way to use a saw? How do saws and scissors differ?Sawing Stations All sawing happens at the sawing station, and with adult supervision. Oneadult can supervise roughly four students at once. Rotate who works atthe station every class. Clamp miter boxes to the edges of a table such that the clamps don’tinterfere with the movement of the saw. Ensure that each miter box is far enough from the others such that thestudents have plenty of room to safely work. Use a clamp (or cam pins) to secure a piece of wood in the miter box.Have students check to make sure their wood is held firmly in place, andthat their fingers are clear of the saw.Screws, Screwdrivers, & DrillsExploration Questions How do screws work? How are screws different from nails? How can we use the screwdriver with the screws?Facilitation Tips Screws and nails are similar but have key differences. Show studentshow you can push a screw through a piece of foam—like you would anail—then pull the screw out. Unlike with a nail, the screw will chew thefoam up. Why do students think this is? What is the proper way to use ascrew? Secure some corks in vises, and have students practice marking thecenter of the cork and drilling through that markAs Making Continues.Integrate planning into students’ making. Have students plan their projects by drawing/describing how they will use their tools andmaterials. Facilitate student independence by ensuring that the materials they need are accessible withoutyour assistance. The goal is to develop student empowerment, or “agency”—recognition that the world isdesigned, as well as the inclination and ability to further design it.5
Woodworking with Older StudentsAlthough this guide focuses on introducing younger (kindergarten) students to woodworking tools andmaterials, there are numerous ways to add complexity for middle and high school students.Classes can choose to focus on the design process with students, where students learn about basicwoodworking tools and techniques, then transition to a culminating project with prototypes and iterations.Design ProcessBrainstormWith your project in mind, have students create an inspiration board. This can be words, drawings, magazinecutouts, textiles, or anything they feel inspired by!Project PlanOnce students know the scope of their project and what they will create, have them create a project planwith step by step instructions. For younger students this can be basic pictures with the words “cut” or “glue”,and for older students this can include detailed instructions and diagrams.PrototypeNext, the students create prototypes out of cardboard, scrap wood, or anything that’s available, refining theirproject plan as they pass through iterations.Final DesignFinally, students use their revised project plan to create their final project. Consider showcasing their workwith all documents and prototypes.With this design process and project, classes could create industry connections - visiting local woodworkingstudios, create a product to sell, or work for a client to address a need and see the end to end process.Reflection & Community ConnectionWoodworking is a great unit to solidify concepts of thedesign process described above. It is also a method tocreate projects that contribute to your community.Consider evaluating a need for your school or communitysite as a class, and design projects around that. Here atLighthouse, one of the starter projects in the High SchoolMaking class was to create and decorate basic chairs. Alongwith reinforcing woodworking skills, these chairs are nowdispersed throughout the school. A group of them is outsideof the middle school Making class as “Peace Chairs”, wherestudents can sit if they need to take a break from class. Itserves as a step before admin intervention.6
Classes can choose to focus on the design process with students, where students learn about basic woodworking tools and techniques, then transition to a culminating project with prototypes and iterations. Design Process Brainstorm With your project in mind, have students create an
