Transcription
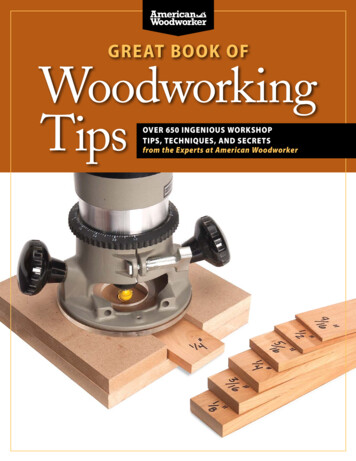
great Book ofWoodworkingTipsOver 650 Ingenious WorkshopTips, Techniques, and Secretsfrom the Experts at American Woodworker
GREAT BOOK OFWoodworkingTips
GREAT BOOK OFWoodworkingTipsOver 650 Ingenious Workshop Tips,Techniques, and Secretsfrom the Experts at American WoodworkerIntroduction by Randy JohnsonEditor, American Woodworker Magazine
Published by Fox Chapel Publishing Company, Inc., 1970 Broad St., East Petersburg, PA 17520,717-560-4703, www.FoxChapelPublishing.com 2012 American Woodworker. All rights reserved. No part of this publication may be reproducedin any form without written permission. Readers may create any project for personal use orsale, and may copy patterns to assist them in making projects, but may not hire others to massproduce a project without written permission from American Woodworker. The information inthis book is presented in good faith; however, no warranty is given nor are results guaranteed.American Woodworker Magazine, Fox Chapel Publishing and Woodworking Media, LLC disclaimany and all liability for untoward results.American Woodworker, ISSN 1074-9152, USPS 738-710, is published bimonthly by WoodworkingMedia, LLC, 90 Sherman St., Cambridge, MA 02140, www.AmericanWoodworker.com.ISBN-13: 978-1-56523-596-0ISBN-10: 1-56523-596-7Publisher’s Cataloging-in-Publication DataGreat book of woodworking tips : over 650 ingenious workshop tips,techniques, and secrets from the experts at American Woodworker /introductions by Randy Johnson, editor, American Woodworker. -East Petersburg, PA : Fox Chapel Publishing, c2012.p. ; cm.ISBN: 978-1-56523-596-0 ; 1-53523-596-71. Woodwork--Handbooks, manuals, etc. 2. Woodwork-Amateurs’ manuals. 3.Woodwork--Technique. 4. Woodwork-Equipment and supplies. I. Johnson, Randy. II. Americanwoodworker.TT185 .G74 2012684/.08--dc23 1204To learn more about the other great books from Fox Chapel Publishing, or to find a retailer nearyou, call toll-free 800-457-9112 or visit us at www.FoxChapelPublishing.com.Printed in ChinaFirst printingBecause working with wood and other materials inherently includes the risk of injury and damage, this book cannot guaranteethat creating the projects in this book is safe for everyone. For this reason, this book is sold without warranties or guaranteesof any kind, expressed or implied, and the publisher and the author disclaim any liability for any injuries, losses, or damagescaused in any way by the content of this book or the reader’s use of the tools needed to complete the projects presentedhere. The publisher and the author urge all readers to thoroughly review each project and to understand the use of all toolsbefore beginning any project.
ContentsIntroduction . . . . . . . . . . . . . . . . . . . . . . . 7Bandsaw . . . . . . . . . . . . . . . . . . . . . . . . . 8Cabinet Making . . . . . . . . . . . . . . . . . . . . 18Chop Saw . . . . . . . . . . . . . . . . . . . . . . . 24Clamps & Clamping . . . . . . . . . . . . . . . . . . 30Drill Press . . . . . . . . . . . . . . . . . . . . . . . 54Electricity & Batteries . . . . . . . . . . . . . . . . . 64Finishing . . . . . . . . . . . . . . . . . . . . . . . . 70Glue & Gluing . . . . . . . . . . . . . . . . . . . . . 92Hardware . . . . . . . . . . . . . . . . . . . . . . . 104Joinery Tricks . . . . . . . . . . . . . . . . . . . . . 112Jointer-Planer . . . . . . . . . . . . . . . . . . . . . 124Turning . . . . . . . . . . . . . . . . . . . . . . . . 132Measuring & Marking . . . . . . . . . . . . . . . . 138Plate-Joiner . . . . . . . . . . . . . . . . . . . . . . 154Router . . . . . . . . . . . . . . . . . . . . . . . . . 168Sanding . . . . . . . . . . . . . . . . . . . . . . . . 188Sharpening . . . . . . . . . . . . . . . . . . . . . . 202Storing Tools & Supplies . . . . . . . . . . . . . . . 226Storing Wood . . . . . . . . . . . . . . . . . . . . . 240Tablesaw . . . . . . . . . . . . . . . . . . . . . . . . 248Tool Smarts . . . . . . . . . . . . . . . . . . . . . . 283Vise . . . . . . . . . . . . . . . . . . . . . . . . . . 302Wood . . . . . . . . . . . . . . . . . . . . . . . . . 310Workbench . . . . . . . . . . . . . . . . . . . . . . 316
It’s about the aha!Everyone loves a clever workshop tip. An ingenious solution to a vexingproblem brings an aha! to the lips, and with it the resolve to try the trick foroneself, or perhaps to go one better by creating an improvement. Or, if the shoptip is obvious, we salute with a slap to the forehead, wondering why we couldn’thave thought of that for ourselves. But we didn’t, and that’s one reason whywoodworkers treasure collections such as this book.The other reason, of course, is wrapped up in today’s workshop reality. It’s notlike it was in Grandpa’s day, when skills and workshop practices were passed frommaster to apprentice and father to son. This is the era of the amateur craftsman,mostly self-taught, working alone in his or her home workshop, and most likelywithout much contact with other woodworkers. In lieu of Grandpa, we rely onwoodworking magazines to provide this all-important sharing of information andshine a light on the conundrums that dog the path to prowess. Every magazineand journal in the field boasts a tips column, largely driven by the readersthemselves and their urge to share hard-earned knowledge. Along with shop tips,readers frequently ask good questions, giving the editors the additional challengeand opportunity of finding and presenting equally good answers.It’s often said that skill has two components: know-what, plus know-how. Youhave to know what to do, as well as how to do it. It’s not always easy to gleanboth components from the printed page, but a sharp photograph certainly doeshelp. Photography is where this collection of workshop tips really shines. Since1999, editors at American Woodworker magazine have invested heavily in creatingclear photo illustrations for reader-submitted tips and questions. When it’s onlya drawing, you’re never quite sure about the underlying reality. But the photoremoves that uncertainty, making the answer clear on the page.We’ve emphasized photo illustrations in this huge collection of workshopwisdom. I’m personally grateful to my predecessors and colleagues for theirdetermination to grace each chunk of solid advice with photographic clarity. Ourteam certainly has enjoyed gathering, illustrating and organizing this pricelessinformation. We hope you enjoy the succession of aha! moments that you’re sure toreceive as you turn these pages.—Randy Johnson, editor-in-chief,American Woodworker magazineGreat Book of Woodworking Tips 7INTRODUCTIONIntroduction
BandsawNew Bandsaw TiresMy bandsaw has developed tracking problems to the point that the blade won’tstay on the wheel. I checked everything and can’t seem to clear up the problem.What’s going on here?Because these problems developed over time, I suggest you check your tires. Thetires on your bandsaw provide traction for the blade and, like the tires on your car,they wear out and the rubber degrades with time. A new set of tires will likely putyour saw back on track.“Obvious signs of worn tires are cracks and tears,” explainsPeter Perez, president of Carter Products Inc., a bandsawaccessory manufacturer. “A good wear test is to sink afingernail into the tire. A good tire will rebound with novisible mark on it. If your fingernail leaves an impression,it’s time to replace the tire.”It’s easier to replace the tires with the wheel removed fromthe saw. Taper the end of a dowel, clamp it in a vise, and setthe wheel on it. We recommend replacing both rubber tireswith urethane tires. Urethane offers two big advantages:It lasts longer and it doesn’t require adhesive to install. Clampthe new tire on the wheel and stretch the tire over the rim.Urethane tires can be made more flexible by soaking themin hot water before you put them on the wheels.New UrethaneTire8 Great Book of Woodworking TipsTaperedDowelEnd
B andsawSpring Clamp Blade StorageI like to keep my bandsaw blades on the wall next to my saw.To save space, I fold them into coils. The trouble comes whenI hang the coiled blade on a peg or nail. I’ve had the bladessuddenly come uncoiled and spring off the wall! That’s unpleasantand potentially dangerous. I tried using twist ties, but they woreout quickly and it was a pain having to tie up and untie the bladeevery time I used it.I came up with this handy hanger made with a 2x4 and somevery small spring clamps. I notched the edge of the 2x4 with adado blade and screwed a spring clamp into each notch. Nowwhen I go to change blades, all I have to do is squeeze the springclamp to release the blade.SpringClampCan a 2x4Dull a Blade?After resawing some pine 2x4s, my bandsaw blade smokedand seemed mighty dull. How can that be?Chances are your blade wasn’t dull at all. It’s teeth were probablycoated with pine pitch, which you should remove with bladecleaner. Other woods, such as cherry, also deposit pitch onbandsaw blades.Like any sawblade, a bandsaw blade’s teeth won’t cut properlyif they’re caked with pitch. Pitch fills in the clearances necessaryfor the blade to cut with a minimum of friction. This makes theblade run hotter, which creates even more buildup. Blade cleanerremoves all traces of pitch, making your blade feel much sharper.You should remove the blade for cleaning to avoid potentiallydamaging your wheel’s tires.Tooth with pitch buildupTooth after cleaningGreat Book of Woodworking Tips 9
B andsawClean Bandsaw TiresMy bandsaw tires have a buildup of pitch and sawdust thatseems to be embedded right into the rubber. What’s the bestway to clean my tires?An excessive buildup of sawdust and pitch on your tirescan lead to tracking problems, so it’s a good idea to cleanthem periodically.Start by unplugging your machine. Then remove the bladeand tilt the table out of the way. You’ll find the buildup tobe much worse on your lower tire where sawdust tends to gettrapped under the blade as it travels around the wheel. Use some120-grit sandpaper or synthetic steel wool and a light touch toclean the wheel as you turn it by hand.SandpaperDirtyTireDisposableGuide BlocksI’ve bandsawed hundreds of puzzle pieces using very smallblades. I gave up on the steel guide blocks that came with mysaw because when those little blades came in contact with theblocks, they’d dull right away. And, when I wanted to back outof a cut, the blade would pop out of the blocks.Now I make my own guide blocks from scraps of hardwood.My blades last longer and don’t pop out or wander because they’retrapped between the wooden blocks. The blocks wear, but it’s soeasy to just re-cut their ends or make new ones altogether.With the bandsaw unplugged, I install the new blocks bypushing them toward the blade until they’re lightly touching it.Then I lock the blocks in place and spin the upper blade wheelto make sure they don’t drag on the blade.10 Great Book of Woodworking TipsCapturedBladeWood GuideBlocks
B andsawAlign Bandsaw WheelsI’ve tried everything to get good resaw resultson my bandsaw, but the blade still wanders.What gives?If you use a sharp blade designed for resawing,compensate for drift angle, and set the propertension and still get bad results resawing, there’sonly one other possibility: Your wheels needalignment. Pop the hood (well, the wheel covers)on your saw and put a straightedge across the rimof both wheels (Photo 1). If there’s a gap, yourwheels are not operating in the same plane.Misaligned wheels are a problem for bandsawswith crowned wheels. If your saw is 16 in. orsmaller, chances are it has crowned wheels. Acrowned wheel has a slight hump where the bladerides. The crown is designed to force the bladetoward the center of the wheel and aid in trackingthe blade. If the two crowned surfaces are notin the same plane, they pull against each other,robbing the saw of power and accuracy.Fortunately, the problem is easy to fix on mostsaws. First, measure the misalignment (Photo 2).Next, remove the blade and the wheel and applythe appropriate shim(s) (Photo 3). Most saws havethin washers behind each wheel. You may findremoving the stock washer and replacing it with athicker one is just the ticket.Reattach the wheel and give your saw a spin.Note: Some saws have an adjustable bottomwheel. Just loosen the setscrew and slide thebottom wheel in or out the appropriate amount.1Check the wheel alignment with your resaw blade mounted and tensioned. Itmay be necessary to adjust the tracking of the upper wheel to make the facesof both rims parallel.23GapMeasure the gap witha ruler calibrated toat least 1/32 in. or witha dial caliper.Add or replace washers behind the wheel toachieve alignment. For small adjustments, usemetal shim stock or metal dado blade shimsbehind the washer.Great Book of Woodworking Tips 11
P l ate - J o i ne rReinforce Short MitersTo strengthen miter joints in narrow stock, use face framebiscuits. They’re like standard biscuits but smaller (about1 3/16 in. long), so you can use them in stock as narrow as 1inch. To cut the slots, use a 5/32-in.-thick slot cutter in yourrouter table. Set the router fence so the bit cuts a 5/16-in.-deepslot. Then clamp 45-degree guides to your router table. Theguides make it easy to feed the workpiece into the slot cutter.Use one guide (A) for one end (A) and the other guide (B)for the other end (B). Test your setup before cutting actualparts of your project.GuideABFee
American Woodworker Magazine, Fox Chapel Publishing and Woodworking Media, LLC disclaim any and all liability for untoward results. American Woodworker, ISSN 1074-9152, USPS 738-710, is published bimonthly by Woodworking Media, LLC, 90 Sherman St., Cambridge, MA 02140, www.AmericanWoodworker.com. ISBN-13: 978-1-56523-596-0 ISBN-10: 1-56523-596-7 Publisher’s
