Transcription
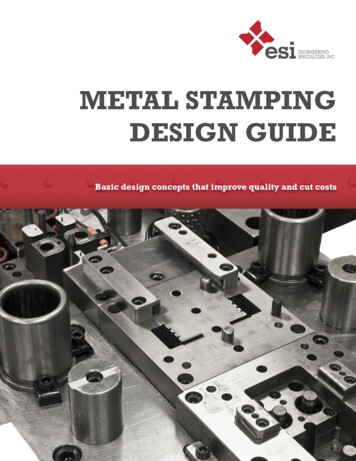
Stamping Dies design textbook for WebsiteJETRO SUPPORTING INDUSTRY PROGRAMJune 2006
SET BStamping Dies design textbook for WebsiteDesigning of Stamping dies1. Designing of blanking dies1.1 Outline of “Blanking Dies”1.2 Design flow of “Blanking Dies”1.3 Blanking layout1.4 Designing of blanking dies1.5 Designing of fixed strippers1.6 Designing of piercing die holders1.8 Designing of blanking punch1.9 Designing of blanking punch plate1.10Designing of blanking punch holders1.11Designing of shanks1.12Post length of Dieset1.13Designing of joint parts
Designing of Stamping dies1. Designing of Blanking dies1.1 Outline of designing blanking dieBlanking dies are intended to blank out the desired shape shown underDiagram 1.Blanked out items is sometimes the final shape, or requires theelement of succeeding procedures such as bending or drawing.MaterialBlankDiagram 1. BlankingDiagram 2. Indicates the standard blanking die structure. This is fixedstripper structure die. Die sets are made of “Upper dies” (composed ofshank, punch holder, punch plate and punch) and, “Lower dies” (composedof Stripper, die, and die holder)shankpunch holderpunch platepunchstripperDieDie holderDiagram 2. Standard Blanking diesJust as indicated in Diagram 3, the upper die is attached to the slides ofstamping machines. In this example, the “Shank” attached to the upper dieholder is fixed to the shank holder found upon sliding of stamping machine.This method usually applies to fix relatively small –sized upper dies.
stamping machineslideupper dieshankholderlower dieclampbolster plateDiagram 3. Stamping machine & dies relationOn the other hand, the lower die is fixed to the “Bolster plate” of stampingmachine.An important factor to consider in this set up of die is the “Blankingclearance”.In this example, it is a must to adjust the clearance upon setting the diesets on the stamping machine. These kinds of dies are called “Open Dies”.We use terminologies such as “Die preparation: Kanagata dandori”meaningsetting of dies to stamping machines. In Open dies, clearance may varydepending on the level of skill of the worker.Which means, there are always possibilities that the finished - productquality may become different every time the worker sets dies on themachine.To avoid such incidence, we utilize the guide post and guide bushing asthose are indicated in Diagram 4, so that the upper-lower die relation iskept intact within the die set.In actual workmanship, there are many similar dies mentioned above tokeep the upper & lower die relation.
When punch holder, guide bushing, guide post and die holder are placed inone unit, we call this as “Die set”.When put together, this is called dies with die set.Punch holderGuide bushingDie setGuide postDie holderDiagram 4. punch & die positioning1.2 Design flow of blank dieThe illustration of design flow is indicated in diagram 5, prior to the actualdesigning of blank dies. It is an outline of the design flow. Some aresimplified and some are explained in details.Blanking layoutDie designStripper designDie holder design(a) Design flow for lower die setPunch designPunch plate designBacking plate designPunch holder design(b) design flow for upper die setDiagram 5. Design flow of punch & blanking die sets
Each designed part is presented in layouts as are indicated in Diagram 6,and are assembled as in Diagram 7.ShankPunch holderBackingplateDie set (upper)BushingPunchplatePunchDiagram 7. Assembled die setStripperplateDieplateGuide postMaterialDie set (lower)1.3 Blank layoutDie holder.Diagram 6. Arrangement of Parts“Blank layouts” refer to material dimensions which can blank out withoutany problem as these are indicated in Diagram 8.“Feedbridge” and “Edge bridge” are necessary factors for one todetermine the material dimensions. Those bridges are indicated in Diagram9. After all, material width as well as feed length will have to bedetermined. .Feeding length: PMaterial width: WEdge Bridge: BMaterial thickness: TDiagram 8. BlankFeed bridge: ADiagram 9. Blanking layout
Table 1. Bridge width dimensionbridgewidthbridge dimensionABOver 1.5 t or 0.7mm A 1.5Feed bridge: AEdge bridge: BMaterial thickness: tYou may refer to Table 1 to determine the “Bridge width”. First, you mustdecide the bridge width. Next, you will decide Edge Bridge. Too smallbridge-width will cause abnormal shearing surface which will also advancethe generation of blanking burrs. On the other hand, too large bridge willcause wastage of materials.One must tryout several blank layouts as these are indicated in Diagram10., so that material wastage may be minimal.Diagram 10. Contraption of blanking layout
1.4 Designing the Blanking dies“Dies” are considered very important tools in the context that these toolsdetermine the final shape of the product. Die holes made on the die platesmust be exactly the same shape and dimension as the finished product(Diagram 11).Same shape & dimension as final productDiagram 11. Shape & dimension of Die holeSo far, explanation is given from the “Plane view shape” points. Anotherpoint necessary to consider is the “Cross-sectional view” (indicating the dieplate thickness)This activity is important, because the long duration of rubbing of materialson the side surface of the die hole may cause burn and deformation in theprocess.To avoid the incidence of potential damage, one must select the style ofcross section type of die hole indicated in Diagram 12. Set 3-4 layers ofmaterials will accumulate at the area (s) of dies, and the rest of materialswill drop down.Diagram 12. Cross sectional shape of blanking dies
In the blanking works, “Lateral force” occurs during blanking.occurrence might cause theThisdie plate to crack if there is not enoughdistance from the outline of die hole to the circumference of the plate.Diagram 13. Indicates general guideline for the distance between theoutline of the die hole to the circumference of the plate.A 1.5T: straight area, gentle curveB 2.0T: shape with an angleC 1.2T: Arc areaT: die plate thicknessDiagram 13. Distance from die contour to plate edgeIn general, die materials which has undergone heat treatment to set SKD11materials into 60HRC are considered “Standard die materials”.One may use the alternative materials such as SKS3 and similar ones whenthe volume of order seems small.1.5 Designing of the fixed stripperLet us explain the role of the fixed stripper. Diagram 14(a) indicates thecondition where the punch has blank out material. Blanked - out productswill then drop down thru the die hole.At this juncture, the pierced material is still attached to the punch(Diagram14(b)). It is necessaryto separate the attached material(s) frompunch. Usually, materials are attached firmly to the punch. According to astudy, the attachment force of materials to the punch is approximately 5%of the blanking force. One must successfully remove the materials from thepunch. It is the “stripper” which takes that role of removing the material(s).Diagram14(c) shows the appearance of the stripper.
PunchPunchPunchFixed stripperMaterialMaterialMaterialBlanked itemDiagram 14. Relationship between punch and stripperIn the blanking works for thin plate fabrication, the fixed part (stripper)where the punch passes thru is used to scratch out materials efficiently.Diagram 15. Shows theimportant functions of the fixed strippers. First,the hole that allows punch to pass thru is necessary. Generally speaking,the size of the hole is for the punch to easily pass thru, and not much ofprecision is required. There is no problem as long as the size of the hole isthe same size as the die hole.
Necessary space tofix stripperHole that allowspunch to enterMaterialSpace wherethe materialsenterDiagram 15. Necessary functions for fixed stripperIt is necessary to provide space to allow materials to pass below the holewhere the punch passes thru. Generally speaking, it is set 5 8 as materialthickness. It is also required to control the material width, so that sidewardshaking can be suppressed and enable one to work easily. .There are some variations on the stripper.Diagram 15 is the standardshape of fixed stripper. It is designed to blank out certain material width inone raw as indicated in Diagram 15(b).On the other hand, there are times when there is a need to blank out 2rows from wide material. In such case, the stripper is set in a cantileverstyle as indicated in Diagram 16.The stripper actually weakens the strength but the workability becomeseven better because the operator can see fabrication of parts.Diagram 16. Cantilever fixed stripper applied for wide materialsThe demerit of the fixed stripper is that the fabrication of parts becomeshidden because of the cover, which makes the operator anxious.To makeup for such demerit, unnecessary portions are removed as shownin Diagram 17 so that inside becomes visible.
Removal of unnecessary cluttersDiagram 17. Removal of unnecessary clutters to make the area orderly and organizedOne may scrape out the stripper from one piece without much burden if thesize of such fixed stripper is relatively small.But then this becomes difficult if the size of the fixed stripper becomesbigger.In such case, the fixed stripper is fabricated separating the functional partsand parts where it creates space for materials to pass.Although the number of parts pieces becomes greater, parts fabrication, onthe other hand become easier.Consider factors such as easy fabrication or cost to decide on whether toprepare one-piece type or split type.This serves as “guide” tomaterial width creating materialspace. Sometimes it is alsocalled “Stock guide part”Stripper partDiagram 18. Functions of each components partsEasy insertion of materials at stock guide part makes press work easyIf one prepares separate stock guide part just like Diagram 19. Extendedstock guide will further attach backing plate, so that materials can be
placed before pushing in.Extension of area tofunction as guide totip of materialsStripperMaterial receiving plateDiagram 19.Diedevise easy way of receiving materialsAs long as it is small sized die, one-piece fixed stripper will not affect muchon stamping works. One will encounter difficulties to place material into thedie if the sizes become bigger. That is the reason for the countermeasure.In the fabrication of standard - sized materials, materials are placed infront of dies and pushed into the posterior. By doing this, there must bepedestal in between die and worker. Make sure materials will not drop downwhile the operator releases hands from the material and placing its handson 2 switches on the stamping machine.That explains why half equivalent length of standard material should befabricated first, pullout materials, reverse materials are fabricated fromopposite side. It is difficult and dangerous if we do not work in this manner.It is sometimes difficult to work in this manner because materials covertwo-hand control safety button.Some people fabricate moving materials horizontally just to avoid the waythe above manner is done. In this operation, the operator still releases itshands from the material, press two-hand control button to operate thestamping machines. If fabricating dies is done without considering theabove, materials will hang down and work cannot be done.Diagram 20shows the contraption of moving materials horizontally.Material used for the fixed strippers is SKS3. It undergoes heat treatmentto create 56HRC.If the production volume is less, you may also use S50C materials without
any heat treatment.StripperMaterial guideStandard sized materialsDieMaterial receiving plateDiagram 20. Combine “holding & guide” of standard materials
1.6 Designing of piercing die holderJust as indicated in Diagram 21, extraction force will be applied on lowerdie.As a necessity, overall body tries to warp. It is not possible to eliminatesuch warp totally, but minimizing warp is ideal. Attempt to eliminate warpby just using die plate, you may have to use expensive materials which iswasteful. Make use of minimum thickness of die plate, then use die holderto backup and minimize warping.Die plateWorking forceDie holderDiagram 21. Deformation due to “Working force”Die holder is a part to fix lower dies. The method is presentedin Diagram22. Diagram 22(a) is a method which will fix using clamping. Die settingwill be much easier if the clamping height (thickness) is unified.Diagram 22(b) indicates fixing method using U-shape groove. In this typeof setting, we must adjust with U-shape groove position of stampingmachines. U-shape groove depth is 2 3 that of bolt diameter.In die holder, it is necessaryto provide product trap hole. Such trap holeshape shall be a simple one like circle or square, but in case shape comeswith 凹凸 just like inDiagram23(a), 凸 part may be easily get damagedonce a simple square trap hole is provided. (shape indicated as NONE goodin Diagram 23(b))
Product trap holeDiagram 22. Fixing method of “Die holder”Just like “Good shape” indicated in Diagram23(c), we must provide 凸 parton die holder to backup weak portions of die hole shape.S50C or SS400 are usual choices as holder materials.No receiving areaConvex area(a) die shapeThere is receiving area(c) good(b) N.G.Product trap hole shapeDiagram 23. Relation between die shape & product trap hole1.7 Designing of blanking punchIn blanking works, die hole and blanking punch must come in same shape.Blanking punch dimension must be smaller than thedie hole dimensionequivalent of clearance.(Diagram24)Clearance may be different according to materials. Table 2 indicatesclearance for main materials.
Die hole shape Product dimensionClearancePunch shapeDiagram 24. Relation between die shape & punch shapeTable 2. Clearance for shearing workWork PieceMild Steel Platehard steel platestainlessBrasssoft aluminumhard aluminumClearance6 109 137 115 104 86 10Clearance indicated is based on % vs. material thicknessIn the designing of dies, the basic practice is always to design die partsshape in simple shape as much as possible. The design of the blankingpunch depends on the size of punch.(1) Designing large punch (refer to Diagram25)For the large- sized punch, because of its large area of punch, we canprovide screws and Dowel pins (Knocking pins) at inner part to fix punch.Such illustration is shown inDiagram25 (a). Such shape can be fabricatedsimply using wire cut EDM.It is a standard form that Diagram25 (b) has been assembled as upper die.Eliminating the punch plate, the structure becomes a simplified one
because the punch is directly attached to the punch holder.If the shape is a simple circle, the shank and punch can be integrated justlike in the Diagram 25 (c).ShankPunch holderPunch(b) Standard designShankPunch(a) Large size punch(c) Integration with shankDiagram 25. Large sized Punch design(2) Medium -sized punch design (refer to Diagram26)This image shows thatfabricating the screw and knocking the hole insidepunch of this size is rather difficult.If the shape comes in simple circle, we can provide flanges and place screwand dowel pin at flange area to simplify structure without punch plate.When shape is complicated, place flange at simple part to design similarform.Once things mentioned above seem to be difficult, then one may use punchplate to fix punch.Please take note that punch plate is NOT an inevitable part.
ShankPunch holderPunch(b) Assemble sample(a) Medium sized PunchDiagram 26. Medium sized Punch(3) Small - sized punch design (refer Diagram27)If the product shape is small, the punch size becomes small too. In thatcase, it is difficult for punch alone to fix itself in the upper die. So weembed punch into plate and fix it. This plate fixing punch is called “Punchplate”.Please refer to Diagram 27(a). Try to set punch as straight as possible.Design “Shoulder-type punch” is used if you find problem in the relationbetween punch areas and punch length.Relation of punch and punch plate is designed that punch will press-fitlightly into (insertion made by small plastic hammer to knock in) punchplate hole.In doing the above, it is set perpendicularly.It is to attain perpendicular fixing of punch by caulking, so try to avoid thismethod as much as possible.Standard punch plate material is S50C or SS400. Thickness of punch plateis ranging from 30 40% of punch.ShankPunch holderPunch platePunchStraightShoulder type(a) Small – sized punch (b) Assemble sample making use of punch plateDiagram 27. Punch & Punch plate design
(4) Punch materialsStandard punch material is SKD11. Expected hardness thru heat treatmentis approximately 60HRC.Usual manner of die fabrication is to make use of “wirecut EDM”. This isbecause wire cut character has good compatibility with SKD11, at the sametime it is abrasion resistance.Using SKD11 as standard material, changing the materials to other typesdepend on process number and product work piece.1.8 Blanking punch plate designIt is difficult to hold by punch alone if size of punch is small. In this casepunch is embedded and fixed into plate.The plate that holds punch is called “Punch plate”.In the fixed stripper structure, perpendicularity and punch position is set bypunch plate. Method of fitting is to press-fit lightly. Image of press-fit lightmeans tapping the punch lightly into hole. Press-fit stronger may warppunch plate.We must also take in to consideration how to prevent punch removal anddrop out. (prevention of dropping out) Diagram 28 shows the relation ofpunch shape and prevention of dropping out.Flange(guard)(a) Round, angledBackingPlateChangethe shank(b) Irregular shape(c) Irregular shapeDiagram 28. Change depends on punch shape and attachment of punch
Diagram 28(a) is an example of simple round and angular shape.In this kind of punch, we provide flange (guard) to prevent from droppingout.Diagram 28(b) is an example of irregular- shaped punch made by wire cutEDM.Place screw on punch, use bolt to join backing plate(backup plate).Diagram 28(c) is an example showing that punch section area is relativelylarge.You may eliminate backing plate when the section area becomes larger,then directly fix punch plate to punch holder. This is an example of boltprevented from dropping out. Please compare the difference betweenDiagram 28(b) and Diagram 28(c). This is an example indicating thatdepending on manners of parts attachment, it will affect other parts.Diagram29 shows the die plate hole design.Diagram 29(a) is an example of angular shape shank hole. In angularshape, the corner becomes problem area. Corner may catch and may notallow entry. If we do not realize this, we tend to expand the straight sidesection and damage those.To prevent this, contraption must be made so as to make assembling easyby giving recess to corner. (X) Indicates when recess is provided at cornerby arc, we shift center of arc to inner part.Diagram 29(b) indicates a contraption how to embed irregular-shapedpunch hole. We don’t have to adjust shape finely, but to press thesignificant points on simple hole.Usual choice of punch plate materials are S50C or SS400.
Punch shank shapeRelief by chamferRelief by an arc Punch plate hole shape(a) Angled shape(b) irregular shapeDiagram 29. Designing of “punch plate holes”1.9 Punch holder designPunch holder is the part to hold upper dies. Except for some special cases(attach shank directly to puch.etc.) all the upper die components areattached to punch holder.It is also a function of the punch holder to support rigidity of upper dies.In upper die structure which has springs, we need to adjust the holderthickness according to spring length.If having difficultyattaching upper die to press machine just by the shank,you may use punch holder to attach.Diagram 30 shows different ways of attachment.Diagram 30(a) is assumption of fixture by clamp. You don’t need to doanything on punch holder.Diagram 30(b) shows fixing U-shape groove with bolt. It is necessary todesign U-shape groove dependingupon the size of the bolt.Diagram30(c) indicates fixing method by hole prepared on holder and bolt.Diagram 30(d) indicates fixing method by screw hole prepared on holderand bolt.Above are usual ways to fix punch holder.
It will make setting easier if punch holder thickness is uniform in Diagram(a),(b),and (c).In Diagram 30(b),(c),(d) is shown the necessity of contraption on U-shapegroove position and hole position dependingupon thespecification ofstamping machines.In punch holder, “thickness” becomes important element.Peripheral canstay in melted appearance.It is convenient if you attach shank for location setting purpose, in case youneed to match center of dies to center of stamping machines.Usual choice of punch holder materials are S50C or SS400.ShankDiagram 30. Fixing method by use of “Punch holders”1.10 Shank designShank is a part intended to attach upper die to slides of stamping machines.This part may apply not only to blanking but also to other types of dies.Shank and punch holder relation is indicated in Diagram31.
ShankPunch holderDiagram 31. Punch holder and ShankParts that punch holder becomes a base, a shank will be attached on top ofit.Shank is a pillar-shaped part, used for attachment of relatively small upperdies(dies used on stamping machines up to 30t capacity) to the slide ofstamping machines.Standard shank diameters are 25, 32, 38 and 50mm. One must take careusing old stamping machines, because sometimes those old machines havesizes like 25.4mm and “inch” indications.Shank length is usually ranging from 50 65mm.Usual choice of materials is SS400 or S50C and its equivalent, FC250 types.(1) Shank types (refer Diagram32)Stud shank, flange shank are used for upper die fixing purpose.There are also shanks to position setting purpose.Implanted shank Flanged shank AFlanged shank BPositioningpurpose shankPunch holderDiagram 32. Types of fixed shank
1) Stud shankStud shanks have screw at edge, used to insert screw hole of punch holder.Sometimes one will apply rotating prevention after screwing in.2) Flange shankIt is a shank with round shape flange.Shank is generally attached to center of die. (Dies with eccentric load mustadjust the position of shank depending on the eccentricity)Dies with knockout mechanism (shown in inverted layout structure ofblanking dies), sometimes stud shank becomes obstruction. In this case,flange shanks are utilized.3) Flange shank BThis shank has square - shaped flange.Unlike the round shape flange shank which can integrate, you have tocombine standard plate to stud shank in many cases.This is used when the flange is desired to cover a wide area.4) Position setting shankIn large die sets, holding upper die by shank becomes dangerous (falling ofupper dies).In such case, upper dies are attached by punch holder.In case there is a necessity for center setting, use a shorter length againstshank diameter.Usual choice of shank materials is S50C or SS400. There are also castedshank materials which are commercially available.1.11 Post length of die setPaying attention to guide post is necessary when die set is used on dies.
This is due to the reason that accurate punch and die relation cannot bemaintained if guide post is too short during bottom dead point of die. Justas it is indicated in Diagram 33(a), it is necessary that insertion must be atleast 1.5 that of guide post diameter.Also take note,just like inthat during bottom dead point, upper part of guide postDiagram33(b) must have at least 10mm space between postupper part and slide bottom surface.This also applies even there will be re-grinding works done on blanking dieswhich has lower die heights.In some cases, if guide post upper edge protrudes in the punch holderupper surface, we can use flange shank to maintain slide lower surface vs.post relation.It will be a major accident if the upper post and slide lower surface willcrash. Enough study must be made upon designing.SlideShank 1.5 dPostBottom dead centerDiagram 33. Relation between shank & die set post1.12 Joining part design(1) size of bolt and location1) plate joining
Size of the bolt is determined by the relation of dimension (B) from theplate indicated in Diagram34, bolt pitch (F), and plate thickness (T)indicated in Diagram35.Provision of bolts around is not enough once plate size is large.In such case, it is a must to decide on the location of bolts within plateshown in Diagram36.Diagram 34. Location of bolts for plate 13 32Diagram 35. Relation between Plate thickness & boltsDiagram 36. Bolt location for large sized plate
2) Joining of block partsUsing bolts shown in Diagram37 applies to block parts. To avoid damage tobolts,select as large size bolt as possible considering size of the blocks.If there are mixed sizes of blocks in one die, useuniform bolt sizeconsidering the balance.D: diameter of boltA: A bolt diameterDiagram 37. Joint purpose bolt of block parts3) Bolt diameter and Tap depthPoint is what should be the sufficient depth of insertion of bolts against boltdiameter. This is also related to Tap depth preparation. Generally, Tap depthis about 1.5 3 of tap diameter. Deep tap preparation is very difficult.Minimum depth of insertion of bolt to Tap hole is equivalent to bolt diameter.Standard is for bolt to be inserted into tap hole equivalent of 1.5 that ofbolt diameter. Deepest may be 2.5 .(2) Size of dowel pin and locationDowel pins are used for setting position of plates and block parts. Dowelpins are press-fit lightly into holes.1) Size of dowel pinWhen you use a dowel pin, dowel pin diameter must be same diameter asthat of bolts used for joining, or 1 size bigger than bolt diameter.
2) Location of dowel pinDowel pins are usually located as far position as possible within plateshown in Diagram38.The accuracy of position setting will improved by doing so.Dowel pinKeep distanceDiagram 38. Location of Dowel pins3) Relation of dowel pin diameter to holeDiagram39 shows the relation of dowel pin and dowel pin insertion hole.It is not economical if we create hole depth more than three times that ofdiameter.If the insertion of dowel pin depth is less than pin diameter, position settingaccuracy will be less.Diagram40 shows condition when dowel pin passes thru 3 layers of plates.In middle plate hole, drill holes are used instead of press-fit holes. Size ofhole diameter is approximately dowel pin diameter 1mm.Diagram 39. Relation between Dowel pin diameter & hole
Diagram 40. Middle plate handling
Stamping Dies design textbook for Website Designing of Stamping dies 1. Designing of blanking dies 1.1 Outline of “Blanking Dies” . bridge-width will cause abnormal shearing surface which will also advance the generation of blanking burrs. On t
