Transcription
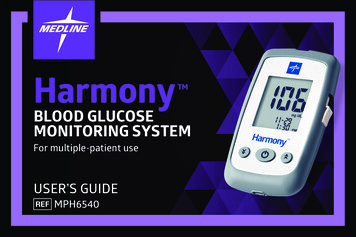
Harmony BLOOD GLUCOSEMONITORING SYSTEMFor multiple-patient useUSER’S GUIDEMPH6540
HARMONYTM2Dear HarmonyTM OwnerThank you for choosing the Harmony Blood Glucose Monitoring System to help monitoryour patient’s blood glucose levels. The Harmony Blood Glucose Monitoring System isan auto-coding system that does not require you to code the meter manually, so testingerrors can be greatly reduced.All of the information you need to use and maintain the blood glucose meter is includedin this manual. Please read it carefully.The Harmony Blood Glucose Monitoring System contains many convenient features tohelp you easily manage your patient’s diabetes, such as hypoglycemia/hyperglycemiawarnings, before/after meal marking, and asterisk marking. The test result from theHarmony blood glucose meter is plasma-calibrated for easy comparison to lab results.If you need assistance, please call Technical Service number at 1-866-274-2131 Mondaythrough Friday from 8am to 5pm CST.
TMThe Harmony Blood Glucose Monitoring System is intended for the quantitative measurement of glucose in venous whole blood, or capillary whole blood drawn from fingertips, palm,or forearm. Alternative site testing should be performed only during steady-state (whenglucose is not changing rapidly). Testing is done outside the body (In Vitro Diagnostic Use). Itis intended for multiple-patient use in professional healthcare settings as an aid to monitoring the effectiveness of diabetes control program. This system should only be used withsingle use, auto-disabling lancing devices. It is not indicated for the diagnosis of or screeningfor diabetes or for neonatal use.HARMONYIntended UseThe Harmony Blood Glucose Monitoring System is comprised of the Harmony Blood GlucoseMeter, Harmony Blood Glucose Test Strips and Harmony Glucose Control Solution.IMPORTANT: Dehydration – Severe dehydration may lead to inaccurate blood glucose test results. Ifyou suspect the patient is severely dehydrated, do not use the system. Hematocrit range – A hematocrit range that is higher than 70% or lower than 10% cancause inaccurate blood glucose test results. Testing is done outside the body (In Vitro Diagnostic Use). Not intended for use on neonates. This system should only be used with single-use, auto-disabling lancets.3
HARMONYTM4Important Safety Instructions Users need to adhere to standard precautions while handling or using this device.All parts of the glucose monitoring system should be considered potentially infectiousand are capable of transmitting blood-borne pathogens between patients and healthcareprofessionals. For more information, refer to “Guideline for Isolation Precautions:Preventing Transmission of Infectious Agents in Healthcare Settings ionprecautions.html The meter should be disinfected after use on each patient. This blood glucosemonitoring system may only be used for testing multiple patients when standardprecautions and the manufacturer’s disinfection procedures are followed. Only auto-disabling, single-use lancets may be used with this device.The link of public health notification and standard practice guideline are: “FDA Public Health Notification: Use of Fingerstick Devices on More than One PersonPoses Risk for Transmitting Bloodborne Pathogens: Initial Communication” ertsandNotices/ucm234889.htm “CDC Clinical Reminder: Use of Fingerstick Devices on More than One Person PosesRisk for Transmitting Bloodborne Pathogens” (2010) icesBGM.html
TMUnderstanding the Harmony Blood Glucose Monitoring SystemThe Harmony Meter . . . . . . . . . . . . . . . . . . . . . . . . . . . . . . . . . . . . . . . . . . . . . . . . . . . . . . . . . . 8The Harmony Meter Display Screen. . . . . . . . . . . . . . . . . . . . . . . . . . . . . . . . . . . . . . . . . . . 10The Harmony Blood Glucose Test Strip. . . . . . . . . . . . . . . . . . . . . . . . . . . . . . . . . . . . . . . . 13HARMONYTable of ContentsSetting Up the New SystemInserting (or Changing) the Batteries. . . . . . . . . . . . . . . . . . . . . . . . . . . . . . . . . . . . . . . . . . 14Setting Time and Date . . . . . . . . . . . . . . . . . . . . . . . . . . . . . . . . . . . . . . . . . . . . . . . . . . . . . . . 16Setting the Alarm . . . . . . . . . . . . . . . . . . . . . . . . . . . . . . . . . . . . . . . . . . . . . . . . . . . . . . . . . . . 20Turning ON/OFF Tone Sound . . . . . . . . . . . . . . . . . . . . . . . . . . . . . . . . . . . . . . . . . . . . . . . . . 22Setting Hypo/Hyper Values . . . . . . . . . . . . . . . . . . . . . . . . . . . . . . . . . . . . . . . . . . . . . . . . . . 24Enable/Disable QC Lock Mode. . . . . . . . . . . . . . . . . . . . . . . . . . . . . . . . . . . . . . . . . . . . . . . . 28Control Solution TestingPerforming a Control Solution Test . . . . . . . . . . . . . . . . . . . . . . . . . . . . . . . . . . . . . . . . . . . .30Control Solution Troubleshooting . . . . . . . . . . . . . . . . . . . . . . . . . . . . . . . . . . . . . . . . . . . . . 365
HARMONYTMBlood Glucose TestingPreparing the Lancets . . . . . . . . . . . . . . . . . . . . . . . . . . . . . . . . . . . . . . . . . . . . . . . . . . . . . . . . . . . 38Important Information on Alternative Site Testing (AST) . . . . . . . . . . . . . . . . . . . . . . . . . . . 39Performing a Blood Glucose Test . . . . . . . . . . . . . . . . . . . . . . . . . . . . . . . . . . . . . . . . . . . . . . . . . 41Understanding Blood Glucose Test Results. . . . . . . . . . . . . . . . . . . . . . . . . . . . . . . . . . . . . . . . 48Limitation. . . . . . . . . . . . . . . . . . . . . . . . . . . . . . . . . . . . . . . . . . . . . . . . . . . . . . . . . . . . . . . . . . . . . . 49Meter Memory. . . . . . . . . . . . . . . . . . . . . . . . . . . . . . . . . . . . . . . . . . . . . . . . . . . . . . . . . . . . . . . . . . 51Upload Data . . . . . . . . . . . . . . . . . . . . . . . . . . . . . . . . . . . . . . . . . . . . . . . . . . . . . . . . . . . . . . . . . . . . 54Caring for the MeterCleaning and Disinfecting the Meter . . . . . . . . . . . . . . . . . . . . . . . . . . . . . . . . . . . . . . . . . . . . . . 56Purchase Information for Validated Disinfecting Wipes. . . . . . . . . . . . . . . . . . . . . . . . . . . . . 60Storage and Precautions. . . . . . . . . . . . . . . . . . . . . . . . . . . . . . . . . . . . . . . . . . . . . . . . . . . . . . . . . 61Troubleshooting . . . . . . . . . . . . . . . . . . . . . . . . . . . . . . . . . . . . . . . . . . . . . . . . . . . . . . . . . . . . . . . . 62Product Warranty . . . . . . . . . . . . . . . . . . . . . . . . . . . . . . . . . . . . . . . . . . . . . . . . . . . . . . . . . . . . . . .66Specifications . . . . . . . . . . . . . . . . . . . . . . . . . . . . . . . . . . . . . . . . . . . . . . . . . . . . . . . . . . . . . . . . . . .676
Each Harmony system may include the following items:TMHarmonyUser GuideHARMONYUnderstanding the Harmony Blood Glucose Monitoring SystemThe Harmony MeterHarmony HarmonyTMThe HarmonyBlood Glucose TestStripHarmonyLevel 1 GlucoseControl SolutionHarmonyLevel 3 GlucoseControl SolutionNOTE: Harmony Blood Glucose Test Strips and Harmony Glucose ControlSolution are necessary but sold separately.Please call Medline’s customer service number at 1-800-MEDLINE Monday through Fridayfrom 8:00 AM to 5:00 PM CST for purchasing information.7
HARMONYThe Harmony MeterTMTest Strip PortThis is where you insert the test strip and themeter will turn on automatically.Meter DisplayShows the blood glucose test results, memoryvalues, and other messages.HarmonyTM8Enter () and buttonsPress and hold Enter ( ) for 2 seconds to turnthe meter on or off, or press enter ( ) to togglethrough set up mode when not testing.Press or to enter control mode with test stripinserted, during meter setup, or to navigate thestored test values.
HARMONYTMTest Strip EjectorSlide to eject a used test strip.Battery CompartmentHolds two CR 2032 3V Lithium coin cell batteries.Data PortTransmits data to computer. (Feature not currently available)9
HARMONYThe Harmony Meter Display ScreenALARM CLOCKTMBEEPERMEMORYHYPO/HYPERMEAL MARKERCONTROL SOLUTIONMODE (CTL)ASTERISK MARKERUNITBLOOD DROPTEST STRIPHOUR/MINUTESBATTERY10TEMPERATURE
TMHYPO . Setting up the hypoglycemic threshold value (see page26).Indicates the test result is at or below the hypoglycemicthreshold valueHYPER . Setting up the hyperglycemic threshold value (see page 27).Indicates your test result is at or below thehypoglycemic threshold value.HARMONYMEMORY . Indicates the number in the display area is a stored testvalue (see page 52).MAIN DISPLAY AREA . Displays test results, stored test values, and messages.BATTERY . Appears when the batteries are low and need to be replaced.TEMPERATURE . Appears when it is either too hot or too cold to test (outsidethe ranges of 41 F 113 F).TEST STRIP . This icon will flash to prompt you to insert a test strip fortesting.UNIT . Unit of measurement for your blood glucose.CTL . This icon indicates a control solution test (see page 30).TONE . Indicates the beeper is on (see page 22).ALARM CLOCK . Indicates the alarm function is turned on.BLOOD DROP . This icon will flash to indicate the meter is ready for testing.11
HARMONYTM12MEAL MARKER . Display when marking a result as before or after meal, orviewing a marked result.ASTERISK MARKER . Marks any result as being unique or different in some wayand for which you may want to make notes in the logbook.Seeing a result with this symbol next to it in the memorywill help remind you that there is more information recordedabout this test result.
Contact PointsHarmonyTMSampling EndApply blood or control solutionhereTMInsert this end to the teststrip port on the meterHARMONYThe Harmony Blood Glucose Test StripThe Harmony Blood Glucose Test Strip is a glucose specific, biosensor-based test strip thatcan test glucose in capillary or venous whole blood in as quickly as 8 seconds and requiresvery little blood sample. The test result is plasma referenced for easy comparison to labresults and has under-fill detection to alert you when there is not enough blood to perform atest, so you can be assured that each reading you get is an accurate and meaningful result.IMPORTANT: Be sure to use only the Harmony Blood Glucose Test Strip with the HarmonyMeter. Other brands of test strips will not work with the meter. It is important to close the vial cap of the test strip bottle tightly after each use.DO NOT leave any test strips outside the bottle while not in use. For foil-wrapped teststrip, DO NOT open the foil wrapping until performing tests. Carefully discard used test strips and lancets in proper waste containers according toyour local regulations. DO NOT reuse test strips. Test strips are single use only.13
HARMONYSetting Up the New SystemInserting (or Changing) the BatteriesTMThe batteries needs to be inserted before using the Harmony Meterfor the first time or when the “ ” icon appears on the meter display.Material you will need: Two CR 2032 3V Lithium coin cell batteries The Harmony MeterStep 1.Turn the meter off. Remove the battery cover on the back of themeter by pushing the tabs and pulling the door up. Remove theold batteries.14
HARMONYTMStep 2.Insert the new batteries with the side up. They do not snapinto place but rest on the metal contact. The door holds thebatteries down.Put the battery door back in the place and snap it closed.NOTE: After changing the batteries, the meter automatically prompts you to check the time anddate when it is turned on either by inserting a test strip or pressing “”. If it is correct,press “” to confirm setup and exit, or if the time and date are not correct, turn to page16 for Setting Time and Date. Meter memory will not be erased when the batteries are being changed. Discard used batteries according to the local regulation. The meter uses two 3-volt lithium batteries, coin cell CR2032. This type of battery canbe found in many stores. Be sure the batteries go in side up. Remove the batteries if unused for a long time.15
HARMONYSetting Time and DateTMMaterial you will need: The Harmony MeterBegin Set UpStep 1.Press and hold “HarmonyTM” to turn on the meter.Step 2.The flashing test strip icon will appear on the meter display screen.Step 3.Press “ ” twice until meter display screen shows “16” and set.
TMStep 4.Press “ ” and the current year will flash. Use “ ” or “ ” to select thecorrect year.Press “ ” to confirm and advance to set the month.HARMONYSet YearSet MonthStep 5.The current month will flash. Use “ ” or “ ” to select the correctmonth.Press “ ” to confirm and advance to set the day.Set DayStep 6.The current day will flash. Use “ ” or “ ” to select the correct day.Press “ ” to confirm and advance to set the 12-hour or 24-hour timeformat.17
HARMONYSet 12-hour or 24-hour Time FormatTMStep 7.The time format will flash. Use “ ” or “ ” to select the time format ofyour choice.Press “” to confirm and advance to set the hour.Set HourStep 8.The current hour will flash. Use “ ” or “ ” to select the correct hour.Press “” to confirm and advance to set the minutes.Set Minutes18Step 9.The current minutes will flash. Use “ ” or “ ” to select the correctminutes.Press “” to confirm and exit time setup.
TM Anytime during setup, you may either press “ ” to exit, or insert a Harmony BloodGlucose Test Strip to begin testing. The changes you have done so far will be memorizedby the meter.HARMONYNOTE:After setting up the time and date, you can turn off the meter by pressing and holding “”,continue to set the meter, or insert a test strip to begin testing (see Blood Glucose Testing onpage 37 or Control Solution Testing on page 30).19
HARMONYSetting the AlarmTMYou can set up to three alarms on the Harmony Meter. You must set the time and datebefore setting the alarms. When an alarm rings, the meter will beep several times in arow. Pressing “” or inserting a test strip will silence the alarm.HarmonyTMMaterials you need: The Harmony MeterStep 1.Press and hold “” to turn on the meter.Step 2.The flashing test strip icon will appear on the meter display screen.Step 3.Press “ ” or “ ” until “setting.20” starts to flash. Press “” to enter alarm
HARMONYStep 4.The display screen will indicate alarm 1 status (the default is OFF). Youcan turn it on by pressing “ ” or “ ”. Press “ ” to confirm and advanceto set hours.TMStep 5.The hours will flash. Press “ ” or “ ” to select the hour. Press “confirm and advance to set minutes.” toStep 6.The minutes will flash. Press “ ” or “ ” to select the correct minutes.Press “ ” to confirm and advance to set alarm 2.Step 7.Set alarm 2 and 3 by following steps 4 through 6. After you have finishedsetting up alarm 3, press “” to exit alarm setup.21
HARMONYNOTE:TM Alarm will follow the time format (12-hour or 24-hour) you chose when setting uptime and date. Alarm settings will not be erased when changing batteries.Begin testing by inserting a Harmony Blood Glucose Test Strip (see Blood Glucose Testing onpage 37 or Control Solution Testing on page 30), or press and hold “ ” to turn off the meter.Turning ON/OFF Tone SoundThe Harmony Meter comes with a beeper sound ON as preset. Thebeeper will sound once to notify you when turning on/off the meter,applying samples, or ending countdown. You will get two beepsounds warning if the results show “hypo”, “hypr”, “HI” or “LO”.Step 1.Press and hold “22” to turn on the meter.Step 2.The flashing test strip icon will appear on the meter display screen.HarmonyTM
” and set.” to enter tone setting. Use “ ” or “ ” to turn on/off the tone.Step 5.Press “” to exit once you have made the selection.TMStep 4.Press “HARMONYStep 3.Press “ ” or “ ” until meter display screen shows “NOTE: Anytime during setup, you may either press “ ” to exit, or insert a Harmony BloodGlucose Test Strip to begin testing. The changes you have done so far will be memorizedby the meter.Begin testing by inserting a Harmony Blood Glucose Test Strip (see Blood Glucose Testing onpage 37 or Control Solution Testing on page 30), or press and hold “ ” to turn off the meter.23
HARMONYSetting Hypo/Hyper ValuesTMThe Harmony Meter has a feature to set the high and low blood glucose threshold (hyperglycemia and hypoglycemia values). Based on the values you have set up, the LCD screen willshow “hypo” if blood glucose test result is below the low glucose threshold value (hypoglycemia level), or the LCD screen will show “hypr” if blood glucose test result is above the highglucose threshold level value (hyperglycemia level).HYPO (hypoglycemia) warning24HYPER (hyperglycemia) warningIMPORTANT: Do not alter or stop the medication based on this feature always consult the patient’shealthcare provider before altering or stopping medication.
Step 1.Press and hold “TMMaterial you will need: The Harmony MeterHARMONYThe factory preset threshold value is 250 mg/dL for hyper and 70 mg/dL for hypo. The allowable range of the threshold setting is 100 to 600 mg/dL for hyper and 20 to 130 mg/dL forhypo, but the meter will never allow the hyper value to be lower than the hypo value. Followthe steps below to adjust the hyper and hypo threshold values.HarmonyTM” to turn on the meter.Step 2.The flashing test strip icon will appear on the meter display screen.25
HARMONYSetting up hypo (hypoglycemia) warning valueStep 3.Press “ ” or “ ” until the meter display screen shows “hypo”.TMStep 4.Press “” to enter hypo setup.Step 5.Press “ ” or “ ” to select the desired value. Press and hold either “ ” or “ ” toaccelerate numbering. Press “ ” to confirm and exit hypo setup. You will return tothe meter display screen.HarmonyTMUPDown26
Step 6.Press “ ” or “ ” until the main display screen shows “hypr”.HARMONYSetting up hyper (hyperglycemia) warning valueTMStep 7.Press “” to enter hyper setup.Step 8.Press “ ” or “ ” to select the desired value. Press and hold either “ ” or “ ” toaccelerate numbering. Press “ ” to confirm and exit hyper setup. You will return tometer display screen.HarmonyTMUPDownAfter setting up the hypo and hyper values, you can either press and hold “ ” toturn off the meter, or insert a test strip to begin testing (see Blood Glucose Testingon page 37 or Control Solution Testing on page 30).27
HARMONYEnable/Disable QC Lock ModeTMThe Harmony Meter offers you a choice to lock in the QC lock mode. When the QClock mode is on and no control test has been performed in the past 24 hours, themessage “qC” will flash on the screen and you will need to perform a control testbefore running a glucose test.Materials you will need: The Harmony MeterStep 1.Press and hold “” to turn on the meter.Step 2.The flashing test strip icon will appear on the meter display screen.Step 3.Press “ ” or “ ” until the meter display screen shows “ctl”.28Step 4.Press “” to enter QC lock setting. Use “ ” or “ ” to turn on/off QC lock.
” to confirm and exit QC lock setup. You will return to meter display screen.TMBegin testing by inserting a Harmony Blood Glucose Test Strip (see Blood Glucose Testing onpage 37 or Control Solution Testing on page 30), or press and hold “ ” to turn off the meter.HARMONYStep 5.Press “If the QC lock is on and no control test has been executed in the past 24hours, the screen will show the flashing message “qC” when you inserta test strip. You will not be able to run glucose tests without running acontrol test first.Press “ ” to select control level (L1 or L3), see Control SolutionTesting on page 30 for details.29
HARMONYControl Solution TestingPerforming a Control Solution TestTMThe purpose of the control solution testing is to validate the performance of the HarmonyBlood Glucose Monitoring System using the testing solution with a known range of glucose.Control solutions are necessary but sold separately, please call 1-800-Medline, Mondaythrough Friday from 8:00 AM to 5:00 PM CST for purchasing information.You should perform control solution testing when: Using the meter for the first time You open a new package of Harmony Blood Glucose Test Strips You leave the cap of the test strip vial open You drop the meter You suspect the Harmony Meter and Harmony Blood Glucose Test Stripsare not working properly The blood glucose test results do not reflect how the patient feels You want to practice the testing procedure30
TM Use only the Harmony Glucose Control Solution (Level 1 and Level 3) with theHarmony Blood Glucose Test Strip. Other brands of control solution will produceinaccurate results. Always check the expiration date. DO NOT use control solutions if expired. Mark the newly opened bottle of control solution with the date opened. Discard any unused control solution three months after opening. DO NOT FREEZE or REFRIGERATE. Store the control solutions at 39 F 86 F.HARMONYIMPORTANT:Materials you will need: Harmony Glucose Control Solution (Level 1 and Level 3) The Harmony Meter A new Harmony Blood Glucose Test StripStep 1.Insert a Harmony Blood Glucose Test Strip into the meter with theblood sample reaction zone facing up. Make sure the test stripcontact points are inserted all the way into the meter.31
HARMONYIMPORTANT: Do not use a test strip that has expired. Check the expiration date which is printed onthe test strip bottle (for vial test strips) or box (for foil-wrapped test strips).TM Use each test strip immediately after removing it from the bottle or opening a foilwrapping. For vial test strip, replace the bottle cap immediately and close it tightly after removing atest strip from the bottle. Do not use wet, bended or damaged test strips. Keep away from direct sunlight and heat. Store the test strip in a dry, cool place. For vial test strips, record the “date opened” on the test strip bottle label when you firstopen it. Six months after first opened, discard the bottle and any remaining test strips. For foil-wrapped test strip, do not use scissors to open the foil wrapping. Scissors candamage test strips. Make sure you are testing in an environment between 41 F 113 F and 20 90% RH, andallow 10 to 15 minutes for it to reach the new temperature before use. The meter will notbegin testing if it detects an out-of-range temperature. This is an auto-coding meter. You do not need to insert a code card.32 You must see a flashing blood drop icon if the test strip has been inserted to the test stripsport.
HARMONYStep 2.Wait until the flashing blood drop and test strip icons appear on thelower left of the meter display screen.TMStep 3.Press “ ” to enter the control mode. You will see “ctl ” on the lower leftof the screen. Use “ ” or “ ” to select control level (L1 or L3).Step 4.Squeeze a drop of glucose control solution (Level 1 or Level 3)onto a clean, dry, non-absorbent surface. Do not apply control solutionto the test strip directly from the bottle. Replace the bottle cap on thecontrol solution bottle immediately after use.Step 5.Hold the meter and touch the control solution to the edge of the sampling end of thetest strip. The control solution will be automatically pulled into the reaction area of thetest strip.33
HARMONYStep 6.The screen will begin to count down. After 8 seconds, the controlsolution testing result will appear on the meter display screen.A “ctl” flag will also be attached when results are shown on the screen.TMStep 7.Compare the reading on the screen to the control range printed on thetest strip bottle or box.If the reading does not fall within the control range printed on the teststrip bottle or box, see Control Solution Troubleshooting on page 36.NOTE: Control solution testing results will be stored into the meter’s memory and indicated by“ctl ” icon. Different vials or foil packages may have different control ranges.34
HARMONYTMStep 8.Remove the used test strip by sliding the test strip ejector. Eject the test strip into a properwaste container.Insert a new test strip to perform the next test, or press and hold “” to turn off themeter.IMPORTANT: Do not reuse test strips.Perform the other level of control solution testing by repeating the above steps.35
HARMONYControl Solution TroubleshootingTMIf your control solution testing is out of range (too high or too low), it may be caused by thefollowing:Possible CausesWhat you can do Wrong brand of controlsolution being used Make sure you are using Harmony Glucose ControlSolution (Level 1 and Level 3). Expired or contaminatedcontrol solution ordamaged test strips Make sure the testing environment is between41 F 113 F and 20 90% RH. Meter malfunction Control solution not atroom temperature36 Check the expiration and opened date on bottlesof both control solution and test strips. Repeatthe test using a new test strip. If the result is stillout of range, use a new bottle of control solutionand retest. Please call Technical Service number at1-866-274-2131 Monday through Friday from8:00 AM to 5:00 PM CST
Materials you will need:TM The Harmony MeterHARMONYBlood Glucose Testing A new Harmony Blood Glucose Test Strip An auto-disabling, single use lancetBefore you begin, make sure: Set up the meter properly and run a control test. See Setting Up the New System onpage 14 and Control Solution Testing on page 30 for more details. Wash your hands and testing site thoroughly with soap and warm water, and dry well. You are testing in an area between the temperature ranges of 41 F 113 F and relativehumidity ranges of 20 90%. The meter will not test outside of this range and will display“ “. Move the meter into an area that is between 41 F 113 F and 20 90% RH, and letit sit for 10 to 15 minutes before testing again. If the meter is being operated by a second person who is providing testing assistance tothe user, the meter should be cleaned and disinfected appropriately when testing isconducted by the second person.37
HARMONYPreparing the LancetsCAUTION:TM Users need to adhere to standard precautions when handling or using this device.All parts of the glucose monitoring system should be considered potentially infectiousand are capable of transmitting blood-borne pathogens between patients and healthcareprofessionals. Please follow the practice guidelines below: “Biosafety in Microbiological and Biomedical Laboratories (BMBL)” found athttp://www.cdc.gov/biosafety/publications/bmbl5/ “Protection of Laboratory Workers From Occupationally Acquired Infections;Approved Guideline-Third Edition”Clinical and Laboratory Standards Institute (CLSI) M29-A3.Only auto-disabling single-use lancets should be used to take a blood sample. Followmanufacturer’s instruction for how to use the lancets.Please call Medline’s Customer Service number at 1-800-MEDLINE Monday through Fridayfrom 8:00 AM to 5:00 PM CST for the purchasing information of auto-disabling single-uselancets.38
TMThe Harmony Blood Glucose Monitoring System can testfor blood glucose from two sites other than your fingertip.These alternative sites are your palm and forearm(alternative site testing, or AST). Alternative site testing canbe less painful than fingertip testing, but because of thephysiological difference between fingertip, palm andforearm(1), AST result may be significantly different thanresults from fingertip testing under certain conditions.Alternative site testing can be used only during steady-stateblood glucose condition.HARMONYImportant Information on Alternative Site Testing (AST)DO AST ONLY in the following intervals: In a pre-meal or fasting state (more than 2 hours since last meal) 2 hours or more after taking insulin 2 hours or more after exerciseAlternative site testing should be performed only during steady-state (when glucose is notchanging rapidly).Alternative site measurements should never be used to calibrate continuous glucosemonitors (CGMs).Alternative site measurements should never be used for insulin dosing calculations.39
HARMONYAST SHOULD NOT be used when: The patient has hypoglycemic unawareness (not able to tell if you have low blood sugar). Within 2 hours of a meal, exercise, or medication.TM The patient be operating machinery or driving a car. The patient is sick. The patient’s blood glucose is low. Testing for hyperglycemia. The patient’s routine glucose results are often fluctuating.Consult with the patient’s healthcare provider to decide if AST is right for them.NOTE: If results from AST do not agree with how the patients feel, use fingertip testing instead.1. Shu M, Osamu F, Kazuhiro H, Yoshihito A: Hypoglycemia Detection Rate Differ s AmongBlood Glucose Monitoring Sites. Diabetes Care 28(3):708–709, 200540
Step 1.Insert a test strip to turn on the meter.HARMONYPerforming a Blood Glucose TestTMIMPORTANT: Check the expiration date printed on the test strip bottle (for vial test strips) or box (forfoil-wrapped test strips). Do not use expired test strips. Use each test strip immediately after removing it from the bottle. Do not use wet, bent or damaged test strips. Keep away from direct sunlight and heat. Store the test strips in a dry, cool place. Record the “date opened” on the bottle label. Discard the bottle and any remaining teststrips after six months from date of opening. Insufficient blood specimen may cause incorrect results. You must see a flashing blood drop icon if the test strip has been inserted into the test strip por
The Harmony Blood Glucose Monitoring System is comprised of the Harmony Blood Glucose Meter, Harmony Blood Glucose Test Strips and Harmony Glucose Control Solution. IMPORTANT: Dehydration – Severe dehydration may lead to inaccurate blood glucose test results. If you suspect t