Transcription
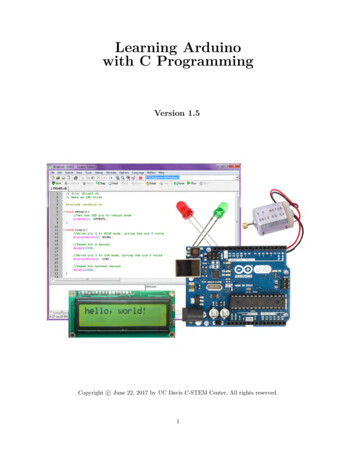
Learning Arduinowith C ProgrammingVersion 1.5Copyright c June 22, 2017 by UC Davis C-STEM Center, All rights reserved.1
Contents1 Introduction1.1 The Board . . . . . . .1.2 The External Circuitry1.3 The Breadboard . . .1.4 The Pins . . . . . . . .1.5 Circuit Diagrams . . .6781213152 Getting Started with Programming the Arduino in Ch2.1 Project 1: Blink . . . . . . . . . . . . . . . . . . . . . . . .2.2 New Concepts . . . . . . . . . . . . . . . . . . . . . . . . .2.3 Required Components and Materials . . . . . . . . . . . .2.4 Building the Circuit . . . . . . . . . . . . . . . . . . . . .2.5 Using the ChDuino GUI . . . . . . . . . . . . . . . . . . .2.5.1 Find and Manage Arduino Boards . . . . . . . . .2.5.2 Connect and Control an Arduino Board . . . . . .2.6 ChDuino Basic Test . . . . . . . . . . . . . . . . . . . . .2.7 Using ChIDE to Run Programs . . . . . . . . . . . . . . .2.8 Writing the Code . . . . . . . . . . . . . . . . . . . . . . .2.9 Alternate Method Using the While-loop . . . . . . . . . .2.10 Exercises . . . . . . . . . . . . . . . . . . . . . . . . . . .16161616172020212122242628.3 Function Definitions and Arduino’s Setup and Loop Functions294 Programming with the Arduino IDE325 Using Debug Mode to Understand and Troubleshoot Programs356 Interfacing with a Push-Button6.1 Project 2: Spaceship Interface . . . .6.2 New Concepts . . . . . . . . . . . . .6.3 Required Components and Materials6.4 Building the Circuit . . . . . . . . .6.5 ChDuino Basic Test . . . . . . . . .6.6 Writing the Code . . . . . . . . . . .6.7 Exercises . . . . . . . . . . . . . . .44444444454747517 Reading an Analog Temperature Sensor7.1 Project 3: Love-O-Meter . . . . . . . . .7.2 New Concepts . . . . . . . . . . . . . . .7.3 Required Components and Materials . .7.4 Building the Circuit . . . . . . . . . . .7.5 ChDuino Basic Test . . . . . . . . . . .7.6 Writing the Code . . . . . . . . . . . . .7.7 Exercises . . . . . . . . . . . . . . . . .5252525253555561.2
8 Using a Potentiometer to Dim an LED8.1 Project 4: Dimmer . . . . . . . . . . . .8.2 New Concepts . . . . . . . . . . . . . . .8.3 Required Components and Materials . .8.4 Building the Circuit . . . . . . . . . . .8.5 ChDuino Basic Test . . . . . . . . . . .8.6 Writing the Code . . . . . . . . . . . . .8.7 Exercises . . . . . . . . . . . . . . . . .62626262636565679 Using Photo-Resistors to Change the Brightness and Color of an RGB9.1 Project 5: Color Mixing Lamp . . . . . . . . . . . . . . . . . . . . . . . . .9.2 New Concepts . . . . . . . . . . . . . . . . . . . . . . . . . . . . . . . . . . .9.3 Required Components and Materials . . . . . . . . . . . . . . . . . . . . . .9.4 Building the Circuit . . . . . . . . . . . . . . . . . . . . . . . . . . . . . . .9.5 ChDuino Basic Test . . . . . . . . . . . . . . . . . . . . . . . . . . . . . . .9.6 Writing the Code . . . . . . . . . . . . . . . . . . . . . . . . . . . . . . . . .9.7 Exercises . . . . . . . . . . . . . . . . . . . . . . . . . . . . . . . . . . . . .LED. . . . . . . . . . . . . . . . . . . . . .686868686971717510 Turning a Servo Motor with a Potentiometer10.1 Project 6: Mood Cue . . . . . . . . . . . . . . .10.2 New Concepts . . . . . . . . . . . . . . . . . . .10.3 Required Components and Materials . . . . . .10.4 Building the Circuit . . . . . . . . . . . . . . .10.5 ChDuino Basic Test . . . . . . . . . . . . . . .10.6 Writing the Code . . . . . . . . . . . . . . . . .10.7 Exercises . . . . . . . . . . . . . . . . . . . . .767676767780808311 Playing Notes with a Piezo and Photo-resistor11.1 Project 7: Light Theremin . . . . . . . . . . . . .11.2 New Concepts . . . . . . . . . . . . . . . . . . . .11.3 Required Components and Materials . . . . . . .11.4 Building the Circuit . . . . . . . . . . . . . . . .11.5 ChDuino Basic Test . . . . . . . . . . . . . . . .11.6 Writing the Code . . . . . . . . . . . . . . . . . .11.7 Exercises . . . . . . . . . . . . . . . . . . . . . .8484848485878790a Piezo. . . . . . . . . . . . . . . . . . . . . . . . . . . . . . . . . . . .9191919192969699.10010010010010110210712 Pressing Different Buttons to Play Different12.1 Project 8: Keyboard Instrument . . . . . . .12.2 New Concepts . . . . . . . . . . . . . . . . . .12.3 Required Components and Materials . . . . .12.4 Building the Circuit . . . . . . . . . . . . . .12.5 ChDuino Basic Test . . . . . . . . . . . . . .12.6 Writing the Code . . . . . . . . . . . . . . . .12.7 Exercises . . . . . . . . . . . . . . . . . . . .13 Data Acquisition and Plotting Using13.1 Project 9: Graphing Light . . . . . .13.2 New Concepts . . . . . . . . . . . . .13.3 Required Components and Materials13.4 Building the Circuit . . . . . . . . .13.5 Writing the Code . . . . . . . . . . .13.6 Exercises . . . . . . . . . . . . . . .a.Notes. . . . . . . . . . . . . . . . . . . . . .on. . . . . . . .Photo-resistor. . . . . . . . . . . . . . . . . . . . . . . . . . . . . . . . . . . . . . . . . . . . . . . . . . . . . . .3.
14 Data Acquisition and Plotting with Multiple Inputs andand a Potentiometer14.1 Project 10: 3D Graphing . . . . . . . . . . . . . . . . . . .14.2 New Concepts . . . . . . . . . . . . . . . . . . . . . . . . .14.3 Required Components and Materials . . . . . . . . . . . .14.4 Building the Circuit . . . . . . . . . . . . . . . . . . . . .14.5 Writing the Code . . . . . . . . . . . . . . . . . . . . . . .14.6 Exercises . . . . . . . . . . . . . . . . . . . . . . . . . . .Outputs Using a Photo-resistor108. . . . . . . . . . . . . . . . . . . . 108. . . . . . . . . . . . . . . . . . . . 108. . . . . . . . . . . . . . . . . . . . 108. . . . . . . . . . . . . . . . . . . . 109. . . . . . . . . . . . . . . . . . . . 111. . . . . . . . . . . . . . . . . . . . 11715 Using Data Acquisition to Verify Ohm’s15.1 Project 11: Science! . . . . . . . . . . .15.2 New Concepts . . . . . . . . . . . . . . .15.3 Required Components and Materials . .15.4 Building the Circuit . . . . . . . . . . .15.5 Writing the Code . . . . . . . . . . . . .15.6 Exercises . . . . . . . . . . . . . . . . .Law. . . . . . . . . . . . . . . . . . .11811811811811912012616 Timing a Program16.1 Project 12: Digital Hourglass . . . .16.2 New Concepts . . . . . . . . . . . . .16.3 Required Components and Materials16.4 Building the Circuit . . . . . . . . .16.5 Writing the Code . . . . . . . . . . .16.6 Exercises . . . . . . . . . . . . . . .12712712712712813113517 Moving a DC Motor by Pressing a Button17.1 Project 13: Motorized Pinwheel . . . . . . .17.2 New Concepts . . . . . . . . . . . . . . . . .17.3 Required Components and Materials . . . .17.4 Building the Circuit . . . . . . . . . . . . .17.5 ChDuino Basic Test . . . . . . . . . . . . .17.6 Writing the Code . . . . . . . . . . . . . . .17.7 Exercises . . . . . . . . . . . . . . . . . . .13613613613613714114114318 Controlling the Speed and Direction of a DC Motor18.1 Project 14: Zoetrope . . . . . . . . . . . . . . . . . . .18.2 New Concepts . . . . . . . . . . . . . . . . . . . . . . .18.3 Required Components and Materials . . . . . . . . . .18.4 Building the Circuit . . . . . . . . . . . . . . . . . . .18.5 ChDuino Basic Test . . . . . . . . . . . . . . . . . . .18.6 Writing the Code . . . . . . . . . . . . . . . . . . . . .18.7 Exercises . . . . . . . . . . . . . . . . . . . . . . . . .14414414414414514914915419 Writing on an LCD Panel19.1 Project 15: Crystal Ball .19.2 New Concepts . . . . . . .19.3 Required Components and19.4 Building the Circuit . . .19.5 Writing the Code . . . . .19.6 Exercises . . . . . . . . .155155155155156160165. . . . . . . . . . .Materials. . . . . . . . . . . . . . . .4.
20 Using a Piezo as a Vibration Sensor20.1 Project 16: Knock Lock . . . . . . .20.2 New Concepts . . . . . . . . . . . . .20.3 Required Components and Materials20.4 Building the Circuit . . . . . . . . .20.5 ChDuino Basic Test . . . . . . . . .20.6 Writing the Code . . . . . . . . . . .20.7 Exercises . . . . . . . . . . . . . . .21 Appendix21.1 Differences Between ”Learning Arduino in Ch for the Absolute Beginner” andArduino in C” . . . . . . . . . . . . . . . . . . . . . . . . . . . . . . . . . . . . . .21.2 Resistor Color Codes . . . . . . . . . . . . . . . . . . . . . . . . . . . . . . . . . .21.3 Using the Multi-Meter . . . . . . . . . . . . . . . . . . . . . . . . . . . . . . . . .21.3.1 Current . . . . . . . . . . . . . . . . . . . . . . . . . . . . . . . . . . . . .21.3.2 Voltage . . . . . . . . . . . . . . . . . . . . . . . . . . . . . . . . . . . . .21.3.3 Resistance . . . . . . . . . . . . . . . . . . . . . . . . . . . . . . . . . . . .21.4 Macros . . . . . . . . . . . . . . . . . . . . . . . . . . . . . . . . . . . . . . . . . .21.5 Functions in Ch . . . . . . . . . . . . . . . . . . . . . . . . . . . . . . . . . . . . .21.6 Functions in Ch and Arduino IDE . . . . . . . . . . . . . . . . . . . . . . . . . .21.7 Classes . . . . . . . . . . . . . . . . . . . . . . . . . . . . . . . . . . . . . . . . . .21.7.1 The Serial Class in Ch and Arduino IDE . . . . . . . . . . . . . . . . . .21.7.2 The Servo Class in Ch and Arduino IDE . . . . . . . . . . . . . . . . . . .21.7.3 The LiquidCrystal Class in Ch and Arduino IDE . . . . . . . . . . . . . .21.7.4 The CPlot Class in Ch . . . . . . . . . . . . . . . . . . . . . . . . . . . . .21.8 Input/Output Alternatives . . . . . . . . . . . . . . . . . . . . . . . . . . . . . .21.9 Installing Arduino Firmware For Ch . . . . . . . . . . . . . . . . . . . . . . . . .5.166166166166167170170177178”Learning. . . . . . . . . . . . . . . . . . . . . . . . . . . . . . . . . . . . . . . . . . . . . . . . . . . . . . . . . . . . . . . . . . . . . . . . . . . . . . . . . . . . . . . . . . . . . . . . .178179180180180181182183183187187188188190191192
1 IntroductionFor engineers, artists, and students alike, the Arduino single-board microcontroller is one of the most popularof its kind in the world. The rise of the Arduino, and similar boards, has brought the diverse functionalityand power of microcontrollers into the realm of the everyday person by not only displaying near unlimitedusefulness in household tasks, but also by bringing to light the fun and creative side to engineering. Thisdocument will be a walk-through in how to program a microcontroller to interact with electronic componentsusing ChIDE and the Ch programming language.Ch and ChIDE provide the ability to enter a line-by-line debugging mode which can be invaluable to theabsolute beginner programmer and breed a greater intuition about how a program actually works. As aninterpreter, ChIDE also does not need to be re-uploaded to the Arduino after every change in the code, unlikewith the Arduino IDE, meaning that Ch has a faster transition time between the editing and the executionof code, keeping students engaged and giving them more time in a classroom setting to troubleshoot orexperiment. The Ch code is written in such a way that it is nearly identical to the what the Arduino codewould be such that the code from a Ch program can be copied and paste into the Arduino programmingenvironment and function the same way, creating a smooth transition from ChIDE to the Arduino IDE.This gives students easy experience with different programming environments and the dynamic nature ofprogramming and programming languages. This book assumes that the user has the hardware from theC-STEM Starter Kit and C-STEM Sensor Kit. These kits are available for purchase from C-STEMIndustrial Partners.These projects and lessons provide a basic knowledge of how microcontrollers function with inputs (such asswitches, knobs, temperature and light sensors) and outputs (such as LEDs, servos, motors). As an expansionfrom previous C-STEM Center courses involving mathematic computing and robotics programming with theLinkbot, this book gives practical applications for programming and explores some of the inner-workingof robotics programming. This will eventually lead a user to having the required knowledge to use theInput/Output (I/O) capabilities of a microcontroller to create a self-driving, autonomous, vehicle. While aself-driving car is a classic goal for robotics, the possibilities for what a person can do with the power of amicrocontroller is only limited by their creativity. The goal of this book is to give the user enough knowledgeto express their creativity with their own projects and functionalities.6
1.1 The BoardFigure 1: Arduino Uno Microcontroller BoardThe centerpiece of the Arduino and other similar project boards is the microcontroller. A microcontrolleris a simple computer that is used for specific, simple, tasks that require interfacing with external hardware,like reading information from a sensor or controlling a motor. This is unlike the microprocessor in a typicalcomputer, which can run multiple programs at once and is used for general purposes. Microcontrollers aretypically used for what are called embedded systems. Embedded systems are only programmed once forone task and contain only the electronic and mechanical components required for completing its task. Asimple example would be the air-conditioning system inside of a house. The microcontroller inside of thatlittle box on the wall takes in information from sensors that tell it what the current temperature is, looksat what buttons the homeowner has pushed to set it, and decides whether or not it needs to turn on theair-conditioning unit.Aside from the microcontroller, the boards hold supporting hardware that physically allow the microcontroller to communicate with external devices, such as the computer the programmer is using. Most projectboards will have a series of sockets, called pins, into which wires can be plugged to connect the board to I/Odevices, like a button or LED for example. There are also pins for 5 volts, 3.3 volts, ground, and serial data.There will be both digital and analog pins, and a number of the digital pins will be PWM capable, whichwill be discussed later in Section 8. The controllers also need to communicate with other computers so thatuser instructions can be received or programs uploaded.Ch code currently supports using a variety of Arduino boards, including the Arduino Uno board, which isthe board included in the Arduino Starter Kit. Other supported boards include the Arduino Mega, Leonardo,Nano, and others. The differences between the spectrum of Arduino boards are the processor size and power,the board’s physical size, and the number of I/O pins. The Uno can be considered the standard board andwill work for all of the projects presented in this book. While other boards will work for projects in thisbook, they are more often used for specific circumstances or special applications.7
1.2 The External CircuitryBreadboardsThe circuits required for the projects cannot be wired directlyto the Arduino. Well, they can but that would be very messy.That is why a breadboard is typically used for building temporary circuits. A breadboard is board with a grid of sockets,like those on the Arduino , that can have wires plugged intothem. Some pins in the rows of the breadboard are connectedinternally so plugging certain into certain pins will connectthose wires. Breadboards allow for relatively complex circuitsto be built and modified easily for testing and troubleshooting.SymbolHardwareResistorsThe simplest electrical component, resistors do exactly whatit sounds like they do, they resist current flow and cause dropsin voltage. Resistors are used in filtering electric signals, controlling power input/output, and protecting other componentsfrom power overload. Resistors will be used frequently in thisbook to protect LEDs from too much power. They are colorcoded to indicate different values of resistance, measured inunits called Ohms. Refer to 21.2 in the Appendix for the resistor color-coding system.CapacitorsA capacitor is an electrical component that stores electricalenergy. Once fully charged, it stops current flow completelyand discharges its stored energy. Capacitors are typically usedto store energy, like a temporary battery, and also for filteringelectric signals. Capacitors will be used later in Sections 10and 20 to smooth out the voltage changes across a servo.Switches/ButtonsAfter years of turning lights on and off, modern society has apretty intuitive understanding of how switches work. A switchor button, when activated by being physically pressed, allowscurrent to flow through a circuit. Switches allow the user/operator to have control and give input to a system. Switchesare how the program knows what the user wants it to do.8
SymbolHardwareTilt SensorA tilt sensor is a special type of switch. It contains a littlemetal ball that, when the sensor is in an upright position, sitson two metal plates which allowing current to flow through thesensor. When the sensor is tilted, the little ball rolls off of themetal plates which stops the current and breaks the circuit.PotentiometersAnother way a user can give input to a system is with a potentiometer, which is more commonly known as a knob. Apotentiometer is technically a variable resistor. It can be awide range of resistances which in turn creates a wide range ofvoltages that can be detected by the microcontroller. Whileswitches can only be on or off, a potentiometer gives the microcontroller a wide range of feedback values. A classic implementation would be a volume knob on a speaker or stereo.DiodesA diode simply only allows electrical current to flow in onedirection. A diode will be used later in Section 17 to preventthe current generated from a DC motor from damaging thecircuit.LEDsLEDs, or Light Emitting Diodes, have been the primary lightproducing electrical component for the past few decades. Theyare a special type of diode. They are used widely as indicatorlights on electrical devices.Photo-resistorsA photo-resistor is a special type of resistor that changes itsresistance when it is exposed to light. Photo-resistor acts as avariable resistor, similar to a potentiometer, and will create awide range of voltages depending on how much light it is exposed to. Photo-resistors have many applications as switcheswhere if something blocks a light signal a photo-resistor candetect it.9
SymbolHardwareTemperature SensorsA temperature sensor will change its resistance based on thetemperature of the surrounding environment. The changingresistance changes the voltage output from the pins of the component, which the microcontroller can detect. The voltagescan be transformed into temperatures with formulas, usuallyunique to the model of temperature sensor.PiezosA piezo is a buzzer that creates sound with a specific frequencyfor a specific input voltage. Depending on the voltage suppliedit will vibrate, creating sound. It also can be used to detect vibrations. A piezo will be used later in Section 20 for detectingvibrations.LCD ScreensAn LCD, or Liquid Crystal Display, is a way for the programto give the user visual feedback from the microcontroller. Itcan display alpha-numeric characters that can give the userinformation about data or errors and prompt the user to takesome action.Servo MotorsA special type of electric motor that can only rotate in a 180degree range. The exact position the servo will move to isdetermined by the voltage or frequency the microcontrollersends to the servo.TransistorsA transistor can be thought of as an electrical switch. When avoltage is applied to specific lead then current can flow throughthe other two leads. Transistors are used for many, many,applications and are the basis of modern computing.H-BridgesAn H-bridge is a chip that controls the polarity, positive-tonegative or the negative-to-positive, of the voltage across acomponent. This is particularly useful in Section 18 to controlthe direction an electric motor will spin.10
SymbolHardwareDC MotorA DC motor rotates a shaft when a voltage is applied to it.The direction of the shafts rotation depends upon the polarityof the voltage applied.BatteryA battery provides power to an electric circuit or component.In this book batteries are used to power DC motorsMulti-meterA multi-meter is a tool used to measure current, voltages, andresistances of electrical components or circuits. When measuring current, a multi-meter’s symbol is a circle with an ’A’inside, and when measuring voltage the symbol is a circle witha ’V’ inside.11
1.3 The BreadboardWhen looking at the breadboard with the shorter edge as the horizontal, notice that the two left-most andtwo right-most columns are marked with a ’ ’ and a ’-’. These are the power strips and each column isconnected internally all the way across the board, so that if one wire is plugged into the far upper socket ofa column and another wire is plugged into the far lower socket, then those two wires are connected at thesame voltage. The strips marked ’ ’ are typically where the positive power lead is connected and the stripsmarked ’-’ are where the ground lead is connected. Plug one end of a wire into one of the columns marked’ ’ and plug the other end into one of the Arduino pins marked ’5V’ and do the same for a ’-’ column andthe pin marked ’GND’.Look in between the two sets of power strips and see that there are two 5 x 30 socket grids with a trenchin between them. The five sockets in each row are internally connected to each other so that if two wiresare plugged into any of these 5 sockets then those wires are connected at the same voltage. The rows of onegrid are not connected to the rows of the other grid, the trench separates them. Thus for any row, pins a,b, c, d, and e are connected internally and pins f, g, h, i, and j are also connected internally but separatelyfrom a-e.a b c d ef g h i 0Row connected internallyColumn connected internally30a b c d ef g h i jFigure 2: Breadboard Diagram12
1.4 The PinsOn either side of the Arduino board is a series of ”pins” where wires can be plugged in. Each of these pinshas a dedicated purpose, for example, some are for power, communication, or input/output for externaldevices. The table below explains the purpose of each of the pins on the Arduino.Figure 3: Arduino Circuit Diagram SymbolPin LabelDescriptionIOREFThis pin is at the voltage that the microcontroller normally runs at. The purpose isthat any Shield (a smaller, separate, board that plugs into the Arduino for variouspurposes) can read the voltage on this pin and know what voltage to run at to becompatible with the Arduino. This pin does not have to be worried about for thescope of this book.RESETIf this pin is made to be low, meaning if it is connected to ground, it will cause theArduino to reset. This pin does not have to be worried about for the scope of thisbook.3.3V5VThis pin provides 3.3 volts outputThis pin provides 5 volts outputGNDThis is the ground pin. Ground is the zero-point reference for voltages. Think of it likethe endpoint for a circuit. So, if every circuit starts at a high voltage, like 5 or 3.3, itneeds to end at ground.VinThe Vin pin is where a user can plug in a battery or other power source. It serves thesame purpose as the power jack or the usb cable in providing power to the Arduino.This pin does not have to be worried about for the scope of this book.13
A0-A5The are the analog Input/Output pins. They are used to read voltages from analogsensors. Remember, analog means that the voltage can be within a large spectrum.So, these pins can read all kinds of voltages between 0 and 5 volts, or between 0 andthe voltage applied to the AREF pin.AREFNormally, the analog pins on the Arduino will only read voltages along a spectrumfrom 0 to 5 volts. The user can set the AREF pin to a certain voltage that will becomethe new maximum voltage that the analog pins can read. This pin does not have to beworried about for the scope of this book.D2-D13These are the digital Input/Output pins. They can read and output digital signals,meaning they can detect a certain level of voltage or output 5 volts. Also, the oneswith a tilde, the squiggly line, next to them are PWM, pulse width modulation, capablemeaning they can produce any voltage between 0 and 5.Rx-Tx (D0-D1)While technically two of the digital I/O pins, these two have a special purpose. Thesetwo pins are connected to the same communication line that the usb cable uses, whereRx is the receiving line and Tx is the transmitting line. These can be used for communicating with the Arduino through methods other than the usb cable, say with abluetooth module.Table 1: Arduino Pin Description Chart14
1.5 Circuit DiagramsUsing words and pictures to describe how circuits are built can only go so far. As circuits become moreand more complex it becomes harder and harder to describe them in simple terms, and pictures become animpenetrable nest of wires. Enter the circuit diagram. The standard circuit diagram is designed to layouthow a circuit is built using lines as wires and simple symbols to represent the various electrical components.The symbols to the left of the component descriptions in the Section 1.2 are actually standard diagramsymbols for each of those components. Figure 4 below is actually the circuit diagram for the second project.The little bits of zig-zag lines represent resistors, the plunger looking symbol represents a push-button switch,and the triangle with the line at the tip and the arrows represents an LED. Each of the lines represents aconnection, in this case the connection can either be an actual wire or a row on the breadboard. Notice thatsometimes, due to the complexity of the circuits, lines have to cross lines, such as in Figure 4 when the linecomes out of the push-button and crosses the three lines connecting the Arduino to the resistors. This doesnot mean that these lines are physically connected when the circuit is built. Lines are only considered tobe connected when there is a dot at the point where they intersect. Circuit diagrams are provided for eachcircuit for reference only. It can take some time to become used to, and interpret, circuit diagrams, so buildthe circuits using the descriptions and pictures while comparing these to the circuit diagrams and hopefullyby the end of this book, you can become comfortable with how circuit diagrams work.Figure 4: Example Circuit Diagram15
2 Getting Started with Programming the Arduino in Ch2.1 Project 1: BlinkProject Description: The first project will be the standard first step in the world of microcontrollers,making an LED blink. This project will have an LED turn on, blink a couple of times, and turn off.2.2 New ConceptsThis project is an introduction into how to control digital output devices, such as an LED. Digital meansthat there are only two possible states, on and off, which electrically means there is some level of voltage (on)or no voltage at all (off). For the Arduino, and most similar microcontrollers, the ”on” output voltage is 5volts and the ”off” is 0 volts. The on state is also called the hi
using ChIDE and the Ch programming language. Ch and ChIDE provide the ability to enter a line-by-line debugging mode which can be invaluable to the absolute beginner programmer and breed a gr