Transcription
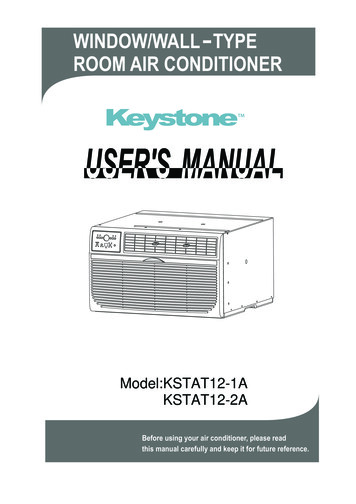
WINDOW/WALL - TYPEROOM AIR CONDITIONERModel:KSTAT12-1AKSTAT12-2ABefore using your air conditioner, please readthis manual carefully and keep it for future reference.
Producto
1 866646 43321 866646 4332
CONTENTS1. SAFETY PRECAUTIONS.22. IMPORTANT SAFETY INSTRUCTIONS .43. NORMAL SOUNDS .54. AIR CONDITIONER FEATURES .55. INSTALLATION INSTRUCTIONS.96. CARE AND CLEANING .227. TROUBLESHOOTING TIPS.23R ead This ManualInside you will find many helpful hints on how to use and maintain your air conditionerproperly. Just a little preventive care on your part can save you a great deal of timeand money over the life of your air conditioner. You'll find many answers to commonproblems in the chart of troubleshooting tips. If you review our chart of TroubleshootingTips first, you may not need to call for service at all.! CAUTIONContact the authorized service technician for repair or maintenance of this unit.Contact the installer for installation of this unit.The air conditioner is not intended for use by young children or infirm personswithout supervision.Young children should be supervised to ensure that they do not play with the airconditioner.If the power cord is to be replaced, replacement work shall be performed byauthorized personnel only.Installation work must be performed in accordance with the national wiringstandards by authorized personnel only.1
Safety PrecautionsTo prevent injury to the user or other people and property damage, the following instructionsmust be followed. Incorrect operation due to ignoring of instructions may cause harm ordamage. The seriousness is classified by the following indications.!WARNINGThis symbol indicates the possibility of death or serious injury.!CAUTIONThis symbol indicates the possibility of injury or damage to property.Meanings of symbols used in this manual are as shown below.Never do this.!Always do this.! WARNING!!!!!!Plug in power plugproperly.Do not operate or stop theunit by inserting or pullingout the power plug.Do not damage or use anunspecified power cord.Otherwise, it may cause electricshock or fire due to excess heatgeneration.It may cause electric shock or firedue to heat generation.It may cause electric shock or fire.If the power cord is damaged, itmust be replaced by the manufacturer or an authorised servicecentre or a similarly qualified person in order to avoid a hazard.Do not modify power cordlength or share the outletwith other appliances.Do not operate with wethands or in dampenvironment.It may cause electric shock orfire due to heat generation.It may cause electric shock.This could damage your health.Always ensure effectiveearthing.Do not allow water to runinto electric parts.!Incorrect earthing may causeelectric shock.It may cause failure of machineor electric shock.Incorrect installation may causefire and electric shock.Unplug the unit if strangesounds, smell, or smokecomes from it.Do not use the socket if it isloose or damaged.It may cause fire and electricshock.It may cause fire and electricshock.Keep firearms away.Do not use the power cordclose to heating appliances.It may cause fire.It may cause fire and electricshock.Ventilate room before operating airconditioner if there is a gas leakage fromanother appliance.Do not direct airflow atroom occupants only.Always install circuitbreaker and a dedicatedpower circuit.Do not open the unitduring operation.It may cause electric shock.Do not use the power cord nearflammable gas or combustibles, suchas gasoline, benzene, thinner, etc.It may cause an explosion or fire.Do not disassemble or modify unit.It may cause failure and electric shock.It may cause explosion, fire and, burns.2
! CAUTIONDo not clean the airconditioner with water.When the air filter is to beremoved, do not touch themetal parts of the unit.It may cause an injury.!!Do not put a pet or houseplant where it will beexposed to direct air flow.Do not clean unit whenpower is on as it may causefire and electric shock, it maycause an injury.This could injure the pet orplant.Operation with windowsopened may cause wettingof indoor and soaking ofhousehold furniture.Do not place obstaclesaround air-inlets or insideof air-outlet.It may cause failure ofappliance or accident.Do not use strong detergent such as wax orthinner but use a soft cloth.Appearance may bedeteriorated due to changeof product color orscratching of its surface.!Hold the plug by the headof the power plug whentaking it out.!Do not use for specialpurposes.Do not use this air conditioner topreserve precision devices, food,pets, plants, and art objects.It may cause deterioration ofquality, etc.!It may cause electric shockand damage.!Ensure that the installation bracket ofthe outdoor appliance is not damageddue to prolonged exposure.If bracket is damaged, thereis concern of damage due tofalling of unit.Do not place heavy object on thepower cord and ensure that the cordis not compressed.There is danger of fire orelectric shock.Use caution when unpacking andinstalling. Sharp edges could cause injury.!3Ventilate the room well whenused together with a stove,etc.An oxygen shortage may occur.Water may enter the unit anddegrade the insulation. It maycause an electric shock.When the unit is to becleaned, switch off, and turnoff the circuit breaker.Stop operation and closethe window in storm orhurricane.!Turn off the main powerswitch when not using theunit for a long time.It may cause failure of productor fire.!Always insert the filterssecurely. Clean filter onceevery two weeks.Operation without filters maycause failure.Do not drink water drainedfrom air conditioner.It contains contaminants andcould make you sick.If water enters the unit, turn the unit off at the poweroutlet and switch off the circuit breaker. Isolatesupply by taking the power-plug out and contact aqualified service technician.
IMPORTANT SAFETY INSTRUCTIONSWARNINGNOTE The power supply cord withthis air conditioner contains a currentdetection device designed to reducethe risk of fire.Please refer to the section Operation,of Current Device for details.In the event that the power supplycord is damaged, it cannot berepaired-it must be replaced with acord from the Product Manufacturer.,Do not, under anycircumstances, cut,remove, or bypassthe grounding prong.Power supply cordwith 3-prong grounding plugand current detection deviceFor your safetyDo not store or use gasoline or other flammable vapors and liquids inthe vicinity of this or any other appliance.Avoid fire hazard or electric shock. Do not use an extension cord or anadaptor plug. Do not remove any prong from the power cord.WARNINGElectrical InformationBe sure the electrical service is adequate for the model you havechosen. This information can be found on the serial plate, whichis located on the side of the cabinet and behind the grille.Be sure the air conditioner is properly grounded. To minimizeshock and fire hazards, proper grounding is important. The powercord is equipped with a three-prong grounding plug for protectionagainst shock hazards.Your air conditioner must be used in a properly grounded wallreceptacle. If the wall receptacle you intend to use is not adequatelygrounded or protected by a time delay fuse or circuit breaker,have a qualified electrician install the proper receptacle.Ensure the receptacle is accessible after the unit installation.Do not run air conditioner without side protective cover in place.This could result in mechanical damage within the air conditioner.Do not use an extension cord or an adapter plug.Operation of Current DeviceThe power supply cord contains a current device that senses damage to the power cord. To test your powersupply cord do the following:1. Plug in the Air Conditioner.2. The power supply cord will have TWO buttons on the plug head.Press the TEST button, you will notice a click as the RESETbutton pops out.3. Press the RESET button, again you will notice a click as the buttonengages.4. The power supply cord is now supplying electricity to the unit.(On some products this it also indicated by a light on the plug head.)NOTES:Do not use this device to turn the unit on or off.Always make sure the RESET button is pushed in for correct operation.The power supply must be replaced if it fails reset when either the TEST button is pushed, or it cannot bereset. A new one can be obtained from the product manufacturer.If power supply cord is damaged, it cannot be repaired. It MUST be replaced by one obtained from theproduct manufacturer.4
NORMAL SOUNDSHigh Pitched ChatterVibrationHigh efficiency compressorsmay have a high pitched chatterduring the cooling cycle.Unit may vibrate and make noisebecause of poor wall or windowconstruction or incorrect installation.Sound of Rushing AirAt the front of the unit, you mayhear the sound of rushing airbeing moved by the fanPinging or SwitchingDroplets of water hitting condenserduring normal operation may causepinging or switching sounds.Gurgle/HissGurgling or hissing noise maybe heard due to refrigerantpassing through evaporatorduring normal operation.AIR CONDITIONER FEATURESELECTRONIC CONTROL OPERATING INSTRUCTIONSBefore you begin, thoroughly familiarize yourself with the control panel and remote as shown belowand all its functions, then follow the symbol for the functions you desire. The unit can be controlledby the unit control alone or with the remote.UNIT CONTROLTempTempTimerTimerSEnergy ffAutoCoolOnOffAutoLow(Cool Only Model)5
AIR CONDITIONER FEATURES(CONTINUED)TO SELECT THEOPERATING MODE:TempSEnergy SleepSaverFanTimerDO THIS:Press the Modebutton.DryTimerModeAutoCoolOnOffTO USE THE ENERGYSAVER FEATURE:TempSEnergy SleepSaverFanDO THIS:Press the buttonNOTE:In this mode, the fan will continue to run for 3 minutesafter the compressor shuts off. The fan then cycleson for 2 minutes at 10 minute intervals until the roomtemperature is above the set temperature, at whichtime the compressor turns back on and cooling starts.TimerDryTimerModeAutoCoolOnNOTE:To choose operating mode, press the Mode button.Each time you press the button, a mode is selectedin a sequence that goes from Auto, Cool, Dry , Heat(Cooling only models without) and Fan. The indicatorlight beside will be illuminated and remained ononce the mode is selected.To operate on Auto feature:In this mode, the fan speed cannot be adjusted, itstarts automatically at a speed according to theroom temperature. If the room does not get toowarm, it will stay at Low speed.To operate on Fan Only:Use this function only when cooling is not desired,such as for room air circulation or to exhaust staleair(on some models). (Remember to open the ventduring this function, but keep it closed duringcooling for maximum cooling efficiency.) You canchoose any fan speed you prefer.During this function, the display will show the actualroom temperature, not the set temperature as in thecooling mode.OffSLEEP FEATURE:TempSEnergy SleepSaverFanModeAutoTimerDryTimerCoolOnOffDO THIS:Press SleepbuttonNOTE:In this mode the selected temperature will increase by2 degrees F 30 minutes after the mode is selected.The temperature will then increase by another 2degrees F after an additional 30 minutes. This newtemperature will be maintained for 7 hours before itreturns to the originally selected temperature. Thisends the Sleep mode and the unit will continue tooperate as originally programmed. The Sleep modeprogram can be cancelled at any time during operationby again pressing the Sleep button.7
SFOLLOW MEFollow MeFollow MeFollow MeFollow Me
1286
INSTALLATION INSTRUCTIONS(CONTINUED)How to Install1. Identify the wall-sleeve brand for your installation, from the chart below.BrandWall Sleeve se251/215 1/416,171/2 or 22FrigidaireCarrier2615 5/816 7/8General Electric/Hotpoint17//Whirlpool25 816 217 1/8 or 233/Fedders/Emerson2716 416 3/4 or 193/4Sears/Kenmore253/416 7/818 5/8CarrierEmerson/Fedders263/415 3/415Friedrich2716 3/416 3/4NOTE: All wall sleeves used to mount the new Air Conditioner must be in sound structural conditionand have a rear grille that securely attaches to sleeve, or rear flange that serves as a stop for the AirConditioner.15/4CAUTION: When installation is complete,replacement unit MUST have a rearwardslope as shown. And ensure the RUBBERCLAMP on the chassis at the back of theunit had been removed before place theunit into the sleeve. But if the rearwardslope is more than 1/ 2 , do not removethe Rubber Clamp before installation.to /16WallSleeveU N ITFRONTREARLEVELRUBBERCLAMP2. Remove old Air Conditioner from wall sleeve and prepare wall sleeve as follows:--- Clean interior (do not disturb seals).--- Wall sleeve must be securely fastened in wall before installing Air Conditioner.Drive more nails or screws through sleeve, into wall, if needed.3--- Repair paint if needed.Max.3. If not existing, drill a 3/16 clearance hole for3/16grounding screw through left side of wall sleeve,Wall sleeve to unitHolein a clear area about 3 inches maximum (to suit)sleeve groundingback from front edge of sleeve as shown below.Next attach ground wire inside sleeve, using1grounding screw and nut. Pull loose end of groundwire out front of sleeve, and temporarily bend itdown and around lower edge of sleeve.4. Prepare the wall sleeve for installation of the new unit per the following Brand instructions.#1 Emerson15 Deep#2 Fedders193/4 Deep#3 Fedders or Friedrich16 3/4 Deep#4 General Electric/Hotpoint16 7/8 Deep#5 Sears or Carrier18 5/8 Deep#6 Whirlpool17 1/8 Deep#7 Whirlpool23 Deep#8 White-Westinghouse/16 17 3/4 DeepFrigidaire/Carrier#9 White-Westinghouse/Frigidaire22 Deep5. Install new unit into wall sleeve.6. To attach ground wire to the new unit, remove the screw from the left side front.7. Assemble and install the Trim Frame (see instruction).10
This units increased performance characteristics meant;1. The rear air intake moved to the opposite side,2. The depth had to be increased.It is very important that these installation instructions are followed so your unit can operate atmaximum efficiency.If this is an existing sleeve, and there is an existing rear grille, the louvers will have to be bentas per the instructions at the beginning of each section.If this proves too difficult to accomplish;EITHER1. Remove the existing grille.2. Place the included aluminum grille towards the rear of the unit.3. Mark through the hole positions.4. Drill through the sleeves flanges with a 1/8 drill bit.5. Attached the new grille with self-threading screws and washers(not included).6. It is VERY IMPORTANT that the partition be placed on the left side of the sleeveas shown below.OR1. Remove the existing grille.2. Use plastic grille and secure to sleeves flanges using existing screws and washers.11
Wall Sleeve Brands:#1 Emerson7Rear Louvers606015 Deep1. Redirect the louvers at the back of the wallsleeve as shown in the illustration. The useof pliers is recommended.Top View2. Attach(1)1/1 2 x3/8 x25 long seal in the center atthe top of the sleeve. Remove the backing paperand press into position.3. Attach the (2) 11/2 x3/8 x14 long seals to theleft and right sides of the sleeve.4. Cut the 11/2 x3/8 x25 long seal to 14 long, andattach it to the vertical section of the rear grilleas shown.5. Attach (2)41/2 x3 1/2 x11/2 centering/support blocksone on each side wall. Place in center of sidewall with the tapered end facing the opening.6. Gently slide unit into sleeve.7. Before sliding all-the-way back, remove 2ndscrew from front on left side of unit.8. Remove the plastic washer from the screw.9. Screw and attach the other end of the groundwire to the unit as shown in picture. Make surethat the toothed washer is against the cabinet.10.Slide the unit completely to the rear to ensurea good seal, making sure the ground wire doesnot become tangled.11.Seal & Frame the unit as described on the lastpage of these instructions.12
Wall Sleeve Brands:193/4 Deep#2 Fedders7Rear Louvers60601. Redirect the louvers at the back of the wallsleeve as shown in the illustration. The useof pliers is recommended.Top View2. Attach(1)41/2 x31/2 x11/2 centering/support blocksone on each side wall. Place in center of sidewall with the tapered end facing the opening.3. Cut (2) 17 Tapered Spacer Blocks as shownbelow into two pieces.173/4Cut HereTapered Spacer Block1Protection PaperBacking4. The 4 section is placed in front of the rib onbase with the tapered end facing the back ofthe sleeve. The remaining portion will beplaced behind the rib again sloping towardthe rear of the sleeve. This helps induce arearward slope on the unit.5. Attach (1)41/2 x3/8 x25 long seal in the centerat the top of the sleeve. Remove the backingpaper and press into position.6. Attach (2) 11/2 x3/8 x14 seals to the left andright sides of the sleeve.7. Cut the 11/2 x3/8 x25 long seal to 14 longand attach it to the vertical section of the reargrille as shown.8. Gently slide unit into sleeve.9. Before sliding all-the-way back, remove 2ndscrew from front on left side of unit.10. Remove the plastic washer from the screw.11. Screw and attach the other end of the groundwire to the unit as shown in picture. Make surethat the toothed washer is against the cabinet.12.Slide the unit completely to the rear to ensurea good seal, making sure the ground wire doesnot become tangled.13.Seal & Frame the unit as described on the lastpage of these instructions.13
Wall Sleeve Brands:163/4 Deep#3 Fedders or Friedrich7Rear Louvers60601. Redirect the louvers at the back of the wallsleeve as shown in the illustration. The useof pliers is recommended.Top View2. Attach(1)41/2 x31/2 x11/2 centering/support blocksone on each side wall. Place in center of sidewall with the tapered end facing the opening.3. Cut (2) 17 Tapered Spacer Blocks as shownbelow into three pieces.173/4Cut HereTapered Spacer Block12-1/212-1/2 Protection PaperBacking4. The 2 1/2 section is placed in front of the rib onbase with the tapered end facing the back ofthe sleeve. Cut the remaining portion to 12 1/2and placed behind the rib again sloping towardthe rear of the sleeve. This helps induce arearward slope on the unit.5. Attach (1)11/2 x3/8 x25 long seal in the centerat the top of the sleeve. Remove the backingpaper and press into position.6. Attach (2) 11/2 x3/8 x14 seals to the left andright sides of the sleeve.7. Cut the 11/2 x3/8 x25 long seal to 14 longand attach it to the vertical section of the reargrille as shown.8. Gently slide unit into sleeve.9. Before sliding all-the-way back, remove 2ndscrew from front on left side of unit.10. Remove the plastic washer from the screw.11. Screw and attach the other end of the groundwire to the unit as shown in picture. Make surethat the toothed washer is against the cabinet.12.Slide the unit completely to the rear to ensurea good seal, making sure the ground wire doesnot become tangled.13.Seal & Frame the unit as described on the lastpage of these instructions.14
Wall Sleeve Brands:#4 General Electra/Hotpoint 167/8 Deep7Rear Louvers60601. Redirect the louvers at the back of the wallsleeve as shown in the illustration. The useof pliers is recommended.Top View2. Cut (2) 17 Tapered Spacer Blocks as shownbelow into two pieces.173/4Tapered Spacer Block131Cut HereProtection PaperBacking3. Install as shown with the tapered end 1/2 fromthe back of the sleeve. This helps induce arearward slop on the unit.4. Attach (1)11/2 x3/8 x25 long seal in the centerat the top of the sleeve. Remove the backingpaper and press into position.
TO USE THE ENERGY SAVER FEATURE: Press the button. DO THIS: In this mode, the fan will continue to run for 3 minutes after the compressor shuts off. The fan then cycles on for 2 minutes at 10 minute intervals until the room temperature is above the set temperature, at wh

