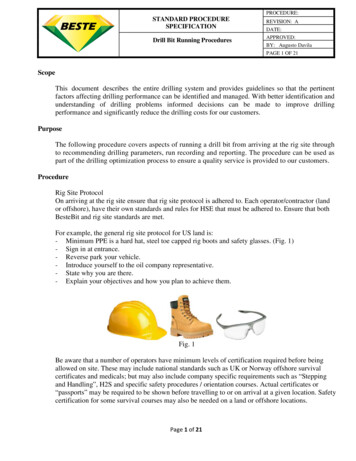
Transcription
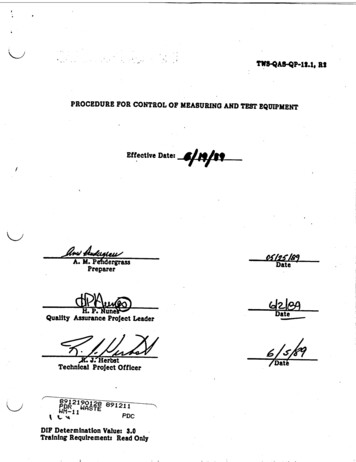
TW"SQA-Qpoig.It RIPROCEDURE FOR CONTROL OF MEASURING AND TEST EQUIPMENTEffective Date:/ *DatePreparerQuality Assurance Project LeaderA J.'HerbstTechnical Project Officer8-ý912190128PDR WASTEJý%A5921PDCDIF Determination Value: 3.0Training Requirement: Read OnlyDate
TWS"QA"-QP-1.1, R2Pagel of 9PROCEDURE FOR CONTROL OF MEASURING AND TEST EQUIPMENT1.0PURPOSEThe purpose of this quality administrative procedure (QP) Is to establish a control"system to identify and calibrate measuring and test equipment (hereafter referredto as instruments or M&TE) used for the Los Alamos National Laboratory (LANL)Yucca Mountain Project (YMP or Project). Implementation of this procedure ensures that M&TE used in activities affecting quality is properly identified and calibrated at appropriate intervals to maintain accuracy within specified limits.2.0SCOPEThis procedure applies to all M&TE (instruments) used in quality assurance (QA)Level I or 11 activities by LANL personnel in YMP investigations.Control of operator-calibrated instruments is addressed in QP-12.2. Except wherespecified, this procedure does not apply to such operator-calibrated M&TE,Calibration and control measures are not required for rulers, tape measures, levels,and other such devices If normal commercial-grade instruments or equipment provide adequate accuracy.3.0REFERENCESLANL-YMP-Quality Assurance Program Plan (QAPP), Section 12.TWS-QAS-QP-2.1, Procedure for Personnel Selection, Indoctrination, and Qualification.TWS-QAS-QP-02.2, Procedure for Personnel Training.TWS-QAS-QP-03.5, Procedure for Documenting Scientific Investigations.TWS-QAS-QP-12.2, Procedure for Control of Operator-Calibrated Instruments.TWS-QAS-QP-13.I, Procedure for Handling, Storage, and Shipping.TWS-QAS-QP-15.1, Procedure for Nonconformances.TWS-QAS-QP-17.1, Procedure for the LANL Group Resident File.4.0DEFINITIONS4.1CalibrateTo calibrate means to check, adjust, or systematically standardize the outputof a measuring or test instrument.4.2Calibration CertificateA calibration certificate, provided by the National Institute of Standards andTechnology [NIST, formerly the National Bureau of Standards (NBS)J, theinstrument's supplier organization, or a service organization, attests to theaccuracy of a calibration and specifies the period of validity for the calibration.4.3Calibration FileThe calibration group or service organization maintains a calibration file foreach instrument it calibrates. This file documents the equipment used in1 1II
TWB-QAS-QP-12.1, R2Pap of 9calibrating that Instrument and maintains the traceability of each piece ofequipmeht to the NIST, other nationally recognized standards,, and/or physicalconstants.4.4Calibration GroupThe calibration group referred to here is the LANL Standards and CalibrationGroup, which provides NIST-traceable calibration to other LANL groups andmaintains the documentation for traceability.4.5Calibration LabelAlU instruments covered by this procedure and QP-12.2 are identified with acalibration label. Examples are shown in Attachment 1.4.6Calibration StandardA calibration standard has a known, valid, documented relationship to theNIST or another nationally recognized standard or physical constant. Thestandard must have equal or better accuracy than that required of the instrument. However, the principal investigator (PI) may approve a standard withthe same accuracy as that of the instrument if this standard is adequate for aspecific application. The PI documents the basis for accepting this standardin a memo to the group Resident File, in a DP, or In an entry In the laboratory notebook.4.7Controlled CalibrationControlled calibration Is performed according to written procedures and tostandards that are traceable to nationally recognized standards or naturalphysical constants. Calibration performed by the calibration group, externalservice organization, or instrument operator is controlled calibration. Whereno recognized standards exist, the calibrator documents the basis for callbration. These calibration procedures are described In written procedures,operator's manuals, or other standard reference documents.4.8M&TE Calibration RecordThe M&TE Calibration Record (Attachment 2) provides the following information:a record of the unique Identification and calibration requirements ofeach individual instrument;the calibration procedure, accuracy, and range through which theinstrument was calibrated; andthe date of next scheduled calibration or the notation "operator calibrated."For every instrument used in this program that requires callbration, an M&TE Calibration Record is completed and filed with the QAS.
TWS-QAS-QP-1.1, RSPage 3 of 94.9Service OrganizationA service organization Is a group outside of LANL that can provide controlledcalibration service using nationally recognized standards or physical constants and written procedures.5.0RESPONSIBILITIES5.1Principal InvestigatorThe PI may delegate any designated function to another Project member bydocumenting such action in a memo to the group Resident File. The PIselects instruments for use on Project work, taking into consideration thetype, range, accuracy, and tolerance required to accomplish the Intendedfunction. This selection Is documented in DPs, laboratory notebooks, or logbooks, as appropriate, following directions In QP-03.5.The PI ensures that all appropriate Instruments are calibrated before they areused for QA Level I or II Project work.When the PI determines that specific instruments are exempt from controland calibration procedures described In this QP and QP-12.2, the PI documents the exemption In a DP, memo to the group Resident File, or entry inthe laboratory notebook.5.2Quality Assurance Support GroupThe QAS notifies the QAL of Instruments due for calibration within the nextmonth.6.0PROCEDURE6.1Performance of CalibrationsInstruments are calibrated by LANL's Standards and Calibration Group, by aservice organization, or by the operator. Calibrations by operators areaddressed In QP-12.2. Individuals who perform calibrations are properlytrained and certified following QP-02.1 and QP-02.2 or the service organization's procedures and use written procedures and appropriate calibrationstandards. Individuals document their calibrations and the standards used.6.2Calibration IntervalThe PI determines the appropriate calibration interval for Instruments, takinginto consideration** type of equipment,manufacturer's recommendation,government and industry codes and standards,frequency and conditions of use,stability, andrequired accuracy and precision.
TWS-QAS-QP-12 1, R2Page 4 of 9The PI specifies the calibration interval on the M&TE Calibration Record foreach Instrument. When a service organization performs calibrations, theservice organization specifies the calibration interval. Unless the PI determines otherwise, balances are calibrated annually and reference weithts,every two years. The PI may have an instrument calibrated after a shorterInterval and may shorten the regular calibration interval, If needed.6.3Calibration Procedure6.3.1Initiating a CalibrationThe PI initially fills in the first section of the M&TE CalibrationRecord (Attachment 2) for each instrument used in his/her Projectwork. For subsequent calibration% the QAS can fill In this section ofthe record. The PI documents the following information:* group and location where the instrument is kept,instrument description,capacity and tolerance as specified by the manufacturer,unique instrument Identification (property number or other), andcalibration Interval.The PI gives this record to the calibration group or service organization performing the calibration and sends a copy to the QAS toshow that the instrument Is used for Project work.6.3.2Performing the CalibrationThe PI may hand carry the instrument or have it packed and shipped toa service organization for calibration, or the Individual who performsthe calibration may calibrate the Instrument where it is used, dependIng upon the circumstance. If handling and shipping are required, theP1 makes arrangements necessary to prevent damage in transit, following considerations in QP-13.1.An individual in the calibration group or service organization calibrates the Instrument. This calibrator fills in the Information requiredin the lower part of the M&TE Calibration Record, Including**reference number, including revision number# of the calibration.procedure used;range through which the instrument was calibrated;accuracy before and after calibration (to determine whether theinstrument is out of tolerance);Identification number of the calibration file where the traceability to NIST or other standards Is documented;name, date, location, and telephone number of the calibrator;date of next calibration;date by which the Instrument should be returned for calibration,as applicable; andany comments, such as inability to calibrate the instrumentwithin the manufacturer's specified tolerance.
TWB-QAS-QP-12.1, R2Page 6 of 9The calibrator returns the record and the instrument, If applicable, tothe PL The PI places a copy of the calibration record and a calibration certificate, if any, in the group Resident File and sends the originals to the QAS as Project records.6.4Labeling the Calibrated InstrumentThe calibrator or the PI places a label (examples are shown in Attachment 1),tag, or other documentation on or with the instrument, Indicating the nextcalibration date and traceability to the calibration data or Indicating that theinstrument Is calibrated by the operator.6.6RecalibrationAfter an instrument Is in the system, the QAS initiates the updated M&TECalibration Record and sends it to the QAL as notification that recalibrationwill be due within the next month. The QAL and PI arrange for recalibration(Section 6.3.2) and labeling, (Section 6.4).6.6Instruments Not In CalibrationThe PI or QAL affixes the tag "DO NOT USE FOR YMP" to any instrumentsthat are beyond the calibration interval, are out of calibration, or cannot becalibrated within the tolerance listed. Any instrument that is consistentlyout of calibration must be repaired or replaced. The PI Informs the QAS bymemo of any instrument that Is removed from service and places a copy ofthe memo in the group Resident File.6.7Instruments Out of ToleranceThe PI compares the instrument's tolerance as stated by the manufacturerwith the accuracy measured by the calibrator before adjustment and noted onthe M&TE Calibration Record. If that accuracy Is not within the statedtolerance, the PI evaluates the validity of information obtained from thatinstrument since the expiration of the previous calibration and documents theconclusions In an entry in the laboratory notebook or a memo to the groupResident File. If Invalid or indeterminate information has been submitted toanother organization (has crossed Interface boundaries), i nonconformancereport (NCR) must be written following QP-16.1. If Invalid or Indeterminateinformation has been submitted to other LANL Project personnel, the P1notifies these individuals.6.8Handling and StorageTo maintain accuracy, measuring and test equipment Is handled and storedusing good scientific and engineering Judgment, following manufacturer'srecommendations or a specific procedure, if the P1 so directs. The PI documents any specific procedure in a memo to the group Resident File and explains the procedure to the users of the instrument.
TWS-QAS-QP--1.19, RIPap 6 of 97.0QUALITY ASSURANCE REQUIREMENTS7.1Calibration RecordsA calibration record for each instrument is initiated and maintained by the PIand QAS on the M&TE Calibration Record form and Includes the followingkinds of information.General information about the instrument Includes ***instrument description,capacity and tolerance specified by the manufacturer,instrument identification number,group and location where the Instrument Is kept, andcalibration interval.Specific calibration information Includes * * reference number, including revision number, of the calibration procedure used;range through which the instrument was calibrated;accuracy before and after calibration (to determine whether the Instrument is out of tolerance);identification number of the calibration file where the traceability toNIST or other standards is documented;name, date, location, and telephone number of the calibrator;date of next calibration;date by which the instrument should be returned for calibration, asapplicable; andany comments, such as inability to calibrate the instrument within themanufacturer's specified tolerance.The M&TE Calibration Record is sent to the QAS, and a copy is maintained Inthe group Resident File. If a calibration certificate (e.g., from the calibration group) Is returned to the PI without the M&TE Calibration Record, the PIsends the certificate to the QAS. The QAS transfers the appropriate information to the M&TE Calibration Record and attaches the Record to the copyof the calibration certificate In the QAS file.7.2LabelsAll instruments covered by this procedure and QP-12.2 are labeled with oneof the following designations or a functional equivalent:SCHEDULED CALIBRATIONCERTIFIED CALIBRATIONOPERATOR CALIBRATEDSee Attachment I for examples of labels.7.3Transfer of Records Package to the Records Processing CenterThe records package for M&TE consists of the following for each calibratedInstrument, Including those addressed in QP-12.2:II
TWSQAS-QP-12.1, R2Page ? of 9a completed M&TE Calibration Record,a calibration certificate If provided by the calibration group or supplier, andany correspondence on instruments removed from use.During the first quarter of each year, the QAS duplicates all calibrationrecords collected during the previous year and submits the duplicate copies asa records package to the Records Processing Center.8.0ACCEPTANCE/REJECTION CRITERIACompletion of the M&TE Calibration Records and the appropriate tags and labelson instruments demonstrates satisfactory performance of this procedure.9.0ATTACHMENTSAttachment 1: Examples of Calibration LabelsAttachment 2: M&TE Calibration Record
TW"-A"-P-12.1. RtAttachment 1Page SOf 9EXAMPLES OF CALIBRATION LABELSCERTI CAION LMTEDgCIEmeow. touM goiai owlnlosg W.m
TWS'QA-'QP-12.1I R2LOS ALAMOS NATIONAL LABORATORYYUCCA MOUNTAIN PROJECTM&TE CAUBRATION RECORDAttachment 2Page 0 of S
Control of operator-calibrated instruments is addressed in QP-12.2. Except where specified, this procedure does not apply to such operator-calibrated M&TE, Calibration and control measures are not required for rulers, tape measures, levels, and other such device
