Transcription
LMS Guide for System AdministratorsAccess LMS at sanmateocounty.csod.com
Learning Management System User Guide forSystem AdministratorsLast updated 1/25/2018The latest version of this manual can be found -lms2
Table of ContentsThis Guide is intended to help LMS System Administrators navigate LMS Administrator tools and carry outroutine system administrator tasks. It includes step-by-step guides on how to carry out an Administrator’smost frequently carried out tasks, specific year-end tasks, and resources important to LMS Administrators.TopicPageLMS Administrator Roles & Responsibilities . .4LMS Power User Group . . .4Logging into your Administrator Account .5Administrator Tools Navigation.6Searching for Users .7Looking Up User Transcripts . . .8Creating & Managing Events Sessions . 9-13Closing a Session . . 14Learning Assignment Tool . . 15-17Running Your Department’s 20-Hour Training Report .18How to Capture All Employees (Add Zeroes) to Your Department’s 20-Hour Training Report .19Creating a Material .20-21Creating a Curriculum .22-23Resources:HR Training & Development Staff Contact Information 24List of Department LMS Administrators.25-26Frequently Asked Questions / LMS Administrator Resources . .27LMS Terms/Glossary.28San Mateo County’s 20-Hour Training Policy.29-303
For LMS AdministratorsLMS Administrator Roles & ResponsibilitiesThe County uses a Learning Management System (LMS) to record and track trainings and otherevents attended by County employees. LMS is also used to track compliance with the County’s 20hour training policy.LMS Administrator roles and responsibilities include, but are not limited to: Serving as the primary contact for LMS support for their employees Initial application support and troubleshooting for end-users Conducting regular and on-going user/system maintenance (e.g., transcript managementand learning assignments) Creating and managing any department-sponsored training Conducting initial training on LMS for new administrators and upon request for end-users Running reports, as necessaryLMS Power User Group (PUG)The LMS Power User Group (PUG) is made up of professionals who act as LMS Administrators,providing LMS technical assistance to their department’s employees.PUG meets bimonthly to share and discuss issues pertaining to LMS usage and overall systemadministration, with topics including (but not limited to): LMS updates/releases/patches Share best practices Updates/resolutions to system issues Open forums/Q&A New feature/navigation demos4
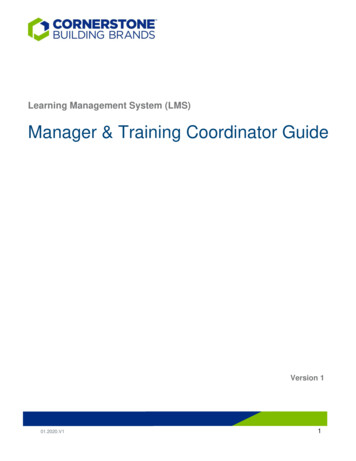
For LMS AdministratorsLogging into your LMS Admin AccountLogging into your LMS Admin account is easy and can be accomplished in justa few steps!1. Go to sanmateocounty.csod.com on a computer connected to the internet. Select the MyCareer Development Site.2. Enter your administrator account username (The one containing “admin” in it) and password.Then click the Sign In button. Note: Your LMS Administrator account is separate from your regular LMS account thatyou access through OKTA. You will be directed to the LMS homepage.3. You will be directed to the LMS Homepage.What if I forgot my LMS Administrator account password?Call the HR Training & Development Team (See page 24 for contact information)OR email CountyLMSRegistrar@smcgov.org5
For LMS AdministratorsAdministrator Tools NavigationAs an LMS Administrator, you have several tabs in your navigation bar unique to administratorsonly. This section will cover some of the most often used administrator tools in three of the mostoften used tabs.Administrator Tab OverviewILT– Instructor Led Trainings Manage Events & Sessions -This section is where you start whenyou want to search for, create or edit any events or sessions. Othertools include viewing waitlists and interest tracking. Vendors & Instructors - View a list of vendors used by the Countyand a list of instructor details and contact information for each one. Facilities & Resources - View and search through a list of venuesused for County training courses.Admin - Administrator Tools Tools - This section allows administrators to customize the look ofyour department’s LMS homepage. Catalog - Create and manage all training courses that have beencreated. Allows for the creation and management of events,sessions, curricula, certificate programs, materials, tests, and othertraining session materials. Knowledge Bank - This section allows you to create centralizedpages to store all materials related to a specific training or program. Email - Allows administrators to create and edit customized emailsto be sent out when people enroll or changes occur for their training. Users - This section allows you to search for a user in LMS byName, Employee ID, Manager, and email. Learning Assignment Tool (Replaced Proxy Enrollment Tool) This tool allows administrators to directly add individuals to classes,overriding any approval mechanisms or course capacity constraints.6
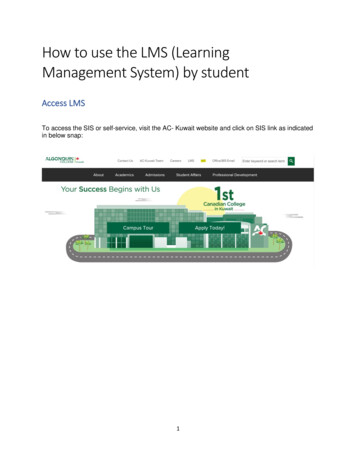
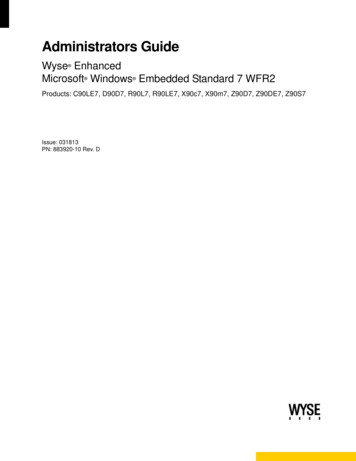
For LMS AdministratorsSearching for UsersOften times, an individual employee will reach out to their Administrator with questions regarding LMS or specifictrainings. To search for specific employees, follow the steps below:1. Access LMS via your LMS Administrator account.2. From the LMS Home Page, go to the Admin Tab and select Users.3. There are a variety of options for searching users, but usually you will search by Name, User ID, or Email. When youhave entered the information, click Search.4. The results will populate below and include user names, user IDs, Status, Identifier (Department), Manager, andApprover. There is also an Options menu that allows administrators to change user’s passwords and view transcripts.7
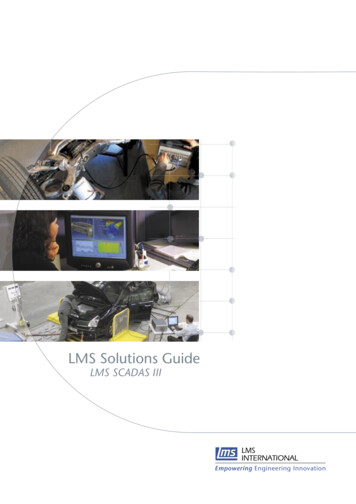
For LMS AdministratorsLooking Up User TranscriptsEmployees will often ask Administrators about the status of a class they are trying to take or have taken recently. InLMS, a user’s transcript holds details of trainings an employee has registered for, been approved for, requested, andshows the aggregate amount of training hours completed for the current fiscal year. To access a user’s transcript, followthe instructions below.1. Go to the Admin tab and select Users.2. Search for the employee, then navigate to the optionsdropdown menu (the column farthest to the right).3. The transcript page shows a variety of information on the employee’s training history. By default it shows the trainingsthe employee is enrolled in and their status. Trainings that have been completed are hidden by default, but can be shown by modifying the filters at thetop of the page from Active to Completed. External Training can be added via the options menu at the top right (See User Guide for how to guideemployees on what qualifies as external training and how to enter it into LMS properly)8
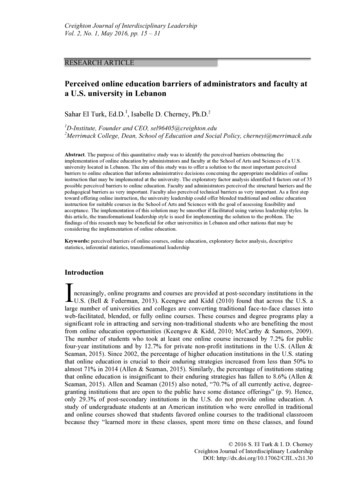
For LMS AdministratorsCreate a New EventIn LMS, an Event is an instructor-led title. Events contain the title, properties, course description, and other informationspecific to that title. A Session refers to an occurrence of the class. Creating a new event involves a few steps.You would create an event and session to open up registration for a future event, or to enter historical attendanceinformation for a training that already happened. You can also use it to enter external trainings for groups of individuals.1. Under the ILT tab, select Manage Events & Sessions2. From this page, you can search for existing training events, or create new events by clicking on Create New Eventbelow the search boxes.9
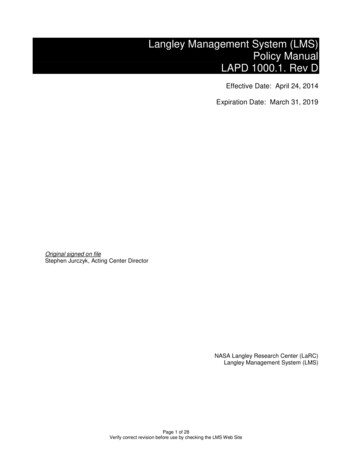
For LMS AdministratorsCreate a New Event (Cont.)3. You will be taken to a 3-step event creation wizard. On the first page, enter all course details. Some of the fields aremandatory, others are optional. If you attempt to move to the next page without filling one of the mandatory fields,you will receive an error message. At a minimum, you should include the following fields: Event Name, InstructionHours, and Subject. When finished, click Next.10
For LMS AdministratorsCreate a New Event (Cont.)4. On the next page, you can set availability. Do this by selecting the criteria dropdown menu, then selecting the typeof group you want to set availability to (Example: Departments, Positions, customized groups, individual users, etc.)5. Once you’ve selected a criteria, click on the arrow icon to the right of the drop down (see circled above). A newwindow will pop up (if it does not, disable any ad-blockers and try again) Click the blue plus ( ) to select the whole group (example: Selecting Departments, then 1-Career wouldset a training’s availability to all departments. (See Left Image below) Click on the black plus ( ) to expand a list to show more specific groups, such as a specific department,budget unit, etc. Once you’ve gotten to your desired group, clickto select it. (See images below). After you have finished selecting your groups, click done at the bottom of the pop up page.Typically, you will want to check the “Include Subordinates” and “Register Upon Approval boxes.” “Pre-Approved” should be left unchecked unless you want to bypass manager approval for the event.5. Use the Session Defaults page to review your event settings, and to define session defaults for future sessions. A typical waitlist expiration and registration deadlines are set to 1 day before a session is held.6. Click Save to create the event listing.11
For LMS AdministratorsAdd a New Session to an EventOnce an event has been set up, sessions need to be added to it so that employees can enroll and attend it.1. Sessions are added to pre-existing events. In order to create a session, search for the event you want to add thesession to. Then, click on the “View Session” button, which looks like a calendar.2. Click on the Create New Session button, OR Copya previously created session, preserving its settings andchanging only certain details (similar to performing a document Save As function).3. You will be taken to a session generation wizard, which will walk you through assigning a date, time, instructor,and location to the session.3.4.5.6.7.8.9.10.11.12.13.4. On the Details page, you can edit any session-specific information12
For LMS AdministratorsAdd a New Session to an Event (Cont.)5. On the next 2 pages, you can adjust the Availability and Email settings for the individual session. NOTE: The settings you set in the Event’s “Session Defaults” will be pre-selected for new sessions.6. The Summary Page allows you to review all your Session data before creating your new session. Click Save.Your session has now been created and employees can begin to enroll in it.13
For LMS AdministratorsClosing a SessionAfter a session has been completed and everyone has been assigned the training, the last step before employeesreceive credit is closing the session.- If you need to add employees to the session, please assign them the training via the Learning Assignment Tool(page 12) BEFORE proceeding to the steps below. Once everyone has been enrolled in the session, proceed to Step 1.1. Under ILT, select Manage Events & Sessions2. Enter the name of the training event and click Search3. Click on the calendar icon4. Click on the People iconto view the list of approved sessions for the desired event.to view the session’s roster.4. The page will open by default on the “Roster” tab. Select the Attendance and Scoring tab.6. For an employee to receive credit for the training, the Attendance and the Pass boxes need to be checked. Toquickly select or deselect all employees, click on the Check/Uncheck all button.7. Once you have adjusted the check boxes accordingly, click on Submit. The attendance and scoring will take up to15 minutes to process. The session will then reflect as completed on users transcript. Should you need to addanother employee to a closed session, you will need to assign the training and then re-close the session.14
For LMS AdministratorsLearning Assignment ToolThe Learning Assignment Tool replaces the previous proxy enrollment tool. It allows LMS administrators to directly addindividuals to classes, overriding any approval mechanisms or course capacity constraints.1. Go to Admin tab Learning Assignment Tool and click Create Assignment.2. Name your Assignment following this naming convention:Department - Name of classes(s) you are assigning - Date of classesEx: HR-Excel 2013 Intro-0607173. Select your trainings by clicking on Select Training.15
For LMS AdministratorsLearning Assignment Tool (Cont.)4. Search for the training(s) you wish to assign. If you are assigning an instructor-led class, make sure youclick on the forward arrow to select the session, not the event.5. Click Next on the bottom right hand corner.6. In most cases, the following settings are appropriate for a learning assignment.16
For LMS AdministratorsLearning Assignment Tool (Cont.)7. Review the settings on this page, and select Next.8. On this page, select who you are assigning the training to. In most cases, you are assigning at the Userlevel.9. Use this page to review your assignment. Select Submit once you are ready to process.17
For LMS AdministratorsHow to Run Your Department’s 20-Hour Training Report1. Go to Reports Custom Reports.2. On the custom report search box, Search “2017”, or whatever the current year is.3. Locate the report titled “COUNTYWIDE 20-hour training report (2017 Update)”4. Under the Actions Column, select Refresh.5. Once the report finishes queueing and becomes available, under the Actions menu, select Excelto export the report.NOTE: This report will only generate employees with training hours on their transcripts. It will omit employees with zero traininghours. If you want a comprehensive report, you will need to compare this training report with a department roster report, andassume that employees missing from the training report have zero training hours (See NEXT page).18
For LMS AdministratorsHow to Capture All Employee (Add Zeroes) to yourDepartment’s 20-Hour Training Report1. Go to Reports Custom Reports.2. On the custom report search box, Search “2017”, or whatever the current year is.3. Locate the report titled “COUNTYWIDE USER Report for Zeroes (2017)”4. Under the Actions Column, select Refresh5. Once the report finishes queueing and becomes available, under theActions menu, select Excel to export the report.6. Compare this report against your Department 20-Hour Training Report. The user report should have more recordsthan the training report. The users who are on the user report, but are missing from the training report, are theemployees with zero hours. Reconcile the two reports against one another. Use the VLOOKUP function to ID thediscrepancies.7. If you do not know how to use VLOOKUP, set up a Skype with HR-T&D, or view this YouTube video (https://youtu.be/m5oMiX4-pmE) that is very helpful in learning how to use the tool.8. Paste the records you have ID’d as missing, from the user report into the training report.19
For LMS AdministratorsCreating a MaterialA material is a file you can upload to LMS to make it alearning object, which can then be assigned or madeavailable to users. Materials are helpful for assigningdocuments to be read, such as policies.Material file types can include doc, docx, xls, xlsx, ppt, pptx,pps, ppsx, pdf, jpeg, jpe, jpg, gif, or zip.To add a material to LMS, follow these steps:1. From the Admin tab, select Catalog.2. Under Learning Objects, select Materials.3. Select “Create Material”.4. Enter a Title, Material Type, Provider, Training Hours, Description, and Subject for your material.5. Under Materialto upload your file. Youradio button instead.Source, select the “Upload Material” radio buttoncan also use a web resource by using the URL20
For LMS AdministratorsCreating a Material (Cont.)6. On the next screen, set Availability, similar to how you would for an Event or a Session.7. On the following screen, select the Emails you would like associated with this material. If none, select No Emails.8. Click Save. Your material is not available within the LMS library and can be assigned out to users via the LearningAssignment Tool. If assigned, it will appear on users’ transcript as a learning object, just like any other event orsession.21
For LMS AdministratorsCreating a CurriculumA curriculum refers to multiple related trainings groupedtogether.1. From the Admin tab, select Catalog.2. Under Learning Objects, select Curricula.3. Select “Create New Curricula” or Search for yourcurriculum to locate an existing one.4. Choose a Title, Subject, and Vendor for your curriculum. Other fields can be filled in as needed but are notrequired.5. Choose Availability, Emails, and Pricing Options (Defaults are usually used for Emails & Pricing Options).22
For LMS AdministratorsCreating a Curriculum (Cont.)6. In the Structure section, select the desired recurrence options.7.The Test Curriculum section is where you add specific trainings to your curriculum. Here you can:A. Add Section - Allows for the addition of multiple sections to the curriculum.B. Add Training - Allows for specific individual trainings to be added to the curriculum. Multiple trainings canbe assigned to any section.C. Remove Training/Section from the curriculum.D. Edit a section in the curriculum, including the option to require that a specific section needs to becompleted before moving on to the next section.E. Specify an order that the trainings need to be taken in.When finished adjusting the curriculum, click Save to keep your customized changes.Additionally, if you are updating an existing curriculum, you will be able to select who is impacted by your changes basedon their progress and who the curriculum is newly assigned to.23
For LMS AdministratorsHR Training & Development Staff Contact lopment-staffContact Training and Development Staff455 County Center, 5th FloorRedwood City, CA 94063-1663Phone: (650) 363-4343Gabe Aponte (ESS Registration, Training Consortium, LMS Issue Reporting)(650) 363-4696Debbie Kong (LMS Assistance/Training Enrollment)(650) 363-1915Rose San Juan (Tuition Reimbursement)(650) 363-4733Ezrah Cambe (LMS Assistance/Training Enrollment)(650) 599-1151Note: Staffing changes may have occurred since this publication. Please visit nt-staff for the most up to date contact information.24
Department LMS Administrators(Updated 12/13/17)The most up to date version of the LMS Administrators list can be found at: http://hr.smcgov.or
Jan 25, 2018 · LMS, a user’s transcript holds details of trainings an employee has registered for, been approved for, requested, and shows the aggregate amount of training hours completed for the current fiscal year. To access a use