Transcription
Integration GuideAlienVault Unified Security Management (USM)Revised: 23 March 2016
About This GuideGuide TypeDocumented Integration — WatchGuard or a Technology Partner has provided documentation demonstratingintegrationGuide DetailsWatchGuard provides integration instructions to help our customers configure WatchGuard products to workwith products created by other organizations. If you need more information or technical support about how toconfigure a third-party product, see the documentation and support resources for that product.AlienVault Integration Guide
AlienVault USM Integration OverviewThis document describes how to configure a WatchGuard Firebox to send log data to AlienVault USM.Platform and SoftwareThe hardware and software used to complete the steps outlined in this document include: Firebox or WatchGuard XTM device installed with Fireware v11.10.xAlienVault-USM trial 5.2.2 with a Virtual ApplianceConfigurationTo complete this integration, you must first deploy AlienVault USM. In our integration tests, we used theAlienVault USM with a Virtual Appliance.TrustedAlienVault USMWatchGuard FireboxTo set up the AlienVault environment, please refer to the AlienVault Initial Setup Guide. In this document, wedescribe how to enable the WatchGuard Plugin on AlienVault USM and how it works with the WatchGuardFirebox. The WatchGuard Plugin is used with the AlienVault USM Sensor to extract and normalize syslog datareceived from a WatchGuard Firebox. For more information on how to enable the plugin see the AlienVaultPlugins Management Guide.Set Up AlienVault USMAfter AlienVault USM is deployed with a virtual appliance and you have completed the initial setup steps,launch a web browser and connect through its web UI at https:// Management IP .AlienVault Integration Guide
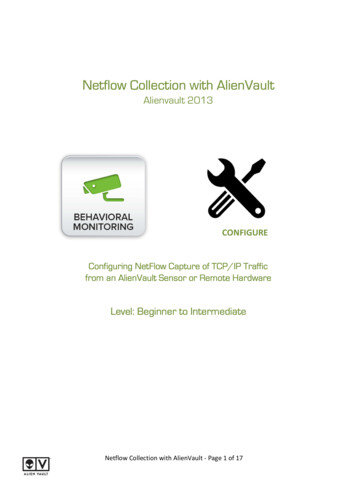
Add AssetsThere are several ways to add an asset or assets on AlienVault USM. In this documentation, we show you howto add an asset manually. To learn more about adding assets, see the AlienVault documentation.1.2.3.4.Navigate to Environment Assets & Groups Assets.Click Add Assets, and then Add Host. The New Asset window displays.In the Name text box, type a name to identify the asset. In our example, we name the asset Firebox.In the IP Address text box type the IP address of the Firebox. In our example, we type 10.0.1.1.AlienVault Integration Guide
5. The other fields are optional. Click Save to save the configuration.Enable Plugin1. Navigate to Environment Assets & Groups Assets.2. Select the Firebox asset you just added to your AlienVault configuration.3. Click.4. Click the Plugins tab.5. Click Edit Plugins.AlienVault Integration Guide
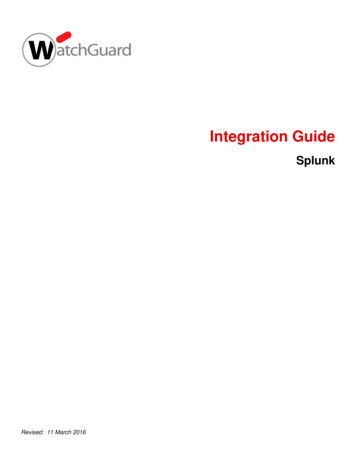
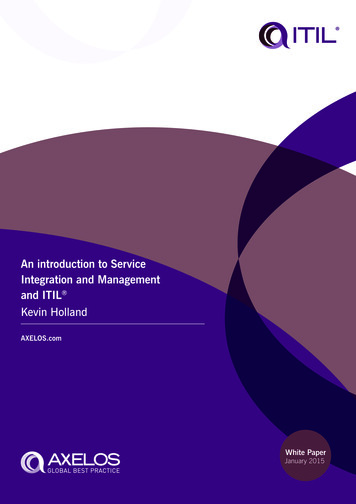
6. Use the drop-down menus to set the Vendor as WatchGuard and the Model to XTM Series. TheVersion is optional.7. Click Save.Set Up Your Firebox to Send Syslog Messages to AlienVault1. Connect to your Firebox with Policy Manager or Fireware Web UI. In this document, we use PolicyManager.2. Select Setup Logging.AlienVault Integration Guide
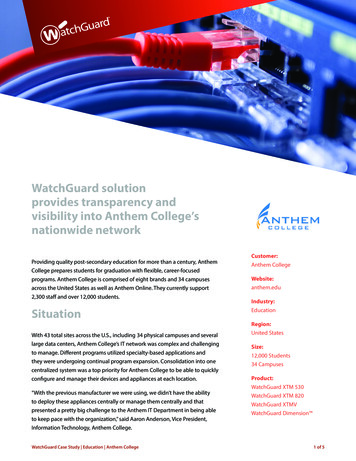
3. Enable the Send log messages to this syslog server check box.4. In the IP address text box, type the AlienVault Management IP address. In our example, that IPaddress is 10.0.1.2.5. From the Port drop-down list, select 514.6. From the Log format drop-down list, select Syslog.7. Save the configuration changes to your Firebox.Test the IntegrationUse these steps to make sure that Firebox syslog messages are correctly sent to AlienVault USM.AlienVault Integration Guide
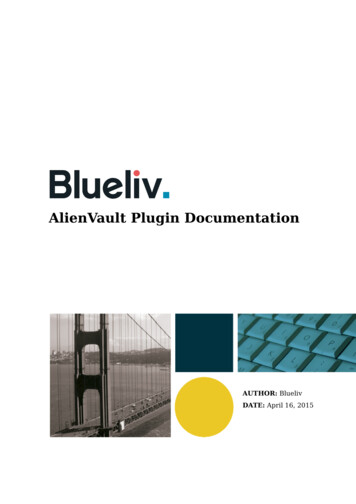
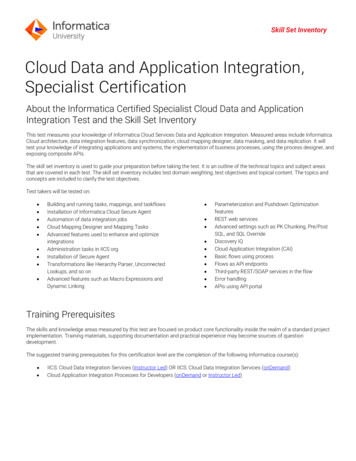
1. In the AlienVault web UI, navigate to ANALYSIS SECURITY EVENTS (SIEM). From the DATASOURCES drop-down list, select Watchguard and click GO to search for events that were generatedthrough the WatchGuard plugin. The Events display will look something like this:2. Double-click an Event to view details.AlienVault Integration Guide
AlienVault Integration Guide
For more information on how to enable the plugin see the AlienVault Plugins Management Guide. Set Up AlienVault USM . After AlienVault USM is deployed with a virtual appliance and you have completed the initial setup steps, launch a web browser and connect through its web UI at https:// Management IP .File Size: 342KB