Transcription
How to Configure a MOXA Device 1RESCUELOGIC Software by Cadgraphics www.RescueLogic.com (612) 722-3233
How to Configure a MOXA DeviceA RescueLogic Technical BulletinCadgraphics IncorporatedMakers of RescueLogic Software for Fire and Security SystemsPO Box 11737St. Paul, MN 55111-0737www.rescuelogic.com(612) 722-3233“Safety Made Simple”June 2014
How to Configure a MOXA Device 1How to Configure a MOXA DeviceA MOXA Device — an NPort serial device server — makes it easy to connect your alarm panels to an Ethernet network so you can monitor them with RescueLogic software.Things You’ll NeedYou will need: A MOXA NPort 5110A serial device server. MOXA utility software. You’ll get a software CD with each device. You can also download the softwarefrom the MOXA website at www.moxa.com. Network information. You’ll need to get a static IP address from the network administrator wherever aserial server is to be installed. For each serial server, the network administrator should also providevalues for the Subnet Mask, Default Gateway, and possibly DNS Servers. (See page 9 for more details.) The network administrator should also know that the serial servers will connect using, by default, TCPPort 4001. It can be changed. TCP Port 23 is a common alternate. (See page 7 for the screen with theTCP Port setting.) Serial Port information. The alarm panel manufacturer’s documentation should show you the RS232serial port settings. These include: baud rate; data bits, stop bits, and parity. See page 8 for the screenwith serial settings to match up with the settings of your alarm panel. You will also need the wiringinformation for the RS232 (or EIA232) connection. Many alarm panels suggest a serial printer would bean optional accessory wired to this port.Helpful Hint: This guide is illustrated with actual RescueLogic screen images, which were captured on acomputer that runs Windows 7. If your computer uses a different Windows operating system, your RescueLogicwindows might look different, but you will follow the same step-by-step procedures.RESCUELOGIC Software by Cadgraphics www.RescueLogic.com (612) 722-3233
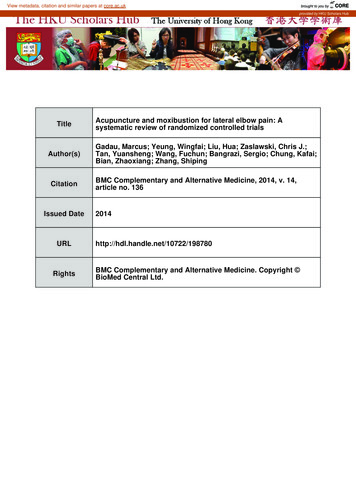
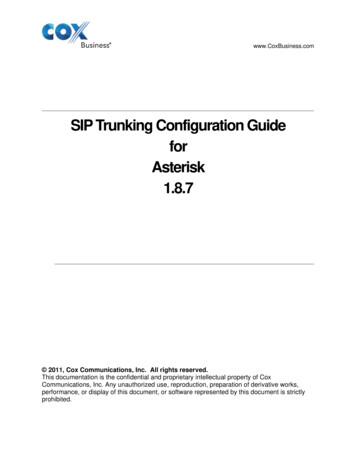
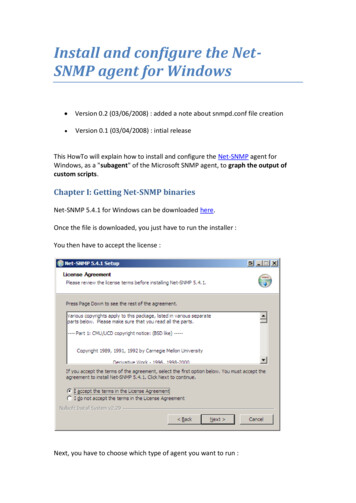
Instructions2InstructionsTo begin, insert the CD or download the install program from the web. Then run the NPort Search Utility from yourWindows menu.The Search Utility will open. Click the “Search” button to continue.Helpful Hint: The default IP address of a MOXA NPort is 192.168.127.254. If you set your LAN card configurationsettings with an IP address in the same subnet (such as 192.168.127.100), you do not necessarily need theSearch Utility software. Just skip to the web configuration shown on page 6, and type 192.168.127.254 in theAddress bar of your browser.RESCUELOGIC Software by Cadgraphics www.RescueLogic.com (612) 722-3233
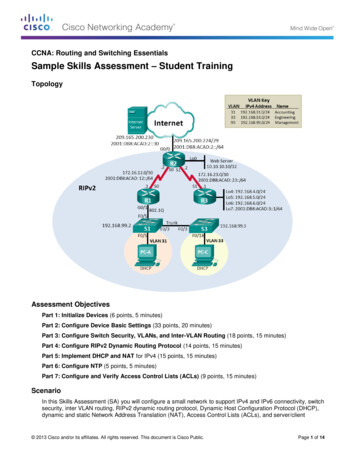
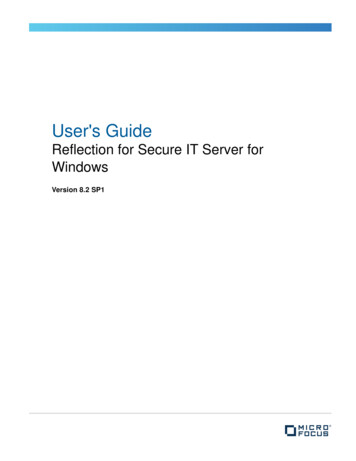
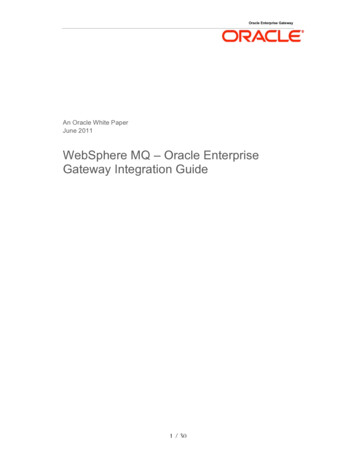
InstructionsA new popup window titled “Searching” will appear for several seconds, list any MOXA NPorts, then disappear.After the search window disappears, the list on the list window should show the NPort server with the default IPAddress 192.168.127.254. Double-click the list item to open a browser window and configure.RESCUELOGIC Software by Cadgraphics www.RescueLogic.com (612) 722-32333
InstructionsThe NPort configuration screen will appear in a web browser. The IP Address of the server will show in yourbrowser’s address bar. The left column has a menu for changing settings. You will need to use three of them:Operating Settings, Serial Settings, and Network Settings.If you like, you can also change the name of the server from the Basic Settings menu.When you are done with any changes on a page, click the Submit button on the bottom of the page.RESCUELOGIC Software by Cadgraphics www.RescueLogic.com (612) 722-32334
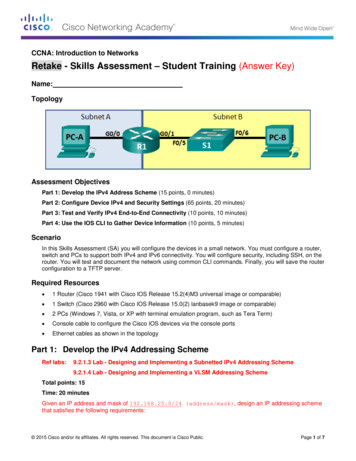
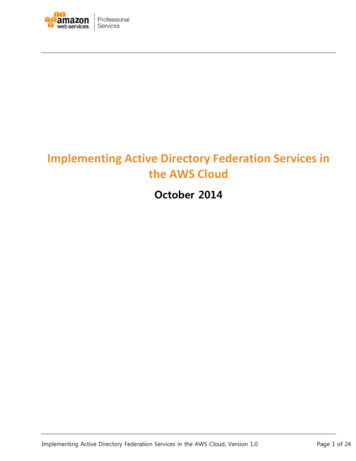
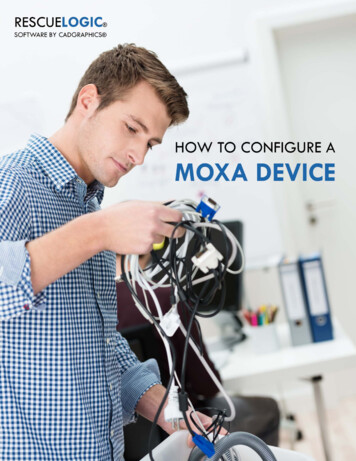
Configure Operating Settings5Configure Operating SettingsFrom the Main Menu in the left-hand column, click “Port 1” under the Operating Settings label.Change the default “RealCOM” operation mode to “TCP Server.” This setting allows the IP Address socket to besupervised by RescueLogic, rather than simulate a COM Port.Change TCP alive check time from “7” to “0.” This allows RescueLogic to reconnect immediately when SystemMonitor is restarted. The default 7 minutes would make the server wait that long before a reconnect.Change Max connection from “1” to “4” to allow connections from remote computers for testing.Note the default “4001” setting for “Local TCP Port.” The IP Address and this port number are the values that youwill enter in RescueLogic for the socket connection.Click “Submit.”Now click “Save/Restart.”RESCUELOGIC Software by Cadgraphics www.RescueLogic.com (612) 722-3233
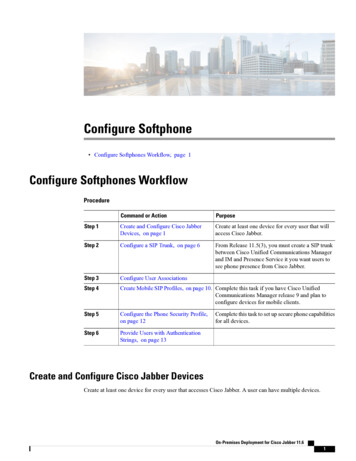
Configure Serial Settings 6Configure Serial SettingsThe serial settings of the NPort must match the alarm panel or printer interface module that you will connect to.Click “Port 1” on the left menu column, under Serial Settings. Set the baud rate, data bits, stop bits, and parity tomatch the values specified in the alarm system manufacturer’s instructions.Click “Submit.”On the page that appears, click “Save/Restart.”RESCUELOGIC Software by Cadgraphics www.RescueLogic.com (612) 722-3233
Configure Network SettingsConfigure Network SettingsClick “Network Settings,” under the “Main Menu” in the left-hand column. The network administrator should haveprovided a static IP Address for use with each serial server. Fill in the blanks to match your system’s information:change the IP Address, Gateway, Netmask and DNS Servers. Leave IP configuration set with the default value“Static.”The SNMP settings are not used, so you can leave the factory defaultsScroll to the bottom and click “Submit.”Another page appears to confirm that you are ready to make the changes permanent. Click “Save/Restart.”RESCUELOGIC Software by Cadgraphics www.RescueLogic.com (612) 722-32337
Configure Network Settings8The IP Address is now changed, and your browser must be changed to match.When you click on a link, you might see a page with a message that the page failed to load.Type the changed address in your browser’s Address bar and Refresh to see the MOXA configuration pageagain.Your serial server is now ready to communicate with RescueLogic. See the RescueLogic Users Guide chapter onCommunication Paths for the next steps.Helpful Hint: If your browser does not find the server with the default or the newly assigned IP Address, checkthe IP settings of your computer’s network adapter. The left three quad elements of the IP Address represent thenetwork, and the right quad element is unique for each endpoint device. Remember to write down yourcomputer’s original settings first. Contact your network administrator if these settings are not familiar to you.RESCUELOGIC Software by Cadgraphics www.RescueLogic.com (612) 722-3233
About the Author 9About the AuthorDan Horon is the President of Cadgraphics Incorporated, makers of RescueLogic software for fire alarm andsecurity systems. Dan was the chair of the NFPA Task Group on Circuits and Pathways when the chapter wasadded to NFPA 72. He still serves on the NFPA Protected Premises Technical Committee, as well as theTechnical Correlating Committee Task Group on Networks. You can email him at dan@rescuelogic.com.Copyright InformationCopyright 2014 by Cadgraphics Incorporated. All rights reserved. No part of this publication may be reproducedor transmitted in any form or by any means electronic or mechanical, including photocopy, recording, or anyinformation storage and retrieval system now known or to be invented, without permission in writing from thepublisher, except by a reviewer who wishes to quote brief passages in connection with a review written forinclusion in a magazine, newspaper, or broadcast.Patent InformationThis guide contains proprietary information. Cadgraphics and RescueLogic techniques and technology areprotected by United States Patents 6,229,429 and 6,369,695.Trademark InformationCadgraphics and RescueLogic are registered trademarks of Cadgraphics Incorporated. “Safety Made Simple” isthe service mark of Cadgraphics Incorporated. Other products mentioned herein are used for identificationpurposes only and may be trademarks or service marks of their respective companies. All terms mentioned in thisbook that are known to be trademarks or service marks have been appropriately capitalized. CadgraphicsIncorporated cannot attest to the accuracy of this information. The use of a term in this guide should not beregarded as affecting the validity of any trademark or service mark.DisclaimerAlthough every precaution has been taken in the preparation of this guide, the author and the publisher assumeno responsibility for errors or omissions. The information in this guide is subject to change without notice toimprove reliability, design, and function. This guide does not represent a commitment or a contract on behalf ofCadgraphics Incorporated. In no event will Cadgraphics Incorporated, its agents, or its representatives be liablefor direct, indirect, special, incidental, or consequential damages arising out of the use or inability to use theproduct or documentation, even if advised of the possibility of such damages. The entire risk as to the results andperformance of Cadgraphics RescueLogic software is assumed by you.RESCUELOGIC Software by Cadgraphics www.RescueLogic.com (612) 722-3233
PO Box 11737 St. Paul, MN 55111-0737 www.rescuelogic.com (612) 722-3233 “Safety Made Simple” June 2014 . How to Configure a MOXA Device 1 RESCUELOGIC Software by Cadgraphics www.RescueLogic.com (612) 722-3233 How to Configure a MOXA DeviceFile Size: 987KB