Transcription
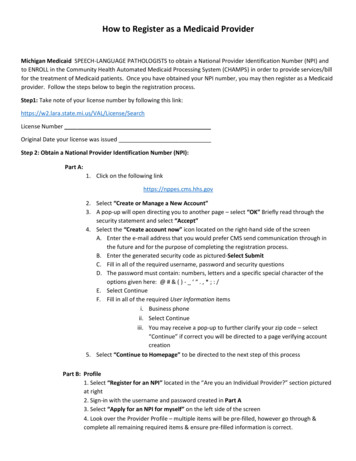
How to Register as a Medicaid ProviderMichigan Medicaid SPEECH-LANGUAGE PATHOLOGISTS to obtain a National Provider Identification Number (NPI) andto ENROLL in the Community Health Automated Medicaid Processing System (CHAMPS) in order to provide services/billfor the treatment of Medicaid patients. Once you have obtained your NPI number, you may then register as a Medicaidprovider. Follow the steps below to begin the registration process.Step1: Take note of your license number by following this hLicense NumberOriginal Date your license was issuedStep 2: Obtain a National Provider Identification Number (NPI):Part A:1. Click on the following linkhttps://nppes.cms.hhs.gov2. Select “Create or Manage a New Account”3. A pop-up will open directing you to another page – select “OK” Briefly read through thesecurity statement and select “Accept”4. Select the “Create account now” icon located on the right-hand side of the screenA. Enter the e-mail address that you would prefer CMS send communication through inthe future and for the purpose of completing the registration process.B. Enter the generated security code as pictured-Select SubmitC. Fill in all of the required username, password and security questionsD. The password must contain: numbers, letters and a specific special character of theoptions given here: @ # & ( ) - ‘ “ . , * ; : /E. Select ContinueF. Fill in all of the required User Information itemsi. Business phoneii. Select Continueiii. You may receive a pop-up to further clarify your zip code – select“Continue” if correct you will be directed to a page verifying accountcreation5. Select “Continue to Homepage” to be directed to the next step of this processPart B: Profile1. Select “Register for an NPI” located in the “Are you an Individual Provider?” section picturedat right2. Sign-in with the username and password created in Part A3. Select “Apply for an NPI for myself” on the left side of the screen4. Look over the Provider Profile – multiple items will be pre-filled, however go through &complete all remaining required items & ensure pre-filled information is correct.
How to Register as a Medicaid Provider5. For “Is this a Sole Proprietor?” select YES6. Next Select AddressA. Click “Add Business Mailing Address”B. You will enter your employer mailing addressC. Enter employer telephone numberD. Click SaveE. You may be prompted via pop-up to select a more standardized address – select “AcceptStandardized Address”F. Click “Add Practice Location”G. Click the box in from of “Same as Mailing Address” to auto-fill all required itemsH. Click Save7. Next Click Other IdentifiersA. This section is optional & therefore you will not enter any information & simply select next atthe bottom of the screen to move on to the Taxonomy section.B. Under Taxonomy – choose your rolei. Speech-Language Pathologistii. Taxonomy #: 235Z00000Xiii. Enter your License number and State Issued from Step 1iv. Select Save8. Next Select Contact InfoA. Click the box in front of “Contact Person is same as Myself” to auto-fill of the of the requireditems9. Next Select Error CheckA. All required items should now appear green – if any item appears red please go back &correct before selecting the next button.10. Next Select SubmissionA. Click in the check box in front of the statement “I certify that this form is being completedby, or on behalf of, a health care provider as defined at ” Select Submit11. Your NPI number will arrive in your email in-box in the second email from npienumerator.com12. Create a folder in your in box to save these emails NPI13. Your NPI number will be the same regardless of your employer.14. If you obtained an NPI while employed elsewhere, you should go to website to update employer(this can be done later: not crucial to the CHAMPS process).Step 3: Register as a Medicaid ProviderPart A: Create an Account1. Follow the link below to create an account with n/authenticate?URL /2.Click Sign-up Profile InformationA. Fill in the required information
How to Register as a Medicaid ProviderB. Use the same e-mail used to set-up the NPI from aboveC. Enter work phoneD. Answer the verification questionE. Click the “I agree to the terms & conditions” check box3. Next Select Security SetupA. Enter your username following the rules given and note it below as you may need it for futurereferencei. UsernameB. Create a password using the rules givenC. Choose your preference Security OptionD. Click on Create Account Confirmationi. After receiving confirmation of creation of your account from Michigan.gov Select Login –this will return you to the Michigan.gov HomepagePart B: Sign-up in the CHAMPS (Community Health Automated Medicaid Processing System) system o1. Log-in with the username & password you created in Part A.2.Click on the Request Access Link Search ApplicationA. Type CHAMPS in the search box & select the singular CHAMPS optionB. Click on the CHAMPS link appears at the bottom of the screenC. Briefly review the terms & conditions as desired and select the “I agree to the terms & condition”button.D. Select Request Access Additional InformationE. Verify all presented information is correctF. Leave CHAMPS user type as “Provider/Other”G. Select Submit Confirmationi. Once you have received confirmation of your CHAMPS application from Michigan.gov ExitPart C: Complete the enrollment process1. Select the CHAMPS link at the bottom of the screen and Acknowledge/Agree to the presented Terms &Conditions. You will be diverted to the CHAMPS Provider Enrollment PageA. Select New EnrollmentB. Leave the select of Individual/Sole ProprietorC. Click Submit at the bottom left of the screenA. A pop-up will open requesting personal informationF. Fill in all required informationi. Leave applicant type as “Rendering/Servicing Only”ii. Enter NPI number from Step 2, Part B above or reference the confirmation emailreceived.iii. Enter the email address provided in the previous stepsa. For Home Addressb. Enter the City & State in the blank space below “OTHER”
How to Register as a Medicaid Providerc. Enter the Zipd. Hit the “Validate Address” Button to auto-fill the drop down options.e. Click FinishG. Note your Application ID Number below as you will need this information to complete theregistration processApplication IDH. Click OK in the bottom Right corner to close the pop-up2.Select Add SpecialtiesA. Click Add at the top leftB. For Provider Type Select “Non-Physicians”C. For Specialty select Speech Language Pathologisti. There is no need to fill in an “End Date”ii. Select Ok in the bottom right of the screeniii. Once all Specialties and Sub-Specialties have been selected; Click on PrimarySpecialty Under Primary Specialty/Sub-specialty select the only available optiona. Do not select “yes” for Board Certificationb. Start date will be auto-filled and will not allow for changesc. There is no “End Date” required. Click Save, Click Closeiv. Click Close to be returned to the Provider EnrollmentD. Select Associate Billing Provider: (your employer)i. Click Add Under Type select NPIii. Enter Employer NPI (assume this is required but not clear on private practice)iii. Enter Start Date as todays date. There is no need to enter an “End Date”iv. Select Confirm Provider. Select Okv. Select CloseE. Select Add License/Certification/Otheri. Click Add Under License/Certification/Other Select “State ProfessionalLicense” oii. Enter All required informationa. Enter the Issue Date of your license from Step 1 without slashesb. Enter you License Number from Step 1. There is no need to enter an “End Date”c. Select Confirm License & the “End Date” will auto-filld. Select OKe. Select CloseF. Skip Add Provider Controlling InterestG. Select Add Taxonomy DetailsA. Select Addi. Enter Corresponding Taxonomy Codeii. 235Z00000X Speech Language Pathologist
How to Register as a Medicaid Provideriii.For start date enter your License Issue Date from the previous steps. Select ConfirmTaxonomy. Click OKiv. Click CloseB. Skip Associate MCO PlanC. Skip Upload DocumentsD. Select Complete Enrollment Checklist Answer the questions as appropriatei. Answer YES for accepting new patientsii. Click Save at the upper left corneriii. Click CloseE. Select Submit Enrollment Application for ApprovalF. You will be directed to a page for Final Submissioni. Select Nextii. Scroll down to the bottom & click on the check box next to the agreement statementiii. Select Submit Application in the upper left corneriv. Click CloseStep 4: Verify your Provider Enrollment ApplicationA. Click on Provider at the upper leftB. Select Track ApplicationC. Enter the Application Number noted in the previous stepsD. Click NextE. Enter Additional security informationF. Click SubmitG. If you have correctly completed the enrollment process, you will see a message stating “Yourapplication is currently In-Review by the Provider Enrollment Unit. You cannot make anymodifications to your enrollment information at this time” at the top of the screen.Following are links to power point presentations that have more in depth instructions for completing this process 2008 sso registration instructions Final Copy 228984 dual rendering servicing 229456 7.pdf
Part B: Sign-up in the CHAMPS (Community Health Automated Medicaid Processing System) system o 1. Log-in with the username & password you created in Part A. 2.Click on the Request Access Link Search Application A. Type CHAMPS in the search box & select the singular CHAMPS option B. Click on the CHAMPS link appears at the bottom of the screenFile Size: 222KB