Transcription
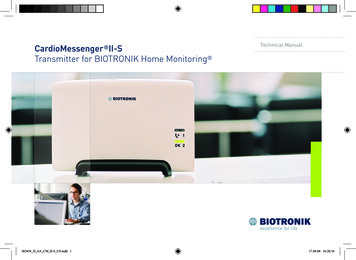
CRM // BIOTRONIK Home Monitoring CardioMessenger SmartenesfrTechnical ManualManual técnicoManuel technique420160--H GA CardioMessenger-Smart e-MUL Cover.indd 121.03.2016 12:35:35
You can also find the CardioMessenger Smart manualin the Internet by visiting the BIOTRONIK --H GA CardioMessenger-Smart e-MUL Cover.indd 221.03.2016 12:35:35
FrançaisEspañolEnglish420160--H GA CardioMessenger-Smart e-MUL.book Page -1 Thursday, March 24, 2016 11:34 AM420160--H
420160--H GA CardioMessenger-Smart e-MUL.book Page 1 Thursday, March 24, 2016 11:34 AM1Table of ContentsTable of ContentsIntroduction . . . . . . . . . . . . . . . . . . . . . . . . . . . . . . . . 2First Steps . . . . . . . . . . . . . . . . . . . . . . . . . . . . . . . . . 3Check the Package Contents . . . . . . . . . . . . . . . . . . . . . . . . .Where Do I Put the CardioMessenger? . . . . . . . . . . . . . . . . .How Do I Connect the CardioMessenger? . . . . . . . . . . . . . . .How Do I Use the CardioMessenger? . . . . . . . . . . . . . . . . . . .How Do I Turn Off the CardioMessenger? . . . . . . . . . . . . . . .35689The CardioMessenger Icons . . . . . . . . . . . . . . . . . 11Functions . . . . . . . . . . . . . . . . . . . . . . . . . . . . . . . . . 12Self-Test . . . . . . . . . . . . . . . . . . . . . . . . . . . . . . . . . . . . . . . . . 12Call Back Function . . . . . . . . . . . . . . . . . . . . . . . . . . . . . . . . . 13Error Resolution . . . . . . . . . . . . . . . . . . . . . . . . . . . 15Error type A. . . . . . . . . . . . . . . . . . . . . . . . . . . . . . . . . . . . . . . 16Error type B. . . . . . . . . . . . . . . . . . . . . . . . . . . . . . . . . . . . . . . 17Error type C. . . . . . . . . . . . . . . . . . . . . . . . . . . . . . . . . . . . . . . 18Handling. . . . . . . . . . . . . . . . . . . . . . . . . . . . . . . . . . 20Charging . . . . . . . . . . . . . . . . . . . . . . . . . . . . . . . . . . . . . . . . .Cleaning . . . . . . . . . . . . . . . . . . . . . . . . . . . . . . . . . . . . . . . . .Maintenance . . . . . . . . . . . . . . . . . . . . . . . . . . . . . . . . . . . . . .Disposal. . . . . . . . . . . . . . . . . . . . . . . . . . . . . . . . . . . . . . . . . .21232324Precautionary Measures . . . . . . . . . . . . . . . . . . . . 25Guidelines . . . . . . . . . . . . . . . . . . . . . . . . . . . . . . . . 26Appendix . . . . . . . . . . . . . . . . . . . . . . . . . . . . . . . . . 30Technical Data . . . . . . . . . . . . . . . . . . . . . . . . . . . . . . . . . . . .Symbols on the Device . . . . . . . . . . . . . . . . . . . . . . . . . . . . . .Legend for the Label . . . . . . . . . . . . . . . . . . . . . . . . . . . . . . .Electromagnetic Emitted Interference according toIEC 60601-1-2 . . . . . . . . . . . . . . . . . . . . . . . . . . . . . . . . . . . . .Electromagnetic Resistance to Interference according toIEC 60601-1-2 . . . . . . . . . . . . . . . . . . . . . . . . . . . . . . . . . . . . .Recommended Safe Distances between Portableand Mobile RF Communications Equipment and theCardioMessenger . . . . . . . . . . . . . . . . . . . . . . . . . . . . . . . . . .303132343540EnglishTable of Contents
420160--H GA CardioMessenger-Smart e-MUL.book Page 2 Thursday, March 24, 2016 11:34 AM2 nical ManualCardioMessenger SmartDear Patient:You have received a device with the additional HomeMonitoring function by BIOTRONIK.How Home Monitoring worksYour device (1) is equipped with a special transmitterwhich sends cardiac information to your CardioMessenger (2). This usually happens at night.The transmission power from your device is low and doesnot impair your health in any way. Its limited transmissionrange, however, requires the use of the CardioMessenger.The CardioMessenger collects the information andtransmits it to the BIOTRONIK Service Center (4) asencoded messages via a mobile connection (3).Here, the messages are decoded and can be viewed byyour physician (5) on a protected web site.Usage of this additional data is specific to the patient andthe implanted device. Your physician will explain to youhow he or she will use the Home Monitoring function.Note: Home Monitoring is not an emergency system. Ifyou are not feeling well, contact a physician.
420160--H GA CardioMessenger-Smart e-MUL.book Page 3 Thursday, March 24, 2016 11:34 AMFirst StepsFirst StepsFirst Steps2399229-GTechnical ManualCardioMessenger SmartCheck the Package ContentsYour CardioMessenger is supplied ready for use, and youcan operate it immediately by inserting the power pluginto the wall outlet.However, prior to usage, check the CardioMessenger andits accessories for any visible damage and use onlyundamaged components.Return a damaged CardioMessenger to your physician.Use only the provided original power supply brick (see thetechnical data).Other equipment may impair proper functioning of theCardioMessenger and increase the emitted electromagnetic interference or decrease the CardioMessenger'sresistance to electromagnetic interference.English23
420160--H GA CardioMessenger-Smart e-MUL.book Page 4 Thursday, March 24, 2016 11:34 AM4 First StepsThe product package includes the CardioMessenger (1)with power supply brick (2), the quick reference guide (3)and the technical manual (4).(1)(2) Smart(3)CRM // BIOTRONIK Home Monitoring CardioMessenger Smartdeenesfritnl(4)GebrauchsanweisungTechnical ManualManual técnicoManuel techniqueManuale tecnico di istruzioniTechnische handleiding
420160--H GA CardioMessenger-Smart e-MUL.book Page 5 Thursday, March 24, 2016 11:34 AMFirst Steps5EnglishWhere Do I Put the CardioMessenger?At night, the CardioMessenger should be placed closeto your bed to ensure the nightly data transfer from theimplanted device.The bedside table is therefore the best location for yourCardioMessenger, as it usually meets the followingconditions: The CardioMessenger is placed on a solid base andcannot fall.The distance to the implanted device is less than 2 m(6 feet), so that regular data transmission from theimplanted device to the CardioMessenger at night isassured.Positioned on the bedside table, you can clearly seethe symbols on the CardioMessenger's display. Thisenables you to verify on a daily basis that it is ready forservice.
420160--H GA CardioMessenger-Smart e-MUL.book Page 6 Thursday, March 24, 2016 11:34 AM6 First StepsHowever, if the bedside table is made of metal, youshould not place the CardioMessenger directly on thetable. For example, place a stack of books to establisha distance of approx. 5 cm between the two so that themetal does not interfere with the device's data reception.Please take the following also into consideration: Do not place the CardioMessenger next to a televisionset, microwave oven, or a similar source of electromagnetic disturbance.You may hear noises typical of cellular phones if youplace the CardioMessenger too close to a radio alarmor a television set, for example. Do not expose the CardioMessenger to temperaturesexceeding 40 C (104 F). Do not put it in places where itis subjected to direct sunlight and do not put it directlyunder a halogen spotlight. Do not expose the CardioMessenger to temperaturesbelow negative 5 C (23 F). The power supply brickshould not be exposed to temperatures lower than O C(32 F). Protect the CardioMessenger against water and highhumidity.Do not place it in the bathroom.How Do I Connect the CardioMessenger?Your CardioMessenger is already configured and is readyfor use. You can operate it immediately by inserting thepower plug (see Appendix, p. 30 for the type) into the walloutlet.Note: Also refer to the included quick reference guide.
420160--H GA CardioMessenger-Smart e-MUL.book Page 7 Thursday, March 24, 2016 11:34 AM7However, proceed as follows if the plug has been disconnected during removal from the package or duringshipping:Connect the small plug (micro USB plug) on theright to the CardioMessenger.Make sure that the marking (white arrow) is onthe upper side of the plug.UP1The connector port is labeled with the followingsymbol:2Insert the power plug into the wall outlet.EnglishFirst Steps
420160--H GA CardioMessenger-Smart e-MUL.book Page 8 Thursday, March 24, 2016 11:34 AM8 First StepsMake sure that the outlet is easily accessible and notconnected to a light switch in order to prevent the CardioMessenger from accidentally being turned off.The CardioMessenger now turns on automatically andperforms a self-test.The CardioMessenger is ready for use once the self-testis completed and the following icons are displayed:If this is not the case, please refer to: Error Resolution,p. 15.How Do I Use the CardioMessenger?The CardioMessenger automatically receives the information from your implanted device and transmits it to theBIOTRONIK Service Center. Therefore, there are only afew points that need to be considered.Check once a day whether your CardioMessenger isswitched on and ready for use.This is indicated by the following icons:If you want to use the CardioMessenger in mobile operation, we recommend that you make a habit of charging itevery night on the bedside table.
420160--H GA CardioMessenger-Smart e-MUL.book Page 9 Thursday, March 24, 2016 11:34 AMFirst Steps9Since the CardioMessenger contains a mobile ("cellular")module, you may need to switch off the CardioMessengerfor safety reasons in areas where the use of mobilephones is prohibited (e.g., in an airplane).Such areas can be identified by the following or similarsigns:In some locations, the use of cellular phones is prohibitedto provide quiet zones (e.g., in a theater or cinema). As theCardioMessenger is silent, it does not need to be turnedoff in such locations.Press and hold the blue key on the right of the CardioMessenger for two seconds until the display turns off.EnglishHow Do I Turn Off the CardioMessenger?
420160--H GA CardioMessenger-Smart e-MUL.book Page 10 Thursday, March 24, 2016 11:34 AM10 First StepsThe blue key is labeled with the following symbol:The CardioMessenger is switched off.Note: The functions of your implanted device are notaffected by the CardioMessenger at any time.Your implanted device remains fully functional even ifthe CardioMessenger is not ready for use.
420160--H GA CardioMessenger-Smart e-MUL.book Page 11 Thursday, March 24, 2016 11:34 AMThe CardioMessenger IconsThe CardioMessenger IconsThe CardioMessenger Icons3399229-GTechnical ManualCardioMessenger SmartThe CardioMessenger has the following icons:1Operation icon2Call back iconSee Call Back Function, p. 133Information iconSee Error Resolution, p. 154The battery icon is always displayedwith 1-3 bars according to the chargingstatus.When the CardioMessenger isconnected to the power supply brickand charging, a battery icon with asmall power plug is displayed.5English311
420160--H GA CardioMessenger-Smart e-MUL.book Page 12 Thursday, March 24, 2016 11:34 AM12 Functions4FunctionsFunctions4399229-GTechnical ManualCardioMessenger SmartSelf-TestThe CardioMessenger automatically conducts a self-testafter being connected.123All icons on the CardioMessenger are displayed.The CardioMessenger then checks the connection to the cellular phone network.The operation icon flashes and the battery icon isdisplayed.The connection test can take up to 15 minutes.Once the connection is established, theoperation and battery icons remain permanentlyactivated.The CardioMessenger is now ready for use.If the connection was not established, the informationicon flashes.Additional information can be found under: Error Resolution, p. 15.
420160--H GA CardioMessenger-Smart e-MUL.book Page 13 Thursday, March 24, 2016 11:34 AMFunctions13The call back function is an additional function that yourphysician can use in different ways. You will be informedby your physician if and how he or she will use thisfunction.For example, your physician can use the call back buttonto ask you for a call. Your physician can turn on the iconvia the cellular phone network. It will then flash for amaximum of three days.Contact your physician during office hours as soon as younotice that the call back icon is flashing.Turning off the call back iconTo turn off the call back icon, briefly turn off the CardioMessenger.1234Press the blue key on the right side of theCardioMessenger for about two seconds.All symbols disappear.Wait approximately ten seconds.Press the blue key again for approximately twoseconds.Note: If the CardioMessenger is connected to the powersupply brick, it starts automatically. You neither have towait nor switch it on.EnglishCall Back Function
420160--H GA CardioMessenger-Smart e-MUL.book Page 14 Thursday, March 24, 2016 11:34 AM14 FunctionsThe CardioMessenger performs a self-test.The operation and battery icon is then displayed, and thecall back icon stops flashing.However, please do not forget to call your physician.
420160--H GA CardioMessenger-Smart e-MUL.book Page 15 Thursday, March 24, 2016 11:34 AMError ResolutionError ResolutionError Resolution5399229-GTechnical ManualCardioMessenger SmartIf your physician contacts you because device messagesare not being received but your CardioMessenger wasready for use during the period in question, you shouldremove possible sources of electromagnetic disturbancefrom the immediate vicinity of the CardioMessenger.Possible sources of electromagnetic disturbance can becommunication devices such as wireless home networkequipment, cellular phones, cordless phones, and theirbase stations.In the IEC 60601-1-2: 2007 standard, a distance of 3.3 m(3.6 yd) is recommended for these cases. (For more information, refer to Appendix, p. 30).Malfunctions on the CardioMessenger are indicated bythe icons.IconBehavior Operational statusOffError type A: No powersupplyFlashing Error type B: Self-testfailedFlashingError type C: Nomobile connectionEnglish515
420160--H GA CardioMessenger-Smart e-MUL.book Page 16 Thursday, March 24, 2016 11:34 AM16 Error ResolutionError type ANo power supplyThe operation icon is not displayed. The CardioMessenger is not ready for use.Make sure the micro USB plug is properly inserted intothe CardioMessenger. Make sure the power plug is properly inserted into thewall outlet. Make sure the outlet provides an electrical current, forexample by temporarily connecting the bedside lamp tothe outlet and turning the lamp on.If you do not find any errors, contact your physician.
420160--H GA CardioMessenger-Smart e-MUL.book Page 17 Thursday, March 24, 2016 11:34 AMError Resolution17Self-test failedAll symbols are flashing.Repeat the self-test as the CardioMessenger did notfinish it.The CardioMessenger is not ready for use.1234Disconnect the CardioMessenger from thepower supply brick if relevant.Press the blue key on the right side of theCardioMessenger for about two seconds.Leave the CardioMessenger turned off for aboutthirty seconds.Turn on the CardioMessenger by connecting it tothe power supply.The CardioMessenger starts and automatically repeatsthe self-test. When the self-test is completed, theCardioMessenger is ready for use.Note: The connection test can take up to 15 minutes.If all symbols continue to flash, the CardioMessenger isdefective. Return it to your physician.EnglishError type B
420160--H GA CardioMessenger-Smart e-MUL.book Page 18 Thursday, March 24, 2016 11:34 AM18 Error ResolutionError type CNo mobile connectionThe information icon flashes and the battery icon isdisplayed. Check the mobile connection since the CardioMessenger cannot connect to the BIOTRONIK ServiceCenter.1Press the blue key on the right side of theCardioMessenger for about two seconds.2Put the CardioMessenger in a place with bettermobile reception.Make sure that the distance to the device is stillless than 2 m (6 feet).Press the blue key again for approximately twoseconds.3
420160--H GA CardioMessenger-Smart e-MUL.book Page 19 Thursday, March 24, 2016 11:34 AM19The CardioMessenger restarts and performs the selftest. It checks the connection to the cellular phonenetwork. The operation and battery icon is displayed oncethe connection test is completed successfully. TheCardioMessenger is now ready for use.The connection test can take up to 15 minutes.If the CardioMessenger is generally unable to connect tothe cellular phone network from near your bed, contactyour physician.Note: Missing cellular phone network connection canoccur in rooms with thick walls or when travelling.EnglishError Resolution
420160--H GA CardioMessenger-Smart e-MUL.book Page 20 Thursday, March 24, 2016 11:34 AM20 Handling6HandlingHandling6399229-GTechnical ManualCardioMessenger SmartThe CardioMessenger is intended primarily for continuous operation at home because it receives informationfrom your implanted device once daily, usually at night,and forwards it to the BIOTRONIK Service Center.Make a habit of charging the CardioMessenger at night sothat it can be used in mobile operation during the day.Fully charged, you can use the CardioMessenger whilemobile for up to 48 hours, but note the following: Protect the CardioMessenger from direct contact withwater. For example, wear it under your coat or keep itin a bag when it rains.Do not carry the CardioMessenger inside the breastpocket of your shirt or jacket as the distance from hereto the implanted device could be less than 15 cm.To prevent skin irritations, do not carry the CardioMessenger directly on your skin.Do not bring the CardioMessenger into the vicinity offire.Do not expose the CardioMessenger to temperaturesbelow negative 5 C (23 F).Battery longevity for the CardioMessenger maydecrease at lower temperatures.Do not turn on the CardioMessenger if it has recentlybeen in a cold environment. Let it warm up slowly toroom temperature, since the resulting condensedwater may harm the electronic circuitry.
420160--H GA CardioMessenger-Smart e-MUL.book Page 21 Thursday, March 24, 2016 11:34 AM 21Do not operate the CardioMessenger in areas wherecellular phones are prohibited for safety reasons (forexample, in certain areas of the hospital or inairplanes).W WARNINGThe distance between the CardioMessenger and thedevice must be at least 15 cm (6 inches) so that theCardioMessenger does not interfere with the device.The CardioMessenger contains a mobile ("cellular")module. In order to prevent any interference with yourimplanted device, the prescribed minimum distancebetween the device and a cellular phone must also bemaintained between the device and the CardioMessenger.To disconnect the CardioMessenger from the alternatingcurrent supply, pull the power supply brick plug out of thesocket.ChargingYou should charge the CardioMessenger once beforeusing it for the first time.It is also recommended to operate the CardioMessengerwith the power supply brick on the bedside table to fullycharge the battery.Note: Do not charge the CardioMessenger with thepower supply brick in the outdoors.EnglishHandling
420160--H GA CardioMessenger-Smart e-MUL.book Page 22 Thursday, March 24, 2016 11:34 AM22 HandlingAt the very latest, the CardioMessenger must be chargedwhen the battery icon flashes.Proceed as follows:1Connect the CardioMessenger to the mainssupply.During charging, the individual segments of the batteryicon flash alternatingly and a small power plug isdisplayed.The three bars on the battery icon flash successively untilthe CardioMessenger is fully charged. Once it is fullycharged, all three bars are completely filled. Thecharging process usually takes three hours.Note: The CardioMessenger can be used with the powersupply brick if the battery is defective.Even if the battery is completely discharged, the CardioMessenger can still operate using the power supplybrick.If handled properly, the installed battery should supplythe CardioMessenger with 48 hours of power even after500 complete charging cycles (which is at least
CRM // BIOTRONIK Home Monitoring CardioMessenger Smart enechnical Manual T es Manual técnico fr Manuel technique 420160--H_GA_