Transcription
IVT Sandbox Guide1
ContentsOverview . 3Pre-requisites. 3Step 1: Reserve the IVT Sandbox: . 3Step 2: Attend Reservation and Review Workflow Commands . 9Step 3: Open Test Plan . 11Step 4: Execute Test Plan. 11Step 5: Submit Results . 11Endpoint IVT Test Section Summary & Steps . 12Section 1: DUT (Device-under-Test) Integration . 12Section 2: Manual Features and Services Tests . 12Section 3: Load Test . 13Section 4: Negative Tests . 13Section 5: Preliminary IVT Test Report Generation . 14Sandbox Instructions and Commands . 15Access Sandbox Servers via SSH or RDP . 18Invite Users to an Active or Scheduled Reservation . 19Enable/Disable Texting Feature . 20Sandbox Idle Timeout . 21Instructions to retrieve CDR from CUCM . 22Remote Phone Control Instructions . 25Remote Phone Control: 2-Way Audio Path Simulation . 27Command Details and Input . 29Useful Links . 302
OverviewWelcome to the Cisco DevNet Sandbox IVT Program. This document will guide you through theexecution of an Interoperability Verification Test (IVT) in the DevNet Sandbox.Pre-requisitesIf you are using this sandbox to complete an IVT in order to get a Cisco Compatibility Logo, you needto make sure you have completed the following: Registered/Approved Solution Program Partner Member (SPP) Approved SB IVT Request for product to be testedStep 1: Reserve the IVT Sandbox:Go to https://developer.cisco.com/sandboxClick here to Login3
Login to DevNet Portal using CCO IDCreate a new account if you do not have a CCO IDGo to SandboxClick either one to go to Sandbox main page4
Click here to view all Sandboxes & ReservationsClick here to view all SandboxesClick here to view reservations5
Reserve an Endpoint IVT Sandbox6
Access information and credentials will be sent to user’s email when sandbox is ready7
Reservation Schedule ConflictSystem will list available timeslots if your reservation schedule conflicts with an existingreservation8
Step 2: Attend Reservation and Review Workflow CommandsClick here and select “Reservations” to view all your active, scheduled or ended reservationClicking on the active or pending reservation link will take you to the respective IVT Sandbox9
Active EP IVT Sandbox Reservation10
Step 3: Open Test PlanOpen the test plan located under the “Endpoints” tab in the “Instructions” pane of the Sandbox Portal.This document will be used in conjunction with the Test Plan to instruct you on executing this IVT.Refer to Section Endpoint IVT Test Section Summary & Steps to guide you through this IVT.Step 4: Execute Test PlanBegin test execution and record test result for each test case. This completed document is required forcompletion of the IVT and will be reviewed by Cisco and stored with your IVT record.Step 5: Submit ResultsAfter you have completed all tests defined in the test plan and all workflow steps – go to the Wrap Upcommand Category to generate a preliminary IVT Test Report. This step collects test logs &performance data during the IVT session. You will need to submit the completed IVT test plan & testreport to Cisco.11
Endpoint IVT Test Section Summary & StepsSection 1: DUT (Device-under-Test) IntegrationTest Case: EP-1Workflow Steps1DescriptionEP Sandbox “Commands” pane, open Part1: SetupStarts basic call traffic (A B) to providebackground traffic during IVTRun Cmd: Start Traffic (Duration: 8 Days)2Pause 10 mins after starting traffic in step 2Ensure traffic is fully started before anyfurther testing3EP Sandbox “Commands” pane, open Part1: SetupProvision 3 DUT(s) in CUCM using SandboxcommandRun Cmd: My Endpoint Registration4Refer to EP-1 test case in Test Plan to update the 3 DUT(s) deviceattributes accordingly.Verify device network settings and dial toneUpdate device settings to validate DUTintegration5EP Sandbox “Commands” pane, open Part1: SetupRecord test step with a “Pass” when DUTis successfully integrated with CUCMRun Cmd: Record Connectivity ValidationSection 2: Manual Features and Services TestsTest Cases: EP-2 to EP-42Workflow StepsDescription1Launch Remote Phone Control via RDPRemote Phone Control User InstructionsAccess Credentials2Execute test cases: EP-2 to EP-42Make manual calls using Remote PhoneControl Tool (RPC)RPC Tool:Phone screen updates are delayed for Cisco IP Phone models 89XX & 9951 due to firmware limitation. Known issue.Workaround: Use 79XX, 88XX and 9971 models3Execute and validate each test case by following the test stepsfor each test case in the Test PlanExecute all the manual test cases4EP Sandbox “Commands” pane, open Part2: Functional TestingRun Cmd: Record Manual Call Test ExecutionRecord test step when all the manual testcases are executed.12
Section 3: Load TestTest Case: EP-43Workflow StepsDescription1Execute the Load Test preparation test steps in EP-43Enable auto-answer for the 3 DUT(s) listed intest case EP-432EP Sandbox “Commands” pane, open Part3: Load TestingRun Cmd: Load Test (Duration: 8hrs)Starts basic call traffic (A B) for 8 hrs3Check Output window for traffic statistics when traffic runendsEmail notification upon completionText notification - optionalSection 4: Negative TestsTest Cases: EP-44 to EP-47Workflow Steps1DescriptionEP Sandbox Commands pane, open Part4: Negative TestingRun Cmd: Start Traffic and Restart PUB (Duration: 30 mins)Starts basic call traffic (A B)CUCM-PUB is restarted automatically after 5mins of background trafficNote: Refer to test case EP-44 for detail test steps3EP Sandbox Commands pane, open Part4: Negative TestingRun Cmd: Start Traffic and Restart SUB (Duration: 30 mins)Starts basic call traffic (A B)CUCM-SUB is restarted automatically after 5mins of background trafficNote: Refer to test case EP-45 for detail test steps4Execute test case EP-45 & EP-46DUT power failure and network failure testsexecuted manuallyNote: Refer to test case EP-46 & EP-47 for detail test steps5EP Sandbox Commands pane, open Part4: Negative TestingRun Cmd: Record Negative Test Execution13Record test step after executing all thenegative tests
Section 5: Preliminary IVT Test Report GenerationTest Result Submission for ReviewWorkflow StepsDescription1Test Wrap-up and SubmissionComplete Test Report and submit for review.2EP Sandbox Commands pane, open Part5: Wrap UpRun Command: Generate ReportGenerates Preliminary IVT Test Report upon IVTcompletion with the following options:Preview - Email a preview of IVT Test Report to UserSubmit - Email IVT Test Report to User and CiscoClear All - Clears all logs and counters14
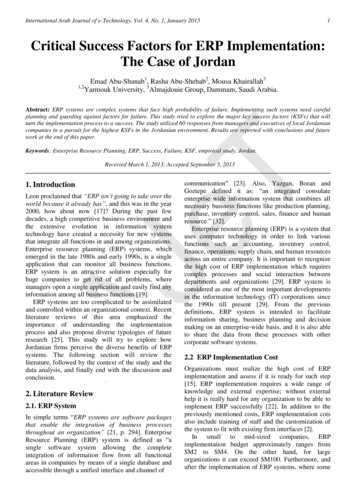
Sandbox Instructions and Commands1)2)From Sandbox portal, click on “Instructions” for sandbox description, access methods etc.Click on Commands for sandbox specific workflow commands15
16
17
Access Sandbox Servers via SSH or RDPTo access any servers in the sandbox topology, hover mouse on server in the virtual sandboxtopology, then select “Attributes”. You can use this method for getting credentials for any server thatis enabled for access in this sandbox18
Invite Users to an Active or Scheduled ReservationShared user will be notified via an email with sandbox access details19
Enable/Disable Texting FeatureEmail notifications sent to users for the following events:1.2.3.4.5.6.7.Sandbox Reservation startedSandbox is ReadyAny commands with “Start Traffic” is completedLoad Test CompletionGenerate ReportSandbox reservation endsAny errors encountered in any command stepsText Notifications sent to users for the following events:1. Sandbox is Ready2. Any commands with “Start Traffic” is completed3. Load Test CompletionNote: Text message for “Lab is Ready” will only be active for future reservations20
Sandbox Idle TimeoutWhen Sandbox is sitting idle for a certain period, you will see a screenshot similar to the one below.To get back into the SB Portal, do the following: Click on “Go to Login”Select “Go to Sandbox” if you are still logged into the DevNet Portal21
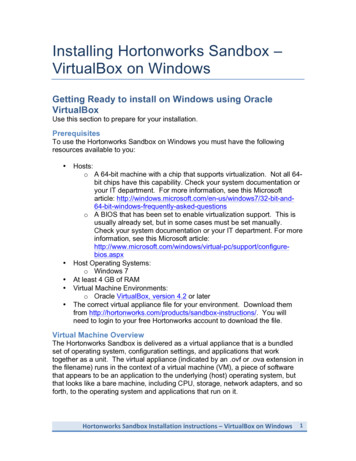
Instructions to retrieve CDR from CUCM1. Login to CUCM Serviceability Page: https://10.10.20.1/ccmservice/ (Administrator/ciscopsdt)2. Navigate to Tools CDR Analysis and Reporting3. Opens a CDR Analysis and Reporting window. Close the warning window.22
4. Navigate to CDR Search By User/Phone Number/SIP URL5. Enter the Calling or Called DN and click “Add Phone Number”23
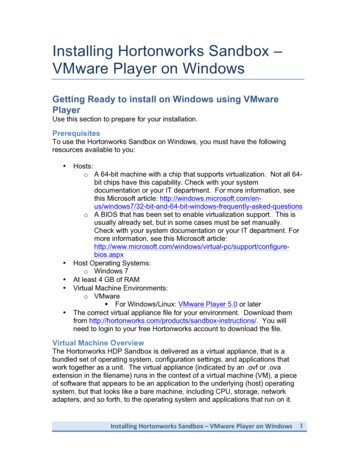
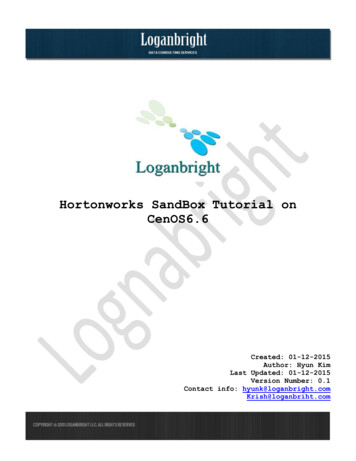
6. CUCM uses GMT timezone for CDR(s). Convert the Call Start Time to GMT7. Enter the start & end date and time accordingly and click “OK”8. Another window opens with the CDR summary record. Click on “View” to open the detailed CDR24
Remote Phone Control InstructionsThis guide provides instructions on how to use the Remote Phone Control Cisco IP Telephony utility application.PhoneView provides a real-time remote view of all your IP phones and allows you to group, filter and controlthe states of those phones from the RPC console. It simplifies management of Cisco IP Phones. In particular itprovides an intuitive graphical display of multiple IP phones' screens and allows you to manage them eitherindividually or in sensible groups.NOTEPhone screenshot updates are delayed for models 89XX & 9951. This is a limitation on the phonefirmware. 79XX, 88XX & 9971 models perform much more efficiently.Remote Phone Control User InstructionsStepsComments1RDP to LabServices Server: 10.10.20.100Username: ABC\AdministratorPassword: ciscopsdt2Double click PhoneviewLaunch RPC Console3RPC Console: File Open Mavericks.pvdLoad CUCM Phone database4RPC Console: Group Update AllSync up with CUCM Database5From Data Explorer, select the following options:Device Pool local mav poolDevice Pool remote mav poolStatus RegisteredRPC Console: Phone Screenshot Automatic UpdateDevices filtered by device pool &status populates the screen67shortcutCheck “Automatic Screenshot”Select a phone by clicking on the phone screenshot (phoneswith background image)Enable all automatic updatesSelected phone is highlighted.Note: Unregistered phones has no DN891011Right click on phones of interest and select “AutomaticScreenshot”Use phone keypad or command line to dial a number.Command Line Syntax: Dial: XXXX CR where XXXX DNNote: CLI dialing is faster than keypad dialingAutomatic phone screen updatesenabled for selected phonesMake a basic call to DN:XXXXUse appropriate keypad based onphone modelsSelect terminating phone, click “Answer” softkey on phonekeypad to answer callSelect phone, click “End Call” softkey on phone keypad toterminate callCall in “Connected” state25Call terminates normally
Remote Phone Control ConsolePhoneview Tips1.2.3.4.5.6.7.8.9.Phone screen size can be increased or decreased by slider bar at the bottomData Explorer Models (lists all phone models supported by tool)For optimum performance, turn on “Automatic Updates” for phones of interest only versus all phonesSupports most call featuresSelect 79XX keypad for 79XX Series and 89XX/99XX keypad for 89XX/99XX Series phonesRemote phone control supported on CUCM multi-cluster topologyAll Registered IP Phones has a background image and a DN assigned to itCommand Line dialing is faster than keypad dialing (Syntax :- Dial:XXXX CR where XXXX is the DN)Phone screenshot updates are delayed for models 89XX & 9951. This is a limitation on the phonefirmware. 79XX, 88XX & 9971 models perform much more efficiently.10. If RPC Tool is unstable, exit out of application and re-launch a new instance26
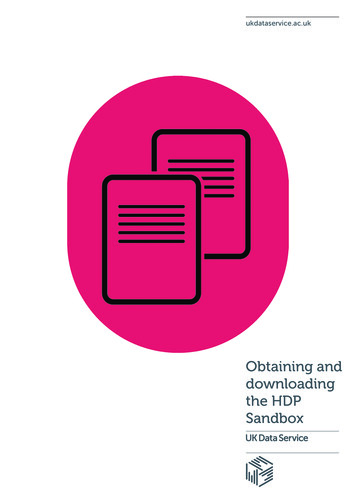
Remote Phone Control: 2-Way Audio Path SimulationTwo-Way Audio Path Simulation for calls originated & terminated to RPC Tool:1. Enable Audio and Video Playback on a local PC accessing RPC Tool Server via RDP2. Launch RDP Options Local Resources Settings Play on this computer3. Establish a stable call between Phone A and Phone B using the RPC Tool4. From RPC, select Phone A by clicking on it’s phone display – it will be highlighted5. Click on the “headphone” iconto start a monitoring session for that phone6. Green speaker iconwith monitoring notice displayed on the phone7. Repeat steps 4-5 for Phone B8. On the CLI, enter “Play:AreYouThere.raw” (male voice) and hit “Send” on Phone B9. Caller at Phone A should hear a male audio10. Select Phone A, on the CLI: “Play:AreYouThereF.raw” (female voice) and hit “Send”11. Caller at Phone B should hear a female audioImportant Note: Phoneview PC Volume On IP Phone Volume On No Headsets connected to IP Phones controlled by Phoneview27
28
Command Details and InputCommands are used to drive the IVT workflow for the required user interaction and steps to befollowed in the sequence presented. Command output can be reviewed in the Command OutputWindow at the bottom of the screen or in the Activity Log. Command actions are recorded as part ofthe test report data.Workflow CommandsThese logging commands are used only once and in sequence. Every step generates log duringan IVT session.EP IVT CommandsDescriptionStart TrafficStarts basic call traffic to simulate background traffic during IVT TestingMy Endpoint RegistrationRun command to provision & register any CUCM supported endpoint(s)Record Connectivity ValidationRun command after verifying product integration and validation with trafficRecord Manual Call Test ExecutionRun command to record completion of manual test case execution as defined in themanual functional tests section of the Test Plan.Load TestRun command to start basic call traffic run (Default Duration: 8 hours)Start Traffic and Restart PUBRun command to start traffic and after 5 mins of traffic, CUCM-PUB is restartedautomaticallyStart Traffic and Restart SUBRun command to start traffic and after 5 mins of traffic, CUCM-SUB is restartedautomaticallyRecord Negative Test ExecutionRun command to record completion of negative test case execution as defined in thenegative tests section of the Test Plan.Generate ReportRun command to preview and submit a preliminary ivt test report or clear test report Preview: Collect logs and sends an email of the test report to sandbox user Submit: Collect logs and sends an email of the test report to sandbox user and CiscoIVT team Clear All: Clears all logs and counters for a fresh start of IVT29
Utility CommandsThese user commands are generic and used interchangeably with the logging commands.CommandsDescriptionDevice StatusRun command to list the device status for a maximum range of 1000 DN(s)RepairEnvironmentRun command to reset the environment for a fresh start. Requires access code from IVTSandbox Support Team. The historical logs and performance data is retained.Note:To erase old reporting data, select “Wrap Up” category from SB Command pane:Run “Generate Report” with “Clear All” optionStop TrafficRun command to stop basic call trafficCommand Queue SupportThe table lists the commands that supports command queue.EP IVT CommandsSupport Queue (Y/N)Start TrafficNRecord Connectivity ValidationNRecord Manual Call Test ExecutionYLoad TestYStart Traffic and Restart PUBNStart Traffic and Restart SUBNRecord Negative Test ExecutionNUseful LinksSandbox Community Support: sandboxDevNet Sandbox: vNet: https://developer.cisco.com/30
6. CUCM uses GMT timezone for CDR(s). Convert the Call Start Time to GMT 7. Enter the start & end date and time accordingly and click “OK” 8. Another window opens with the CDR summary record.