Transcription
DanStem and NNF CPRFlow Cytometry Core FacilitySony SH800 Cell SorterQuick Reference Guide
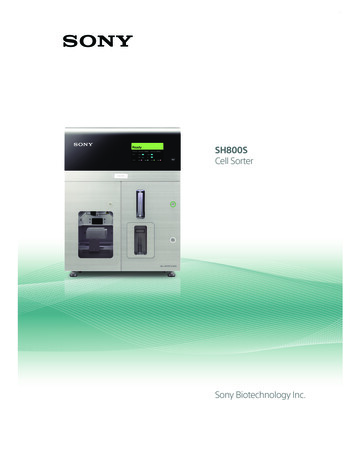
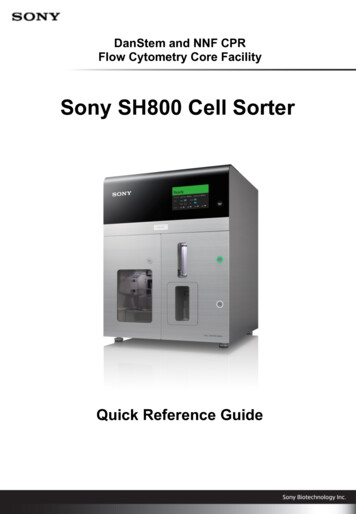
Introduction to Sony SH800The SH800 is a simple, ready-to-use, cell sorter developed by Sony CorporationMain Features1. Fully-automated setupAll setup steps, including optical alignment, droplet formation, side streamcalibration, and delay time adjustment, are automated using Sony-developedCoreFinderTM technology This completely eliminates all the complicated setupwork required with conventional cell sorters2. High-accuracy sortingEquipped with built-in analog-to-digital converter module for high-speed signalprocessing, using Sony electronics technology cultivated in the development ofconsumer devices. High-speed signal processing enables the SH800 to achievehigh-purity sorting performance3. Simple maintenanceThe SH800 uses a unique Sony-developed plastic sorting chip, created usingmicro-fabrication technology gained through experience with optical discs Thisallows disposable components to be employed, instead of using fixed, expensivequartz flow cells. The sample line and sample probe are also designed for easymaintenance4. Desktop size footprintEmploys integrated laser technology and compact mechanical design, making itapproximately 1/3rd the size of conventional cell sorters.[Width 55 cm (21 3/4 in.) / Depth 55 cm (21 3/4 in.) / Height 72cm (28 3/8 in.)]5. Easy-to-use softwarePowered by SH800 software, created by Sony, that performs all functions,including automatic setup, sorting, and acquired data analysis
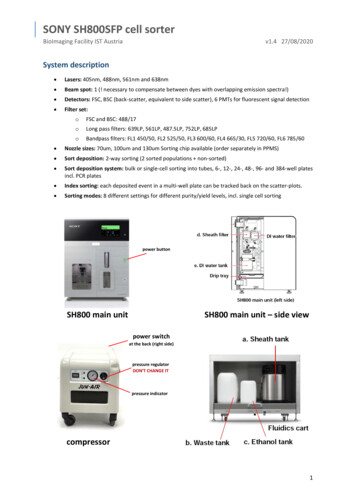
System Configuration and Name of the PartsFluidics cartHost computerSH800 main unitNote!Droplet formation maybecome unstable if the fluidicslines between the main unitand fluidics cart are exposedto air flow due to airconditioners, fans, openwindows, or other sourcesCompressor The host computer controls data acquisition and other hardware modules, andperforms analysis on acquired data. The SH800 main unit contains the lasers, detectors, electrical systems, and fluidicsflow systems. The fluidics cart contains the sheath tank, waste tank, and ethanol hutdown
Startup Preparationa. Sheath tankd. Sheath filterDI water filterFluidics cartb. Waste tankc. Ethanol tanke. DI water tankDrip traySH800 main unit (left side!f. Automatic setup beads and sorting chip1. heck that the sheath tank in the fluidics cart (a) is full with sheath fluid (PBS bag).2. heck that the waste tank in the fluidics cart is empty (b).3. During normal operation, ethanol is not required in the ethanol tank in the fluidicscart (c)* Fill the ethanol tank with ethanol only when cleaning the sheath line using ethanol(page 314. Open the fluidics maintenance door (left side) and check that there are no bubblesin the sheath filter (d). Check only. If there are bubbles, de-bubble the filter afterturning on the power (page 85. Open the fluidics maintenance door (left side) and make sure the DI water tank isfull (e) with milliQ water.6. Prepare the automatic setup beads (LE-B3001) and a sorting chip (LE-C3110) hutdown
Refilling the Sheath TankBefore startup, always check the sheathfluid level and refill the sheath tank ifnecessary (5 to 10 liters, 1.3 to 2.6 gallons).The sheath fluid consumption rate is about2.5 liters/8 hours If the sheath fluid runsout, acquisition will be stopped, so it isrecommended to always start with a fulltank.Sheath&tank&lid1.2.3.4.Check that the power is turned offCheck that the compressed air supply is turned offPull out the fluidics cart trayDisconnect the sheath air line (clear) and sheath fluid line (blue) from the top of thesheath tank.5. Release the residual air pressure from the tank using the ring-pull air relief valve,then remove the tank from the tray.6. Lift the lever securing the lid of the tank to open the lid.7. Lower the lid slightly into the tank, turn it 90 degrees, and then remove the lid fromthe tank.8. Refill the tank with sheath fluid9. Insert and secure the lid, and reconnect the sheath lines in the reverse order ofremoval.10.Place the tank back in the fluidics cart.Note!Droplet formation may be adversely affected if the temperature of the added sheath fluidis significantly different from that of the sheath fluid in the tankStore replacement sheath fluid, if possible, in a room with the same temperatureconditions as the room housing the main unit. Alternatively, place the replacementsheath fluid in the same room as the main unit and allow it to acclimatize before refillingthe sheath hutdown
Emptying the Waste TankBefore startup, always dispose of waste fluid andreplace with an empty waste tank1. Check that the power is turned off2. Pull out the fluidics cart tray3. Remove the cap of the waste tank and remove thenozzle4. Remove the tank from the fluidics cart5. Place an empty tank in the fluidics cart6. Reinsert the nozzle into the waste tank, tighten thecap, and stow the trayWaste tank capDispose of waste fluid in accordance with laboratoryrulesRefilling the DI Water TankBefore startup, always make sure the DI water is full1.2.3.4.Check that the power is turned offDisconnect the line from the top of the DI water tank.Undo the metal retaining clamp and remove the tankRemove the cap from the tank, refill with DI water upto the lip of the tank, and reattach the cap5. Place the tank back in the unit and reattach theclamp.DI water is principally used to clean the sample probeand sample line after each measurementRefilling the tank at the beginning of each day will ensurethere is sufficient fluid for a day of testing.DI water tank(inside fluidics maintenancedoor on left side of main Shutdown
Turning System Power OnSH800 main unitCompressorNote!Do not open the flip-updoor before turning onthe air supply!Doing so may damagethe unitPower switchTurn compressor on1 minute beforeturning on the mainunitKeyboardMouseComputerTurn on the system power in the following sequence.1. Press the power button on the right of the front panel of the SH800 main unitA green indicator lights up and system initialization starts (“Standby” appearsafter about 30 seconds).2. Turn on the host computer using the power switch on the top right of the screen3. Turn on the keyboard using the power switch on the top right.4. Turn on the mouse using the power switch on the aningShutdown
Checking and De-bubbling the Sheath FilterSheath filter(inside fluidics maintenancedoor on left side of main unit)After startup, always check that there are no bubbles inside the sheath filter.Remove any air trapped inside the filter.1. Check that “Standby” appears on the LCD display on the front of the main unitafter initialization finishes2. Open the fluidics maintenance door, remove the sheath filter from the retainingclamp (without disconnecting the connectors), tap the side of the filter 2 or 3times with your hand, and check for bubbles in the filter.If there is no air trapped in the filter, place the sheath filter back and reattachthe clamp (no further action is required). Reinsert the filter with the arrow onthe side of the filter facing up3. If there is air trapped in the filter, open the air release port on the top of thefilter to expel the trapped air. Hold a kimtowel wipe around the port to collectany sheath fluid overflow from the air release port.4. Flip the sheath filter upside down and repeat the procedure to release trappedair from the air release port on the bottom of the filter5. Reinsert the filter with the arrow on the side of the filter facing up and reattachthe Shutdown
System Startup dow"1. When the Windows login screen appears, enter your User ID and Password, andthen log in.User ID fcmPassword password2. Wait until the SH800 has finished the initialization and the monitor displays“Standby”3. After Windows starts, double-click the SH800 icon on the desktop to launch SH800softwareWhen the login window above appears, enter your Username and Password, andthen press [Login].Username: user1Password: (leave blank)After logging in, the Initial Instruments Setup window appears
System Startupacbd1. When the login window above appears, enter your Username and Password (a),and then press [Login] (b).Username: user1Password: (leave blank)2. If you would like to shutdown the instrument press [Shutdown] (c)3. To access different cleaning routines press CleaningShutdown
Chip DetectionQR codebRegister a sorting chip with the SH800 main unit1. Hold the QR code on the sorting chip package in front of the built-in camera on thehost computer.2. Check the information displayed on the screen for the sorting chip, and then click[Next] (b).The Chip Loading window appears. The sorting chip can be used for 24 hours after it is eaningShutdown
Loading a ChipabLoad the sorting chip in the SH800 main unit1. Open the flip-up door on the top of the front panel of the main unit2. Remove the sorting chip ejected automatically from the chip insertion slot3. Insert the new registered sorting chip (a).Insert the chip part-way into the chip insertion slot with the 100 m label facingtoward you. The chip loader automatically loads the chip* Do not exert excessive force when inserting the chip4. Click [Next] (b).The Laser Setting window ingShutdown
Laser SelectionExample. Display for 4-laser modelChoose your desired laser configuration for your experiment1. Placing a check mark in a checkbox selects the corresponding laser.2.The blue (488 nm) laser is mandatory for the system setup.3.4.You can change these settings later in the experimentClick gShutdown
Check the Optical Filter PatternabCheck that the optical filter pattern is correct for the selected combination of lasers1. Check that the physical optical filter pattern is the same as the displayed filterpattern (a).2. Click [Next] hutdown
Fluidics Check1. Automatic fluidics check starts2. Takes 5 min to complete3. Startup of the fluidics, followed by repeated de-bubbling of the sorting chip4. Stabilization of pressure and hutdown
Set Automatic Setup Beads6 dropsPlace holder with tube inthe sample loaderInsert in tube holderPour 6 drops of automaticsetup beads into sampletubeb&aStart automatic calibration1. Load a sample tube with automatic setup beads, then click OK (a).* If running samples without sorting, click [Analyzer mode] to reduce the timetaken for calibration (b).2. Calibration starts and automatically performs the 4 calibration steps listed on theleft side of the ngShutdown
Chip Alignmentab1. During Chip Alignment the sorter sets the optimal position of the sorting chip infront of the optical lense, where the peaks of the bead populations exhibit highestand most focussed fluorescence intensity.2. Alignment according to two bead populations: Beads with high and lowfluorescence intensity.3. First Step: Coarse mode (a), then Fine mode and finally SuperFine mode utdown
Droplet and Side Stream Calibrationba1. During Droplet Calibration the sorter identifies the optimal Droplet Clockfrequency to form stable droplets (a)2. During Side Stream Calibration the sorter sets the optimal Droplet Driveamplitude to produce stable side streams.3. The sorter sets the optimal voltage on the deflection plates to hit the target valuesfor the angle of the side streams utdown
Sort Delay Calibrationa1. The sorter calibrates the time for the optimal sort delay (a)2. First whole drops are being screened and then fine-tuning by changing the sortphase is Shutdown
End of Automatic CalibrationAuto Calibration final displayaHistogram and droplet appearance may vary slightly depending on the system)Check the following after automatic calibration finishes.1. The status is updated after each calibration step is finished.2. After all steps are finished, check that automatic calibration has “completedsuccessfully” (a).3. If successful, click [OK] to display the Create Experiment window Even when started in Analyzer mode, you can still perform automatic calibration forsorting from SH800 software to enable sorting operations (page hutdown
Creating an ExperimentabdceCreate Experiment windowCreate an experiment for measurement.1. Clicking [OK] at the end of automatic calibration automatically displays the CreateExperiment window. Alternatively, you can click [New] in the [File] tab in SH800 softwareto display the window at any time.2. Enter the name of the experiment, operator, cell type, and other information inExperiment Information]a).3. Enter the name of markers and select the corresponding fluorochromesb).4. Select the acquisition parameters (Area, Height, Width) to be measured for the scatteredlight and fluorescent channelsc). “Area” is enabled by default for the FSC and BSCchannels.5. Select the laser wavelengths to be used (d).6. When finished, click Create Experiment] to display the Experiment Explorer in the mainwindow hutdown
Creating an Experiment from TemplateabcCreate Experiment windowCreate an experiment for measurement.7. Alternatively, you can create new Experiments based on existing Experiment Templates8. You can also use Recent Experiments as a Template for creating new Experiments hutdown
New Experiment Startup ProcedureabNew Experiment Startup ProcedureCreate an experiment for measurement.1. Clicking [Create Experiment] at the end of Experiment Setup, will automatically open the[New Experiment Startup Procedure] window.2. You can choose to directly start by acquiring the first tube. This option is recommended,if you don‘t want to run automatic compensation procedure (a).3. You can also start the compensation wizard, if you wish to run automatic compensationprocedure (b).4. It is also possible to start the compensation wizard later in the software. Go to[Compensation] tab and click [Compensation Wizard].5. It is also possible to manually adjust compensation in the software. Go to[Compensation] tab and click [Manual nCleaningShutdown
SH800 Software OverviewbcadefMain windowSH800 Software Features Intuitive interface based on tabs and ribbons– Select a tab or plot to display the applicable operations for that object in theribbon– Tab with tube icon indicates the target tube for data acquisition (a) Undo/Redo functionUndo/Redo using icons in top left corner of the window (b) or using Ctrl-z/Ctrl-y keycombinations Independent zoom and automatic layout of plots and tables on the worksheet Configuration of main SH800 cytometer functionsClick the [Cytometer] tab (c).– Sorting automatic calibration (sorting also supported after starting in Analyzermode) (d)– Temperature control (cooling) of samples after sorting (e)– Sample agitation On/Off utdown
Configuring Data Acquisition Settingsgfb&cdeaDisplays the enabledlasers, interior lights, andlevels in the sheath,waste, DI water, andethanol tanksDisplays the dropletside streamsConfiguring data acquisition settingsTube 1 is created in the Experiment Explorer (a) All subsequent measurements aretied to this tube The first step is to configure settings for data acquisition by selectingparameters from the pull-down menus.* You can change the name of the tube by right-clicking it and selecting [Properties] orby selecting [Tube Information] in the Experiment Explorer.1. Set the sample stop condition (b).2. Select the trigger channel (normally set to FSC) (c).3. Select the recording stop condition (d).4. Select the recording stop condition limit value (up to 1,000,000,000 events) (e).5. Select the number of events to display (screen update condition) (f).The default value is 5,000 events. If the targeted cells have few events, the displaymay be updated before there are sufficient events to display6. Place a sample tube in the sample loader, and click the [Start] button to begin dataacquisition hutdown
Modifying Data Acquisition SettingscfbdaeModifying data acquisition settingsModify the data acquisition settings in the data acquisition control paneThis procedure describes an FSC-A vs. BSC-A plot as an example1. Click a plot to select it (a).The Plot Tools ribbon is displayed2. Set the plot type, X/Y axis types (Linear, Log, or Biexponential), zoom, and othersettings (b).3. Adjust [Sample Pressure] to set the desired event rate (c).4. Click [Detector & Threshold] (d) and adjust the detection sensitivity of the detectors,selecting values so that events appear on the plots (e).5. Click [Restart] to confirm that the desired results are being achieved hutdown
Plot Display SettingscbadPlot Display Settings1. Click [All Events] (or other Gate name appearing in the top left corner), a drop downmenu will open, where you can choose the population for display in the respective plot(a).2. Choose the plot type – Density, Dot Plot and Histogram (b).3. Add a New Plot to your analysis (Density, Dot Plot or Histogram), Remove or DuplicatePlots (c).4. Clicking on the Legend of X- and Y-axis of plots will open drop down menus, where youcan choose the parameter you want to display on the respective axis hutdown
Gating Acquired DataacbfdeGating acquired dataAdd gates to isolate event populations on the worksheet1. Click [Pause] to reduce consumption of the sample (a).2. Click the “All Events” plot to select it (b).The Plot Tools ribbon is displayed3. Select the gate shape that best fits the acquired data from [Gate] in the Plot Toolsribbon, and draw a gate around the events in the plot (c).4. Double-click the gate to add a child plot that contains only the data within the gate (d)The index letter for the source gate is displayed at the top left of the child plotChange the X/Y axis settings and other parameters as necessary, and proceed withanalysis5. Add and then double-click a gate in a child plot to add a grandchild plot to theworksheet (e).You add gates to child plots and grandchild plots in the same way as the “All Events”plot.The gates, including the parent-child relationship, are added to the Gates and Statisticstable hutdown
Acquiring DataabcAcquiring dataAcquire and record data after adjusting detector settings and adding gates1. Click [Resume] to restart the sample flow (a).2. Monitor [Event Rate] and check that the value is stable (b).3. Click [Record] to start recording the acquired data (c).When the stop condition is satisfied, acquisition and recording automatically stops,and the sample tube is unloadedTo stop recording before the stop condition is satisfied, click ngShutdown
Configuring SortingeabdcSorting settingsConfigure the sorting parameters in the sort control pane in the main windowClick [Next Tube] and prepare “Tube 1-1” for sorting.1. Set [Sample Stop Condition] to Recording and Sorting” (a).2. Set the sort [Mode] and [Stop Condition] (b).3. Select the samples to sort from the [To Sort] pull-down menus, and set the stopcondition values (c).4. Open the sorting area door, and place collection tubes and tube holder on thecollection stage. Make sure the collection tube holder is not sitting at an angleIt is recommended that the collection tubes be prepared with suitable cell capturemedia to prevent damage to cells. Fill 1/2 to 2/3 with.5. Close the door and click Load Collection] to move the collection tubes into position (d).6. Click [Resume] to restart the sample flow (e).Note that sorting does not start at this gShutdown
Starting SortingacbdSortingStart sorting1. Monitor [Event Rate] and check that the value is stable (a).2. When the value stabilizes, click Sort Start] to commence sorting (b).Sorting automatically stops when the Stop Value] condition is satisfied.3. Click [Record] to record the acquired data, if required (c).Recording automatically stops when the recording Stop Condition] is satisfied.4. When finished, click [Unload Collection] to unload the collection tube holder andremove the tubes hutdown
Reference: Verifying PuritycabdVerifying purityVerify the purity of the sorted samples.Prepare an appropriate dilution of the sorted sample in the collection tube, then wash thesample probe and sample line with DI water to remove any residual sample.1. Click [Next Tube] (a).This creates “Tube 1-2” with the same settings and gating inherited from “Tube 1” (b).2. Load a sample tube containing about 15 ml of DI water, set [Sample Pressure] to themaximum value of 10, and click [Start to start cleaning (c).3. Click [Stop] when the Event Rate] is as close to zero as possible.4. Click Next Tube] again to create a new tube, load the sorted sample tube, reduce the[Sample Pressure] to a value of 5 and click Start] (c).Data acquisition/analysis starts, and automatically stops when the [Stop Count]condition is satisfied.5. Verify the purity in the Gates and Statistics table hutdown
Adjusting Compensation (start wizard)bacAdjusting fluorescence compensationAdjust the fluorescence compensation using the compensation wizardPrepare a negative control sample and positive control samples1. Click the Compensation tab of the ribbon (a).2. Click Compensation Wizard] (b).The Compensation Wizard starts (c).Follow the instructions in the wizard to perform adjust leaningShutdown
Cleaning the Sample Line (Bleach)abSample line cleaning (bleach)Clean the sample fluidics system, comprising the sample probe and sample line withbleach.Prepare a 1% bleach solution1. Click the Cytometer tab of the ribbon (a).2. Click [Bleach Cleaning] (b) and follow the instructions to load a 15 ml tube with 10 mlof bleach solution in the sample loaderDo not overfill with bleach. The level of DI water in the next cleaning phase must behigher than the level of bleach in order to remove all bleach from the sample probe3. When cleaning is finished, unload the sample hutdown
Cleaning the Sample Line (DI water)abSample line cleaning (DI water)Clean the sample fluidics system, comprising the sample probe and sample line, with DIwater.Always perform DI water cleaning before shutting down.Prepare a 15 ml tube with 12 ml of DI water (always add more DI water to cleaning tubesthan bleach to remove all traces of bleach from the sample probe)1. Click the Cytometer tab of the ribbon (a).2. Click [DI Rinse (b) and follow the instructions to load a 15 ml tube with 12 ml of DIwater in the sample loader3. When cleaning is finished, unload the sample hutdown
Shutting downabShutdownShut down the system1. Click the Cytometer tab of the ribbon (a).2. Click [Software and Hardware] in the Shutdown group of the ribbon (b).The SH800 main unit and SH800 Software automatically shut down3. Shut down the host computer.4. Turn off the air compressor*** If the instrument is connected to house air, disconnect the system from houseair and vent the sheath tank at the end of the day.Note:If you shut down SH800 Software only, you can still safely shut down the SH800 mainunit. Press and hold the power button on the front panel for a few seconds.If you leave a sample in the sample loader after shutting down, check that the aircompressor is on and then press the power button on the front panel The sample doorwill open after initialization finishes. Remove the sample tube and then press the powerbutton for a few seconds to shut down the main hutdown
MaintenanceChoose your desired maintenance protocol and press [Start]Ethanol Cleaning:Internal sheath line and DI water line are cleaned with ethanol.WasteA maintenance:If the instrument hasn’t been used for a longer time, please run WasteA maintenance.Fluidics system is cleaned using Bleach solution. DI water lines and internal sheathlines are cleaned to prevent buildup of gShutdown
Ethanol )&fSheath filterDI water filtere. DI water tankSH800 main unit (leftside!Drip trayClean and disinfect the sheath line using ethanolNote: Take all necessary safety precautions when handling ethanolPrepare 1 l of 70% ethanol1. Prepare a cleaning chip (yellow label package) and the supplied sheath filter and DIwater filter bypass lines (a). Usually, they can be found in the drip tray behind theleft door of the instrument (b).Note: Ethanol will damage the filters if the bypass lines are not connected2. Click the Cytometer tab of the ribbon (b).3. Click [Ethanol Cleaning] (c) and follow the instructions to refill the ethanol tankf),refill the DI water tank (e), attach the sheath filter bypass line (for details see nextpage), and start cleaningCompletely fill the DI water tank when prompted as ethanol cleaning consumesabout 700 to 800 ml of DI water.4. When finished, remove the bypass line and reattach the sheath gShutdown
Ethanol CleaningSheath filteraDI water filterCleaning&chip&and&bypass&line&(supplied)&DI water tankDrip traySH800 main unit (left side!Default situationFilters are correctly installed,bypass lines are storedin the drip tray under the filters.OverviewStartupCalibrationFilters are bypassedsheath filter (left) withyellow bypass line,DI water filter (right)with green bypass line.AcquisitionCleaningShutdown
Introduction to Sony SH800 The SH800 is a simple, ready-to-use, cell sorter developed by Sony Corporation Main Features 1. Fully-automated setup All setup steps, including optical alignment, droplet formation, side stream calibration, and delay time adjustment, are automated using Sony-developed
