Transcription
Instructions for runningSpiceworks Inventory
OverviewSpiceworks Inventory is a free of charge scanning tool from Spiceworks that allows for scans of your corporate network to becompleted, either through a self-hosted setup or remotely via Spiceworks themselves. It reports on a multitude of informationto help you stay in the know about your deployed infrastructure. To begin, follow the download link y/You may be asked to register with Spiceworks to initiate the download.Spiceworks Inventory is designed for IT Pros who have admin rights on their network. Organizations with less than 1,000 devices on their network. It will work with more but it won’t be as fast. Running on a PC. It discovers Windows, OS X, Linux and Unix but you need to run it from a Windows computer on yournetwork.Minimum Requirements: Windows 7, Windows 8, Windows Server 2008 R2 or Windows Server 2012 R2. 1.5 GHz Pentium 4 class processor 2 GB RAMFull requirements can be found at https://community.spiceworks.com/help/Spiceworks RequirementsBrowser Requirements:Officially Supported: Firefox most recent version Chrome most recent version Internet Explorer 11 Not supported but users report good experiences with: SafariInstalled Software:The Spiceworks suite includes: Nmap Ruby SQLite Apache WinPcapUninstalling Spiceworks:Be sure you want to uninstall Spiceworks, because once you remove Spiceworks, all your Help Desk (including tickets), Inventory, etc. will be deleted forever. All files listed under Installed Software above will be uninstalled. On the computer that contains the installation of Spiceworks, go to Remove Programs through the Control Panel. Find Spiceworks in the list and click on it. Click uninstall to remove the program.For additional information about uninstalling Spiceworks and closing your account, click here.
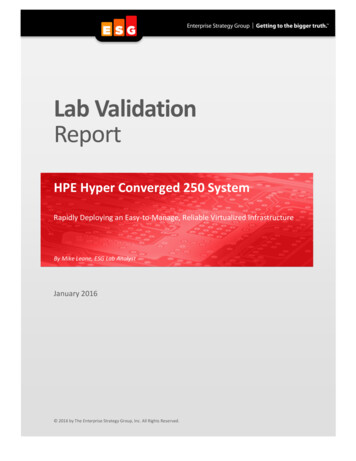
InstallationInstalling Spiceworks is very easy, simply follow the steps within the wizard.As the title suggests, the optional components are not essential but we recommend they’re included as part of the installationprocess.
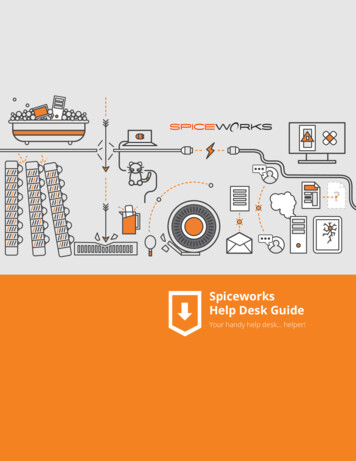
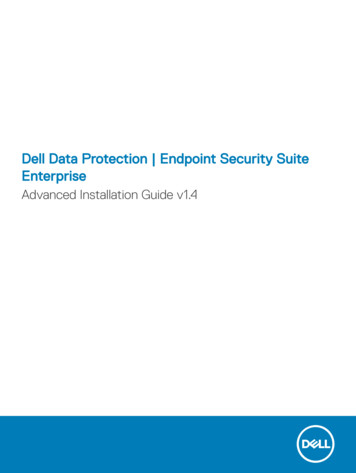
Starting Up SpiceworksUpon a successful installation, Spiceworks can be started using the desktop shortcut (or from the Start menu if you have chosen against a desktop shortcut). The following screens will appear:Following initialisation, you will be asked to sign in (or register if this is your first use of Spiceworks) followed by a request forsome details to the personalise the install of Spiceworks.
Complete all of these steps and you will then be transferred to the Inventory dashboard. From here, you can utilise all of thefeatures Spiceworks has to offer; including initialising the first scan of your environment.
Device ScanningTo use the Spiceworks Inventory tool, you’re going to need to get your devices into Spiceworks, or you’re going to have a badtime. There are a couple of ways you can do this.Using the Spiceworks Inventory agentIf you’re looking for the easiest way to get your networked devices scanned, you’ll want to use the agent. You just install theagent on each of your devices, do a little bit of configuring on each end (or deploy the agents so you only have to configureonce), and your networked devices are set. You’ll still need to use other methods if you want to track some non-networkeditems though. You’ll find that info on this doc.For all you’d want to know about the agent, including how to download it, go to /docs/agent.Using the agent-less scanner in SpiceworksSpiceworks also has a built-in agentless scanner to discover and scan the devices on your network. Depending on the setup ofyour network, this can also be an easy way to manage your devices. You’ll just need to do a little setup.Set up your network IP rangesThis is the range of IP addresses that Spiceworks will scan for devices. By default, Spiceworks will include the range of the subnet the Spiceworks server is a part of. You might need to add additional ranges for: Devices an another location: Your network may be broken into multiple subnets. Add their ranges so Spiceworks canpick up your remote devices. Devices that you don’t want scanned: You can exclude specific devices and IP ranges that you don’t want Spiceworks todetect.Adding new rangesTo add a new range, navigate to Settings Inventory Device Scanning and click Find More Devices.You’ll enter your IP addresses or hostnames that you want to scan in the Scan Criteria field. You can add the following: Single IP address: You can add one specific device on a known address (e.g. 192.168.1.1). Range of IP addresses: When you want to add a number of devices. Use a hyphen to have Spiceworks scan all devices inthe range (e.g. 192.168.21.22-89), or you can use commas to denote individual machines (e.g. 192.168.1.12,14,15,60) orsubnets (e.g. 192.168.1,5,7-10.1-254). Single hostname: To add one specific device. Multiple hostnames: You can add multiple hostnames to your discovery scan by separating them by a space (e.g. hostname1 hostname2 hostname3). AD Organisational Unit: Use this to scan an Organizational Unit (e.g. WAD:ActiveDirectoryOU) or (e.g.WAD:MyComputers). Note: this setting will not discover devices that are not in Active Directory e.g. (Workgroup computers). For distinguishing between similarly named OU’s, go to /docs/device-scanning#similarly-named-ous.Add stored passwords for Spiceworks to scan devicesIn order to properly scan the devices on your network, Spiceworks will need to be able to communicate with them. This includes being able to log in to the devices so that all the information you’ll need is made available. By default, Spiceworks willuse the account you’re using to log in to Windows to scan these devices, so if it’s not a network-wide admin account, you’llneed to add a new one. You’ll also need to add all the SSH, SNMP, vPro, etc. accounts you’ll need.
Adding stored passwords:To add a new account, navigate to Settings Inventory Device Scanning and find the Stored Passwords table. Find and click the type of account you need to add. Click Add Account Fill in the fields that are displayed in the right-most column. These will vary depending on the type of account you’veselected, but will mostly involve usernames and passwords.For more information on the account types, go to .Scan schedulesScans in Spiceworks are scheduled by groups. This will give you total control over which types of scans occur however often onwhichever devices. You can scan the resources of your server group every 5 minutes, but only scan printers for this every hour,for example.The types of scans are broken down into: All: This is the full network scan. It will check and update hardware, software, configuration, etc. Because this kind ofscan is so intensive, it’s generally recommended to run this one outside of business hours, once per day. Resources: This type of scan will check for disk configuration & capacities, network adapters, mailboxes, and switchports, as well as Microsoft Exchange info. Utilisation: The utilisation scan will look for your services, and some network adapter and netstat data. Events: This scan will check for Windows Events that have occurred on the devices. Up/Down: This scan just does a ping sweep of the devices to check whether they are connected to the network. Cloud Services: This scan looks for cloud resources (rackspace, google apps, etc.) that devices on your network may beaccessing.Adding & editing schedules:Spiceworks will come with several scan schedules out-of-the-box to cover most of what you need, however, you can edit theseor add additional ones to get the precise scan you want. If you want to add groups to an existing scan time frame or change the frequency, you should Edit the schedule. If you want to add a new time frame (i.e. every 5 minutes), you’ll need to Add a schedule.You can edit a schedule simply by clicking the pencil icon next to it. Here you can add new groups, change the frequency, andedit the days the scan will run on.You can add a new schedule by clicking the Add Schedule button. Then you’ll need to select the type of scan you want to add,the groups that will be scanned, how frequently the scan should occur, and what days the scan should run on.You can also personalise your scan even more by creating special custom groups.Remote sitesFor those devices that you need to manage on separate networks, you can use remote sites. This will have a remote Spiceworks installation scan those networks then send the results back to your central installation.On a remote site, you’ll be setting up the discovery scan by adding the ranges and credentials on the remote site installationitself. The device information scans are controlled by the schedule set on the central installation though (i.e. it’s the same asyour central scan schedule). If you want to customize the schedule to be different for the remote collector, you’ll need to create custom groups for the devices in the remote site, and then add those groups to the scan schedule as you want. Note thatyou’ll need to manually exclude these devices from the default groups if you go this route.
Manually adding devicesIf you need to keep track of assets that aren’t automatically detected by Spiceworks, you can add them yourself. This might bethe case if you have inventory that isn’t currently being used, assets that are being used but aren’t part of your network, oreven assets that are being used on your network but are located on a subnet not being scanned by Spiceworks.Creating a new asset: Navigate to Inventory Devices and click Add Device Manual Entry. Enter Name, Serial#, Mac Address, Asset Type, Groups, and optionally, the Purchase Date & Price. NOTE: if you don’tsee an appropriate Type in the dropdown list, select create new type and enter an appropriate description. When youcreate a new asset type, the asset will be placed in the ‘Other’ asset category. Click Save this asset.Device scanning additional settingsClicking the Show Settings button under Settings Inventory Device Scanning will take you to some of the more advancedscan settings. We generally don’t recommend messing with these unless you would consider yourself a “Pro” user. We’ve designed the scan so that these settings won’t be as necessary. Here are some of the more relevant settings: Default discovery scan starting hour: This is the first time of the day that Spiceworks will run a discovery scan for newdevices. This could be through ping or Nmap, based on how you have it set up. The default value is midnight. You mightwant to change this if your Spiceworks server is powered down overnight. Default discovery scan repeat interval: How often do you want Spiceworks to attempt to discover new devices eachday? The default is every hour. Enable scheduled scanning: Disabling this setting will turn off all automatic scanning. So you should probably leave itenabled. For science. You monster. Scan Speed: Faster scans utilize more resources and can sometimes have less accurate results. “Medium” should be finefor most people. Wake-On LAN: Enabling this setting will have Spiceworks attempt to wake devices with WOL functionality before scanning them.
ReportingAccessing reportsThere are two levels of access when it come to reports in Spiceworks. There is Admin access and Reporting access. You candesignate reporting access to anyone who might regularly need reports. A convenient way to save yourself a little work. Admin access: This is the normal level of access that you have as the administrator of Spiceworks. You have completecontrol over all reporting functions, including granting “Reporting” access to others. Reporting access: People with reporting access are allowed to open Spiceworks and run reports designated “public”.Reporting users cannot create their own reports nor access any other Spiceworks features. See Managing Users to learnhow to grant reporting access.Running reportsSpiceworks includes a ton of built-in reports that are super simple to run.To run a report if you have ‘Admin’ access: Click Reports in the navigation menu. Mouse over the report you’d like to run in the report table and click the Run icon.To run a report if you have ‘Reporting’ access: Log in to the Spiceworks Inventory. You will be taken directly to a web page designed for users with reporting access torun ‘public’ reports. Click on a report in the table.Once you are viewing the report: Click column headings to sort the report information. Click the Print button to print the report. Click the Export button and select PDF, CSV or XLS to save the report in the desired format.Editing reportsSometimes, the content in the report might not quite be what you want. You can easily edit any of the reports to tweak thecontent shown, or how the content is displayed.Find the report you’d like to edit in the report table, mouse over it and select Edit.You will be taken to the Report Details page where you can change the following: The report name. The report description. Whether or not you want to make a report public.
The report type. What to include in the report. What columns to display.For a detailed description of these fields please see ‘Creating a custom report’.Click Save or Save and Run.Exporting reportsLet’s say you’ve spent hours, days, or even years crafting the perfect report. You don’t want to leave that report at the mercyof a single drive. You can export your report definition for safe-keeping, or just to share a report between Spiceworks installations. Find the report you’d like to export in the report table and select Share or Export. Select Export to Local System. Save the report somewhere safe (make sure to leave the .rptx extension to aid in importing at a later time).Importing reportsOh no! Disaster struck! Good thing you read that previous section and exported your report. Here’s how to import it. Click Reports from the navigation menu. Click the Import Report button in the toolbar. Use the Browse button to find the file to import. It should have a .rptx extension. Click the OK button and a new report will be added to your report table. Depending on the type of report, it may take awhile to import.Note: If the imported report contains custom attributes which are not defined in your Spiceworks, then those custom attributes will be created.
Creating custom reportsAs much as Spiceworks tries to anticipate your needs, sometimes you want a report run on something they never would’veguessed. Don’t worry, though. You can create custom reports to gather the data you need. Click Reports from the navigation menu. Click the New Report button.You will be taken to the Report Details page where you can enter the following: Name: This is the name that will appear in the name column of the reports table. Description: This is the description that will appear in the description column of the reports table. Public: Check this box if you want to make the report available to Reporting users. SQL: Check this box if you want to write the report using SQL rather than the default options Spiceworks gives you. Email Report on Schedule: If you enable this option, you can choose how often you want the report to be run and whoshould be emailed the report on that schedule. What to include in report: This section is the heart of your search criteria. It will dictate what rows are displayed in yourreport. You’ll need to identify what type of entity you’re searching for (devices, tickets or applications), indicate whether‘any’ or ‘all’ search criteria must be true to be included in the report, and enter what you’re searching for (your ‘searchcriteria’). You can specify more than one search criteria by selecting the Add button just below the list of search criteria.Each data field is driven by selections made up to that point. You will always be given a list box with relevant choicesbased on selections you’ve already made. Columns to Display: This section allows you to essentially ‘format’ your report. You can add, remove, or rearrange columns. Spiceworks will select a default set of columns to be included in the report automatically depending on what typeof entity you’re searching for (devices, tickets, or applications). You can remove any column by clicking ‘x’ in the columnheading. You can rearrange the columns by dragging/dropping the column to a new location.You can add new columnsby selecting a column heading from the drop-down list and clicking the Add button. The drop-down list only shows column headings that are not already selected and are relevant for the entity type you’re searching for (devices, tickets, orapplications).Click Save or Save and Run.
Scheduling reportsIf you have a report that needs to be run on a regular basis, you can schedule Spiceworks to run it directly from the report itself. Navigate to Reports. Mouse over the report you want to schedule and click the pencil icon to edit it. Click the box next to Email Report on Schedule to enable it. Choose the frequency (weekly, monthly, or end-of-month), the start date and who will receive the report. You can add names from your people inventory, email addresses, or groups such as “admins”. All recipients of scheduled reports must have Spiceworks Community accounts associated with the email addressor profile name entered. Choose the format the report should be sent in (whether PDF, CSV or XLS). Finally, if you only want the report to be sent if there is actual data in the report (i.e. if your scheduled report is for overdue tickets, but you had none this month, so you don’t want a blank report to be sent) check the Results Only box.You can quickly view the status and disable scheduled reports by clicking the entry in the “Scheduled” column of the report. Ifyou want to enable a disabled report schedule, you’ll need to edit the report again.Additional InformationAdditional information and support for Spiceworks can be found through their support community (https://community.spiceworks.com). Resources specific to Spiceworks Inventory can be found at /docs.
Overview Spiceworks Inventory is a free of charge scanning tool from Spiceworks that allows for scans of y