Transcription
VLSC 3.0Finland & centerOne Great Experience
AgendaModule 1Module 2Module 3 Module 1 – Introduction and Overview Module 2 – User Registration and User Interface Updates Module 3 – User Self Service Module 4 – Administrator User Management Module 5 – Select Plus ReportingModule 4Module 5This training covers new functionality brought about by the VLSC 3.0release. For training on the previous December release and Augustreleases please review training materials on Explore.ms. 2
Module 1 – Introduction and OverviewOne convenient location on Microsoft Volume Licensing Service Center ! LSC allows all Volume Licensing customers to: Manage their agreements/license entitlementsManage User PermissionsAccess product keysDownload productsVLSC Releases Version 2.5 released on August 12th 2009 Continued drive to further improve the self serve functionality This release is the 3.0 release (MVLS/eOpen retirement) on December 6th 2009 3
Module 1 – MVLS & eOpen RetiresMicrosoft Volume Licensing Services (MVLS) and eOpen will be retired onDecember 6th 2009. All existing administrations functions currently managedthrough MVLS and eOpen will be performed directly from VLSC. MVLS will redirect to VLSC Current Licensing IDs will migrate seamlessly to the new system No need to register accounts again eOpen will redirect to VLSC Current Licensing IDs will migrate seamlessly to the new system No need to register accounts again First time VLSC users will need to agree to the Open Terms &Conditions that apply to their Open License on sign-in to VLSC Customers with no business email associated to their Openlicenses should contact support 4
Module 2 – MVLS & eOpen Change in ProcessHow the Administrator role is assigned to a License ID :As Is Process In MVLS & eOpen no users were granted automatic access Users need to claim the agreement/license If successful, agreement claimed, user becomes AdministratorTo Be Process Primary and the Notices Correspondent automatically granted Adminaccess Any user can request access to an agreement in VLSC Request will go through an approval process with the administrator(s)Note: See Module 3 and Module 4 for more information on requesting and approving access to alicense ID. 5
Module 2 – Importance of Business Email Address Business email address is used to associate a user to a license ID1 Business EmailAddress1 Windows Live ID(WLID)Things to note when logged in: User can only see agreements associated to that email address If user has two different WLIDs, these will give two different views– E.g. Licensing@example.com and someone@example.com Possible to join two accounts 6
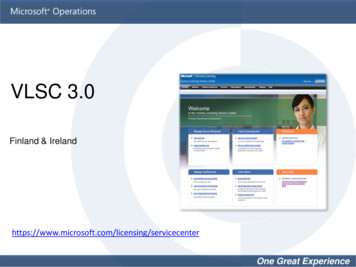
Module 2 – Homepage Log-inHomepage updated tofacilitate self registrationfor non-registered users.All users log-in usingWindows Live ID.Where a user is new toVLSC the user can selfregister by providing theirbusiness email andcompleting a validationprocess.Note: Existing MVLS and eOpen customers arenot considered new users to VLSC and will not berequired to complete the registration process. 7
Module 2 – Self-RegistrationEnter business emailaddress and click Submit.User will receive validation email.Click on the link within the email.User is now registered on VLSC andwill be able to see the followingMenu Bar items: 8
Module 2 – Logged-in HomepageHomepage for aregistered, logged-inuser.Notifications and menuitems displayed will beuser–specific. 9
Module 2 – Menu UpdatesIntroduction of usermanagement functionality.Users given permissions to alicense via specific user roles.Will enable the retirement ofMVLS and E-Open sites.Provides customized menunavigation based upon a user’sroles.Enabling of particular menuand sub-menu items.See Download examples 10
Module 2 – Menu Bar UpdatesAdministrators will see all menuand sub-menu items.A non-Admin user with a Download role would see the menu items –Software, Settings, Help and the sub-menu items Licensed Downloads,Product Families. The remaining menus will be greyed out.Note: See Appendix for additional screenshots of Menu bar updates.Also details on managing Software Assurance, Services and Subscriptions will be covered later in the training. 11
Module 2 - Menu Options by User RoleThis table shows the menu options available by user tionsSettings Download- --- Product Key- --- Licensing Info - Software Assurance Manager Software Benefits sub-role -- Software Assurance Manager - -- Subscriptions Manager - - Online Services Manager -- Registered User, no role--- AdministratorLicenses HelpNote: Users with Product Key role will have sub-menu items Existing Keys and New MAK Key only enabled in theSoftware Menu 12
Module 2 - Administrator InheritanceThe option to automatically takeon the Admin role on all childrenagreement associated with theparent agreement is provided tothe user.This is applicable to LicenseAdministrators on a parentagreement only.Admin inheritance optiondisplayed on initial registration.Choice to opt-in or to opt-outof Admin inheritance on allchildren agreements. 13
Module 2 - Changing Your Inheritance PreferenceAdmin users can changeAdmin inheritance opt-in/optout selection.Click Settings MyPreferencesScroll down to AdministratorInheritance section andupdate preference.Notification and alertpreferences can also be set onthis page. 14
Module 2 - Open Terms & Conditions Applicable to users with unsigned Open License Agreement Prompted to sign T&Cs at each login All Open licenses removed from user profile until signed Signing applies to all Open T&Cs across all T&C types Also current and future Open agreementsDoes a userhave 1 ormore OpenLicense?YesIs T&C signedon OpenLicense(s)?NoNoDon’t showT&Csproceed toHomepageShow user‘sign T&Cspage’YesDon’t showT&Cs,proceed toHomepageUser AcceptsNo Filter isapplied. Userviews all LicenseIDs on VLSCFilter out OpenLicense IDs fromall licensingviews on VLSC 15
Module 2 - Open License T&CsTo Review and Sign T&Cs selectthe Open License Type, Countryof Usage, Language.Click Go.The appropriate Open LicenseAgreement will display.Review T&Cs.To sign enter user’s name in thetext box provided.Click I Accept.Note: Users will be able to view the Open License Agreement at any time by clicking onthe Related Documents link when viewing any tab in the License Details. 16
Module 2 – Viewing an Open LicenseTo view the License detailsfor an Open License:Click Licenses, RelationshipSummary.In the Summary Reportclick on the License ID.In the Summary Report click on theLicense ID.License Detail provides all detailsfor that license ID.To view licenses specificallyassociated with that Open Licenseclick on the Licenses tab. 17
Module 2 – Open License T&CsUnder RelatedDocuments, click onOpen License Agreementlink to view the OpenLicense T&Cs. 18
Module 2 – Printing an Open License – Step 1To print the license for proofof license the user mustprint the order confirmationalong with the licensesummary.Click the Order Confirmationtab.Click Print.The Order Confirmationdetails are printed offexactly as shown on screen. 19
Module 2 – Printing an Open License – Step 2Click Licenses LicenseSummaryClick Print.The print out of the LicenseSummary along side theOrder Confirmation showsproof of license.Note: For details on transferring a license, please contact your reseller who can provide theappropriate forms. 20
Module 2 – Software Assurance Benefits ManagementClick on the SoftwareAssurance menu.A report of your SoftwareAssurance (SA) Benefitsentitlements across allLicensing IDs associated toyour Windows Live ID isdisplayed.Click on an active Benefitlink to view further detailson this eligible benefit.Note: Any Software Assurance Benefit you are not currently eligible for are displayed in grey text. 21
Module 2 – Managing SA BenefitsThe SA Entitlement foreach Licensing ID isdetailed.Click on the license IDlink to open the SABenefit System. Fromhere you can activateand manage yourBenefits. 22
Module 2 – Online Services Subscription ManagementTo access Online ServicesSubscriptions Management:Click on the Services menu.Click on the Online ServicesAgreement List link to accessdetails on your Online Servicesand how to manage them. 23
Module 2 – MDSN & TechNet Subscription ManagementTo access MSDN and TechNetSubscriptions management:Click on the Subscriptionsmenu.Click on the View or Managelinks to access details andmanagement tools for yourMicrosoft Developer Network(MSDN) and TechNetsubscriptions. 24
Module 3 - User Settings My PermissionsSelect Settings MyPermissions from the menu bar.Users can view ownpermissions, request additionalpermissions, request access toa new Licensing ID, and reviewtheir preferences. 25
Module 3 - My Permissions Request PermissionsSelect Settings RequestPermissions from themenu bar to requestaccess to a specific licenseID1. Within Licensing IDAccess choose theProgram and enter theenrollment number2. Within Permission RoleRequested select therequired role.3. Request the requiredrole permissions.4. Click OK. 26
Module 3 - My Permissions Request Permissions Cont.Repeat as required for eachrole, e.g. SubscriptionManager or OLS ServicesManager.Add comments if necessary.Click Add to save and sendrequest. 27
Module 3 - My Permissions Removing a License IDClicking on the “X”adjacent to the specificlicense ID.A confirmation pop-upwill appear. Click OK tocontinue.The license ID will nolonger be associated withthe user. 28
Module 4 - User Management – Display UsersSelect Administration Manage Users from the Menubar.Displays users associatedwith a license(s) which theAdministrator has anAdministrator role on.Click user’s Email Address toview roles and permissionsfor that user.Note: User access and permissions need to be set or approved on an individual user and license IDbasis. 29
Module 4 - Editing User PermissionsUser’s roles andpermissions are listed foreach license ID.Review legend for roledescription.Click on role to be assignedto a license ID e.g. SAManagerSA Manager window opensallowing assignment ofpermissions under this role.Note: Newly assigned permissions may take up to 2 hours to be reflected in VLSC. 30
Module 4 - Assigning Role PermissionsUpdate permissions asrequiredClick OK to save changesand close window.Repeat as required for eachrole, e.g. SubscriptionManager or OLS ServicesManager. 31
Module 4 - Saving Role/Permission UpdatesOnce all roles andpermissions have beenassigned click Add to saveupdates made.In this example the user haspartial OLS and full SApermissions. This can bedetermined by the symbolcoding of the role.Note: The user who’s permissions have been updated will receive a notification emailadvising of the updates. 32
Module 4 - Adding a Licensing ID to an Existing UserIn Edit User Permissionspage click Add LicensingID.Available License IDs notcurrently associated with theuser are displayed.Select the user roles andpermissions for the appropriatelicense ID.Click Add to save changes. 33
Module 4 - Removing a License ID from a UserClick on of the red X in theStatus column.Click Ok in the Confirmationpop-up window.Click Add to save thischange.This removes theassociation of a License IDfrom a user. 34
Module 4 - Pending RequestsSelect Administration Manage Users from theMenu bar.List of pending userrequests displayedClick on Request Numberto view request detailsChoose Accept or Deny.Add a message to requestorif required.Click OK. 35
Module 4 - Add a New UserSelect Administration AddUser from the Menu bar.Enter the new user’s personalinformation – Name andEmail.Licenses associated with theAdministrator are displayed.Assign user roles andpermissions for the requiredlicense IDs, on an individualbasis.Click Add to save theupdates. 36
Module 4 - Deactivating a UserSelect Administration Manage Users from theMenu bar.In the Status column clickDeactivate.Click Ok in theconfirmation pop-upwindow.Removes all associationsbetween user and licenseIDs associated with thatAdministratorUser status Inactive 37
Module 4 – Additional Notifications Updates to email notificationFour new e-mails may be sentPermissionassignment e-mails#1 Permission notification for unregistered user#2 Permission notification for registered userPermission requeste-mails#3 User request for additional permissions#4 Admin response to user request forpermissions 38
Module 5 - Viewing an Order Renewals ReportFrom the ‘Licensing’ menu,choose ‘RelationshipSummary’Click on a License ID whichis associated with a ‘SelectPlus’ agreementClick on the Order Renewals tabto view the Select Plus OrderRenewals report. 39
Module 5 - Refining an Order Renewals ReportThe Coverage End Date andLine Item filters can be usedto refine an Order RenewalsReport.On selecting theappropriate filters clickCreate Report. 40
Module 5 - Viewing a Select Plus Step-Up ReportTo view a Select Plus Step-upReport choose RelationshipSummary from the Licensingmenu.Click on a License ID which isassociated with a ‘Select Plus’agreement. 41
Module 5 - Refining a Select Plus Step-Up ReportClick on the ‘SA Step-Ups’ tabto view the Select Plus StepUp reportThe Coverage End Date andLine Item filters can be usedto refine a Select Plus Step-upReport.On selecting the appropriatefilters click Go.Note: Step-up reports are only available to users with a Select Plus Affiliate role. 42
Module 5 - Download SettingsAdditional text displayed onDownload Settings page ifcustomers work addresscountry not known.Clicking on the link andentering this detail allowsVLSC to determine userseligibility to purchase amedia kit.VLSC FAQs will be updatedalso to support this change.Additional text will appear here.Note: This functionality will be made available shortly after go-live on Dec 6th. 43
Additional Information - FAQTo get additionalinformation the FAQpage on VLSC is anvaluable resource ifyou are new to VLSC.This can also be usedas a glossary if you arenew to the VLSCterminology. 44
Escalation Paths Channel Partners– No change - log calls through CLT End Customers– Review Help menu on VLSC site– Region specific contact @microsoft.com@microsoft.com@microsoft.comDisplay NameVL Service Center North AmericaVL Service Center EMEAVL Service Center APGCVL Service Center JapanVL Service Center LATAMMicrosoft Taiwan Loyalty Program Center 45
Next Steps - PartnersKey Takeaways1. Familiarise yourself with the changes outlined2. Share this training content with anyone inside or outside of yourorganisation that deals with Volume Licensing3. Review the User Guide and Simulations on Explore.ms foradditional info.–Explore.ms Program Training folder 46
APPENDIX 47
Appendix – Product Keys & Licensing MenuA non-Admin user with a Product Keys Role will see the menuitems – Software, Settings, Help and the sub-menu itemsExisting Keys and New MAK Keys. The remaining menus will begreyed out.A non-Admin user with a Licensing Info role would see all menu itemsexcept Software and all sub-menu items except those under Software. 48
Appendix – Menu NavigationA non-Admin user with Software Assurance Manager role andSoftware Benefits sub-role will see all menu items exceptServices and Subscriptions and all sub-menu items exceptthose under Services and Subscriptions.A non-Admin user with Software Assurance Manager role only will seeall menu items except Software, Services and Subscriptions and all submenu items except those under Software, Services and Subscriptions. 49
Appendix – Menu NavigationA non-Admin user with Online Services Manager role will seemenu items Licenses, Services, Settings, Help and all sub-menuitems except those under Software, Software Assurance andSubscriptions. 50
Microsoft Volume Licensing Services (MVLS) and eOpen will be retired on December 6. th. 2009. All existing administrations functions currently managed through MVLS and eOpen will be performed directly from VLSC. MVLS will redirect to VLSC Current Licensing IDs will migrate seamle