Transcription
Master File Interface User GuideVersion 1.8March 15, 2018
Master File User Interface User GuideLocation of licationAccess/Default.aspxRevision rst Released .6Production URLs now available. Updatedreporting instructions to show possible errorconditions. Added note to U.I. error displayon upload.Added new sections for Data Upload,Actions, Rates and NotificationsAdded new section for Use Limit Plan DataTemplate; added ULPDT error messages toAppendix B.ProjectProjectLRivera3/11/20161.7Updated URLs and screenshotsLRivera3/15/20181.8Updated to reflect recent UI changes andinstructions; added new ULPDT validationrules to Appendix, updated Reportingscreenshots and instructionsProjectVersion 1.8Page 2 of 54Copyright 2018 CALIFORNIA INDEPENDENT SYSTEM OPERATOR. All rights reserved.Information in this document is subject to change.3/15/2018
Master File User Interface User GuideTable of ContentsContentsVersion 1.7 . Error! Bookmark not defined.1.Introduction . 41.11.21.31.42.Purpose . 4Scope . 4Content and Organization . 5Definitions . 6Installation . 72.12.23.System Requirements. 7Application Access . 7Using the System . 93.1 Accessing the Application. 94.Upload of RDT data. 134.15.Submission of Upload Request . 13Upload of ULPDT data . Error! Bookmark not defined.5.16.Submission of Upload Request. Error! Bookmark not defined.Status of Submission . 176.1 Request Status Information . 177. Reports . 206.16.26.36.3.16.3.26.48.Generating the Reports . 21Download and Viewing the Reports . 31Resources with Approved Changes Becoming Effective . 41Search Criteria . Error! Bookmark not defined.Report Output . 43Program Limitations. 44Data Load . 458.1 Uploading using the Data Load feature . 459.Actions. 479.1 Actions related to Batch . 4710. Rates . 4810.1 Updating the Rates . 4811. Notifications . 4911.1 Show notifications. 4912.Help . 5012.1 Help on the Master File User Interface . 5013.Troubleshooting/FAQ. 5114.Contact Information . 53Appendix A – External User Request for Certificate . 54A.1A.2A.3Digital Certificate . 54Certificate Installation . 54Accessing the Master File User Interface . 54Appendix B – User Messages . 55Version 1.8Page 3 of 54Copyright 2018 CALIFORNIA INDEPENDENT SYSTEM OPERATOR. All rights reserved.Information in this document is subject to change.3/15/2018
Master File User Interface User Guide1. IntroductionThe Master File database contains static data that reflects the operating characteristics of resources thatparticipate in California ISO Markets. Periodically, Scheduling Coordinators may need to make changesto specific operating parameters and may do so by submitting their data changes via a GeneratorResource Data Template (GRDT or RDT), Intertie Resource Data Template (IRDT or RDT), or Use LimitPlan Data Template (ULPDT). This user guide explains how to use the Master File User Interface forsubmitting these data changes, viewing and downloading approved RDT or ULPDT data for a selectedeffective trade date, and viewing and downloading a list of resources with upcoming approved changes forspecified date range.1.1 PurposeThe purpose of the Master File database is to hold static reference data that is used by many key marketapplications that operate at the California ISO.1.2 ScopeThis manual provides instructions for using the basic Master File User Interface features, which includethe following topics: Accessing the application Navigating through the web content and controls Generating and saving reportsThe details of how to utilize the Master File Application Programming Interface (W eb Services) aredocumented in the Technical Interface Specification for Master File Data Exchange Services.Version 1.8Page 4 of 54Copyright 2018 CALIFORNIA INDEPENDENT SYSTEM OPERATOR. All rights reserved.Information in this document is subject to change.3/15/2018
Master File User Interface User Guide1.3 Content and Organization1. The purpose of the guide is to instruct users how to use the features of the Master File UserInterface.2. This guide describes the steps for submitting (uploading) RDT data updates using threeExcel templates: the GRDT, IRDT, or ULPDT.3. This guide describes the steps for viewing and downloading data in GRDT, IRDT, and ULPDT Excelformats.This application may be used to generate the following reports:a. Generator RDT Report – data for GEN, TG, LOAD resources in a format used currently toexchange resource data between CAISO and Scheduling Coordinators. It also allows users toview/download data which SIBR/IFM/SaMC use to perform validations.b. Intertie RDT Report – data for ITIE, ETIE resources in a format used currently to exchangeresource data between the CAISO and Scheduling Coordinators. It also allows users toview/download data which SIBR/IFM/SaMC use to perform validations.c.Use Limit Plan (ULPDT) Report – data for Use Limit Plans in a format used to exchange ULPdata between the CAISO and Scheduling Coordinators.d. Resources with Approved Changes – list of resource IDs that have approved changes for aspecified effective trade date, or range of effective trade dates.4. This guide describes the steps for viewing the status of an uploaded RDT or ULPDT request.Version 1.8Page 5 of 54Copyright 2018 CALIFORNIA INDEPENDENT SYSTEM OPERATOR. All rights reserved.Information in this document is subject to change.3/15/2018
Master File User Interface User Guide1.4 DefinitionsThe following defined terms and acronyms are used within this document:ObjectApprovedA submitted data change must be approved by ISO staff before it canbe considered effective.Effective DateSCIDResource TypeResource IdTrade DateULPULPDTVersion 1.8DefinitionApproved data changes will be included in the featured reportsbeginning the calendar day following the day the change is approved byISO staff.The first trading date an approved data change becomes applicable.A unique identifier for a market participant that is certified by the ISO tosubmit bids and preferred self-schedules.Descriptive identifier denoting the type of resource. Different types ofresources may have additional validation requirements. Resource typecan be one of the following:a) GEN: Generating Resourceb) TG: Dynamic Tie Generator Resourcec) LOAD: Load Resourced) ETIE: Export System (Intertie) Resourcee) ITIE: Import System (Intertie) ResourceThe ISO resource identifier used for tracking each resource for marketscheduling and outage coordination purposes.The effective date for which the report retrieves the data from MasterFileUse Limit PlanUse Limit Plan Data TemplatePage 6 of 54Copyright 2018 CALIFORNIA INDEPENDENT SYSTEM OPERATOR. All rights reserved.Information in this document is subject to change.3/15/2018
Master File User Interface User Guide2. Installation2.1 System RequirementsHardwareThere is no specific limitation on the Hard Disk Drive or the RAM capacity however, a minimum of 512Mb of RAM is advised for better performance.Software Windows XP or W indows NT 2000 and above Internet explorer 6.0 with service pack 2 is recommended Microsoft Office 2000 or higher is recommendedLower versions of the software components may result in some of the user features not looking thesame and some features may be totally unavailable.2.2 Application AccessPlease refer to Appendix A – External User Access for external user access information.URL information is located in section 3.1 (Using the System).Version 1.8Page 7 of 54Copyright 2018 CALIFORNIA INDEPENDENT SYSTEM OPERATOR. All rights reserved.Information in this document is subject to change.3/15/2018
Master File User Interface User Guide2.3 Client Side Setup ProcedureUse this procedure to configure the Microsoft Explorer to open Office files in the appropriate Officeprogram by using the Folder Options tool. These steps are performed in order to allow the ActuateReporting Tool to open Excel files in a separate window, which enhances its usability:1.Open My Computer.2.On the Tools menu, click Folder Options.3.Click the File Types tab.4.In the Registered file types list, click the specific Office document type (select Microsoft ExcelWorksheets .xls, .csv), and then click Advanced (or click Edit).5.In the Edit File Type dialog box, click to clear the Browse in same window check box (or clickto clear the Open Web documents in place check box).6.Click OK.Version 1.8Page 8 of 54Copyright 2018 CALIFORNIA INDEPENDENT SYSTEM OPERATOR. All rights reserved.Information in this document is subject to change.3/15/2018
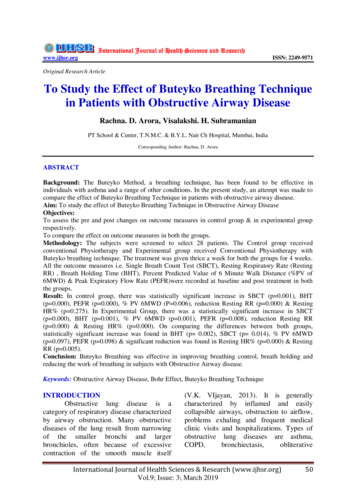
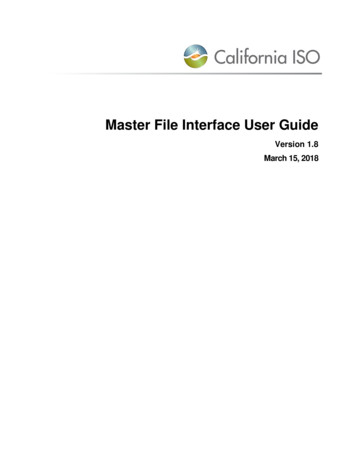
Master File User Interface User Guide3. Using the System3.1 Accessing the Application1. Click on the URL for the application:Master File Production EnvironmentCAISO PortalSelectPlease refer to the Master File Production URL List to start Master File2. A pop-up window appears with the list of available installed certificates displayed. Select the DigitalCertificate with which the request is to be authenticated and click on OK.3. Figure 1: Login Dialog - CertificateFor the next pop-up window, accept the request to sign datawith the Private Exchange Key of the certificate by clicking on the OK button. This screen should onlyappear the first time accessing the application.Version 1.8Page 9 of 54Copyright 2018 CALIFORNIA INDEPENDENT SYSTEM OPERATOR. All rights reserved.Information in this document is subject to change.3/15/2018
Master File User Interface User GuideFigure 2: Login Dialog – AccessVersion 1.8Page 10 of 54Copyright 2018 CALIFORNIA INDEPENDENT SYSTEM OPERATOR. All rights reserved.Information in this document is subject to change.3/15/2018
Master File User Interface User Guide4. The Master File Home Page will display as shown belowFigure 3: Master File Home Page5. The functionality available includes:a.Upload (RDT and ULPDT)b.Reportsc.Status of Submissiond.Actionse.Data Loadf.Ratesg.Notificationsh.Help6. Role to Function MatrixVersion 1.8Page 11 of 54Copyright 2018 CALIFORNIA INDEPENDENT SYSTEM OPERATOR. All rights reserved.Information in this document is subject to change.3/15/2018
Master File User Interface User GuideExternalOperatorFunction/RoleExternal Viewer Internal OperatorUpload RDT/ULPDT Data RDT Submission Status Reports (Download) Actions Data Load Rates Notifications HelpVersion 1.8 Page 12 of 54Copyright 2018 CALIFORNIA INDEPENDENT SYSTEM OPERATOR. All rights reserved.Information in this document is subject to change.3/15/2018
Master File User Interface User Guide4. Upload of RDT/ULPDT data4.1 Submission of Upload Request1. Click the “Upload” button from the home page.2. The system displays the “Upload” Page. Note the RDT selections require entering Effective Dateand SC ID. These fields are not required/displayed when the ULPDT radio button is selected.Figure 4a: Upload Page for RDTFigure 4b: Upload Page for ULPDT3. Interact with the following elements on the upload screen:a.File Name – Must be an .xls file in RDT o r U L P D T format. The “Browse” buttonwill allow for file selection from any local or network drive that user is hooked up to. This fieldis required.b.Upload Type – Defaults to “RDT Generator”. Be sure to select “RDT Generator” if aGRDT is being submitted, “RDT Intertie” if an IRDT is being submitted, or “ULPDT” if a UseLimit Plan data template is being submitted. A GRDT can contain Generator, TG, and Loadresource IDs, and an IRDT can contain only Intertie resource IDs. This field is required.c.Effective Date (RDT Only) – Defaults to today plus five business days. The date should befive or more business days from the current date. Business days exclude weekends andCAISO holidays. If the five business day rule is broken, an error message will be displayed.Beginning in Spring 2018, ULPDTs will not be required to adhere to the 5 business day rule.Version 1.8Page 13 of 54Copyright 2018 CALIFORNIA INDEPENDENT SYSTEM OPERATOR. All rights reserved.Information in this document is subject to change.3/15/2018
Master File User Interface User GuideType in a date, or use the calendar popup to select an appropriate date. Only valid dateswill be accepted. This field is required.4.d.SC ID (RDT Only) – A list of SC IDs will be displayed which is based on the valid SC IDs inthe Security Certificate for the User who has logged on. Only one SC ID may be selectedper batch submission. All data contained in the file must be associated to the specified SCID. This field is required. Note that SC ID is not required for ULPDT uploads.e.Comments – This field allows you to send comments to the CAISO Business Unit thatpertain to the file being submitted. The comment field is optional.f.Upload button – Select the Upload button to submit the file for processing. W hen Upload isselected, the system will perform basic structural validation on the RDT file. It will verify thatthe file is in the correct format (based on the RDT Type selected), and valid data types arepresented (such as numbers in a numeric field and values based on a list of valid values). ForULPDTs, the contents of the file are also validated upon uploading the file. Refer to AppendixB for User Messages.If no errors are found with the submission, the following screen will appear. Note that there is amessage between the header block and “Upload” title which indicates that the uploadrequest was successful. The Batch Id associated with this RDT/ULPDT Upload is provided. TheBatch Id is needed for following the progress of this request.Figure 5: RDT/ULPDT Successfully Uploaded for SubmissionVersion 1.8Page 14 of 54Copyright 2018 CALIFORNIA INDEPENDENT SYSTEM OPERATOR. All rights reserved.Information in this document is subject to change.3/15/2018
Master File User Interface User Guide5. If an error is found upon Upload, a list of the errors will display on the screen as shown in Figure6: Upload Error Display. Note: once leaving this screen, the errors won’t be available again, anew upload request will need to be made.Figure 6: Upload Error Displaya. Status Bar – Overall message; in
Mar 15, 2018 · program by using the Folder Options tool. These steps are performed in order to allow the Actuate Reporting Tool to open Excel files in a separate window, which enhances its usability: 1. Open My Computer. 2. On the Tools me