Transcription
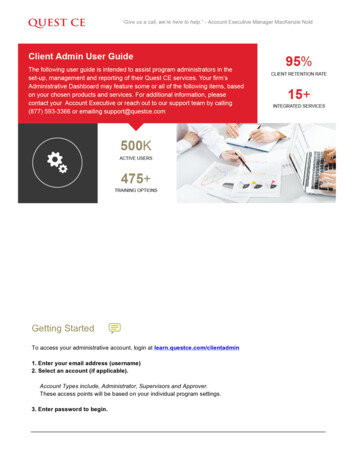
“Give us a call, we’re here to help.” - Account Executive Manager MacKenzie NoldGetting StartedTo access your administrative account, login at learn.questce.com/clientadmin1. Enter your email address (username)2. Select an account (if applicable).Account Types include, Administrator, Supervisors and Approver.These access points will be based on your individual program settings.3. Enter password to begin.
System Icon LegendBelow are the system’s main menu items. This page is actionable for your convenience, click on any of the belowsections to jump to it’s associated page. We have also provided a page-by-page Guide , accessible throughoutthe system. Please note that only purchased services will be viewable in your dashboard.IconsQuest CE 2017Name FunctionAccountEdit firm-specific details and program settings; create and maintainbranches, departments, supervisors, administrators, etc.UserUpdate user information, add or terminate users, promote user tosupervisors, unlock user accounts, send password resets, etc.TrainingAssign training to usersQuestionnaireAssign questionnaires associated with your Annual ComplianceMeeting and track, manage and respond to user inquires.DisclosureView questionnaires for the Disclosures types associated withaccountPolicyCreate, manage and store firm policiesSupportTrack and submit support tickets and access the Knowledge BaseDiscussion BoardTrack, approve, and respond to comments/questions submitted by yourusers regarding trainingQueueSetup and maintain Business Rules and Approver Groups whiletracking managing and maintaining submitted disclosuresVoucherTrack the status of voucher codes associated with your accountUtilitiesLocate user certificates, import data, send an email blast, create alesson plan, setup onboarding, bulk assign user alert messagesReportingView. Filter, organize and download on-demand reports related to useractivity, firm statistics, and administrative items.Menu OptionsList of actionable items per by pageHelp GuideDirections, tips and tricks by pageBranch AuditSchedule, execute and manage internal and individual auditsNeed Help? Contact your Account Executive for more information. 8/3/17 9:16 AMyour2
Back to LegendAccount FunctionalityIn the Account Functionality tab you will be able to maintain, edit and manage your firms contact information,and program settings, edit branch and department information, add, edit and manage supervisor andadministrative information, edit firm limits, access the resource library and print certificates.See below for detailed instructions on managing these materials.In Account Detail MainView Main Contact information, Compliance Department Contact Information, Relationship, and FINRAInformation.In Account Detail Service OptionsView all services currently utilized with Quest CE for your training program. Please contact your accountrepresentative for more information and/or questions regarding your service options.In Account Detail SettingsUpdate Primary Contact Information: Click the Editicon to the right Edit necessary fields Update when finishedUpdate Compliance Department Contact Information: Click the Updateicon to the right Edit necessary fields Update when finishedUpdate Exam Settings: Click the Updateicon to the right Flip Email on Fail flag to “On” or “Off” – If flipped to “On,” this will trigger an email anytime someone failsan exam.oIf the flag is set to “On,” input email address (or multiple addresses separated by a semicolon ‘;’)of who should receive an email if an exam is failed Update when finishedQuest CE 2017 Need Help? Contact your Account Executive for more information. 9/23/16 11:43 AM3
Back to LegendUpdated License Automated Reminders: Click the Update Flip Reminder flag to “On” or “Off” for each of the three reminders Indicate the number of day(s) before expired each email should go out.o icon on the right to edit120, 60, and 30 days will autofill as default numbers.Update when finishedUpdate settings for Registered Rep: Click the Management Click the Update Click theicon to the right of any of the listed formsicon to turn on the flag to notify users’ supervisor upon submissionbutton to assign an administrator to a form and upon submission thespecified administrator will be notified via email oCheck off the box(s) of the administrator(s) to receive notificationoAdd when finishedClick thebutton to assign a supervisor to a form and upon submission thespecified supervisor will be notified via emailoCheck off the box(s) of the supervisor(s) to receive notificationoAdd when finishedUpdate settings for Producer: Click the Management Click the Update Click theicon to the right of any of the listed formsicon to turn on the flag to notify users supervisor upon submissionbutton to assign an administrator to a form and upon submission thespecified administrator will be notified via email oCheck off the box(s) of the administrator(s) to receive notificationoAdd when finishedClick thebutton to assign a supervisor to a form and upon submission thespecified supervisor will be notified via emailoCheck off the box(s) of the supervisor(s) to receive notificationoAdd when finishedAdd User Profile Management: Click the Update Select user access to profileoQuest CE 2017 icon on the right to editRead onlyNeed Help? Contact your Account Executive for more information. 9/23/16 11:43 AM4
Back to LegendoCustom ControloEditableIn Account BranchDetails of current Branches linked with the Firm. All firms will have a default branch, “HOME-OFFICE,” associatedwith their account automaticallyAdd a new branch: Click the Addicon Fill out all required* fields including: Name, Type, Code, etc. Click Add when finishedView/manage branch details: Locate specific branch in branch list Click the Management Below the branch details are three tabs: Department, Supervisor, and User (Auditor will also show ificon to the rightapplicable)oClicking any of these tabs will display the associated list of information for this branch.oClicking the Managementicon in any row will allow you to manage the details of thatspecific item: a user record, department or supervisor record, etc.oBy clicking the Addicon in any tabbed section, you will be able to add an associated recordto this branch (i.e. Supervisor(s), user(s), etc.) Click the Branch Reporticon in the top right corner to view a PDF of the branch's details including alist of supervisors, users, departments and branches. Clicking the Inactive Usersicon will display a list of the branch's inactive supervisors and/or usersIn Account DepartmentList of all branch departments and how many supervisors/users are assigned to each. *Note: Make sure allbranches are setup before creating any departmentsAdd a new department: Click the Add Input the department name and select the branch it is located at Add when finishedQuest CE 2017 icon to the rightNeed Help? Contact your Account Executive for more information. 9/23/16 11:43 AM5
Back to LegendManage a specific branch department: Click the Management To edit Department name click the Updateo icon to the right of a specific departmenticon at the top rightMake edits necessary and Update when finishedAdd a new supervisor/user by clicking the Addicon at the top right. Please note each departmentcan have only one supervisor.o Click the Addicon next to (each) individual you would like to add as a user/supervisorRemove a user/supervisor from the department by clicking the RemoveiconIn Account SupervisorList of all current supervisors for the firmCreate a new Supervisor: Click the Add Select Create New Useroicon in the top, right cornerThis will create a new user account while simultaneously making the user a supervisor Fill out all required* information Make sure the Set as Supervisor box remains checked Add when finishedPromote an existing user to a Supervisor: Click the Add Select Promote Existing Useroicon in the top, right cornerA list of currently active users will populate Find user in list, or use page filter bar in the top, right corner to search for a specific user Click theicon to the right to promote the user to a supervisorUnlock a Supervisor’s account: Find supervisor in list Click the Unlock Supervisor Select Yes when pop up box appears “Are you sure you want to unlock this supervisor?”icon located in the Lock columnORQuest CE 2017 Need Help? Contact your Account Executive for more information. 9/23/16 11:43 AM6
Back to Legend Find supervisor in list Click the Management Click the Additional Actionsicon to the right of the supervisoricon in the top, right corner and select Unlock SupervisorView/Manage a specific Supervisor’s details: Click the ManagementoA list of assigned reps will appear for the selected supervisor under the Reps taboClicking the Branches tab will show a list of branches the supervisor is associated withoDepartments will display branch departments the supervisor is associated withClick theo icon to the right of the supervisoricon within the Reps tab to assign repsClick the RemoveClick theicon to unassign a rep from a supervisoricon within the Branches tab to assign to a branchoFind branch in list and click theoFill out required informationoAssign when finishedoClick the RemoveClick theoicon to the righticon to unassign from a branchicon within the Departments tab to assign to a branch departmentClick the Removeicon to unassign from a departmentRemove supervisor status: Find supervisor in list Click the Management Click the Additional Actions Select Remove Supervisor Statusoicon to the righticon in the top, right cornerSupervisor status is revoked, but user status will remainLock Supervisor Account: Find supervisor in list Click the Management Click the Additional Actions Select Lock AccountoQuest CE 2017 icon to the righticon in the top, right cornerSupervisor account remains, but account is lockedNeed Help? Contact your Account Executive for more information. 9/23/16 11:43 AM7
Back to LegendIn Account AdministratorCreate a New Admin: Click the Addicon in the top, right corner Fill out all required* information Select proper setting flagsoBranch Auditor: if access to the audit capabilities of Quest's Branch Audit tool is requiredoBA Supervisor: if access to the management portion of Quest's Branch Audit tool is requiredoBA Admin/Reporting Access: provides the ability to navigate between the Branch Audit tool andRenaissance Client AdminoContent Manager Only: provides access to the creation of custom learning itemsoApproval Access Only: provides only access to the Queue portion of Renaissance Client Adminfor review purposes Add when finishedManage an existing Admin Account: Find Admin in list Click the Management Click the Updateicon to the righticon in the top, right corner to edit or clickto remove accessUnlock an Admin Account: Find Admin in list – a locked admin account will display the Locked Click the Management Click the Update Flip the Admin Lockout flag to “N” Update when finishedicon in the Lock columnicon to the righticon in the top, right cornerIn Account Firm LimitsSet Firm Limits for Gifts: Click the Update You have the ability to set an individual budget, give limits, and receive limits Update when finishedQuest CE 2017 icon in the top, right cornerNeed Help? Contact your Account Executive for more information. 9/23/16 11:43 AM8
Back to LegendSet Firm Limits for Entertainment: Click the Updateicon in the top, right corner You have the ability to set an individual budget, give limits, and receive limits Update when finishedSet Firm Limits for Political Contributions: Click the Updateicon in the top, right corner Fill in Max Contribution box Update when finishedTurn On/Off Manual Override: Set Flag to On or Off Update Flag when finishedIn Account External FirmsList of external firms your firm submits gifts/entertainment disclosures for.Add an External Firm: Click the Addicon Input Firm Name Add when finishedAdd an individual to an External Firm: Find external firm in list Click the Management Click the Add Input individuals name Add when finishedicon to the righticonManage an existing External Firm: Find external firm in list Click the Management Click the Additional Actionso icon and:Select Update to edit External Firm nameClick the RemoveQuest CE 2017icon to the righticon to remove an individual from an External Firm that has not been usedNeed Help? Contact your Account Executive for more information. 9/23/16 11:43 AM9
Back to Legend Click the View Usericon next to an individual’s name to view Receiver/Giver itemsMerge duplicate external firms together: Click the Managementicon to the right of the external firm you would like to be merged with anotherexisting external firm Click the Additional Actions Find external firm in Target Firm drop down box you wish to merge with Click Mergeoicon in the top, right corner and select MergeAll data from the current firm will be transferred to the target firm, and the current firm will bedeletedMerge duplicate individuals in an external firm together: Click the Managementicon to the right of the external firm with a duplicate individual Click the View User Click the Additional Actions Find the individual in Target Individual drop down box you wish to merge with Click Mergeicon next to the individual you would like to be mergedicon in the top, right corner and select Mergeo All data from the current individual will be transferred to the target individual, and the current firmwill be deletedIn Account Resource LibraryA general resource libraryUpload a file: Click the Add Resource Group button Input resource group name and Add when finished Click the Addicon to upload a fileMaintain Resource Library: Click the Update Click the Removeicon to make edits to the group nameicon next to any file to delete itIn Account Product CertificationsView/add insurance Product Certifications users are authorized to sell.Quest CE 2017 Need Help? Contact your Account Executive for more information. 9/23/16 11:43 AM10
Back to LegendAdd a Product Certification: Click the Add Input Product name and click Add when finishedoiconThis product certification will then be available to add to a producer’s summaryUpdate/Remove a Product Certification: Click theicon to make any edits to the product name Click the RemoveiconIn Account Assign Outside TrainingUsed for tracking additional training completed outside of the Quest CE system.Assign Outside Training: Input Training Name, credits awarded, and date completed Check off all users who completed the same training on the date specified Click Assign when finishedQuest CE 2017 Need Help? Contact your Account Executive for more information. 9/23/16 11:43 AM11
Back to LegendUser FunctionalityIn the User Functionality tab you will be able to add and manage users, producer summaries, unlockand reset user profiles and passwords, promote users to supervisors and manage terminates users asneeded.See below for detailed instructions on managing these materials.To add a new user: Click the Add User Fill out all required* information Add when finished Turn on/off each service you want assigned to that individual user’s account Once complete, click continueicon in the top right cornerTo manage user info: Find user in list, or use search bar in the top, right corner to search for a specific user Click the Management Select a category from the top you wish to view and/or manually update for a specific user: Profile Click theicon to change/update the branch a user is located at Click theicon to update the current settings for the user Click on theQuest CE 2017 icon to terminate the userIdentifiers Click theicon to add license numbers Click theicon to update unique identifiers Click theicon to add training Click on theTrainingicon to remove a courseQuestionnaire icon to the rightClick theicon to add a questionnaireDisclosureNeed Help? Contact your Account Executive for more information. 8/1/16 2:57:52 PM12
Back to Legend Click the Click the Managementicon to submit a disclosure on behalf of a usericon to view the details of that disclosurePolicy Click theicon to add a policy Click theicon to remove a policy Click theto the right of a ticket to view ticket details/activity Click theSupporticon to go back to the User ProfileSystem Settings Where applicable, Click theicon to update individual limits for gifts,entertainment, and political contributions Click theicon to update the current settings for the UserAlert Message View user alert message currently setup for a user’s profile Click theicon to update the User’s Alert MessageManage a User’s Rep SummaryPlease contact your Quest CE Account Representative if you would like to utilize this feature.oClick on Rep Summary tab on the left, side menuoSelect a category at the top you wish to view/manually update Quest CE 2017 Identifying Information Click theicon to update a user’s home address Click theicon to update a user’s business address Click theicon to edit the Additional Identifying InformationResidential History Click Add to input residential history Click the Click theicon to update addressicon to removeEmployment HistoryNeed Help? Contact your Account Executive for more information. 8/1/16 2:57:52 PM13
Back to Legend Click Add to input employment history Click the Click theicon to updateicon to removeSRO Registrations Click Add to input SRO registrations Click the Click theicon to updateicon to removeJurisdiction Registrations Click Add to input jurisdiction registrations Click the Click theicon to updateicon to removeProfessional Designations Click Update to input any professional designations Flip a flag to “On” if a user has the professional designation Input license number for specific designation Click Add when finishedOther Names Click Add to input other names Click the Click theicon to updateicon to removeManage a User’s Producer SummaryPlease contact your Quest CE Account Representative if you would like to utilize this feature.oClick on the Producer Summary tab on the left, side menuoSelect a category from the top you wish to view/ manually update: Identifying Information Click the Click theicon to update a user’s home address Click theicon to update a user’s business addressCarrier Appointments Quest CE 2017 icon to change/update identifying informationClick Add to input new carrier appointmentNeed Help? Contact your Account Executive for more information. 8/1/16 2:57:52 PM14
Back to Legend Click the Click theicon to update licenseicon to remove appointmentProduct Certifications Click Add to input new product certification Click the Click theicon to updateicon to remove certificationState/Designation Licenses Click Add to input new license Clickto add a Line of Authority Click theicon to update Click theicon to removeCE Requirements Click Add to input CE Requirements Click the Click theicon to updateicon to removeCourses Taken Click Add to input new course taken Click the Click theicon to updateicon to removeTo unlock a user account: Find user in list, or use search bar in the top, right corner to search for a specific user Click the Additional Actions Select Unlock AccountoiconThis action will not reset a user’s password or notify a user that his/her account has beenunlockedTo send a user a password reset: Find user in list, or use search bar in the top, right corner to search for a specific user Click the Additional Actions Select Password ResetoQuest CE 2017 iconUser’s password will be set to default password: Welcome 123Need Help? Contact your Account Executive for more information. 8/1/16 2:57:52 PM15
Back to LegendoUser will receive email notifying him/her of password resetTo promote a user to a supervisor: Find user in list, or use search bar in the top, right corner to search for a specific user Click the Additional Actions Select Set As SupervisoriconT
o BA Supervisor: if access to the management portion of Quest's Branch Audit tool is required o BA Admin/Reporting Access: provides the ability to navigate between the Branch Audit tool and Renaissance Client Admin o Content Manager Only:

