Transcription
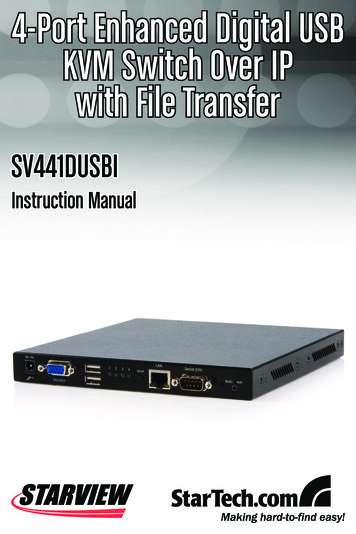
4-Port Enhanced Digital USBKVM Switch Over IPwith File TransferSV441DUSBIInstruction Manual
FCC Compliance StatementThis equipment has been tested and found to comply with the limits for a Class B digitaldevice, pursuant to part 15 of the FCC Rules. These limits are designed to provide reasonable protection against harmful interference in a residential installation. This equipment generates, uses and can radiate radio frequency energy and, if not installed andused in accordance with the instructions, may cause harmful interference to radio communications. However, there is no guarantee that interference will not occur in a particular installation. If this equipment does cause harmful interference to radio or televisionreception, which can be determined by turning the equipment off and on, the user isencouraged to try to correct the interference by one or more of the following measures: Reorient or relocate the receiving antenna. Increase the separation between the equipment and receiver. Connect the equipment into an outlet on a circuit different from that to which the receiveris connected. Consult the dealer or an experienced radio/TV technician for help.Use of Trademarks, Registered Trademarks, and other Protected Names and SymbolsThis manual may make reference to trademarks, registered trademarks, and otherprotected names and/or symbols of third-party companies not related in any way toStarTech.com. Where they occur these references are for illustrative purposes only anddo not represent an endorsement of a product or service by StarTech.com, or an endorsement of the product(s) to which this manual applies by the third-party company inquestion. Regardless of any direct acknowledgement elsewhere in the body of this document, StarTech.com hereby acknowledges that all trademarks, registered trademarks,service marks, and other protected names and/or symbols contained in this manual andrelated documents are the property of their respective holders.
Instruction ManualTable of ContentsIntroduction . 1Features.2Package Contents.3Hardware Guide. 4Front Panel.4Installation. 6Device Connection.6Initial Power-Up.7Operation. 8Initial IP-OSD Setting.8Mouse Setting.11KVM Switch OSD Operation.12Data-Transfer Rule.13USB Port Rule.14Using the Web Interface. 15The Login Screen.15Web Interface Introduction.16Main Menu Selections.17Network Configuration.18User Accounts.20System Identification.20Security.25i
Instruction al Ports.27Time / Date.27Firmware.27Purchase Options.28Status.29Port Numbers.29Help Menu.30Site Map Menu.30Copyright Menu.30Using the Terminal Interface via Serial Port.30Accessing the VNC Interface. 32Web Interface.32Native VNC Client.33SSH Tunnel (with Native VNC client).33Using the VNC Menu.34Bribar Feature.35Main Menu.36VirtKeys Menu.38Video Tuning menu.39ii
Instruction ManualAccessing KVM Features. 40Cascade Configuration.41OSD Operations.41OSD Function Keys.42Hot Key Commands.45Changing Your Configuration.47Optimizing video performance. 48Choose the best video mode.48Noisy video cards.48Network performance.48Using the Advanced Video Tuning Feature.49Using the Modem feature. 50Background.50Connecting a Modem.51Modem configuration.52Configuring the Remote Connection.53Accessing the Web Interface.54Modem Troubleshooting Guide.56Serial Remote Control operation. 57Background.57Connecting Serial Remote Control Modules.57Using the Web Interface.57Advanced Configuration Using the Integrated SSH Shell.59Remote Login via SSH.60iii
Instruction ManualOperating Notes. 60About Security Certificate Warnings.61Installing the New Certificate.62Troubleshooting. 63Specifications. 65General Specifications.65Supported Protocols.66Technical Support. 68Warranty Information. 68iv
Instruction ManualIntroductionThank you for purchasing a StarTech.com 4-Port IP KVM Switch withUSB Console. The SV441DUSBI revolutionizes remote server management by combining our industry-leading, third generation Server RemoteControl technology with a proven Enterprise class digital KVM switch.The SV441DUSBI empowers you to securely manage up to four computers remotely from almost anywhere using the internet or your local areanetwork (LAN). Unlike software solutions that require installation and workthrough your server’s operating system, the SV441DUSBI gives you BIOSlevel control and full interaction with your system’s boot process. Controldoes not come at the expense of security: SSH tunneling, SSL encryption, RADIUS authentication, and a configurable firewall are all includedto ensure that your network stays secure. Its standardized 1U rack-mountable metal chassis allows easy installation in your existing rack or cabinetsolution.Server Remote Control is about more than just servers. Using the SerialRemote Interface Module (RPORT), you can interact with virtually anydevice that uses a RS-232 serial terminal interface like routers, switches,environmental controls, alarm systems, and more. You can also useStarTech.com’s 8 outlet Remote Power Module (PCM815SHNA) to powercomputers and equipment on an off using an interactive menu.The SV441DUSBI is the perfect solution for any organization thatdemands secure, flexible, local and remote administration of its criticalsystems.1
Instruction ManualFeatures Able to connect to USB dev ices such as a keyboard, mouse, USBhard drive, USB CD-ROM, or USB flash drive Access to the web console is user ID and SSL password secure. TheRemote Server Management over IP supports 32 user accounts andincorporates SSL encryption of session data, and SSL webcommunication encryption Allows for disk emulation and file transfers, including complete remoteapplication and operating system installations Auto Scan Mode lets you switch between computers for easymonitoring Compact 1U rack height takes up very little cabinet or rack space Each computer name can be defined via the OSD menu Flash upgradeable Hot-pluggable feature allow computers to be added or removed withoutshutting down Includes an onboard Web Server, providing browser-basedconfiguration and administration Multiple user accounts restricts access to authorized users and storespersonal settings Network Setup and Reset buttons No software or drivers required Obtains an IP address using either DHCP or manual configuration Plug and Play compliant Supports 16-bit video Supports customized SSL certificates Users can reboot the system, access the BIOS, and have full controlover the keyboard and mouse - as if they are on site Works with PC, Mac, Linux and Sun Systems Optional mounting bracket2
Instruction ManualPackage Contents 1 x SV441DUSBI 1 x User’s Manual 4 x KVM Cables 1 x Package of screws 1 x Power Adapter 1 x Power Cord 1 x RS-232 Cable3
Instruction ManualHardware GuideFront Panel2146385791. Power Supply Connects to a DC 12V power adapter.2. HDB15 Connector Connect to the console monitor.3. USB Type A Connectors Connect to the console keyboard andmouse ports.4. Port LED Indicator Displays the status of connected PCs (formore specific instructions, see the tablebelow).5. Setup Button Press this button to bring up the IP-OSDmenu.6. RJ-45 Connector Connects to the LAN.7. RS-232 Connector Connects to a PC for initial setup.8. Reset Button This dual-function button selects PowerReset or Restore Factory Defaults.9. Auxilliary Input Link - Reserved for multimedia module.LED ColorGreenMeaningConnected to a PC that is powered on.RedPort selected.BlueData-transfer function is enabled.4
Instruction ManualLED ColorMeaningGreen Blue (Light Blue)Connected to a PC that is powered on andpossesses the data-transfer function.Red Blue (Light Purple)The selected port possesses the datatransfer function.Red Green (Yellow)The PC that is powered on is selected.Red Green Blue (White)The selected and powered on PCpossesses the data-transfer function.Rear Panel2131. R-Port For serial device management with SerialSupervisor.2. USB Type A Connectors Two additional ports for any USB devices(e.g. memory, printer, etc.).3. HDB15 Connectors Connect to 4 servers (or PCs)5
Instruction ManualInstallationDevice Connection1. Connect the USB keyboard, mouse, and monitor to the consoleconnectors on the SV441DUSBI.2. Connect a Cat5 cable to the LAN port of the SV441DUSBI.6
Instruction Manual3. Power up the monitor and the SV441DUSBI. The IP-OSD menu shouldcome up automatically. Follow the on-screen instructions to finish theinitial setup.Initial Power-UpYou must power up the SV441DUSBI with a keyboard, mouse, and monitor connected before turning on any other devices.Ensure that the devices you are connecting are powered off before connecting them to the unit.7
Instruction ManualOperationInitial IP-OSD SettingPower on the monitor and the SV441DUSBI. The IP-OSD menu willautomatically appear. Follow the on-screen instructions to complete theinitial setup.Press the Enter key to enter theAdvanced Settings Menu. Once thedesired settings have been achieved,press ESC to close the Menu.It is reccomended that you changethe password immediately and makea note of it.Press Enter to go to the next menu.8
Instruction ManualThe IP KVM can have its IP addressassigned dynamically, or it can begiven a fixed IP address. If you areunaware of the IP address, obtain itfrom the network administrator.Press Enter to go to the next menu.Enter the Netmask (Consult yournetwork administrator if necessary).Enter the Gateway (Consult yournetwork administrator if necessary).9
Instruction ManualEnter the address (Consult your network administrator if necessary).Wait for the SV441DUSB to apply thesetting changes.Press the Enter key.Press Enter to complete the settingprocess.10
Instruction ManualMouse SettingMany operating systems offer a feature called mouse acceleration thatallows the user to adjust the responsiveness of the cursor on the screento the physical movements of the mouse. While this is usually a beneficialinterface enhancement, it can interfere with the operation of the unit andshould be disabled on the managed computers before a remote sessionis attempted. Follow the instructions below to disable mouse accelerationfor the operating system installed on each managed computer.1. Open the Mouse Properties application located in the Control Panel.2. Under the Motion heading, center the arrow used to modify the pointerspeed.3. Disable the Enhance Pointer Precision setting by unchecking itsrespective checkbox.11
Instruction ManualKVM Switch OSD OperationTo enter the Hotkey Menu, press the Ctrl key twice within two seconds. L-CTRL is the Ctrl key located on the left side of the keyboard. 1 8/A H are the number keys 1-8 located in the upper row of thekeyboard, and the character keys A-H (not case sensitive).Please Note: Do not use the keypad at the right of the keyboard.To enter the KVM Menu, press the Ctrl key three times within twoseconds. Once entered, the menu will display a list of the connectedcomputers with corresponding port numbers, names, and statuses, asshown below.12
Instruction ManualTo access additional menu functions, press the F4 key. A new screen willappear displaying more functions, as shown below.To access the remaining menu functions, press the F4 key again. This willbring you to the screen shown below.Data-Transfer RuleManual stick-on: Data-Transfer function resides in one particular KVMChannel, pressing Ctrl Ctrl T to switch to the next KVM-Channel.13
Instruction ManualTracking KVM-Channel: Data-Transfer function tracks the selected KVMChannel.USB Port RuleManual stick-on: USB-Port resides in one particular KVM-Channel,pressing Ctrl Ctrl U to switch to the next KVM-Channel.Tracking KVM-Channel: USB-Port tracks the selected KVM-Channel.14
Instruction ManualUsing the Web InterfaceThe Web interface is the most intuitive way to configure the SV441DUSBI,offering a Java-based VNC client that can be used to control the hostcomputer from a remote location, as well as support for any industrystandard HTML Web browser. You can access the Web interface by opening your Web browser and entering the IP address of the SV441DUSBIyou wish to access/configure. The IP address will be either a) the addressassigned by your DHCP server as identified in the previous section, or b)192.168.1.123 if your network uses static IP addressing.The Login ScreenBefore you can access the Web configuration interface, you must entera username and password. The default username and password asshipped from the factory is username admin, with a password of admin.NOTE: Before the login screen appears, your web browser may displaya warning about an invalid security certificate. This does not affect thesecurity of your data in any way. Whenever you are prompted about a certificate security problem by your browser or the Java VNC client, alwayschoose the option to continue.15
Instruction ManualWeb Interface IntroductionAfter the inital login screen, the screen is divided into several sections, anumber of which will remain on the screen at all times while viewing theWeb Interface:NameMainMenuName: At the top of the screen, the name of the machine being controlledis displayedMain Menu: At the left-most side of each page, the Main Menu is displayed, allowing users to choose functions offered by the Web Interface.Help area: The right-most column offers an optional help summary foreach page. If you don’t wish to use this information, it can be closed byclicking the small [x] at the top right (within the Web Interface). If closed,click on the Help button near the top right of each page to re-display it.Please note: The aforementioned sections of the Web Interface willremain on the screen at all times. Selected categories will be displayed inthe center of the screen.16
Instruction ManualMain Menu SelectionsPlease note: Some of the following items may not be present based onassigned user privileges (i.e. non-admin users will not see any itemsunder the Admin category).Home: The Home screen offers a Screen Thumbnail view of thecontrolled computer, as well as basic file transfer functions, MonitoringInformation, System Identification and VNC Client options:Preferences: The Preferences screen offers several configuration options pertaining to the functionality of the SV441DUSBI. Here, you areable to customize settings to optimize overall performance (i.e. Encryptionoptions, VNC options, display and bandwidth options etc.), according toeach user’s individual preferences. Please save your selections by clicking the Save Changes button.17
Instruction ManualSnapshots: The Snapshots screen allows you to view and save ascreenshot of the controlled computer in its current state. This screenshotwill update periodical
4-Port Enhanced Digital USB KVM Switch Over IP with File Transfer Instruction Manual. FCC Compliance Statement This equipment has been tested and found to comply with the limits for a Class B digital device, pursuant to part 15 of