Transcription
QUICKBOOKS 2016 STUDENT GUIDELesson 16Working with Multiple Currencies
CopyrightCopyright 2016 Intuit, Inc.All rights reserved.Intuit, Inc.5601 Headquarters DrivePlano, TX 75024Trademarks 2016 Intuit Inc. All rights reserved. Intuit, the Intuit logo, Intuit ProLine, Lacerte, ProAdvisor,ProSeries and QuickBooks, among others, are trademarks or registered trademarks of Intuit Inc. inthe United States and other countries. Other parties’ marks are the property of their respectiveowners.Notice to ReadersThe publications distributed by Intuit, Inc. are intended to assist accounting professionals in theirpractices by providing current and accurate information. However, no assurance is given that theinformation is comprehensive in its coverage or that it is suitable in dealing with a client’s particularsituation. Accordingly, the information provided should not be relied upon as a substitute forindependent research. Intuit, Inc. does not render any accounting, legal, or other professional advicenor does it have any responsibility for updating or revising any information presented herein. Intuit,Inc. cannot warrant that the material contained herein will continue to be accurate nor that it iscompletely free of errors when published. Readers should verify statements before relying on them.
Lesson 16 — Working with Multiple CurrenciesTable of ContentsTable of ContentsLesson Objectives . 4Setting Up Multiple Currencies . 5Buying and Selling Items in Multiple Currencies . 8Creating a Purchase Order in a Foreign Currency. 9Receiving Inventory and Entering a Bill from a Foreign Vendor . 10Creating an Invoice for a Multicurrency Transaction . 11Working with Multiple Currencies — Review Questions . 12Review Activities. 13Answers to Review Questions . 14QuickBooks 2016 Student Guide3
Lesson 16 — Working with Multiple CurrenciesLesson ObjectivesLesson ObjectivesTo set up a QuickBooks company file to use multiple currenciesTo perform a transaction using multiple currenciesQuickBooks 2016 Student Guide4
Lesson 16 — Working with Multiple CurrenciesSetting Up Multiple CurrenciesSetting Up Multiple CurrenciesTo use multiple currencies in QuickBooks, you select the multicurrency preference and load exchange rates eithermanually or automatically. It is important to keep in mind that once your choose to use Multiple Currencies, youcannot go back; existing Customers and Vendors who have transactions linked to them can only be home currency.Only new customers and vendors will have the option to choose a foreign currency. Therefore, it is very important toback up your QuickBooks data before turning on Multiple Currencies.To use multiple currencies in QuickBooks:1. Make sure you are signed in to the QuickBooks company as the Admin user. (If other users have been set up onother computers to access the company in multi-user mode, ensure that they are not signed in and that you arein single-user mode.)2. Go to the Edit menu and choose Preferences.3. Click Multiple Currencies on the left side of the Preferences window.4. Click the Company Preferences tab.5. Click Yes, I use more than one currency.6. Click Yes in the message informing you that you cannot turn this preference off.7. Leave US Dollar selected for your home currency, then click OK.In most cases, the home currency is the US dollar (USD). Your home currency is the currency of the countrywhere your business is physically located.If you choose to set a home currency other than the US dollar, Intuit services such as payroll and online bankingwill not be available as these services are available only in US dollars.After Multiple Currencies are turned on, you can assign a foreign currency to any new names that are: Bank Accounts Credit Card Accounts Accounts Receivable Accounts Accounts Payable Accounts Customers Vendors Price LevelsQuickBooks 2016 Student Guide5
Lesson 16 — Working with Multiple CurrenciesSetting Up Multiple CurrenciesSome QuickBooks information — such as income and expense accounts — always uses your home currency.8. Click OK when you are notified the company file will close and be reopened.9. From the Company menu, click Manage Currency then choose Currency List.10. Click to uncheck the box next to Include inactive at the bottom of the window.11. Click the Activities menu button and select Download Latest Exchange Rates.QuickBooks 2016 Student Guide6
Lesson 16 — Working with Multiple CurrenciesSetting Up Multiple Currencies12. Click OK when notified that the exchange rates were updated successfully.You can also enter exchange rates manually if you wish to enter your own rates or if you wish to enter historicalrates. (Download Latest Exchange Rates does not bring in historical rates.) To enter exchange rates manually,right-click on the currency you’re interested in updating and choose Edit Currency. Enter the date(s) and theexchange rate for each date. Click OK.13. Close the currency list.NOTESQuickBooks 2016 Student Guide7
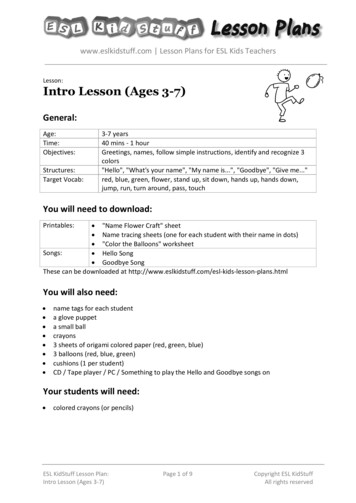
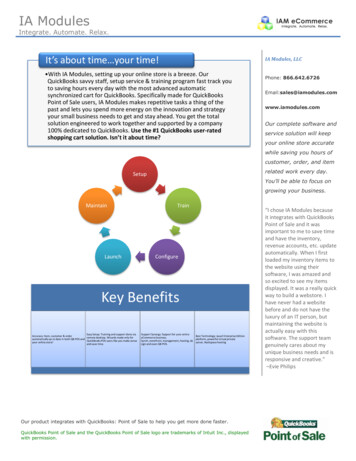
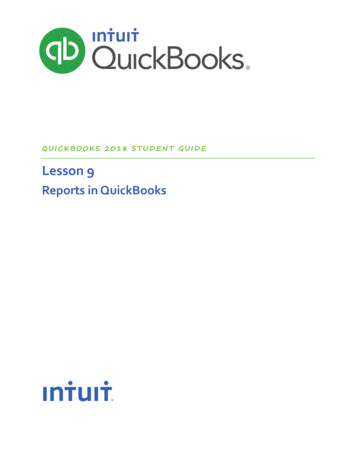
Lesson 16 — Working with Multiple CurrenciesBuying and Selling Items in Multiple CurrenciesBuying and Selling Items in Multiple CurrenciesYou can assign one currency to each of your customers and vendors.If you have an existing customer or vendor with transactions associated with them, you cannot change theircurrency. You should create a new customer or vendor name instead.To create a new vendor and assign a currency to them:1. Click Vendor Center in the icon bar.2. Click New Vendor.3. In the Currency list, select the currency you wish to use for the vendor.4. Enter the remaining information for the vendor. Your screen should resemble the following figure.5. Click OK.6. In the Vendor Center, notice the currency code (CAD in this case) is listed next to the vendor.7. Close the Vendor Center.QuickBooks 2016 Student Guide8
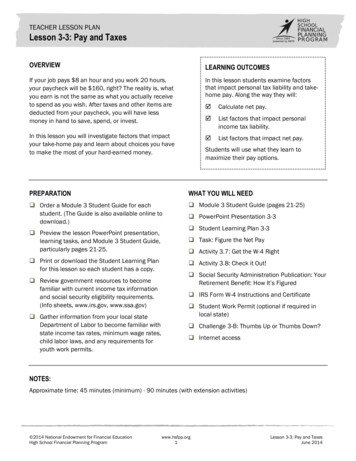
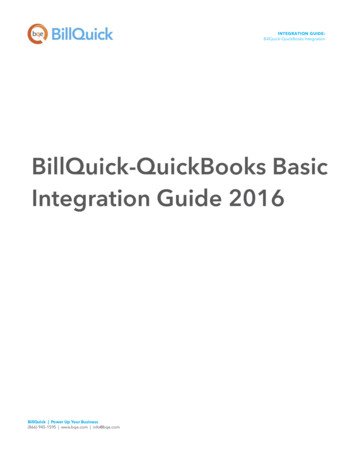
Lesson 16 — Working with Multiple CurrenciesCreating a Purchase Order in a Foreign CurrencyCreating a Purchase Order in a Foreign CurrencyTo create a purchase order:1. On the Home page, click Purchase Orders.2. Choose the appropriate vendor from the drop-down list.3. Enter the items you wish to add to the purchase order.Notice the value of the purchase order appears in both the foreign currency (CAD in this case) and the homecurrency (USD in this case).4. Click Save & Close.NOTESQuickBooks 2016 Student Guide9
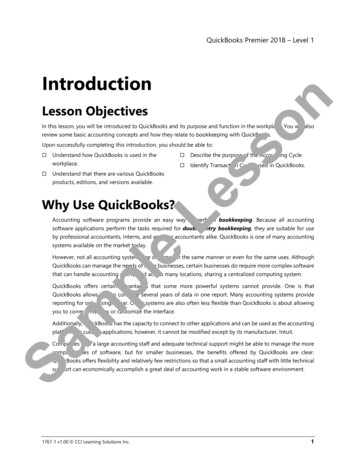
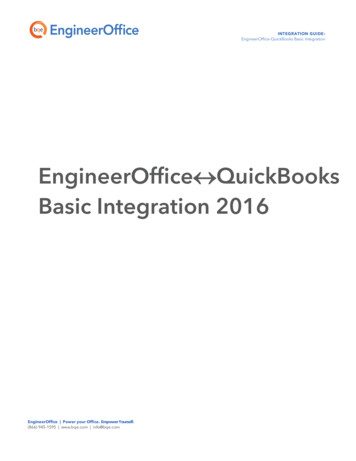
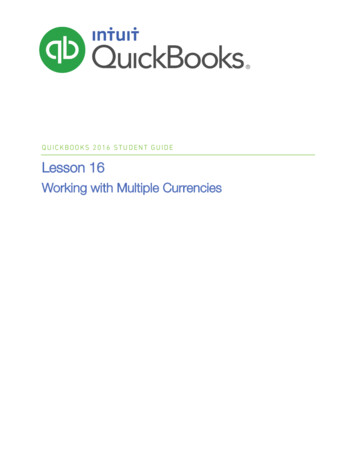
Lesson 16 — Working with Multiple CurrenciesReceiving Inventory and Entering a Bill from a Foreign VendorReceiving Inventory and Entering a Bill from a Foreign VendorTo receive inventory and enter a bill:1. On the Home page, click Receive Inventory then select Receive Inventory with Bill.2. On the Enter Bills screen, choose the appropriate vendor name.3. Click Yes when asked if you want to receive against an open purchase order (or click Select PO if youaccidentally choose No from the pop-up).4. Choose the PO against which you wish to receive and click OK.5. Review the Enter Bills window. Notice the bill is in the foreign currency and is affecting the foreign AccountsPayable account (created automatically by QuickBooks).6. Add a bill number, terms and a memo as necessary.7. Click Save & Close. If you added a term, you will be asked to confirm that you wish to associate this vendor withthis term. Click Yes.NOTESQuickBooks 2016 Student Guide10
Lesson 16 — Working with Multiple CurrenciesCreating an Invoice for a Multicurrency TransactionCreating an Invoice for a Multicurrency TransactionCreating an invoice for a customer that includes an item from a foreign vendor is the same as creating a standardinvoice. When you create an invoice for your customer, all information appears in the currency that you haveassigned to them.To create an invoice for a billable item from a foreign vendor:1. Click Create Invoices.2. Select the appropriate customer/job from the drop-down.3. From the Billable Time/Costs window that appears, choose Select the outstanding billable time and costs to addto this invoice? or, if you’ve dismissed this window, select Add Time/Costs, then check off the correspondingbillable expenses you wish to add.4. Click OK. Notice the invoice displays in the currency assigned to the customer, not the currency assigned to thevendor.5. Click Save & Close.NOTESQuickBooks 2016 Student Guide11
Lesson 16 — Working with Multiple CurrenciesWorking with Multiple Currencies — Review QuestionsWorking with Multiple Currencies — Review Questions1. List five QuickBooks elements to which you can assign a foreign currency:a.b.c.d.e.2. True or false: You should back up your company file before you enable the multicurrency preference.a. Trueb. False3. If you have an existing customer or vendor with transactions associated with them and want to assign them adifferent currency, you should:a. Change the currency to update any historical transactions to the new currency.b. Create a new customer or vendor name.QuickBooks 2016 Student Guide12
Lesson 16 — Working with Multiple CurrenciesReview ActivitiesReview Activities1. Create a new customer with the following information: Name: Alexander Thomas Address: 101 Main Street, Spruce Grove, Alberta, Canada Currency: Canadian Dollars2. Make sure you have the latest exchange rate information.3. Create an estimate for 30 hours of removal labor.4. Create a progress invoice for half of the removal labor from the estimate.QuickBooks 2016 Student Guide13
Lesson 16 — Working with Multiple CurrenciesAnswers to Review QuestionsAnswers to Review Questions1. List five QuickBooks elements to which you can assign a foreign currency:a. Customersb. Vendorsc. Price levelsd. Bank accountse. Credit card accountsf. Accounts receivable accountsg. Accounts payable accounts2. True or false: You should back up your company file before you enable the multicurrency preference.a. Trueb. False3. If you have an existing customer or vendor with transactions associated with them and want to assign them adifferent currency, you should:a. Change the currency to update any historical transactions to the new currencyb. Create a new customer or vendor nameQuickBooks 2016 Student Guide14
5. Review the Enter Bills window. Notice the bill is in the foreign currency and is affecting the foreign Accounts Payable account (created automatically by QuickBooks). 6. Add a bill number, terms and a memo as necessary. 7. Click Save & Close. If you added a term, you will be asked to confi