Transcription
MassLynx/NLD P-720Workstation Disk ReimagingReference Guide715005934Revision ACopyright Waters Corporation 2018All rights reserved
MassLynx/NLD P-720 Disk ReimagingReference GuideDocument Number: 715005934Issue Date: 10-Oct-2018Copyright notice 2018 WATERS CORPORATION. PRINTED IN THE UNITED STATES OF AMERICA AND INIRELAND. ALL RIGHTS RESERVED. THIS DOCUMENT OR PARTS THEREOF MAY NOT BEREPRODUCED IN ANY FORM WITHOUT THE WRITTEN PERMISSION OF THE PUBLISHER.The information in this document is subject to change without notice and should not be construedas a commitment by Waters Corporation. Waters Corporation assumes no responsibility for anyerrors that may appear in this document. This document is believed to be complete and accurateat the time of publication. In no event shall Waters Corporation be liable for incidental orconsequential damages in connection with, or arising from, its use. For the most recent revisionof this document, consult the Waters website (www.waters.com).TrademarksMassLynx, Nonlinear Dynamics, “THE SCIENCE OF WHAT'S POSSIBLE.”, and Waters aretrademarks of Waters Corporation.Intel is a registered trademark of Intel Corporation in the U.S. and/or other countries.Lenovo is a trademark of Lenovo in the U.S. and/or other countries.Microsoft is a registered trademark of Microsoft Corporation in the US and/or other countries.Windows is a registered trademark of Microsoft Corporation in the US and/or other countries.All other trademarks are property of their respective owners.This documentation is considered PROPRIETARY and is made available for business operations and review by employees of thecompany and regulatory agencies. Distribution to third parties without prior permission is prohibited.Revision A2
MassLynx/NLD P-720 Disk ReimagingReference GuideDocument Number: 715005934Issue Date: 10-Oct-2018Table of contentsCopyright notice . 2Trademarks . 21.Introduction . 42.Prepare the system . 4Save data and settings. 4Verify network ports . 5Prepare the system for user interaction . 53.Establish BIOS settings and prepare for reimaging . 54.Reimage the disk . 75.Initialize and configure system settings .116.Verify/configure Windows security settings.177.Verify/configure the network connections.218.Activate Windows .289.Verify system integrity .29A.Microsoft Windows 10 Enterprise 64-bit updates installed on this disk image .36B.Recovery via the F8 Advanced Boot Options menu .36This documentation is considered PROPRIETARY and is made available for business operations and review by employees of thecompany and regulatory agencies. Distribution to third parties without prior permission is prohibited.Revision A3
MassLynx/NLD P-720 Disk ReimagingReference Guide1.Document Number: 715005934Issue Date: 10-Oct-2018IntroductionThis disk imaging procedure is for the configuration of Waters MassLynx and Nonlinear Dynamics(NLD) software for the Microsoft Windows 10 operating system on a Lenovo P-720 platform.No application software is installed in this disk image.Note:This procedure returns the platform to factory standards. Any data on this platformwill be lost. This procedure is not a substitute for making system-level backups.The 667005749 S/W, ML/NLD Win 10 P720 USB Flash Drive is for the following models:186009023W/S ML Perf P720186009024W/S ML GPU P720186009030W/S NLD Stage 2 LM P720The model is then incorporated into the following kits:176004032MassLynx Performance P-Series176004033MassLynx GPU P-Series176004029Progen Proteomics High Throughput Wrkstn667005750Kit, ML/NLD Win 10 P720The Windows 10 64-bit updates that are in this disk image are listed in Appendix A. The diskimaging process configures some of the network adapter settings. To verify these settings andconfigure the other settings, follow the instructions in Section 7.The Windows DVD Maker, Windows Media Center, and Windows Media Player programs(features) are not installed in this disk image. They have been disabled in Control Panel Programs Uninstall a program Turn Windows features on or off by clearing the MediaFeatures check box.2.Prepare the systemSave data and settingsIf the computer to be imaged is currently in use, you must back up any customer data on the harddrives before imaging the computer because data will be lost from all partitions on the harddrives.Note: This process returns the platform to its original factory state. Any data that is currentlyon the system will be deleted.Any configuration information, such as network settings (such as computer name, domain name,or TCP/IP address, for example), Windows user and group names, and application login namesshould be recorded so they can be restored onto the newly imaged disk drives.This documentation is considered PROPRIETARY and is made available for business operations and review by employees of thecompany and regulatory agencies. Distribution to third parties without prior permission is prohibited.Revision A4
MassLynx/NLD P-720 Disk ReimagingReference GuideDocument Number: 715005934Issue Date: 10-Oct-2018Verify network portsThe P-720 system has two network ports fixed to the motherboard. The Intel Ethernet Connection(3) I219-LM network port is used for connecting to the Corporate Network and the Intel I210Gigabit Network connection is used for Ethernet instruments.Prepare the system for user interaction3.1.Connect a monitor, keyboard, and mouse to the P-720 computer system.2.Connect an AC power cord to the monitor and another one to the computer.3.Power-up the monitor.4.If the system is not already on, power it up.Establish BIOS settings and prepare for reimaging1. Restart the system and repeatedly press F12 until the boot menu appears.2. Press Enter to select Enter Setup.3. Select Setup. The Setup menu appears.4. Select Main System Time & Date to see whether the current values are correct.5. If the date or time is incorrect, select the correct value in the appropriate field.6. Select Setup Menu Startup, and ensure that the Boot mode is set to UEFI only.7. Select Setup Menu Startup Primary Boot Sequence. Press Enter.8. On the right-hand pane, if the USB Storage Device entry (USB KEY, USB FDD) is notalready at the top of the list, select it, and then click the icon (to the right of the deviceselection box) to bring it to the top of the list. Ensure that VMD1, VMD2, VMD3, or any of the SSDs do not contain a previously loadedoperating system (OS).Select the USB KEY option. Ensure that in addition to VMD and SSDs, none of the otherstorage devices (such as SATA) do not have a prior loaded OS.To remove an existing OS, refer to step 13b.9. Select Setup Menu Devices PCH SATA configuration.a. Set the SATA controller to Enable.b. Configure the SATA as AHCI.c. Set Port 1, Port 2, Port 3, Port 4, Port 5, and Port 6 to Enable.This documentation is considered PROPRIETARY and is made available for business operations and review by employees of thecompany and regulatory agencies. Distribution to third parties without prior permission is prohibited.Revision A5
MassLynx/NLD P-720 Disk ReimagingReference GuideDocument Number: 715005934Issue Date: 10-Oct-201810. Select Setup Menu Devices Audio setup.a. Press Enter.b. Disable the Azalia HD Audio.11. Select Setup Menu Power. For After Power Loss, ensure that Last state is selected.12. Select Setup Menu Security Tab, and ensure that Secure Boot is disabled.13. Select Setup Menu Advanced Tab.a. Ensure that Hard Disk Pre-Delay is disabled.b. Ensure that all the CPU ports are set to Disabled in the Intel VMD technology.14. Select Setup Menu Devices PCH sSATA Configuration, and ensure that SATA Drive7 Hot-Plug Support is enabled.15. Select Setup Menu Devices Super IO Configuration, and ensure that the check box forSerial Port is selected.16. Select Setup Menu Security Tab TCG Feature Setup, and ensure that SecurityChip isdisabled.17. Insert the restore media into the USB port.18. On the left-hand side, at the bottom of the screen, select Exit Save Changes and EXIT(F10). The system should restart.This documentation is considered PROPRIETARY and is made available for business operations and review by employees of thecompany and regulatory agencies. Distribution to third parties without prior permission is prohibited.Revision A6
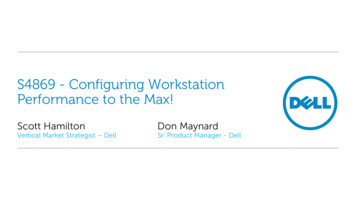
MassLynx/NLD P-720 Disk ReimagingReference Guide4.Document Number: 715005934Issue Date: 10-Oct-2018Reimage the disk1. When the system restarts, if prompted, press any key to boot from the USB.2. If the Command Prompt window does not appear, restart the system and repeatedly pressF12 until the boot menu appears.3. Select the USB image drive under UEFI BOOT option. If prompted, press any key to boot offthe USB.A Command Prompt window appears, with a warning about data loss:This documentation is considered PROPRIETARY and is made available for business operations and review by employees of thecompany and regulatory agencies. Distribution to third parties without prior permission is prohibited.Revision A7
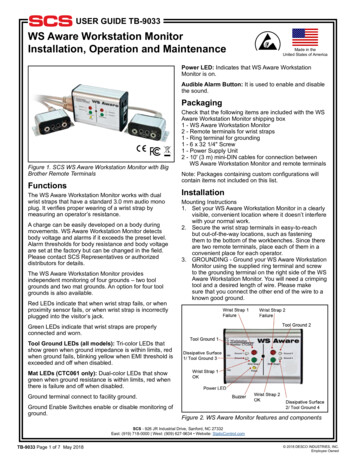
MassLynx/NLD P-720 Disk ReimagingReference GuideDocument Number: 715005934Issue Date: 10-Oct-20184. To stop the procedure, press Ctrl-C type y, and press Enter.a. Type Exit and press Enter again.b. To proceed with imaging, press any key.The DiskPart utility runs and shows you a disk list for the system similar to the following:5. Verify that the status of all disks is Online.This documentation is considered PROPRIETARY and is made available for business operations and review by employees of thecompany and regulatory agencies. Distribution to third parties without prior permission is prohibited.Revision A8
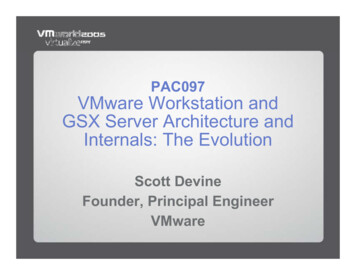
MassLynx/NLD P-720 Disk ReimagingReference GuideDocument Number: 715005934Issue Date: 10-Oct-20186. To proceed, type Y or y and press Enter; otherwise, type N or n and press Enter.a. If you want to format disk drive 0, press Y or y and Enter. Only disk drive 0 will becleaned and partitioned.b. If you want to format all the disk drives, press A or a and Enter. All partitions and data onall the disks will be deleted. Messages appear indicating that all the disks present in thePC are being cleaned, converted to GPT, partitioned, and formatted, and that newpartitions are being created on all disks.This documentation is considered PROPRIETARY and is made available for business operations and review by employees of thecompany and regulatory agencies. Distribution to third parties without prior permission is prohibited.Revision A9
MassLynx/NLD P-720 Disk ReimagingReference GuideDocument Number: 715005934Issue Date: 10-Oct-20187. The progress updates as the imaging takes place.This documentation is considered PROPRIETARY and is made available for business operations and review by employees of thecompany and regulatory agencies. Distribution to third parties without prior permission is prohibited.Revision A10
MassLynx/NLD P-720 Disk ReimagingReference GuideDocument Number: 715005934Issue Date: 10-Oct-20188. When instructed, remove the restore media from the system USB port, and then press Enter.The system restarts.5.Initialize and configure system settingsWithout further user action, the Windows 10 Automated Setup runs when the system restarts andgoes through the following actions: Automatically logs in to the Waters accountRuns the post-installation scriptsReboots multiple timesDisplays the system login screenFollow this procedure to continue:1. At the login screen press Ctrl Alt Delete to log in.2. Type administrator for the User name, Lenovo Serial Number for the Password, andthen click the right arrow icon or press Enter.This documentation is considered PROPRIETARY and is made available for business operations and review by employees of thecompany and regulatory agencies. Distribution to third parties without prior permission is prohibited.Revision A11
MassLynx/NLD P-720 Disk ReimagingReference GuideDocument Number: 715005934Issue Date: 10-Oct-2018Note: There are waters and administrator user accounts that use the Lenovo serialnumber for the password. Other accounts remain as is.3. The disk image sets the computer name to Wat-Lenovo Serial Number.4. Right-click the time display in the lower-right corner of the taskbar and select Adjustdate/time.This documentation is considered PROPRIETARY and is made available for business operations and review by employees of thecompany and regulatory agencies. Distribution to third parties without prior permission is prohibited.Revision A12
MassLynx/NLD P-720 Disk ReimagingReference GuideDocument Number: 715005934Issue Date: 10-Oct-20185. Verify that the time zone is set correctly. If necessary, update your time zone by selecting itfrom the Time zone drop-down menu.This documentation is considered PROPRIETARY and is made available for business operations and review by employees of thecompany and regulatory agencies. Distribution to third parties without prior permission is prohibited.Revision A13
MassLynx/NLD P-720 Disk ReimagingReference Guide6.Document Number: 715005934Issue Date: 10-Oct-2018Verify that the date and time settings are correct.If necessary, select Control Panel Clock, Language, and Region Set the time anddate Change date and time and update the settings.7. Click OK.This documentation is considered PROPRIETARY and is made available for business operations and review by employees of thecompany and regulatory agencies. Distribution to third parties without prior permission is prohibited.Revision A14
MassLynx/NLD P-720 Disk ReimagingReference GuideDocument Number: 715005934Issue Date: 10-Oct-20188. If you want to rename the computer, right-click the This PC icon and select Properties.Select Advanced system settings Computer Name Change.This documentation is considered PROPRIETARY and is made available for business operations and review by employees of thecompany and regulatory agencies. Distribution to third parties without prior permission is prohibited.Revision A15
MassLynx/NLD P-720 Disk ReimagingReference GuideDocument Number: 715005934Issue Date: 10-Oct-20189. The computer name is initially set to Wat-Lenovo Serial Number. If required, type a newname into the Computer name text box. Click OK.Note:If you type in a non-standard computer name, click Yes in the non-standard namedialog box that appears.10. Click OK in the Computer Name/Domain Changes dialog box.11. In the System Properties window, click Close.12. Click Restart Now in the Microsoft Windows dialog box.13. At the login screen, press Ctrl Alt Delete to log in.14. Type in administrator for the User name, Lenovo Serial Number for the Password, andthen click the right arrow icon or press Enter.This documentation is considered PROPRIETARY and is made available for business operations and review by employees of thecompany and regulatory agencies. Distribution to third parties without prior permission is prohibited.Revision A16
MassLynx/NLD P-720 Disk ReimagingReference Guide6.Document Number: 715005934Issue Date: 10-Oct-2018Verify/configure Windows security settings1. Select Start Control Panel System and Security Review your computer’s status.This documentation is considered PROPRIETARY and is made available for business operations and review by employees of thecompany and regulatory agencies. Distribution to third parties without prior permission is prohibited.Revision A17
MassLynx/NLD P-720 Disk ReimagingReference GuideDocument Number: 715005934Issue Date: 10-Oct-20182. Select Change User Account Control settings near the top of the left-hand pane.The bottom setting Never notify should already be selected. If you want a different protectionlevel, drag the UAC settings selection bar to the desired setting and click OK.If you choose any of the other three settings, it is best to restart the computer to turn on UserAccount Control, but you need not do that now.Click the red X in the upper-right corner to exit the window.3. Ensure that Windows automatic update detection is disabled, as follows:a. Click Start and select Run.b. Type gpedit.msc.c. Navigate to Computer Configuration Administrative Templates Windows Components Windows Update.d. Double-click Configure Automatic Updates and Automatic Updates DetectionFrequency.This documentation is considered PROPRIETARY and is made available for business operations and review by employees of thecompany and regulatory agencies. Distribution to third parties without prior permission is prohibited.Revision A18
MassLynx/NLD P-720 Disk ReimagingReference GuideDocument Number: 715005934Issue Date: 10-Oct-2018The Disabled option should be selected in both cases.4. Ensure that the Receiving Windows Feature Updates setting is disabled, as follows:a. Click Start and type Run.b. Type gpedit.msc.c. Navigate to Computer Configuration Administrative Templates Windows Components Windows Update Defer Windows Update.d. Double-click the Select when feature Updates are received key and the Select whenQuality Updates are received key.The Disabled option should be selected in both cases.This documentation is considered PROPRIETARY and is made available for business operations and review by employees of thecompany and regulatory agencies. Distribution to third parties without prior permission is prohibited.Revision A19
MassLynx/NLD P-720 Disk ReimagingReference GuideDocument Number: 715005934Issue Date: 10-Oct-20185. To verify the Windows Firewall settings, go to Control Panel System and Security Checkfirewall status, and then select Turn Windows Firewall on or off.6. For the Private network settings, ensure that Turn off Windows Firewall is selected. Forthe Public network settings, ensure that Turn off Windows Firewall (not recommended)is selected. Click OK.7. In the Windows Firewall window, click the red X in the upper-right corner to close it.This documentation is considered PROPRIETARY and is made available for business operations and review by employees of thecompany and regulatory agencies. Distribution to third parties without prior permission is prohibited.Revision A20
MassLynx/NLD P-720 Disk ReimagingReference Guide7.Document Number: 715005934Issue Date: 10-Oct-2018Verify/configure the network connectionsNote: The disk imaging process should configure some of the network adapter settings. Verifythese settings using the instructions in this section. Only make the changes to the networkadapter settings as necessary to match the final results as shown in this section.The P-720 system has two network ports fixed to the motherboard. The Intel Ethernet Connection(3)
1. Connect a monitor, keyboard, and mouse to the P-720 computer system. 2. Connect an AC power cord to the monitor and another one to the computer. 3. Power-up the monitor. 4. If the system is not already on, power it up . 3. Establish BIOS settings and prepare for reimaging . 1. Restart the system and repeatedly press . F12. until the boot .