Transcription
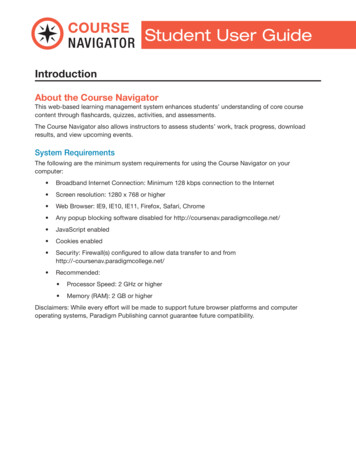
Instructor User GuideIntroductionAbout the Course NavigatorThis Web-based learning management system enhances students’ understanding of core coursecontent through flashcards, quizzes, and activities, and assessments.The Course Navigator also allows instructors to assess students’ work, track progress, downloadresults, and view upcoming events.System RequirementsThe following are the minimum system requirements for using the Course Navigator on yourcomputer: Broadband Internet Connection: Minimum 128 kbps connection to the Internet Screen resolution: 1280 x 768 or higher Web Browser: IE9, IE10, IE11, Firefox, Safari, Chrome Any popup blocking software disabled for http://coursenav.paradigmcollege.net/ JavaScript enabled Cookies enabled Security: Firewall(s) configured to allow data transfer to and fromhttp://coursenav.paradigmcollege.net/ Recommended: Processor Speed: 2 GHz or higher Memory (RAM): 2 GB or higherDisclaimers: While every effort will be made to support future browser platforms and computeroperating systems, Paradigm Publishing cannot guarantee future compatibility.Registering and Getting StartedRegistering as an Instructor.If you have not already done so, request an instructor profile from your Paradigm Account manager.You will receive a Username and Password via email.Launching the Course NavigatorTo Launch the Course Navigator:1. Launch your web browser.2. Go to http://coursenav.paradigmcollege.net/
3. Enter your Instructor Username and Password, sent to you via email, into the login fields.4. Click the Login button.Student RegistrationYou will need the following to enroll in the Course Navigator as a student: Course Navigator Activation code (packaged with each textbook) Enrollment key for the course (see below) Email address student will use to register accountHow to register:1. Open your web browser and go to http://coursenav.paradigmcollege.net/.2. Click the Register button below the Login button.3. Fill out the form by entering a desired Username and Password, Email address, First name,Last name, City/town and Country. Also enter the course Enrollment key and the Activationcode. Note: Required fields are highlighted in red.
4. Click the Create my new account button at the bottom of the window to submit the formand register your student account.If all account information was entered correctly, the student version of course home page willimmediately load.Navigating in the Course NavigatorImmediately after logging in, you will be shown your Home page. The Home page is divided intothree sections.Top Banner - Account MaintenanceThe top part of the screen displays user information, including your name, a link to view and edit yourProfile, view Help, and, if appropriate, access your eBook. There is also a Log Out link. The Help linkthat takes you to links for Help, FAQs, Customer Support, as well as a link to About Paradigm.Navigation PaneThe Navigation pane includes information about your courses. You can also access a list ofParticipants, Grades and Course Settings from this pane. Additional resources can be accessed fromthe Navigation pane. These resources may include: Search forums, Upcoming events, Messages,Activities, and Blog menu.
Content PaneContent for the course that is currently available will be shown in the center of the page, also knownas the content pane. Using the navigation pane, or by clicking on an activity, you can navigate to aspecific activity. You can also pull up grades using the navigation pane on the left.Using the Navigation PaneYou navigate around your Course Navigator courses by using the Navigation Pane on the left andthe Assignments Listing in the center content pane. The navigation pane provides quick access tocourses, activities, students, and grades.Navigation Tree Links Home: Opens a listing of available courses; click a course name to open the course. Create Course: Used to create a new course. Manage Courses: Opens a listing of available courses. Participants: Used to enroll and un-enroll students from the course and allow otherinstructors in your school access to your course. Grades: Access student grades. Settings: Access your profile.Hiding and Docking the Navigation PaneIf you decide that you do not want to see the contents of the navigation pane, you can minimizeit by clicking the hide button. To expand the navigation pane back to its normal size, you can clickthe show button.Should you decide that you would like more screen space for the course content section (the centerpane of the page), you can choose to dock the navigation pane to the side bar. Click the dock buttonto the right of the hide/show button.The navigation pane will now shrink to a small tab on the far left of your screen. To view the contentsof the Navigation pane, mouse over it. To un-dock it back to its original location, click the un-dockbuttonto the right of Navigation.Using the Content PaneCourse content is shown in the center part of the screen, which is referred to as the Content Pane.To view a specific activity, click the name of the activity in the content pane.By using the Navigation pane to drill down to a specific chapter or activity, you can narrow the resultsthat display in the content pane.
Maintaining and Changing Your ProfileAt the top section on the home page is information about you and your courses.To view your current account settings click your name in the upper right part of the screen. Theprofile overview screen will be displayed.To edit your current profile settings click Edit profile in the lower left hand corner of the profileoverview screen. The current profile settings will be displayed.Change any value in the General section, such as your First name, Last name, Email address,City/town, Country, or Timezone.To reset your password, enter your new password twice in the Change password section.Once you are satisfied with your changes, click the Update profile button at the bottom of the page.If you have forgotten your password and cannot log in, see Using the Forgot Password Functionbelow. If you do not receive the password reset email, or you would like your User name changed,please contact Technical Support.
Using the Forgot Password FunctionIf you have forgotten your password, and need to reset it, take the following steps:1. Click Forgot Password link on the Course Navigator login page.2. Enter either your Username or your email address into the fields provided, and click theSearch button. You will then receive the message below.3. Check your email. If you entered valid account information, you will receive detailedinstructions via email.Your temporary password is shown in the email. Use this the next time you log in. It is stronglyadvised that you then change your password. For information on how to change your password, seeMaintaining and Changing Your Profile above.If you do not receive an email regarding your password reset request, this likely means there is a typoin either your username or email address. To correct this, please contact Technical Support.Program ManagementAs an Instructor using the Course Navigator, you have the ability to create new courses very quickly.You also have the ability to enroll and un-enroll students and other instructors into your courses, editthe content of your courses and even send messages to students within your course.
Creating, Editing and Deleting a New CourseCreating a New CourseTo create a new course, follow these steps:1. Verify that your sales representative has provided you with an instructor username andpassword. Log in to the Course Navigator with your instructor username and password.2. In the left hand Navigation Tree, click the Create Course link.3. In the Course Wizard, fill in the Course full name field. This is the full descriptive name of thecourse (for example, Electronic Health Records 1001)4. Fill in the Course short name field. This is the short descriptive name of the course (forexample, EHR 1001). This name will be displayed on the left navigation pane.5. You may enter information in the Course summary field. This field is not required.6. Fill in the Course start date. The date you enter will not limit students in anyway, and is usedfor organizational purposes.7. Select the Book you are using for this course.8. When you are satisfied with your settings, click the Save changes button at the bottom.Editing Course SettingsTo view and edit your course settings:1. Select the course whose settings you wish to view in the left navigation pane. Click theSettings link in the navigation pane.2. Edit any settings you wish to change in the appropriate fields.3. General course information such as Course full name, Course short name and Course startdate can be edited at the top of the screen.4. Click Save changes at the bottom.Deleting a CourseTo delete a course:1. Select the course whose settings you wish to view in the left navigation pane. Click theSettings link in the navigation pane. The Edit course settings page will be displayed.2. Click the Delete button at the top left. A confirmation window will pup up.3. Click OK to confirm you would like to delete the course.The course will now be removed from your course listing, and all course data will be removed fromthe Course Navigator database.Note: When a course is deleted, all course data (scores and grades) will be permanently deleted, butall accounts in that were enrolled in the course will not be removed.
Editing Course ContentThe Course Navigator comes with a built-in editing tool that will allow you to reorder and hide itemson the Content pane.To use the editing tool take the following steps:1. From the home screen click the Turn editing on button in the top right corner of theapplication, immediately below the Help/Profile/eBook links. Or go to the Navigation pane,click Settings and then click Turn editing on.Or2. The page will refresh with new icons next to each label and item. The icons each do different things.o Move: Drag and drop feature that allows you to quickly move an activity to anotherpart of the page.o Move Right: Indents the item.o Move Vertical: Click this icon, then click the corresponding icon to quickly movethe selected item to another location.o Update/Edit: Update information about the item.o Hide/Show: Hides or shows the item, depending on what is currently selected.When an item is hidden from view, a student cannot see it.3. Click the Turn editing off button to hide these icons when you are finished.Editing ActivitiesScheduling Assessments and AssignmentsIn the Course Navigator, instructors can exercise a great amount of control over how their studentsexperience the training and assessment. Instructors can schedule multiple attempts at assessmentsfor students.
To modify the settings for a particular assignment take the following steps:1. Click the Settings link in the left navigation pane and then click Turn editing on. This willdisplay the editing shortcut icons for each assignment.2. Navigate through your course to the section and unit containing the assignment you wouldlike to edit. Click the Paper and Pencil icon(displays Update on mouse-over) to the rightof the assignment’s name.You will see a page with the following fields: Attempts Allowed: determines how many attempts a student can make for a particularassessment. This value can be set from 1 to 10 or Unlimited as you determine appropriate. Grading Method: determines in what manner the assessment is graded. The availableselections are Highest Grade, First Attempt, and Last Attempt. When Highest Grade isselected the grade book will only reflect the attempt in which the student received the highestgrade. First Attempt will cause the gradebook to reflect only the first attempt made by thestudent even if multiple are scheduled. When Last Attempt is selected only the most recentattempt by the student will be reflected in the grade book. Display description on course page: if enabled, the introduction/description above will bedisplayed on the course page just below the link to the activity/resource. Time limit: if enabled, a floating timer window (requiring JavaScript) is shown with acountdown. When the time limit is up, the quiz is submitted automatically with whateveranswers have been filled in so far. Grade category: setting controls the category in which this activity’s grades are placed in thegradebook. Layout/New page: For longer quizzes it makes sense to stretch the quiz over several pagesby limiting the number of questions per page. When adding questions to the quiz, pagebreaks will automatically be inserted according to this setting.However page breaks may later be moved manually on the editing page. Question behavior/Shuffle within questions: If enabled, the parts making up each questionwill be randomly shuffled each time a student attempts the quiz, provided the option is alsoenabled in the question settings. This setting only applies to questions that have multipleparts, such as multiple choice or matching questions. How questions behave: Students can interact with the questions in the quiz in variousdifferent ways. For example, you may wish the students to enter an answer to each questionand then submit the entire quiz, before anything is graded or they get any feedback. Thatwould be ‘Deferred feedback’ mode. Alternatively, you may wish for students to submiteach question as they go along to get immediate feedback, and if they do not get it rightimmediately, have another try for fewer marks.That would be ‘Interactive with multiple tries’ mode. Review options: These options control what information students can see when they reviewa quiz attempt or look at the quiz reports. “Immediately after the attempt” means within twominutes of the attempt being finished. “Later, while the quiz is still open” means after this,and before the quiz close date. “After the quiz is closed” means after the quiz close date haspassed. If the quiz does not have a close date, this state is never reached.
Display/Show the user’s picture: If enabled, the student’s name and picture will be shownon-screen during the attempt, and on the review screen, making it easier to check that thestudent is logged in as him- or herself in an invigilated (proctored) exam. Display/Decimal places in grades: This setting specifies the number of digits shown after thedecimal point when displaying grades or grades. It only effects the display of grades, not thegrades stored in the database, nor the internal calculations, which are carried out to full accuracy. Display/Decimal places in question grades: This setting specifies the number of digitsshown after the decimal point when displaying the grades for individual questions. Extra restrictions on grades/Require password: If a password is specified, a student mustenter it in order to attempt the quiz. Extra restrictions on grades/Require network address: Quiz access may be restricted toparticular subnets on the LAN or Internet by specifying a comma-separated list of partial orfull IP address numbers. This can be useful for an invigilated (proctored) quiz, to ensure thatonly people in a certain location can access the quiz. Extra restrictions on grades/Enforced delay between 1st and 2nd attempts: If enabled,a student must wait for the specified time to elapse before being able to attempt the quiz asecond time. Extra restrictions on grades/Enforced delay between later attempts: If enabled, a studentmust wait for the specified time to elapse before attempting the quiz a third time and anysubsequent times. Browser security: If “Full screen pop-up with some JavaScript security” is selected, the quizwill only start if the student has a JavaScript-enabled web-browser; the quiz will appear in afull screen popup window that covers all the other windows and has no navigation controls;and students are prevented, as far as is possible, from using facilities like copy and paste. Overall feedback: Overall feedback is text that is shown after a quiz has been attempted. Byspecifying additional grade boundaries (as a percentage or as a number), the text shown candepend on the grade obtained. Common module settings/Group mode: This setting has 3 options:oNo groups: There are no sub groups, everyone is part of one big community;oSeparate groups: Each group member can only see their own group, others are invisible;oVisible groups: Each group member works in their own group, but can also see other groups. Note: The group mode defined at course level is the default mode for all activitieswithin the course. Each activity that supports groups can also define its own groupmode, though if the group mode is forced at course level, the group mode setting foreach activity is ignored. Common module settings/Visible: determines whether an assessment is visible or hidden tostudents. Training and assessment assignments are visible by default but can be hidden ifdesired. Common module settings/ID number: Setting an ID number provides a way of identifying theactivity for grade calculation purposes. If the activity is not included in any grade calculationthen the ID number field may be left blank. The ID number can also be set in the gradebook,though it can only be edited on the activity settings page.
Enrolling Existing Students and InstructorsFinding and Editing the Enrollment KeyThe Enrollment key is a unique key that instructors provide to their students that allows them to enrollin a specific course. When a student registers, they are asked to enter their unique Activation code(provided with textbook purchase) and Enrollment key.To find your Enrollment key take the following steps:1. Click the name of the course in the navigation pane.2. Click the Settings link towards the bottom of the navigation pane. The course settings pagewill load.3. Make note of your Enrollment Key, which is located towards the bottom of the page abovethe Save changes button. You may edit this field by clicking the text and entering your ownEnrollment Key.4. Click Save changes to save the Enrollment Key if you made any changes.Enrolling StudentsWhen a student registers for an EHR course, he or she self-enrolls using the Activation code fromtheir textbook purchase, and the Enrollment key, which is provided by the instructor.If a student already exists in the EHR database, it is possible to manually enroll them in your course.To do this, click the course you wish to enroll the student on the left navigation pane, and followthese steps:1. Click the Participants link in the Navigation pane.2. Click the Paper and Pencil icon(displays Edit on mouse-over) to the right of the Allparticipants text. You could also click the Enroll Students link in the Navigation pane.A list of Enrolled users will be displayed.3. Click Enroll users. You can click either the Enroll users button in the top right corner of theEnrolled users table, or the Enroll users button in the lower right corner. The Enroll userspop-up dialog box is now displayed.4. Select student from the Assign roles drop-down list in the Enroll users dialog box. Note: Enrolling an instructor in a course as a student will remove their Instructorprivileges. This is to prevent a student from gaining Instructor rights by mistake. Ifan instructor wishes to view a course through a student’s perspective, he or she canrequest a student code from his or her Account Manager and register in the courseas a student.
5. Type the student’s name in the Search box at the bottom and then press the Enter key. If thestudent exists in the Course Navigator database, the instructor’s name should now be displayed.6. Click the Enroll button to the right of the student’s name to enroll them in the course as aninstructor. After clicking the Enroll button, the student’s name should now appear on a linewithout an Enroll button. This indicates that the user is currently enrolled in the course.7. Click Finish enrolling users at the bottom of the En
3. Enter your Instructor Username and Password, sent to you via email, into the login fields. 4. Click the . Login. button. Student Registration. You will need the following to enroll in the Course Navigator as a student: Course Navigator . Activation code (packaged with each textbook) Enrollment key. for the course (see below)File Size: 1MBPage Count: 28People also search forcourse navigator plusnavigator plus paradigmnavigator plus paradigmnavigator plus register
