Transcription
Instruction 510-025105-29-14Copyright 2014by S&S Cycle, Inc.S&S Cycle, IncAll rights reserved.Printed in the U.S.A. .14025 Cty Hwy G PO Box 215Viola, Wisconsin 54664Phone: 608-627-1497 Fax: 608-627-1488Technical Service Phone: 608-627-TECH (8324)Technical Service Email: sstech@sscycle.comWebsite: www.sscycle.comInstallation and Jetting Instructions forS&S Super E and G Series “Shorty” Performance Carburetorsfor 1984-’99 Harley-Davidson Big Twin and 1986-03 Sportster ModelsDISCLAIMER:S&S parts are designed for high performance, closed course, racingapplications and are intended for the very experienced rider only. Theinstallation of S&S parts may void or adversely affect your factory warranty.In addition such installation and use may violate certain federal, state, andlocal laws, rules and ordinances as well as other laws when used on motorvehicles used on public highways, especially in states where pollution lawsmay apply. Always check federal, state, and local laws before modifying yourmotorcycle. It is the sole and exclusive responsibility of the user to determinethe suitability of the product for his or her use, and the user shall assume alllegal, personal injury risk and liability and all other obligations, duties, andrisks associated therewith.The words Harley , Harley-Davidson , H-D , Sportster , Evolution , and allH-D part numbers and model designations are used in reference only. S&SCycle is not associated with Harley-Davidson, Inc.IMPORTANT NOTICE:Statements in this instruction sheet preceded by the following words are ofspecial significance.WARNINGMeans there is the possibility of injury to yourself or others.CAUTIONMeans there is the possibility of damage to the part or motorcycle.NOTEOther information of particular importance has been placed in italic type.S&S recommends you take special notice of these items.WARRANTY:SAFE INSTALLATION AND OPERATION RULES:Before installing your new S&S part it is your responsibility to read and followthe installation and maintenance procedures in these instructions andfollow the basic rules below for your personal safety. Gasoline is extremely flammable and explosive under certain conditionsand toxic when breathed. Do not smoke. Perform installation in a wellventilated area away from open flames or sparks. If motorcycle has been running, wait until engine and exhaust pipeshave cooled down to avoid getting burned before performing anyinstallation steps. Before performing any installation steps disconnect battery to eliminatepotential sparks and inadvertent engagement of starter while workingon electrical components. Read instructions thoroughly and carefully so all procedures arecompletely understood before performing any installation steps.Contact S&S with any questions you may have if any steps are unclear orany abnormalities occur during installation or operation of motorcyclewith a S&S part on it. Consult an appropriate service manual for your motorcycle for correctdisassembly and reassembly procedures for any parts that need to beremoved to facilitate installation. Use good judgment when performing installation and operatingmotorcycle. Good judgment begins with a clear head. Don’t letalcohol, drugs or fatigue impair your judgment. Start installation whenyou are fresh. Be sure all federal, state and local laws are obeyed with the installation. For optimum performance and safety and to minimize potentialdamage to carb or other components, use all mounting hardware that isprovided and follow all installation instructions. Motorcycle exhaust fumes are toxic and poisonous and must not bebreathed. Run motorcycle in a well ventilated area where fumes candissipate.All S&S parts are guaranteed to the original purchaser to be free ofmanufacturing defects in materials and workmanship for a period of twelve(12) months from the date of purchase. Merchandise that fails to conform tothese conditions will be repaired or replaced at S&S’s option if the parts arereturned to us by the purchaser within the 12 month warranty period or within10 days thereafter.In the event warranty service is required, the original purchaser must call orwrite S&S immediately with the problem. Some problems can be rectified by atelephone call and need no further course of action.A part that is suspect of being defective must not be replaced by a Dealerwithout prior authorization from S&S. If it is deemed necessary for S&S tomake an evaluation to determine whether the part was defective, a returnauthorization number must be obtained from S&S. The parts must be packagedproperly so as to not cause further damage and be returned prepaid to S&Swith a copy of the original invoice of purchase and a detailed letter outliningthe nature of the problem, how the part was used and the circumstances atthe time of failure. If after an evaluation has been made by S&S and the partwas found to be defective, repair, replacement or refund will be granted.ADDITIONAL WARRANTY PROVISIONS:(1) S&S shall have no obligation in the event an S&S part is modified by anyother person or organization.(2) S&S shall have no obligation if an S&S part becomes defective in whole orin part as a result of improper installation, improper maintenance, improperuse, abnormal operation, or any other misuse or mistreatment of the S&S part.(3) S&S shall not be liable for any consequential or incidental damagesresulting from the failure of an S&S part, the breach of any warranties, thefailure to deliver, delay in delivery, delivery in non-conforming condition, orfor any other breach of contract or duty between S&S and a customer.(4) S&S parts are designed exclusively for use in Harley-Davidson and otherAmerican v-twin motorcycles. S&S shall have no warranty or liability obligationif an S&S part is used in any other application.
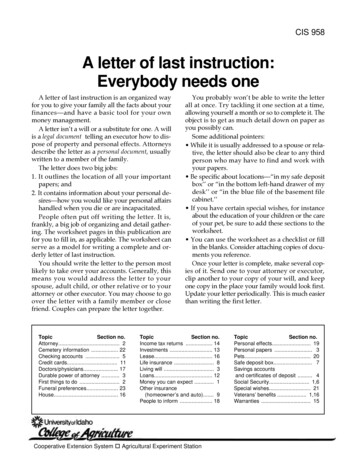
1984 to 1999 Big Twin ModelsStock big twin models from 1981-‘89 have two-cable throttle systemdesigned for stock, butterfly type carburetors. Big twins from 1990to present have a two-cable throttle system designed for the stock,constant velocity (CV) type carburetor. In spite of the differences inthrottle cables for these year groups, stock throttle cables on all 1984‘99 big twin models can be installed on the S&S Super E or G throttlelinkage with no cable modification. S&S Super E and G carb kits for1984-‘89 big twins contain a throttle cable guide designed for butterflytype throttle cables, and kits for 1990-‘99 big twins contain a tallerthrottle cable guide designed for CV type throttle cables. See Picture2. The two throttle cable guides are interchangeable on the carburetorbody, and can be changed very easily to update older carburetorsor to accommodate custom throttle cables which are not stock for aparticular year chassis.INTRODUCTIONS&S Super E and G Shorty carburetors are butterfly type carburetorswith fully adjustable idle mixture and circuit and changeable midrange and high speed jets The high speed circuit features a changeableair bleed. Both carburetors also feature an adjustable acceleratorpump and variable enrichment/fast idle device for improved throttleresponse, engine starting and warm ups.The Super E has a 17 8" (47.6mm) bore and 19 16" (39.6mm) venturi. It isidentified by an “E” cast into the throttle linkage side of the body belowthe letters “S&S SUPER”. The Super E is recommended for use on anydisplacement big twin or Sportster model.The Super G has a 21 16" (52.3mm) bore and 3 4" (44.5mm) venturi. It isidentified by a “G” cast into the carb body. See Picture 1. The SuperG is recommended for use on modified engines of 100 cubic inches ormore. While both carburetors can be made to work on most engines,the Super G is not recommended for small, low compression engines. Ifthere is doubt as to which carburetor to use, S&S suggests the Super E.Picture 21986 to 2003 Harley-Davidson Sportster ModelsStock Sportster models from 1986-‘87 have two-cable throttle systemdesigned for butterfly type carburetors. 1988-‘03 models have a twocable throttle system designed for use with the stock constant velocity(CV) type carburetor. A tall guide included with this kit should be usedon 1988-’03 carbureted Harley-Davidson Sportster models.Picture 1IMPORTANT NOTES Recommended for Racing Only - S&S Super E & G carburetors coveredby these instructions are not legal for use in California on motor vehiclesoperated on public highways or in other states where similar pollutionlaws apply. The user shall determine the suitability of the product for hisor her use and shall assume all risk and liability in connection therewith. Because S&S carburetors are significantly larger than OEM units,unmodified, small displacement engines such as 883 Sportster modelsmay experience sluggish low speed response when equipped with S&Scarburetors. This can often be minimized with performance exhaustand careful tuning. All manufacturer warranties become void if any part of the carburetor ispolished, chrome plated or otherwise altered.CARB INSTALLATIONRead instructions thoroughly to familiarize yourself with all proceduresbefore beginning installation.NOTE: Installation of S&S Super E and G carb kits on certain modelsis easier with gas tanks removed. Some owners may elect to performinstallation without removing gas tanks. This is left to individual discretion.If installer elects to remove tanks or other stock parts, S&S recommendsreferring to appropriate Harley-Davidson service manual for correctremoval procedure as necessary.THROTTLE REQUIREMENTS1. Remove Old Carburetor And Manifolda. Shut off fuel petcock and disconnect battery.b. Remove air cleaner assembly. Drain fuel from existing carburetor.Remove carburetor, manifold, choke cable and any carburetormounting hardware.NOTE: S&S Super E and G carburetors require the use of a two cable, pullopen - pull closed throttle assembly.WARNINGWARNINGSingle, braided wire cable throttle mechanisms cannotmechanically close the throttle. If throttle inadvertently sticks inopen position, loss of control of motorcycle and personal injury tooperator or others may result. Gasoline is extremely flammable and explosive under certainconditions. Do not smoke around gasoline. Gasoline fumes aretoxic when inhaled. Perform installation in a well ventilatedarea away from open flames or sparks. Any gasoline leak or spillconstitutes a health and fire hazard.2
If motorcycle has been running, wait until engine and exhausthave cooled to avoid getting burned during installation. Electrical sparks can ignite explosive gasoline fumes. Failure todisconnect battery while working on motorcycle can also resultin inadvertent engagement of starter and personal injury.NOTES: Removing and tightening hard to reach Allen bolts like carb-manifoldmounting bolts and manifold flange bolts can be greatly simplified byusing some special tools. The S&S rocker cover wrenches work very wellfor this application. See Picture 3. Allen ball-end drivers are also very helpful, and are available at mostautomotive and tool supply houses. See Picture 4. As an alternative,standard hex wrench can be shortened for convenience.Picture 5iii. Assemble fast idle mechanism as shown in Figure A. On currentbackplates the pivot point for the enrichener does not have ascrew holding it; a boss has been cast onto the backplate toreplace this.Picture 3Figure Ab. 1986 to 1990 Sportster modelsi. Install plug into hole on right in air cleaner backplate as shown inPicture 6.ii. Screw vent hose nipple fitting into remaining hole at left. SeePicture 6. Elbow fitting supplied in kit may also be used in thislocation if required.iii. Assemble fast idle mechanism as shown in Figure A. On currentbackplates the pivot point for the enrichener does not have ascrew holding it; a boss has been cast onto the backplate toreplace this.Picture 42. Prepare Air Cleaner BackplateNOTE: Fast idle lever screws must not be over tightened. Loctite or otherthread locking compound may be used sparingly on threads to preventscrews from vibrating loose.CAUTIONOver tightening fast idle lever screws may damage backplate.Picture 6a. 1984-’92 Evolution big twin enginesi. Install plug into hole on left in air cleaner backplate as shown inPicture 5.ii. Screw vent hose elbow fitting into remaining hole at right. SeePicture 5.c. 1993-99 big twin & 1991-06 Harley-Davidson Sportster i. Install plugs into both holes in air cleaner backplate as shown inPicture 7.3
CAUTIONImproperly mounted carburetor could loosen unexpectedly,resulting in air leak, poor performance and possible damage toengine or carburetor.Incorrect combinations of mounting hardware may causemounting bolts to bottom out in holes or inadvertently contactother parts possibly causing damage to engine or carburetorcomponents.WARNINGImproperly mounted carburetor may break free in event ofcollision or other vehicle accident creating a fire hazard withpotential personal injury to operator/others.Picture 7a. Clean intake ports on cylinder heads to insure proper manifold tohead seal.b. Install S&S intake manifold. For manifold flange and seal assemblyorder, See Figure B. Note that bevel side of seal goes toward recessin manifold flange, flat side of seal against head. Do not completelytighten manifold clamps or flange bolts at this time.c. Sportster models 1986-’03 and all 1984-’05 big twins- Connectvacuum operated advance ignition switch (VOES) to manifoldusing 8" piece of black tubing supplied in kit. Cut tubing to shorterlength if necessary.ii. Assemble fast idle mechanism as shown in Figure A. On currentbackplates the pivot point for the enrichener does not have ascrew holding it; a boss has been cast onto the backplate toreplace this.3. Throttle PreparationNOTE: Throttle grip assembly and throttle cables must be assembledcorrectly and work freely to prevent possible sticking during operation.Throttle must snap closed when released. Cable routing must be free oftight bends to minimize friction between cable and housing.WARNINGIf throttle does not work freely, it may inadvertently stick openpossibly causing loss of control of motorcycle and personal injuryto operator or others.a. Prepare existing throttle assembly - 1984-‘99 big twin and 19861989 Harley-Davidson Sportster chassis equipped with two cablepull open-pull closed type throttle assembly.i. Loosen cable freeplay adjustment locknuts and thread adjustingscrew so half of threads are exposed. See Picture 8.ii. Clean grease and dirt off cables, cable housings and cable fittings.iii. Apply light coat of cable lubricant to cables and fittings.Figure B5. Install Carba. Check idle mixture and idle speed screw settings.i. Check setting of idle mixture screw on top of carb body. SeePicture 9. Turn screw clockwise to close screw, counting numberof turns to fully closed position - setting should be 11 2 turns. Resetby turning screw counterclockwise to 11 2 turns open. After engineis started, screw must be reset as explained in “Adjusting IdleMixture” section of instructions.Picture 8b. If installing a custom or aftermarket throttle assembly, followmanufacturer’s instructions, but ensure that throttle and cableswork freely.4. Install New Manifold and Mounting HardwarePicture 9NOTE: When applicable, all carburetor mounting brackets and hardwaresupplied in kit must be installed to secure carburetor and air cleanerbackplate assembly or air horn rigidly to engine.NOTE: Turn idle mixture screw in only far enough to contact seat. Do notover tighten.4
CAUTIONCAUTIONOver tightening idle mixture screw may cause irreversible damageto carburetor body.If insulator block is not installed, lower manifold bolt may damagecarburetor bowl causing possible gasoline leak.ii. Check setting of idle speed adjusting screw. See Picture 10. Turnscrew counterclockwise until it no longer contacts throttle linkagespool. Next, turn screw clockwise until it just contacts spool. Thenturn additional 1 2 turn clockwise to slightly open throttle plate.WARNINGGasoline is extremely flammable and explosive under certainconditions. Do not smoke around gasoline. Gasoline fumes aretoxic when inhaled. Any gasoline leak or spill constitutes a healthand fire hazard.d. Adjust throttle cablesi. Turn threaded throttle cable adjusters to remove excessivefreeplay.ii. Test throttle to insure that it opens and closes freely. Turnhandlebars to extreme left and open and close throttle, then turnbars to extreme right and open and close throttle. If throttle binds,loosen cable adjusters to put more freeplay in cables. Tightenadjusting screw locknuts after making final adjustments.NOTE: Throttle must not bind and must snap shut to fully closed positionwhen released.WARNINGPicture 10If throttle does not return to fully closed position when released,it may inadvertently stick open, causing possible loss of control ofmotorcycle and personal injury to operator or others.b. Install throttle cables on carburetor.i. Apply drop of Loctite 242 or equivalent to threads of cablebracket screw and install the proper throttle cable guide on thecarburetor.ii. Install opening side throttle cable barrel fitting and throttle cablein throttle linkage and appropriate side of throttle cable housingbracket. Opening side cable housing outside diameter is smallerand measures .190".iii. Repeat step 2 for closing side throttle cable. Closing side cable hasa spring around inner cable wire. See Picture 11.e. Slip fuel overflow hose onto fitting on carb bowl and neatly routebehind pushrod tubes. On a big twin model, hose should gotoward back of engine. On Harley-Davidson Sportster models,hose should go toward front of engine. Exit end of overflow hosemust extend down below engine and away from exhaust pipes.See Pictures 12 and 13.Picture 12Picture 11c. Install carb on manifoldi. Install manifold o-ring in o-ring groove in insulator block.ii. Bolt carb and insulator block to intake manifold using two 3 8"16 socket cap screws provided in kit. (O-ring side of block facesmanifold.) Carb kits for big twins include two 3 8"-16 x 11 4" socketcap screws. Kits for Harley-Davidson Evolution Sportster models contain a thicker (3 8") insulator block and two 3 8"-16 x 13 8"socket cap screws to compensate for the additional thicknessof the spacer block. (See important note below and cautionconcerning insulator block.)NOTE: If insulator block is not installed, manifold bolts supplied in kit willbe too long and may bottom in holes. Shorter manifold bolts must be usedif insulator block is not installed.Picture 135
NOTES: Most 1992 big twins have crankcase breather routed from case to aircleaner backplate. However, some late 1992 engines have breatherrouted from heads to air cleaner backplate through air cleaner mountingbosses. If crankcase breather is routed through heads, 1993 and later carbkit must be installed. Follow instructions for installation on 1993 engine. Thread-serts may be supplied with or without thread locking compoundon threads. Loctite 242 or equivalent should be applied to threads ofthread-serts not supplied with thread locking compound. Thread-sertsshould be installed in desired position and left in place. Installing thread-sert in hole activates thread locking compound makingit difficult to change position of thread-sert after installation.WARNINGOverflow hose must not contact hot surface such as exhaust pipewhere it could melt and catch fire.f. Slip hose clamp over end of fuel line. Apply thin coat of oil to carbfuel inlet fitting and slip end of fuel line on fitting. Position fuelline in such a way as to avoid contact with cylinders and other hotengine parts. Tighten hose clamp. Slip protective fuel line coveringover fuel line and position where contact with engine parts couldoccur. On models equipped with fuel line support guide, use guideif possible. Connect other end of fuel line to gas tank petcock usinghose clamp provided.CAUTIONWARNINGCylinder head vent passages in “head breather” type engine mustnot be
Cycle, Inc. 14025 Cty Hwy G PO Box 215 Viola, Wisconsin 54664 Phone: 608-627-1497 Fax: 608-627-1488 . G is recommended for use on modified engines of 100 cubic inches or more. While both carburetors can be made to work on most engines, the Super G is not recommended for small, low compression engines. .


![API Ballot: [Ballot ID] – API 510 & API 570, Deferrals, Rev05](/img/5/api510andapi570deferralsrev5.jpg)