Transcription
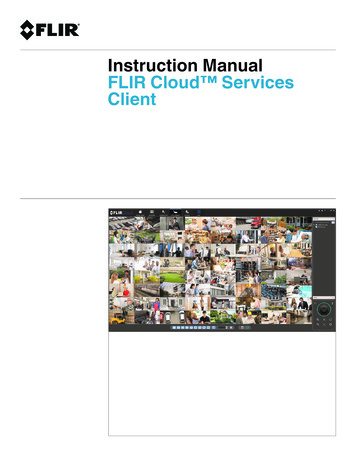
Instruction ManualFLIR Cloud ServicesClient
Instruction ManualFLIR Cloud ServicesClient#LX400018; r. 2.0/14567/14568; en-USiii
Table of contents1Setting up FLIR Cloud Client for PC or Mac .11.1System Requirements. 11.2Installing FLIR Cloud Client . 11.3Adding a System using FLIR Cloud Services . 11.4Adding a System over the Local Network (LAN). 41.5Adding a System over the Internet using a DDNS Address . 62Using FLIR Cloud Client for PC or Mac . 102.1Home Page . 102.2Live View . 102.2.1 Live View Controls. 112.2.2 Opening Live View in Multiple Monitors . 122.3Controlling PTZ Cameras . 132.3.1 PTZ Presets. 142.3.2 PTZ Tours. 152.3.3 PTZ Pattern . 162.3.4 PTZ Scan . 172.3.5 PTZ Pan. 172.4Playback. 172.5Playback Controls . 192.6Downloading Video to your Computer Hard Drive. 202.7Alarm . 212.8Log . 212.9E-map . 222.10Devices . 242.11Device Config . 252.12Alarm CFG . 262.13Tour & Task . 292.14Account . 302.14.1 Managing User Accounts . 302.14.2 Managing Roles. 322.15General . 332.15.1 Basic . 332.15.2 File . 332.15.3 Alarm Prompt . 342.15.4 Version . 35#LX400018; r. 2.0/14567/14568; en-USv
1Setting up FLIR Cloud Client forPC or MacFLIR Cloud Client is a central management software that allows you to view and manage multiple FLIR security systems on a PC or Mac. It includes support for FLIR Cloud Services, allowing a simple, secure connection to compatible systems over the Internetwith no network configuration required.1.1 System RequirementsYour system must meet the system requirements below:DescriptionRequirementCPUCore 2 Duo 3.0GHzOperating SystemWindows 8/7/VistaMac OSX 10.7 and aboveMemory2GBVideo512 MB of video memory and aboveNetwork (LAN)10/100 BaseT NetworkNetwork (WAN)1 Mbps upstreamHigh-speed Internet service is required to remotelyconnect to your system.1.2 Installing FLIR Cloud Client1. Download and install the client software. PC Users: Download and install FLIR Cloud Client for PC fromwww.flirsecurity.com/pro. Mac Users: Download and install FLIR Cloud Client for Mac fromwww.flirsecurity.com/pro. Double click to extract the software. Then, dragthe software to Applications.2. Once installation is finished, double-click the FLIR Cloud Client icon (desktop or Applications list.) from the3. Log into the Client Software using the Client Software user name (default: admin) andpassword (default: admin) and then click Login.1.3 Adding a System using FLIR Cloud ServicesIf you have systems that support FLIR Cloud Services, you can securely connect themusing FLIR Cloud Client without any network configuration.Prerequisites:#LX400018; r. 2.0/14567/14568; en-US1
1Setting up FLIR Cloud Client for PC or Mac Your system must support FLIR Cloud Services. If your system supports FLIRCloud Services, it will have a QR code label with a Device ID somewhere on the unit.You will need to refer to the Device ID during setup.NoteIf your system does not support FLIR Cloud Services or have the QR code label, you can connectto it using the IP or DDNS address (see 1.4 Adding a System over the Local Network (LAN), page 4). Connect your system to your router using an Ethernet cable. Make sure to upgrade your system to the latest firmware version. You must havethe latest firmware and client software to connect to the system over the Internet.NoteAn upload speed of 1Mbps is required to use FLIR Cloud Services. Up to 3 devices may connect toa system at the same time.To connect to your system using FLIR Cloud Services:1. Clickand then click.2. Click Add Device.#LX400018; r. 2.0/14567/14568; en-US2
1Setting up FLIR Cloud Client for PC or Mac3. Enter the following:123453.1.3.2.3.3.3.4.3.5.Device Name: Choose a name for your system of your choice.Device ID: Manually enter the Device ID printed on the product label.Client Port: Enter the system’s Client Port.User Name: Enter the system’s User Name.Password: Enter the system’s Password.4. Click Add. If this is the first time you are connecting, you will be prompted to changethe system password.5. Enter a new 6 character password and click OK. This password will be used to connect to your system from now on.#LX400018; r. 2.0/14567/14568; en-US3
1Setting up FLIR Cloud Client for PC or Mac6. Clickthen.7. Click and drag Default Group to the display window to open your cameras in live view.Congratulations! You can now connect over the Internet to view and playback video onyour computer.1.4 Adding a System over the Local Network (LAN)You can also add systems over a local network (LAN). The software will automatically scanthe network for compatible systems.Prerequisites: Connect the system to your router using an Ethernet cable. Install FLIR Cloud Client on a computer in the same network as the system you areconnecting to.To add a system over the LAN:1. Clickand then click#LX400018; r. 2.0/14567/14568; en-US.4
1Setting up FLIR Cloud Client for PC or Mac2. The client scans your LAN for connected systems. Check your system (a) and clickAdd (b).ab3. Enter the password for your system (default: 000000) and click OK.4. If this is the first time you are connecting, you will be prompted to change the systempassword.5. Enter a new 6 character password and click OK. This password will be used to connect to your system from now on.6. Clickthen.#LX400018; r. 2.0/14567/14568; en-US5
1Setting up FLIR Cloud Client for PC or Mac7. Click and drag Default Group to the display window to open your cameras in live view.Result1.5 Adding a System over the Internet using a DDNS AddressIt is recommended to sign up for a free FLIR DDNS address to connect to compatible systems over the Internet that do not support FLIR Cloud Services.Prerequisites: Create a DDNS account at http://ddns.myddns-flir.com.Input the DDNS address into the system locally.Port forward the required ports on the router to the system’s local IP address.Install FLIR Cloud Client on a remote computer.To add a system using a DDNS address:1. Clickand then click#LX400018; r. 2.0/14567/14568; en-US.6
1Setting up FLIR Cloud Client for PC or Mac2. Click Add Device.3. Enter the following:2134563.1.3.2.3.3.Check By IP/Domain to add a system using the DDNS address.Device Name: Choose a name for your system of your choice.IP/DDNS Address: Enter the Domain Name/URL Request you received in theemail when you registered for DDNS followed by .myddns-flir.com.NoteFor example, if your Domain Name/URL Request is tomsmith, enter tomsmith.myddns-flir.com3.4.3.5.3.6.Client Port: Enter the system’s Client Port.User Name: Enter the system’s User Name (default: admin).Password: Enter the system’s Password (default: 000000).#LX400018; r. 2.0/14567/14568; en-US7
1Setting up FLIR Cloud Client for PC or Mac4. Click Add. If this is the first time you are connecting, you will be prompted to changethe system password.5. Enter a new 6 character password and click OK. This password will be used to connect to your system from now on.6. Clickthen.7. Click and drag Default Group to the display window to open your cameras in live view.Congratulations! You can now connect over the Internet to view and playback video onyour computer.#LX400018; r. 2.0/14567/14568; en-US8
1Setting up FLIR Cloud Client for PC or MacResult#LX400018; r. 2.0/14567/14568; en-US9
2Using FLIR Cloud Client for PCor MacFLIR Cloud Client allows you to connect to multiple systems from a PC or Mac.2.1 Home PageThe Home Page allows you to access all the tabs within the software. Each tab allows youto access different features.To open tabs:Click a tab from the Home Page to open it or click thefrom within any tab to open a new tab.button at the top of the screen2.2 Live ViewThe Live View tab is where you can view live video from connected systems.To view live video from a system:1. Clickand then clickto create a Live View tab.2. Click and drag a DVR, NVR, group, or individual camera to open live video. To accessindividual cameras, you can click to expand groups or systems.#LX400018; r. 2.0/14567/14568; en-US10
2Using FLIR Cloud Client for PC or Mac2.2.1 Live View Controls9187324561. Live display: Double-click to expand the area. Right-click to access additional options.Hold the mouse over the display area to access the camera toolbar.Camera toolbar:11.1.1.2.1.3.1.4.1.5.1.6.1.7.1.8.2 3 4 5 6 7 8Streaming quality: Shows the bitrate and resolution for the stream, and shows if display isshowing the Sub Stream or Main Stream.Manual recording: Click to start/stop manual recording.Snapshot: Click to save a snapshot.Mute/unmute: Click to mute/unmute audio (audio camera required).Not supported.Instant playback: Plays back the most recently recorded video from the camera. By default, itwill play back the last 5 minutes of recorded video from the camera.Digital zoom: Click to enable digital zoom mode. Click and drag over the display area to zoomon the camera. Then click and drag to pan. Click the icon again to zoom out.Disconnect.2. Split-screen mode: Click to select split-screen layout.3. Aspect ratio: Use the drop down menu to select the aspect ratio for the selectedcamera. Original uses the actual aspect ratio of the image. Full-win stretches the image to fill up the entire display area.4.Full-screen: Click to open full-screen mode. Press ESC to exit full-screen mode.#LX400018; r. 2.0/14567/14568; en-US11
2Using FLIR Cloud Client for PC or Mac5.Save view: Click to save the current display layout and open cameras as a view.Then enter a name for the view.6.Start/stop tour: Click to start the tour. During the tour the client will cycle throughall saved views every few seconds. Click again to stop the tour.7. PTZ Controls: Controls for PTZ cameras (not included). See 2.3 Controlling PTZCameras, page 13 for details.8. View: Click View to access view menu. Then double-click on a view to open it in thedisplay area.9. Devices: Shows a list of groups, cameras, and systems connected to the client. Dragitems to the display area to open live video. Right-click to view additional options.2.2.2 Opening Live View in Multiple MonitorsIf your computer has multiple monitors, you can open more than one Live View tab andmove them to secondary monitors. This allows you to monitor cameras on multiple monitors at the same time.NoteUsing multiple monitors significantly increases the amount of computing resources necessary to run theapplication and may affect performance.To open Live View in multiple monitors:1. Clickand then click#LX400018; r. 2.0/14567/14568; en-USto create a Live View tab.12
2Using FLIR Cloud Client for PC or Mac2. Click and drag the tab outside of the client window to create a new window. You candrag the window to one of the secondary monitors.Result2.3 Controlling PTZ CamerasIf you have PTZ cameras (not included), you can control them using the client.NoteYou must ensure the PTZ camera is properly connected to your system and your system is configured todetect it before you can control them using the client.To control PTZ cameras: Click the display area with the PTZ cameras and use the on-screen PTZ controls.#LX400018; r. 2.0/14567/14568; en-US13
2Using FLIR Cloud Client for PC or MacPTZ controls:1263451. Open menu: Click to open camera OSD menu controls. This feature may not be supported for all camera models.2. Move camera: Click the arrows to move the camera.Clickto open dynamic zoom mode. Then click and drag in the video area to zoomin the camera on an area.3.4.5.6.Zoom /-: Click to zoom the camera in and out.Focus /-: Click to increase/decrease the focus.Iris /-: Click to increase/decrease the iris.Advanced: Click to access advanced PTZ controls.2.3.1 PTZ PresetsPresets will save a camera position for quick retrieval.To add presets:1. Click2. Clickto open the Advanced controls. Select Preset.#LX400018; r. 2.0/14567/14568; en-US14
2Using FLIR Cloud Client for PC or Mac3. Select the number of the preset you would like to add.4. Move the camera to the desired position.5. Clickto save the current position as a preset.To go to a saved preset:1. Select the preset number from the list or clickpreset.to go to the currently selected2.3.2 PTZ ToursTours will cycle through a set of presets.To configure a PTZ tour:1. Click2. Clickto open the Advanced controls. Select Tour.3. Under Cruise ID, select the number of the tour you would like to configure.4. (Optional) Under Cruise Name, enter a name for the tour.#LX400018; r. 2.0/14567/14568; en-US15
2Using FLIR Cloud Client for PC or Mac5. Use the chart to select which presets you would like to include in the tour and the orderof presets. Preset: Select the preset number. Time(s): Enter the time in seconds the camera will remain on the selected preset. Operation: Clickthe tour.to add a preset to the tour. Clickto delete a preset from6. Click OK to save changes.To run a PTZ tour:1. Select the tour number and click.2.3.3 PTZ PatternPatterns automatically cycle the camera between two positions.To create a pattern:1. Clickto open the Advanced controls. Select Pattern.2. Select the number of the pattern you would like to set up.3. Move the camera into the desired start position.4. Clickto start recording the pattern.5. Move the camera to the desired end position. Then, clickpattern.to stop recording theTo run a pattern:1. Select the pattern number and click#LX400018; r. 2.0/14567/14568; en-US.16
2Using FLIR Cloud Client for PC or Mac2.3.4 PTZ ScanScan automatically cycles between a left and right point.To set up scan mode:1. Clickto open the Advanced controls. Select Scan.2. Move the camera to the desired left position and click.3. Move the camera to the desired right position and click.To run scan mode:1. Click.2.3.5 PTZ PanPan makes the camera continuously pan 360 .To run Pan mode:1. Click2. Clickto open the Advanced controls. Select Pan.2.4 PlaybackYou can use Playback mode to playback video saved on systems connected to the client.To access Playback mode: Clickand then clickto create a Playback tab.12345#LX400018; r. 2.0/14567/14568; en-US17
2Using FLIR Cloud Client for PC or MacTo playback video:1. Check the channels you would like to play back from in the Device List.2. Under Type, check the file types you would like to search for. All: All recordings.General: Continuous recordings.MD: Motion recordings.Alarm: Alarm recordings. Your system must support alarm devices (not included) touse this feature.3. Under Stream, select Main Stream to search for Main Stream recordings (high quality) or Sub Stream to search for Sub Stream recordings (smaller file size).4. Select the start time and end time for your search under From and To. You may notsearch more than 24 hours of video.5. Click Search. Wait for the client to find video saved to the system.6. Click inside the play back bar to start playback.#LX400018; r. 2.0/14567/14568; en-US18
2Using FLIR Cloud Client for PC or Mac2.5 Playback Controls11845 6 7891011122317131514161. Display area: Double-click to expand/return to split-screen mode. Hold the mouseover the display area to open the camera toolbar. Snapshot: Click to save a snapshot. Digital zoom: Click to enable digital zoom mode. Then, click and drag to zoom in. Click anddrag to pan the camera. Clickagain to zoom out.2. Event: Click to view recordings based on a list of events and files.3. Record: Click to view recordings on a timeline.4. Sync: Click to sync playback between channels. This forces all channels to playbackfrom the same time.5. Pause/play.6. Stop.7. Frame-by-frame: Click to advance the video by a single frame.8. Playback speed: Use the slider to adjust the playback speed.9. Mute.10. Volume.11. Split-screen: Select split screen configuration.12. Full-screen: Click to open playback in full-screen. Press ESC to exit full-screen.13. Timeline zoom: Use the slider to zoom in/out on the timeline.14. Playback timeline: Shows recordings from the selected channels on a timeline. Clickinside the timeline to start playback or select a playback time. Each type of recordingsis shown in a different color. Continuous recordings are green, motion recordings areyellow, and alarm recordings are red.15. Video clip: Click to start a video clip. You can download video clips to your hard drive.#LX400018; r. 2.0/14567/14568; en-US19
2Using FLIR Cloud Client for PC or Mac16. Download list: Click to see a list of files you have downloaded and the progress offiles that are currently downloading.17. Search: Search for video on the selected channels based on the search parametersyou set.18. Device list: Select the channels you would like to search or playback video from.2.6 Downloading Video to your Computer Hard DriveYou can download video to your computer hard drive to save important events or sharethem. It is recommended to download video of important events as soon as possible to ensure they are not overwritten by new recordings.NotePC Users: You may need to run FLIR Cloud Client as an administrator to download files to your harddrive.To download video files:1. Start playing back video using the steps in 2.4 Playback, page 17.2. Clickclip.to start a video clip at the current playback time. Clickto stop the video3. Configure the following save options: Path: Use the default save folder or click Browse to select a different folder. File Format: Select Original Format to save to .dav format (requires the videoplayer). Select AVI to save files to .avi format (can be played in VLC Media Player).NoteThe Mac version only supports downloading video to .dav format. Download Video Player: Check to save a copy of the video player with the downloaded file.4. Click OK to start the download. A status screen will pop up to show progress on downloaded files.NoteTo retrieve d
Jun 04, 2014 · Setting up FLIR Cloud Client for PC or Mac 1 FLIR Cloud Client is a central management software that allows you to view and man-age multiple FLIR security systems on a PC or Mac. It includes support for FLIR Cloud Services, allowing a simple, secure connection to compatible systems over the Internet with no network configuration required.