Transcription
Storage Center 5.5System Setup Guide
Storage Center 5.5 System Setup Guide680-022-009RevisionDateDescriptionAMarch 2011Initial Release for Storage Center 5.5.2.BApril 2011Updated to include new locations for contacting Dell technical support anddownloading product manuals.DisclaimersInformation in this document is subject to change without notice.Trademarks and CopyrightTrademarks used in this text: DellTM, the DELLTM logo, and CompellentTM are trademarks of Dell Inc.Other trademarks and trade names may be used in this document to refer to either the entities claiming themarks and names or their products. Dell Inc. disclaims any proprietary interest in trademarks and tradenames other than its own. 2011 Dell Inc. All rights reserved.
ContentsPrefacePurpose vRelated Publications vContacting Dell Support Services v1Getting StartedPre-installation Documents 1About Virtual Ports 1System Power Up 22Setting Up the Storage CenterSetting Up a Controller 3Connect to a Controller 3Reset Hardware and System Serial Numbers 4Set IP Addresses 5Configuring a System via the Startup Wizard 6Step 1: Launch the Storage Center Startup Wizard 6Step 2: License Agreement 7Step 3: Load License 7Step 4: Create Disk Folder 8Step 5: Add Controller (dual-controller systems only) 13Step 6: Time Settings 16Step 7: System Setup 17Step 8: Configure SMTP 18Step 9: Update Setup 21Step 10: User Setup 22Step 11: Configure IO Cards (optional) 23Step 12: Configure Ports 24Step 13: Generate SSL Certificate 43Completing the Storage Center Setup 45Configure a Phone Home Proxy 45Phone Home 46Check for Storage Center Updates 47iii
Contents3Virtual Storage and Virtual PortsAbout Virtual Storage 50About Virtual Ports 51Legacy Mode 51Virtual Port Mode 52Glossary 53ivStorage Center System Setup Guide
PrefacePurposeThis guide describes how to setting up a new Storage Center.Related PublicationsWhile using this guide, you may also want to refer to the following related publications: Storage Center System Manager User GuideProvides instructions for using Storage Center System Manager to manage storage. Storage Center System Manager Upgrade GuideDescribes how to upgrade Storage Center software from version 4.5.6 and above toversion 5 and from version 5.0 and higher to version 5. Enterprise Manager User GuideProvides instructions for managing multiple Storage Centers.To download Dell Compellent product manuals, go to:http://www.dell.com/manualsContacting Dell Support ServicesPlease contact Dell Technical Support Services from the following address if you needsupport assistance:http://support.dell.com/compellentv
PrefaceviStorage Center System Setup Guide
1Getting StartedPre-installation DocumentsAll hardware must be installed and cabled before you begin the setup and softwareinstallation process. If server connectivity is through Fibre Channel (FC), the FC switchesmust be configured and zoned before the controller/s are set up.Your Storage Architect or Business Partner supplied pre-installation documents thatinclude: List of hardware needed to support storage requirements Optional connectivity diagrams to illustrate cabling between the controllers, enclosures,network, and servers Optional network information, such as IP addresses, subnet masks, gateways, and soforthRefer to these documents for information about site-specific settings that will be usedduring controller configuration described in Setting Up a Controller on page 3.About Virtual PortsBecause Virtual Ports change IO ports from a physical to a virtualized representation, theyeliminate the need for reserve ports. All ports within a network or fabric are Primary and canread and write IO. If a physical port fails, any Virtual Port in the same fabric can take overfor the failed port. Because each Virtual Port has a preferred Physical port association; thevirtual port returns to its preferred Physical port when the system is rebalanced.You may want to define a Virtual Port configuration before you start the Storage CenterStartup Wizard. However, if there is no Virtual Port configuration defined, Step 12:Configure Ports on page 24 allows you to skip configuring ports during initial setup.If you have not used virtualization before, refer to Virtual Storage and Virtual Ports onpage 49 for an introduction to Virtual Storage and Virtual Ports.1
Getting StartedSystem Power UpPower on the system by pressing the power switches in the following order.1 Power up each enclosure. Simultaneously press the two power switches on the rear ofeach enclosure.2 Wait several minutes until the drives spin up.3 After all drives in the enclosure spin up, power up each controller by pressing the powerbutton on the front of the enclosure.Note Always power up disk drive enclosures before powering up the controllers.After powering on the Storage Center, go to Setting Up the Storage Center on page 3 tocontinue the setup.2Storage Center System Setup Guide
2Setting Up the Storage CenterSetting Up a ControllerOnce hardware has been racked and cabled and any FC switches that provide serverconnectivity have been configured and zoned, you configure and identify a controller.Configuring a controller includes the following tasks: Connect to a Controller on page 3 Reset Hardware and System Serial Numbers on page 4 Set IP Addresses on page 5If you have a dual-controller system, you will configure both controllers using the serialconnection. For documentation purposes we call the controller you assign the lower serialnumber as Controller 1 and the other as Controller 2. Configure Controller 1 and thenconfigure Controller 2.Connect to a Controller To connect to a controller1 Using a DB9 cable, connect a PC or laptop to a Storage Center controller DB9 serialport. (To connect from a USB port, use a USB to DB9 converter.)2 Power up the PC.3 Open a terminal emulator or a command line interface. Configure the connection asfollows:SettingValueEmulationVT220Column Mode132Line WrappingOffConnectionSerial PortConnection Type DirectBaud Rate115,2003
Setting Up the Storage CenterSettingValueParityNoneData Bits8Stop Bits1Flow ControlHardware or defaultNote You should also enable logging as the logs will be helpful if Copilot support isneeded.4 Press Enter several times to initiate the connection. The terminal echoes back toindicate that connectivity has been established. If the prompt is not displayed, verify thecommunications settings or cabling.Reset Hardware and System Serial Numbers1 Once you establish connection to a controller via the terminal software, view thecurrent serial numbers by entering the following console command:controller show2 For Controller 1, change the current Hardware Serial Number (HSN) and System SerialNumber (SSN) to the HSN and SSN listed in your pre-installation documents. For moreinformation about pre-installation documents, refer to Pre-installation Documents onpage 1.Note The following commands are for a new installations only. Using the cs purge allcommand on an existing Storage Center deletes the existing configuration and canmake data inaccessible.On the terminal screen, enter:shellaccess developerplatform init hsn set [new HSN]platform init ssn set [new SSN]cs purge all-reset3 The controller takes several minutes to reset. If you are near the controller, you can hearit power down and reboot.Note The controller may reboot more than once. This is normal.4 From the controller show command output, write down the factory default eth1addresses from each controller. If you are setting up a dual system, the eth1 addressfrom controller 2 will be needed during the setup process.4Storage Center System Setup Guide
Setting Up a ControllerSet IP AddressesStorage Center controllers use static IP addresses. eth0 supports system login and access for the software. It is used to send email, alerts,SNMP traps, and phone home data. eth1 is used for dedicated Inter-Process Communication (IPC) between controllers in aclustered-controller system. There is no default gateway for eth1.Note There is rarely a need to change the eth1 address as it is only used for IPC betweencontrollers. One reason you might need to change the address during setup is in theunlikely scenario that both controllers were factory configured with the same eth1address. Installation team members do not change eth1 settings unless requestedby the customer. If changed, the settings can NEVER reside in the same subnet aseth0.5 When the serial numbers are correct, enter the following with IP address, netmask, andGateway separated by a single space (The second DNS server IP address is optional.):controller ipconfig eth0 [IP address] [netmask] [Gateway]controller dnsserver [DNS server 1 IP address] [DNS server 2 IP address]controller domainname [domain name]The following is an example of IP settings:controller ipconfig eth0 172.31.1.101 255.255.0.0 172.31.0.50controller dnsserver 172.31.0.50 172.31.0.60controller domainname mycontroller.mydomain6 Verify the settings by entering:controller showNote In a dual-controller system, repeat steps 1 through 6 for Controller 2.Once the controller(s) is configured, you can run the Startup Wizard from any PC orworkstation with an Ethernet connection to the controller. Go to Configuring a System viathe Startup Wizard on page 6 for instruction on how to use the wizard.5
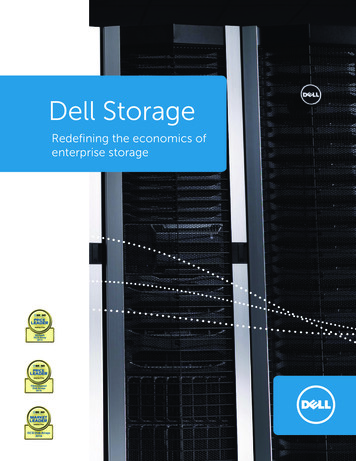
Setting Up the Storage CenterConfiguring a System via the Startup WizardAfter establishing a connection to Controller 1, use the Storage Center Startup Wizard forthe remainder of the setup. The Startup Wizard takes you through the following steps:Step 1: Launch the Storage Center Startup Wizard on page 6Step 2: License Agreement on page 7Step 3: Load License on page 7Step 4: Create Disk Folder on page 8Step 5: Add Controller (dual-controller systems only) on page 13Step 6: Time Settings on page 16Step 7: System Setup on page 17Step 8: Configure SMTP on page 18Step 9: Update Setup on page 21Step 10: User Setup on page 22Step 11: Configure IO Cards (optional) on page 23Step 12: Configure Ports on page 24Step 13: Generate SSL Certificate on page 43Step 1: Launch the Storage Center Startup WizardNote The Storage Center System Manager cannot load with the following uniquecombination of applications: Windows 2008 (64 bit), FireFox 3.0, and Java RuntimeEnvironment 6 10. To launch the Startup Wizard1 Open a browser on a workstation or PC with an Ethernet connection to the controller.The following browsers are supported: Microsoft Windows Internet Explorer Versions 7, 8, and 9Mozilla Firefox Version 3 on Microsoft Windows2 Enter the eth0 IP address of Controller 1.3 Click Yes to acknowledge the security alert.Note Depending on your browser settings and Java version, additional security alertsmay appear.4 Agree to any security alerts that are displayed by clicking Yes. The Storage Center loginwindow appears.6Storage Center System Setup Guide
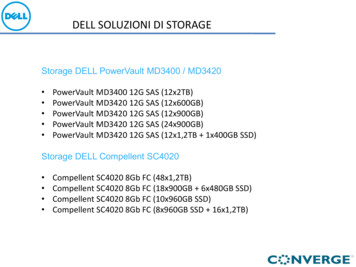
Configuring a System via the Startup WizardFigure 1. Login Window5 Enter the default user ID and password:Adminmmm6 Click on Login.Step 2: License AgreementThe Startup Wizard displays the Software End User License Agreement (EULA).1 Enter information for the required Approving Customer Name and ApprovingCustomer Title fields. The name and title of the approving customer is recorded alongwith the date of approval.Note The End User License Agreement is also displayed the first time any new user logsin to the Storage Center. When displayed for a new user, the EULA does not requirea customer name or title. The new user is simply asked to accept the license.2 Click Accept to continue with setup. The Load License dialog appears.Step 3: Load LicenseThe Load License step asks to you browse to the location of the Storage Center licensefile. The license file location and name shown in Figure 2 are for illustrative purposes only.Customer end-user license files have the following naming convention:serial number 35 date.licWhere: Serial number is the serial number of the Storage Center (should match the serialnumber of the controller from which you started the wizard). 35 indicates that the system runs post-3.5 code.7
Setting Up the Storage Center License generation date is shown in YYMMDD format. .lic is the file extension.Figure 2. Load License1 Browse to and select the license file, and click Load License. The Startup Wizardinforms you when the license is successfully loaded.2 Click Continue. The Create Disk Folder step appears.Step 4: Create Disk FolderThe Storage Center binds disks into a disk folder to create one pool of storage across whichvolumes are created. By using a single disk folder, you maximize the effectiveness of ThinProvisioning and Dynamic Capacity.8Storage Center System Setup Guide
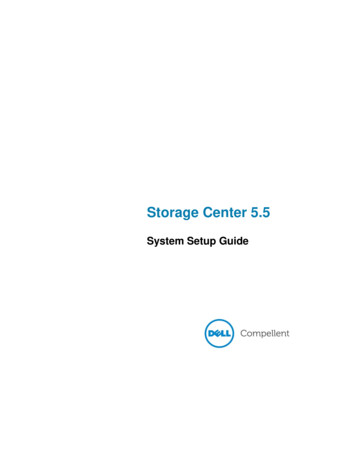
Configuring a System via the Startup WizardSelect Disks for the Disk FolderTo maximize the benefit of Data Progression, the Startup Wizard selects all available disks.Figure 3. Select Disks for Disk Folder1 From the list of disks, check disks to include in the disk folder. By default, all disks areselected. If desired, change the selection by un-checking individual disks, or by clickingUnselect All and then checking the individual disks that you want to include. To selectall disks again, click Select All.2 Click Continue. A dialog appears allowing you to select Hot Spares.9
Setting Up the Storage CenterSelect Hot SparesA Hot Spare replaces a failed disk. It is held in reserve until needed. A spare disk must beas large or larger than the largest disk in the disk folder. For redundancy, there must be atleast one Hot Spare for each enclosure.Figure 4. Select Hot Spares1 The Startup Wizard automatically selects the appropriate disk(s). Optionally, select oneor more disks to be used as Hot Spares.Note If drive size or type are mixed in an enclosure, the rule of thumb is one spare perdrive type per enclosure. Check your pre-installation documents for any site-specificchanges.2 Click Continue. The confirmation dialog appears.10Storage Center System Setup Guide
Configuring a System via the Startup WizardName Disk FolderThe default name for the disk folder is Assigned. Enter another name or accept the default.Optionally, enter notes for the folder.Figure 5. Name Disk FolderNote Default folder settings are appropriate for most sites. However, the Advanced buttonallows you to change the defaults. To change defaults, go to Advanced Options(Optional) on page 12.3 If you are not using any advanced options, click Create Now and then click OK toconfirm. If you are entering advance options, go to Advanced Options (Optional) onpage 12.11
Setting Up the Storage CenterAdvanced Options (Optional)Note The default disk folder settings are appropriate for most sites. If you are consideringchanging the disk folder default settings using the advanced options, contact CopilotServices for advice.1 To change the default redundancy or datapage size, click Advanced. The followingdialog appears.Figure 6. Advanced Disk Folder Options2 Select Prepare Disk Folder for redundant storage.3 (Optional) Tier Redundancy: The redundancy level for each tier defaults to eithersingle-redundant or dual-redundant depending upon the disks expected to be found inthe tier. If a tier contains at least six managed disks of which one is 900GB or greater,then that tier and all tiers below it default to dual-redundant storage.Single-redundant storage protects against the loss of any one drive. RAID 10 (each disk is mirrored)RAID 5-5 (4 data segments / 1parity segment per stripe)RAID 5-9 (8 data segments / 1parity segment per stripe)Dual-redundant storage protects against the loss of any two drives: RAID 10 Dual-Mirror (data is written simultaneously to three separate disks)RAID 6-6 (4 data segments / 2 parity segments per stripe)RAID 6-10 (8 data segments / 2 parity segments per stripe)4 (Optional) Datapage Size: Choose a datapage size.12Storage Center System Setup Guide
Configuring a System via the Startup Wizard 2 MB: (Default) Recommended for most application needs. 512 KB: Appropriate for applications with high performance needs or environmentsin which Replays are taken frequently under heavy I/O. Selecting this size reducesthe amount of space the System Manager can present to servers. 4 MB: Appropriate for systems that use a large amount of disk space with infrequentReplays.5 Prepare for Non-Redundant Storage: Non-redundant storage does not protect data inthe event of a disk failure. Non-redundant storage uses RAID 0. Select Prepare forNon-Redundant Storage only for data which is backed up in some other way.6 Click Continue.7 On the next window, click OK to confirm.Step 5: Add Controller (dual-controller systems only)The Add Controller step adds a second controller to a Storage Center.Figure 7. Add ControllerIf.Then.You are installing a second controllerClick Add Controller. The Controller Information dialogappears. Go to Controller IP Information on page 14.You are not installing a second controller Click Continue Setup. Go to Step 6: Time Settings on(you have a single-controller system)page 16.13
Setting Up the Storage CenterController InformationTo add a controller to the Storage Center, complete the information in the Add Controllerdialog.Figure 8. Controller IP Information1 Enter the following: Controller ID: If the peer controller’s Hardware Serial Number (HSN) is included inthe license file, the Add Controller process uses that value as the Controller ID andusers cannot enter a different value. If the HSN is not in the license file, users areallowed to enter a HSN value. The grayed-out field in the figure above indicates theHSN was in the license file making the Controller ID field un-editable by users.Ether 0 Interface: Enter the IP Address, Netmask, and Gateway for the Ether 0interface for the current controller.Ether 1 Interface: (Used for communication between controllers.) Enter the IPaddress, netmask, and gateway for the Ether 1 interface. Use the IP address fromthe controller show console command for Controller 2.Primary DNS Server: Enter the IP address of the primary DNS.Secondary DNS Server: (Optional) Enter the IP address of a secondary DNS.Domain Name: (Optional) Enter the domain name for the controller.2 Click Continue.The Startup Wizard issues a warning that data and configuration information on thecontroller to be joined will be lost and asks you to confirm.14Storage Center System Setup Guide
Configuring a System via the Startup WizardFigure 9. Confirm Add Controller3 To confirm, click Join Now. Wait for the system to join the controller to the StorageCenter.15
Setting Up the Storage CenterStep 6: Time SettingsThe Time Settings step allows you to set the system time for the Storage Center.Figure 10. Set Time1 Set the system time: Region: Select the region in which the Storage Center is located.Time Zone: Select the time zone in which the Storage Center is located.To configure time manually: Select Configure Time Manually, and enter the date and time.To configure time using an NTP Time Server:a Select Use NTP Time Server.b Enter the name or IP address of an NTP server.Note Accurate time synchronization is critical for replications. Make sure that NetworkTime Protocol (NTP) is configured accurately. For more information, refer to: http://ntp.isc.org/bin/view/Support/WebHome.2 When you have finished setting the system time, click Continue.16Storage Center System Setup Guide
Configuring a System via the Startup WizardStep 7: System SetupThe System Setup step allows you to set the System Name and Management IPAddress for the Storage Center.Figure 11. System Setup1 Enter the following: Enter a System Name for the Storage Center.(Dual-controller systems only) Enter the Management IP Address specified inthe pre-installation document. (On single-controller systems, this field is notdisplayed and the message at the top of the dialog is slightly different.)Note The Management IP Addre
iii Contents Preface Purpose v Related Publications v Contacting Dell Support Services v 1 Getting Started Pre-installation Documents 1 About Virtual Ports 1 System Power Up 2 2 Setting Up the Storage Center Setting Up a Controller 3 Connect to a Controller 3 Reset Hardware and System Serial Numbers 4 Set IP Addresses 5 Configuring a System via the Startup Wizard 6