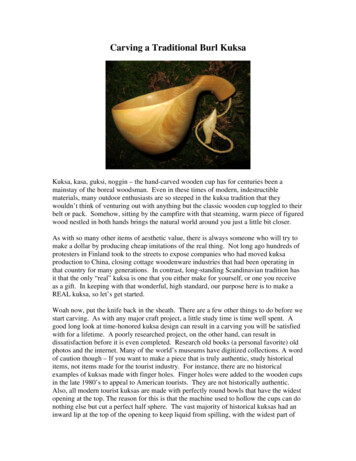
Transcription
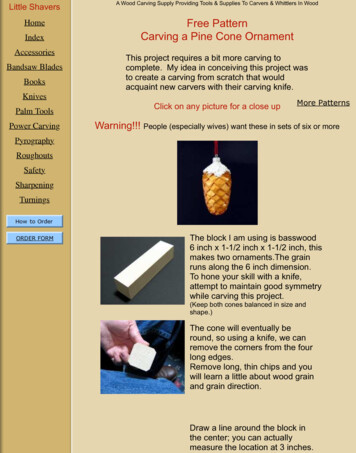
Little ShaversA Wood Carving Supply Providing Tools & Supplies To Carvers & Whittlers In WoodHomeFree PatternCarving a Pine Cone OrnamentIndexAccessoriesBandsaw BladesBooksThis project requires a bit more carving tocomplete. My idea in conceiving this project wasto create a carving from scratch that wouldacquaint new carvers with their carving knife.KnivesPalm ToolsPower CarvingClick on any picture for a close upMore PatternsWarning!!! People (especially wives) want these in sets of six or ER FORMThe block I am using is basswood6 inch x 1-1/2 inch x 1-1/2 inch, thismakes two ornaments.The grainruns along the 6 inch dimension.To hone your skill with a knife,attempt to maintain good symmetrywhile carving this project.(Keep both cones balanced in size andshape.)The cone will eventually beround, so using a knife, we canremove the corners from the fourlong edges.Remove long, thin chips and youwill learn a little about wood grainand grain direction.Draw a line around the block inthe center; you can actuallymeasure the location at 3 inches.
Using a knife, carve down towardthe center of the block; leavingenough wood to make theornament stems.This is a slow process, but quiteenjoyable for passing time whilewaiting somewhere.Center carved enough to maketwo stems. The line is for yourreference only.Center marked on each flat sideof cone. This helps maintain acylindrical shape as we carve it.Begin Rounding both cones intocylindersSee Pictures Below FirstRight(On this project)When carving toward the center,keep your thumb below centerline ofthe carving.WrongIn this position, your thumb is heldfirmly in the notch and is easily cut.
Rounding is complete on onecone. Note the reference linesare still visible.Now round the other end into acylinder also.You may already be saying "There has to be a faster way"Yes, there is, but this project is designed for inexperienced carvers;to introduce situations they may encounter in future carvings.I believe it also teaches patience, a necessary trait for carvers.It should also demonstrate the value of having enough wood to holdwhile carving small items; that's why there are two cones connected bystems.No, this is not the fastest way to carve this project, but small well-definedsteps are easy to follow.Both ends are rounded intocylinders.Draw a line 1/4 -1/3 down fromthe top of the pine cone.This locates the largest diameterof the cone.Although not required, you maywish to locate the center of thecone before you begin shaping it.It helps keep the conesymmetrical.
Cone is beginning to take shapealthough it still needs somerefining.One cone is shaped complete,not perfect, but as good as it'sgonna get.If desired, the shaped cone may be sanded; I don't, but it is your choice.Using a pencil, layout four linesaround the cone to make eightequal segments.AEThis view is helpful when trying tolayout equal segments.HCDGFBDraw line A-B first, then line C-D;Divide the four segments into eightby drawing lines E-F and G-H.Draw a line around the cone 3/4inch from the top of the cone.Not the top of the stem.Draw three more lines 3/8 inchfrom the first line. One to the leftand two to the right.
Draw in remaining lines, reducingthe distance apart as you nearthe pointed end.Starting at the point where thestem meets the cone, draw fromthe end of one segment linediagonally to the intersection oftwo lines 3/8 inch down the cone.Continue to draw around thecone connecting intersections oflines.This picture shows four linesdrawn around the cone.This shows the top sectioncomplete.Once all the spiral lines aredrawn in, the segment lines areno longer needed.
I don't draw well with a mouse,but this shows how the layout isused to create the cone pattern.If you make a few of these pinecones, adjust the line spacing tosuit you.Layout is complete and ready tocarve.You may begin removing chipswhere ever you like, I amremoving this one as an example.This is the first cut, deepest at thetop, shallow in the bottom.Left side is cut the same.A slicing cut is made to removethe chipThe first of many chips is removed.Continue removing chips, rememberthere is grain direction and you musttake some care in cutting the chips atthe ends.
The last item I should mention is when you near the very bottom ofthe cone, don't try to cut chips out. Use a V-tool to cut a snowflakedesign.To add the snow on the ornament, use;Course Pumice Gel by Golden Paints Allow to dry overnight and paint white.Click usandreturn tobeginner'spageCopyright 1999-2017 Little Shavers Woodcarving Supply all rights reserved
to create a carving from scratch that would acquaint new carvers with their carving knife. Click on any picture for a close up The block I am using is basswood 6 inch x 1-1/2 inch x 1-1/2 inch, this makes two ornaments.The grain runs along the 6 inch dimension. To hone your skill with a knife, attempt to maintain good symmetry while carving .