Transcription
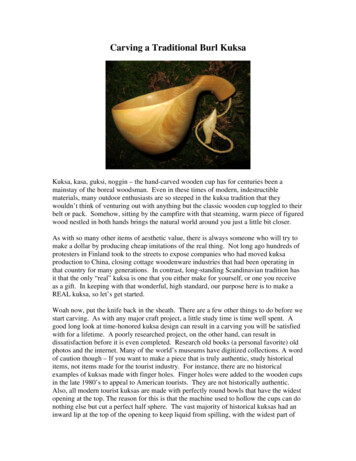
Carving a Traditional Burl KuksaKuksa, kasa, guksi, noggin – the hand-carved wooden cup has for centuries been amainstay of the boreal woodsman. Even in these times of modern, indestructiblematerials, many outdoor enthusiasts are so steeped in the kuksa tradition that theywouldn’t think of venturing out with anything but the classic wooden cup toggled to theirbelt or pack. Somehow, sitting by the campfire with that steaming, warm piece of figuredwood nestled in both hands brings the natural world around you just a little bit closer.As with so many other items of aesthetic value, there is always someone who will try tomake a dollar by producing cheap imitations of the real thing. Not long ago hundreds ofprotesters in Finland took to the streets to expose companies who had moved kuksaproduction to China, closing cottage woodenware industries that had been operating inthat country for many generations. In contrast, long-standing Scandinavian tradition hasit that the only “real” kuksa is one that you either make for yourself, or one you receiveas a gift. In keeping with that wonderful, high standard, our purpose here is to make aREAL kuksa, so let’s get started.Woah now, put the knife back in the sheath. There are a few other things to do before westart carving. As with any major craft project, a little study time is time well spent. Agood long look at time-honored kuksa design can result in a carving you will be satisfiedwith for a lifetime. A poorly researched project, on the other hand, can result indissatisfaction before it is even completed. Research old books (a personal favorite) oldphotos and the internet. Many of the world’s museums have digitized collections. A wordof caution though – If you want to make a piece that is truly authentic, study historicalitems, not items made for the tourist industry. For instance, there are no historicalexamples of kuksas made with finger holes. Finger holes were added to the wooden cupsin the late 1980’s to appeal to American tourists. They are not historically authentic.Also, all modern tourist kuksas are made with perfectly round bowls that have the widestopening at the top. The reason for this is that the machine used to hollow the cups can donothing else but cut a perfect half sphere. The vast majority of historical kuksas had aninward lip at the top of the opening to keep liquid from spilling, with the widest part of
the cup cavity being about an inch below the rim. You can accomplish that with acrooked knife, but the machine cannot. Again, study time is time well spent and will leadyou to an authentic, satisfying completed project.This photo from a century-old book shows woodenware design from a region ofnorthern Finland in the 1800’s.Once you have in mind the kuksa you would like to carve – nope, don’t start carving justyet – you need to draw it from every angle. Drawing can solve problems and tweakdesign to insure that you will be completely satisfied with your finished carving. Manytimes carving students will think they know exactly what they want – then when theydraw their idea, they don’t really like it. Much better to adjust design on paper than toruin a prime piece of carving wood. Once you are satisfied with your drawing, you cantransfer the outline to a piece of stiff paper to use as a pattern for your cup.Selecting Wood. The wood you choose should be carvable and should have a closegrain pattern. Avoid woods that have an open grain because they are impossible to clean.Oak for instance is quite hard and durable, but has an extremely open grain that can trapfoods and liquid. Birch is an ideal kuksa wood and is historically the most commonwood used for this purpose. The ultimate kuksa wood is a birch burl that has the samecurvature as the cup you are going to carve, but other woods can be used as well. Aswith any carving project, your block of wood should be cut so that the center of the tree iscompletely eliminated. Cut your block as far from the center of the tree as is practical.This will minimize checking / cracking in the final product. If at all possible, try to cutyour kuksa block from a piece of figured grain. This of course will make the piece moreattractive, but more importantly, the figured wood will minimize the amount of end grainon the thin wall of the cup. The end grain is where the wood will likely crack whenrepeatedly filled with hot water and then dried. I have carved several kuksas that crackedthe first time they were used, but have never had that problem with figured wood. Thefollowing photo is a cup made of figured wood from the crotch of a black birch treewhere the main trunk separated into two smaller trunks. This cup has had hundreds ofuses with no hint of checking.
Using figured wood from the crotch of a black birch tree eliminated thedanger of cracking in this kuksa.Roughing Out the Project. Sometimes commercial kuksa makers will cut a very largebirch burl and cut a dozen or so cups from the same burl. This works quite well, but asmentioned above, the ideal cup project follows the grain of the burl itself. Thiscompletely eliminates the troublesome end grain and of course makes the strongest cuppossible. You can saw out the rough shape of your project with a large, deep-throatcoping saw (use the coarsest blade available). My favorite saw is a traditional frame sawwith a narrow blade. Work your wood green and wet. Green wood is so easy to carvethat you don’t even have to use a saw. You can rough shape with an axe and then shapethe handle with a carving knife. If you must leave the project for even a short while,dampen the wood and cover it with plastic. If you must leave the project for days orweeks, double wrap in plastic and put in the freezer. Once you have sawed or axed theside profile, draw the outline on the top and shape to the line.
The shape of the final cup will be carefully planned into the natural shape of the burl.This will make the strongest cup possible.Notice the grain of the burl wood in relation to the outline of the cup.
After sawing out the side profile, saw out the top profile as well. Again, notice that theshape of the cup is designed to follow the natural grain and shape of the burl.The Carving Begins. With the sawing and / or axe work complete, now the fun begins.Get a cup of your favorite beverage, go sit on the deck and start to whittle. Keeping thewood moist with a sprayer or by dipping in a bucket, round the outside to the basic shapeyou want. Turn the piece frequently to make sure you have good symmetry. Follow theold carvers’ adage that you should use the largest tool suitable for the job. If you areexperienced and competent with a large knife, then a blade of 3 ½” to 4’ would be ideal.Working the inside curve of the handle may take a narrower blade such as a Mora 120 ora Mora 106. The carving can be bold and the chips can be large, but be constantlymindful of the final shape.
Carving the basic shape of the outside will be a true pleasure in green wood.Turn frequently to insure good symmetry.Once the outside has its basic shape, do not do any finish work.It is really important at this point to start hollowing.
Hollowing Your Kuksa. The main reason wood cracks is from uneven drying. A roundpiece of firewood cracks because the outside of the piece dries faster than the inside ofthe wood near the center. If wood can dry at about the same rate from both the outsideand the inside, there will be no cracks from the drying process. Of course that isn’tpossible with a piece of firewood, but it is possible (and quite necessary) with yourkuksa. Waste no time in getting it hollowed so the walls of the cup can dry evenly fromthe inside and the outside. When hollowing the inside of vessels made of dry, hard wood,I have been guilty of using a drill to start the process. Drilling is a risky venture thoughand can quickly ruin a project. And with the luxury of carving green wood, it just isn’tnecessary. I started hollowing this cup with a spoon gouge. The word “spoon” refers tothe shape of the tool. The spoon-like shape near the cutting edge allows the tool to reachinto the deep rounded bottom of the cup without tearing. The gouging was easy andpleasurable work. The gouge of course leaves deep furrows in the wood so immediatelyafter gouging I started to work with the crooked knife to smooth away the furrows. Youwill notice in the photo that I use Alaska Native-style crooked knives. They are much,much more difficult to learn to use than Scandinavian type crookeds such as those madeby Pinewood Forge. However, they have long handles, they are sharpened on both sidesand cut both directions. And they are held in a powerful dagger style with the bladedown. This makes them several times faster when hollowing, especially deep hollowingas in this cup. They also leave a smoother finish. However, use what you have. AScandinavian style spoon knife will do a nice job. Start with a standard spoon bend tosmooth the inside of the cup walls, and then if you have one, switch to a more open bendsuch as those made to hollow large ladles to do the bottom. Extra time spent at this stagewill be well worth the effort since carving away green wood with a sharp tool is manytimes faster and easier than trying to do it later with sandpaper.Just as soon as you are finished roughing the outside to shape, hollow the inside. Havingboth inside and outside exposed to the air will minimize chance of the cup walls cracking.Start hollowing with a spoon gouge to move material quickly.
When finished with the spoon gouge, clean up the inside of the cup with a crooked knife.Do the best job you can do here, as time spent smoothing with the crooked knifewill save much more time in the less pleasant job of sanding.Drying the Roughed-Out Cup. Now it is time to dry your cup. There is no use sandingat this stage because the wet wood will fuzz up and will clog your sandpaper. Drying theproject SLOWLY is absolutely essential. Rushing the drying process can result inruining all of your hard work, not to mention the material. My favorite method for dryingis to use a plastic bag. I put the piece in the bag and leave the end of the bag unsealed,but mostly closed and put it in a cool place. Over a day or two, moisture will come out ofthe wood and will appear on the inside of the bag. At this point you must turn the baginside out a put the cup back in the bag. Failure to turn the bag can result in moldgrowing on the wood. This mold can actually grow down into the wood and can makeugly blotches on your project.Once moisture no longer forms on the inside of the bag, take the cup out of the bag andplace it in a cool, dry place for a week or so. I put mine on the floor in a back bedroomcloset where the temperature rarely goes above 55 – 60 degrees. When the wood feelsdry to the touch, gradually move it into warmer areas. I cannot tell you exactly how longthe curing process will take, but for the cup in the photos, it took about a month. The lastplace my project was placed to cure was in the same room with our wood stove. After aweek or so there I knew it was dry and ready to finish.Finish Carving. To finish the carving process, simply take a freshly sharpened knife, laythe bevel flat against the wood, and skim off the bumps created earlier by the roughcarving. Again, time spent with the knife will save lots of time in the long run.Sanding. Once carving is finished you can begin to sand. I usually start with 80 gritpaper. Do not skip grades of sandpaper – that will not save time. Typically I will use 80,100, 120, 180, 220, 280, 320, 400, 800 and 1200. This task is not as daunting as all thosenumbers might sound. The first sanding with the 80 grit is the most work. After that, all
you are doing is removing the scratches from the previous sandpaper, so the finer gradeswill go quickly. For the smoothest finish you should “bring up the grain.” After youfinish with the 320 sandpaper, lightly wet the wood and set it aside to dry. This willcause the grain to fuzz up just a little. Then sand again with the 320 and progress throughthe other sandpapers.While sanding, be careful that you preserve the edges around the handle area. Theyshould be rounded slightly to make them more durable, but too much rounding takesaway from the clean lines of the design. Take a look at the final photos in this article tosee how lines are preserved. Use a sanding block on the top of the handle if you intend tocarve any embellishments. The section on sanding after painting will explain the reasonfor this.Embellishment. Unlike their commercial counterparts, nearly all hand carved kuksashave some sort of embellishment or decoration added after the sanding is completed.Any design you use should follow tradition, as other figures can look out of place. Thisagain is a time to do some research to see what was used on historical pieces.Embellishment can be added with a variety of processes. The most classic of these is apolished piece of antler inlaid in the cup handle with carvings on the antler. A lesstraditional process I have used is to carve voids down into the handle and fill the voidswith colored epoxy. To the untrained eye, this simply looks like paint, but it is extremelydurable. Another traditional method of ornamentation is to carve classic designs into thesurface of the handle with the tip of a knife and fill the resulting grooves with paint. Thisis what you see on the handle of the pictured cup.The carving on this handle is only about 1 / 16” deep. That is plenty deep to protect thepaint that would otherwise wear off if it were just on the surface. First, lightly draw thepattern you want to carve. It is good to use a fairly soft pencil that is not too sharp, as asharp pencil can put deep scratches into the surface of the wood. Once you are satisfiedwith the drawing, take a small carving knife such as a Mora 120, and hold it pencil stylewith the blade tip down. Start carefully carving the design with the blade held at about a45 degree angle to the side. Then go back on the other side of the groove at the sameangle to release the sliver of wood. You can do finer work if you thin the tip of the bladejust a bit on a sharpening stone. If you have not done this before, do yourself a favor andPRACTICE ON A SCRAP PIECE OF WOOD before starting on the cup handle. Thishas a completely different feel to it than the other carving you have done, and of course ifyou slip, you can’t put wood back on. Patience and practice always pay off. Whether youare going to keep the cup or give it as a gift, the new owner’s name carved in the bottomwill be a wonderful personal touch.Painting. Once your embellishment patterns are carved into the handle, use a qualityacrylic artists’ paint to fill the grooves. Box store paints are mostly filler and don’t stickwell. Use only the best acrylics that come in a tube. Use a tiny stiff brush to force thepaint down into the grooves. If places are too tight for the brush to reach, use the end of a
toothpick to push the paint into crevices. Do not thin the paint – use full strength. Fill thegrooves completely with paint, and let the paint spill out over the edge just a little. Youwill sand off any extra when the paint is cured.In a few hours the paint will feel dry, but do not sand just yet. If you sand at this point,the paint will still be rubbery. It will ball up in the sandpaper and may pull out of thegrooves. Let the paint cure for three days or so before sanding. Once the paint hascompletely cured, use the sanding block once again to sand excess paint off of the top ofthe handle. Start with 320 grit sandpaper and progress through the final grits as above. Ifany spot needs repainting, just paint that spot and go through the same process until youare satisfied.Carving a traditional embellishment into your kuksa will give it an artistic flair andwill make it a truly personal piece of art.
A name carved into the bottom will not only identify the new owner, but willadd the ultimate personal touch.To Toggle or Not to Toggle. At this point there is one final decision to make beforeputting a finish on the kuksa. Most of the older kuksas had a toggle attached to thehandle by a cord. The toggle was tucked under the wearer’s belt or sash so the cup wouldremain handy by being worn on the outside of all clothing. If you decide to make atoggle of some sort for your cup, you will need at this time to drill or carve a hole toattach the cord. This is yet another situation where a solid study of old pieces can helpyou make a good decision. The toggle on the pictured cup is the outline of a ptarmigan.It is made of a piece off moose antler that was cut out with a coping saw. The edges wererounded with a file, and then the piece was sanded until it had a nice shine to it – 2000grit sandpaper.Just as a side note – To me the traditional toggle looks a bit odd when attached with apiece of nylon cord or some other synthetic material. I like to use cordage that wasavailable when the kuksa was standard equipment. The cordage in the photos was madeof 22 pieces of grass bark. It is made with a common two-strand twist, but there is asecret. Most natural cordage does not last well when constantly exposed to liquid, andafter all, this is a DRINKING cup. ------- To make your natural cordage water resistant,give it a 5 minute soak in a thin, clear acrylic solution. You can use acrylic leatherfinisher diluted half with water or acrylic floor finish diluted with 2/3 water. The soakingmay cause the twist to relax a bit, so when you take it out of the soak, retwist it until itstarts to kink and clamp it in place until it dries. The best part of this little trick is that noone will ever know that you have used a modern treatment (except me of course).
The Final Finish. It is necessary to put a final finish on your completed kuksa. If youdon’t finish it, it will soon look dirty and you will not be able to clean it. Use only afood-safe hardening oil – oil that is manufactured for this purpose. Do not use any sort ofcooking oil because it can turn rancid, and every time you put hot liquid in the cup, someof the oil will ooze out. I use Mahoney’s Heat Treated Walnut Oil available fromWoodcraft Supply. There are also some food safe hardening oils available at the big boxhome stores. Any of them will be fine as long as it says on the container that it is foodsafe and that it will harden.To oil your cup, put it upside down in a cake pan or dish, and brush on the oil until it nolonger soaks into the wood. Warming the oil just a bit helps it to soak in. Do not oil theinside because oil inside the cup will break down when you fill it with hot water, givingyour beverage an unwelcome taste. Now is the time for patience. Wipe off the excess oiland put the cup, still upside down, in a warm place for the oil to cure. To be sure that aircirculates all over the cup, set it on a pair of pencils or something else to hold it up just alittle. The oil will feel dry in a few days, but give it a few weeks for it to completelycure.Nope, not yet. Before using your cup you should minimize any “off” tastes by puttinghot water in it several times and rinsing it out. If you do experience a bit of an odd tastewhen you start to use it, be assured that it is nothing harmful, and that the taste willdisappear after a few uses.Well, now you know everything I know about carving kuksas. You have just run out ofexcuses and it’s time to start carving. As for me, I’m going to put the coffee pot on thecampfire and brew a cup to put in my authentic, one-of-a-kind, hand-carved, highlyembellished, historically correct burl kuksa.Keep ‘em sharp and strop often, Jim
Woah now, put the knife back in the sheath. There are a few other things to do before we start carving. As with any major craft project, a little study time is time well spent. A good long look at time-honored kuksa design can result in a carving you will be satisfied with for a lifetime
