Transcription
2Getting Started withDreamweaver CS6IntroductionAdobe Dreamweaver CS6 is the industry leading web development tool for building web sites and applications. It provides a combination of visual layout tools, applicationdevelopment features, and code editing support, enablingdevelopers and designers at every skill level to create visually appealing, standards-based sites and applications quicklyand easily. From leading support for Cascading Style Sheet(CSS) design to hand-coding features, Dreamweaver provides the tools professionals need to get the job done. Inaddition, developers can use Dreamweaver with the servertechnology of their choice to build powerful Internet applications that connect users to databases, live data feeds, andlegacy systems.Dreamweaver is an application that's rooted in the realworld. In the real world, new or updated browsers come intothe marketplace every year, and this creates problems incompatibility. Dreamweaver solves this problem by givingyou powerful error-checking tools, and even gives you theability to use Live Data View, and see exactly how your pageswill perform on virtually any browser.In the real world, server technologies change quickly.Dreamweaver's extensible architecture makes server compatibility a snap by giving you the tools to customize for thirdparty server models. In the real world, computer operatingsystems change. Dreamweaver's CS6 supports use onWindows and Macintosh systems.Web designers come at all levels of experience.Dreamweaver's user-friendly interface helps you out. If you'rerelatively new to the application, you can jump right in andbegin designing simple web pages. If you are an experienceddesigner, you will be able to access the power and controlthat this application offers, and take your web designs whereno one has gone before.What You’ll DoUnderstand System RequirementsInstall DreamweaverGet StartedExamine the Dreamweaver WindowCreate a Web SiteOpen a Web SiteCreate a Blank Web PageCreate Web Pages from Templates2Create a Web Page from a Fluid GridLayoutCreate a Web Page from a SampleSave a Web PageOpen an Existing Web Page or FileWork with ViewsSwitch Between Pages and ViewsPreview a Web PageGet Help While You WorkGet Dreamweaver Updates on the WebClose a Web Site or FileFinish Up11
Understanding System RequirementsSystem RequirementsBefore you can install Dreamweaver, you willneed to make sure that your computer meetsthe minimum system requirements.Dreamweaver CS6 is supported on bothWindows and Macintosh computers.While many designers bemoan the factthat their older computer systems will notsupport the newer applications, in the longrun it's all for the best. The original versionsof Dreamweaver (many years ago) were simply non-visual HTML editing applications.Dreamweaver CS6 is not only doing thingsthat were not even dreamed of in years past;it's also faster. As a web designer, time is animportant part of getting the job done, andgetting it done quickly.If I can accomplish more work in less time,it gives me more time to be creative, and ableto meet my deadlines. And that's a goodthing. So think of system requirements as thepower behind the applications, that's going tohelp you do more, better work, and all in lesstime.For Windows ComputersYou need to have a computer with the following minimum configuration: Intel Pentium 4, AMD Athlon 64 (orcompatible) processor. Microsoft Windows 7, Windows Vistawith Service Pack 1, or Windows XPwith Service Pack 3 or higher. 512 MB of RAM. 1 GB of available hard-disk space(additional free space required duringinstallation).12Chapter 2 1280 x 800 monitor resolution with16-bit video card. Java Runtime Environment 1.6(included). DVD-ROM drive. QuickTime 7.6.6 software required forHTML5 media playback. Internet connection required foractivation, registration, and someonline services.For Macintosh ComputersYou need to have a computer with the following minimum configuration: Multicore Intel processor. Mac OS X 10.6 or 10.7 or higher. 512 MB of RAM. 1.8 GB of available hard-disk space(additional free space required duringinstallation). 1280 x 800 monitor resolution with16-bit video card. Java Runtime Environment 1.6. DVD-ROM drive. QuickTime 7.6.6 software required forHTML5 media playback. Internet connection required foractivation, registration, and someonline services.
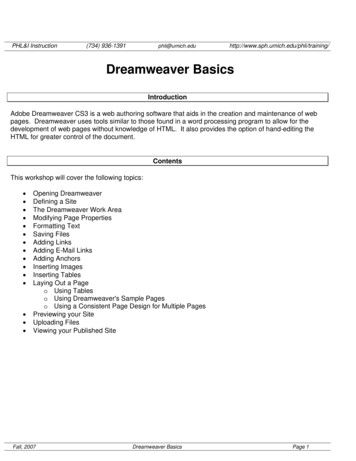
InstallingDreamweaverThe process of installing the Dreamweaver application is fairly straightforward; you insert the Dreamweaver CS6 install disc into your DVDdrive or download the software online to your computer, double-clickthe setup program and simply follow the on-screen instructions. Thefirst thing that will happen is that the installer will check to see if youhave the minimum system requirements. If you meet the minimums, theinstaller will guide you through the steps to complete the installation.The whole process takes about ten minutes, and at the end of theprocess you can launch Dreamweaver for the first time. Remember tohave your serial number handy, because you will have to type it in during the installation process. It's a good idea to have that serial numberin a safe place, just in case you would need to reinstall Dreamweaver.Install Dreamweaver CS61Insert the Dreamweaver CS6 DVDinto your DVD ROM drive, ordownload the software online toyour hard disk.2If necessary, double-click the DVDicon or open the folder with thedownloaded software, and thendouble-click the setup icon.3Follow the on-screen instructionsto install the product; the installerasks you to read and accept alicensing agreement, enter a serialnumber, indicate the language youwant, enter or create an Adobe IDor skip the step, and specify whereyou want to install the software.2Did You Know?Most Adobe applications can bedownloaded. It's all very simple, yougo to www.adobe.com, click theProducts menu item, and then selectthe application you want to purchase.You will need a credit card (of course),and a lot of bandwidth.3Chapter 2 Getting Started with Dreamweaver CS613
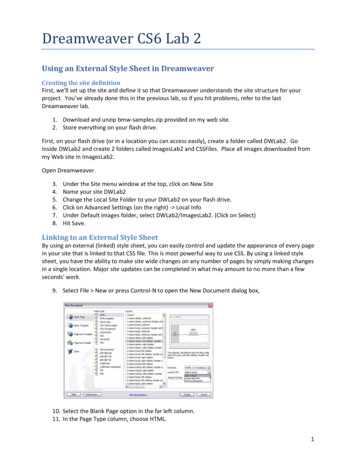
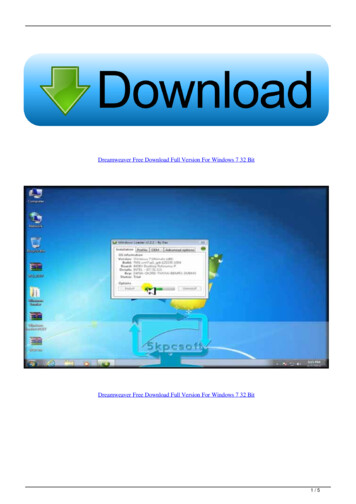
Getting StartedYou can start Dreamweaver in several ways, depending on the platformyou are using. When you start Dreamweaver, the software displays aWelcome screen and then the Dreamweaver window. When you start anew Dreamweaver session or close all documents, a Welcome screenappears in the Dreamweaver window, providing easy access links toopen a file, open a recent file, create a new file, and create a new filefrom a template. You can also use links to access videos, and help information, including Getting Started, New Features, and online Communityresources, such as the Dreamweaver Exchange web site, where youcan download additional applications and information.Start Dreamweaver CS6 inWindows1Click Start on the taskbar.2Point to All Programs (whichchanges to Back).3Point to an Adobe Collection CS6menu, if needed.4Click Adobe Dreamweaver CS6.5If you’re starting DreamweaverCS6 for the first time, you might beprompted to specify the following: Enter or create an Adobe ID toregister the product, clickSubmit, and then click Done.The Dreamweaver window opens,displaying the Welcome screen.124Welcome screenDid You Know?You can create and use a shortcuticon on your desktop to startDreamweaver (Win). Click Start on thetaskbar, point to All Programs, rightclick Adobe Dreamweaver CS6, pointto Send To, and then click Desktop(Create Shortcut). Double-click theshortcut icon on your desktop to startDreamweaver.14Chapter 2
Start Dreamweaver CS6 inMacintosh13Open the Applications folder(located on the main hard drive). For Lion, you can also click theLaunchpad icon on the Dock,and then click the AdobeDreamweaver CS6 icon.2Double-click the AdobeDreamweaver CS6 folder or anAdobe Collection CS6 folder, ifinstalled.3Double-click the AdobeDreamweaver CS6 program icon.4If you’re starting DreamweaverCS6 for the first time, you might beprompted to specify the following:Shortcut for Adobe Dreamweaver CS6 Enter or create an Adobe ID toregister the product, clickSubmit, and then click Done.Launchpad icon in Mac OS X LionThe Dreamweaver window opens,displaying the Welcome screen.For Your InformationDid You Know?You can create a shortcut on theMacintosh. Drag and drop theDreamweaver application icon to thebottom of the screen, and then add it tothe shortcuts panel.Activating DreamweaverIn order to curb theft of their products, Adobe requires you to activatethe Dreamweaver application. The first time you open it, you will beprompted to enter your serial number, and then activate Dreamweaver.You will be able to delay the activation process for up to 30 days; however, on day 31 the application will cease to run until activated.Activation can be accomplished by the Internet, or by phone.You can launch Dreamweaver and open a document at the same time.Simply double-click on the document icon (i.e. index.html). If the document was originally created within Dreamweaver, the file automaticallyopens in the Dreamweaver application.Chapter 2 Getting Started with Dreamweaver CS615
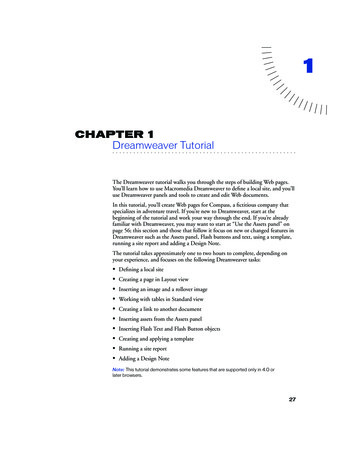
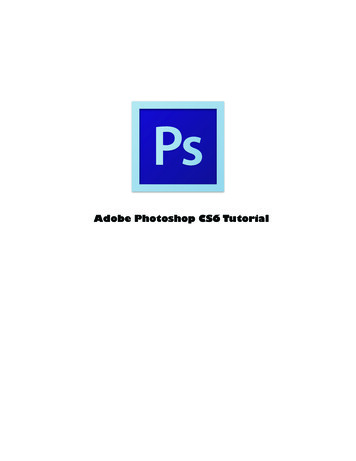
Examining the Dreamweaver WindowWhen you start Dreamweaver, the programwindow displays a Graphical User Interface orGUI (pronounced “GOOEY”) with windowsand tools you can use to create and designweb pages. These windows include theProgram window, Document window, variouspanels, and the Properties panel. Dependingon your installation and previous programusage, not all of these windows may appear,or additional ones may be visible.Document WindowDisplays open documents along with theDocument and Related Files toolbars.In Dreamweaver, windows appear in theProgram window. The Program window displays a program icon, Application bar (whichdisplays options for working with and switching between layout displays, web sites, andextension applications), menu bar (dependingon screen size), Workspace menu, Search boxfor product help, resizing buttons, and a Closebutton at the top of the screen.Applications barDisplays options for working with displays,sites, and extension applications.ControlsGives youaccess toWorkspacemenu, helpSearch box,and programbuttons.Menu barDisplays amenu list ofcommandsto executespecifictasks.PanelsGives youaccess toauthoringtools andattributesettings forelements.Property Panel/InspectorDisplays information about the properties andattributes of tools and graphic elements.16Chapter 2Status barDisplays current information about the activedocument and common display tools.
A menu bar appears on or below theApplications bar with menu names. A menu isa list of commands that you use to execute oraccomplish specific tasks. A command is adirective that accesses a feature of a program.Dreamweaver has its own set of menus,which are located on the menu bar along thetop of the Dreamweaver window. On a menu,a check mark identifies a feature that is currently selected (that is, the feature is enabledor on). To disable (turn off) the feature, youclick the command again to remove the checkmark. A menu can contain several checkmarked features. A bullet (Win) or diamond(Mac) also indicates that an option is enabled,but a menu can contain only one bullet-ordiamond-marked feature per menu section. Todisable a command with a bullet or diamondnext to it, you must select a different option inthe section on the menu.When you perform a command frequently,it's faster, and sometimes more convenient, touse a shortcut key, which is a keyboard alternative to using the mouse. When a shortcutkey is available, it is listed beside the command on the menu, such as A F3 (Mac) orCtrl F3 (Win) for the Properties command onthe Window menu.Below the menu bar is the Insert toolbar,which appears by default and provides tabswith a variety of different buttons. A Toolbarcontains a set of commonly used buttons youcan quickly access to help you to create webpages. Dreamweaver comes with four different toolbars (Document, Standard, Coding,and Style Rendering), which you can show orhide to customize the Program window.The Document window displays openDreamweaver documents. Dreamweaver usestabs to make it easier to switch back and forthbetween documents. Each document tabincludes a Minimize, Maximize, and Close but-ton at the top, and a Status bar at the bottom,which displays current information about theactive document and common display tools.Below a Document tab is the Related Filesand Document toolbar. The Related Files toolbar displays tabs to access the source codefor the document file, and related externalfiles. The Document toolbar appears bydefault with Page (Code, Split, and Design)and Live (Live Code, Live View, Inspect, andMultiscreen) View buttons.A panel is a window you can collapse,expand, and group with other panels, knownas a panel group, to improve accessibility andworkflow. A panel appears with a shadedheader bar, which includes the window titleand additional options, such as the Insertpanel. A panel group consists of either individual panels stacked one on top of the otheror related panels organized together withtabs, such as the Files panel, to navigate fromone panel to another. Dreamweaver providesa wide variety of panels you can use to workwith different aspects of a web page, including CSS Styles, Insert, Assets, AP Elements,Databases, Tags, and Frames, which you canopen and close from the Window menu. Asyou open, close, and move around windowsand panels to meet your individual needs,you can save the location of windows andpanels as a custom panel layout set, whichyou can display again later.The Properties panel, known more commonly as the Property Inspector, at the bottom of the Program window provides aconvenient way to view and change attributesof any selected object or multiple objects—such as text, graphics, media, and shapes—ona web page. After you select an object, relevant commands and associated fields for itappear in the Property Inspector.Chapter 2Getting Started with Dreamweaver CS617
Creating a Web SiteBefore you create a web site, you need to create a local root folderwhere you’ll store all the elements that make up the site. web sites aremore than just a bunch of web pages. All the images, videos, navigational buttons, documents, scripts, etc., are separate files that must beuploaded into those pages. Defining a web site instructs Dreamweaverthat the local root folder is the folder location that contains all the elements of your site. In turn, Dreamweaver will keep track of the fileswithin the folder, automatically update them as needed, and give youaccess to them, while you're working. The Site Setup dialog box doesn’tforce you to complete the site setup unless it’s required. As you work onyour site and a task needs information from the Site Setup dialog box,Dreamweaver opens it and highlights the required setting.Create a New Web Site41Define a local root folder whereyou’ll store all the elements thatyou will use to build your web site.2Start Dreamweaver.3Click the Site menu, and then clickNew Site.56Dreamweaver gives you severalcategories on the creation of aweb site: Site, Servers, VersionControl, and Advanced Settings.4Click the Site category.5Name your site (Site names arenot file names, so feel free to useany naming convention you wish).6Enter the location of your localroot folder, or click the Browse ForFolder icon, located to the right ofthe input box, navigate to thefolder you want to use as the rootfolder, and then click Select.7Click the Servers category.8To specify the server (optional atthis point; you can do it later) thatwill host your pages on the web,click the Add New Server button,specify the server name, FTPaddress, username and password,and root directory on the Basictab, and then click Save.18Chapter 278
99Click the Version Control category.1010 To use version control software(optional at this point; you can do itlater), click the Access list arrow,click Subversion, and then specifythe protocol type, server addressand settings, and username andpassword.11 Click the Advanced Settingscategory.A list of subcategories appears,where you can set advancedsettings. You can set options forthe following categories: LocalInfo, Cloaking, Design Notes, FileView Columns, Contribute,Templates, Spry, and Web Fonts(New!).1112We'll deal with Advanced Settingsin Chapter 20.12 Click Save to complete theprocess.Dreamweaver creates a sitedefinition based on your optionsand your choice of the local rootfolder (In our example,youtechtube).When you define a site inDreamweaver, the Assets andFiles panels will now display a listof all your folders and files.See AlsoSee “Setting Advanced SiteDefinitions” on page 484 for information on using the Advanced tab in theSite Definition dialog box.For Your InformationCreating a Local Root FolderThe first step to a successful web site is careful planning, and the creation of a local root folder. Since this is covered in Chapter 1, we'llassume that you've already taken care of this very important part of thedesign process. Remember, the local root folder contains all the elements that you use to build your web site and all the individual pagesand parts that it contains. It's very possible that you've already put in alot of computer time before coming to this very important first step inDreamweaver. For example, you may have created many of the imagesand graphics that you're going to use by working in Adobe Photoshopand Illustrator. You may have designed some Adobe Flash animations,and you might have even used Microsoft Word and Excel to generatesome text documents and spreadsheets. All of these elements wouldbe in the local root folder. In keeping with Chapter 1, we call this localroot folder, youtechtube. Now that you have your local root folder, thenext step is to inform Dreamweaver that this is the folder you'll beusing for the creation of this particular web site.Chapter 2 Getting Started with Dreamweaver CS619
Opening or Importinga Web SiteDreamweaver allows you to manage multiple sites. When you openDreamweaver it will load the web site last used. If, however, you need towork on another web site it's a simple matter to redirect Dreamweaverto the needed site using the Manage Sites dialog box (New!), whichyou can also use to create, edit, duplicate, remove, export, and importsites. You can create and import sites from Dreamweaver—using a SiteDefinition File with the STE extension—and Adobe Business CatalystSite (New!), which is a hosted web site solution that allows you to builddynamic, data-driven web sites.Open or Import Sites1Click the Site menu, and then clickManage Sites.2Select the site from Your Sites list.3To import a site, do either of thefollowing:2 Dreamweaver Site. Click ImportSite, select a Dreamweaversite definition file (.ste), andthen click Open. Business Catalyst Site. ClickImport Business Catalyst Site(New!), sign in and enterrequested information, ifprompted, and then select thesite.4Use to delete, edit, duplicateor export a site.4Click Done.Dreamweaver closes the first siteand loads all the assets for theselected site.Did You Know?You can export a site. Click the Sitemenu, click Manage Sites, select thesite, click the Export button, specify aname for the site definition file (.ste),select a location, and then click Save.203Chapter 2For Your InformationWorking with Business Catalyst SitesAdobe Business Catalyst is a hosted web site solution that allowsyou to build dynamic, data-driven web sites with some advancedfeatures, such as search, forums, blogs, password protected areas,web forms, and online stores. You can create a new BusinessCatalyst Site from Dreamweaver by using the New Business CatalystSite command (New!) on the Site menu or the New BusinessCatalyst Site button (New!) in the Manage Sites dialog box. If youalready have a Business Catalyst site, you can import it intoDreamweaver by using the Import Business Catalyst Site button(New!) in the Manage Sites dialog box. Sign in and enter requestedinformation, if prompted.
Creating a BlankWeb PageThe process of creating a site can become involved; however, it allbegins with the creation of pages. These pages will load static anddynamic content, and be bundled together with a navigational system;finally winding up as a web site. A page is based on a type, such asHTML, and layout (or structure), such as columns and headers, whichincludes HTML5 layouts (New5.5). A new page is a blank slate for youto draw. A new web page can be literally anything from a text page to ahigh-end page dealing with animation, video, audio, CSS, incontext editing or any combination of the above.Create a Blank Web Page1Click the File menu, and then clickNew.234TIMESAVER Press Ctrl N(Win) or A N (Mac).The New Document dialog boxopens.TIMESAVER To create a webpage without the dialog box, clickthe file type you want at theWelcome Screen.52Click the Blank Page category.73Select the Page Type you want (inthis example, HTML5 (New5.5)).4Select the Layout you want.5Click the DocType list arrow andselect the option you want.6Click the Layout CSS list arrow, ifavailable, and select the optionyou want.7Click the Link button to attach aCSS file to the current document.8To add an editable region for ablank HTML page, select theEnable InContext Editing checkbox.9Click Create.689Create New without a dialog boxDreamweaver creates the newpage and opens it.Chapter 2 Getting Started with Dreamweaver CS621
Creating a WebPage from a BlankTemplateA Dreamweaver template is a common structure created and used forall or some pages of a web site. Each section of a web site can have itsown template with variations in structure or color from the others.Templates are fantastic timesaving tools because they allow you to create pages that share the same design but different content, and if youmodify a template document, you immediately update the design of allpages. Dreamweaver templates are special master files that containeditable and locked regions. Pages based on a template enable users toedit parts of a web page within the editable regions without the risk ofaccidentally changing the locked regions. This is useful if you are creating a site that will be maintained by other users. You can specify whichparts of pages editors can and cannot change. A template page is basedon a type, such as HTML template, and layout (or structure), such ascolumns and headers, which includes HTML5 layouts (New5.5).Create a Blank Template1Click the File menu, and then clickNew.2Click the Blank Template category.3Select the Template Type you want(in this example, HTML Template).4Select the Layout you want (in thisexample, 2 column, elastic, leftsidebar).234In this example leave the Doc Typeand Layout CSS at their defaultvalues of XHTML 1.0 Transitional,and Add to Head, respectively.5Click Create.Dreamweaver opens the template.6Click the File menu, click Save,click OK if necessary to dismissthe no editable region alert,specify a name, and then clickSave.5For Your InformationStoring TemplatesWhen you work with templates, Dreamweaver automatically creates afolder called Templates, and all template files are stored in this folder.If you move a template file outside that folder, Dreamweaver will notbe able to create new files based on that template. In addition, it creates problems when you insert paths for hyperlinks. Keep your templates within the Templates folder.22Chapter 2
Creating a Web Pagefrom a Fluid GridLayoutCreate a Web Page from a FluidGrid Layout1The process of creating a site just got easier with fluid grid layouts(New!). Instead of dealing with code, you can create complex webdesigns and layouts for mobile, tablet and desktop devices. Fluid gridlayouts provide an adaptive display on different screen sizes on differenttypes of devices. It contains 3 layouts—Mobile, Tablet, and Desktop—based on a single fluid grid and typography presets, which you canmodify. After you create a new document, you can use the Insert panelto insert Fluid Grid Layout Div tags.32Click the File menu, and then clickNew.TIMESAVER Click the Filemenu, and then click New FluidGrid Layout or click Fluid GridLayout at the Welcome Screen.The New Document dialog boxopens.2Click the Fluid Grid Layoutcategory.3Specify the number of columns, apercentage of column width, and apercentage width for the device.4Click the DocType list arrow andselect the option you want.5Click the Layout CSS list arrow, ifavailable, and select the optionyou want.6Click the Link button to attach aCSS file to the current document.7To restore default settings, clickReset To Default.8Click Create.45678Dreamweaver creates the newpage and opens it. It also createsa boilerplace.css file, an externalcss file (one that you name), and arespond.min.js (JavaScript) file,which all appear on the RelatedFiles toolbar.Chapter 2 Getting Started with Dreamweaver CS623
Creating a Web Pagefrom a TemplateCreate a Web Page from anExisting Template1Instead of creating a web page from scratch, you can create a newweb page based on the existing template, which can save you a lot oftime and effort. In the New Document dialog box, you can select yourown custom template designs available in the Page From Template category or click the Get More Content link to open the DreamweaverExchange on the web to download more template page designs.234Click the File menu, and then clickNew.TIMESAVER Press Ctrl N(Win) or A N (Mac).The New Document dialog boxopens.2Click the Page From Templatecategory.3Select the site that contains thetemplate you want.4Select the template you want touse.5Select or clear the Update PageWhen Template Changes checkbox.6Click Create.7Click the File menu, click Save,specify a name, and then clickSave.Did You Know?You can create a document from atemplate in the Assets panel. Open theAssets panel using the Windows menu,click the Templates icon to view the listof templates, right-click (Win) orControl-click (Mac) the template youwant, click New From Template, andthen save the document.24Chapter 256
Creating a Web Pagefrom a SampleCreate a Web Page from aSample1If you’re not sure where you start, you can use one of Dreamweaver’ssample designs as a starting point for a new page and then make anychanges you want to customize it to suit your specific needs. In theNew Document dialog box, you can preview sample file designs andthen create a new document based on the one you want to use. You canselect from sample pages with CSS (Cascading Style Sheets) andMobile Starters. The Mobile Starter (New5.5) sample pages providejQuery functionality with a HTML5-based interface for mobile devices.When you create a new document, Dreamweaver makes a untitled copyof the sample file, which you can save with a new name.234PreviewClick the File menu, and then clickNew.TIMESAVER Press Ctrl N(Win) or A N (Mac).The New Document dialog boxopens.2Click the Page From Samplecategory.3Select the type of sample folderyou want to use: CSS Style Sheetor Mobile Starters (New5.5).4Select the sample page you want(New5.5).5If available, click the DocType listarrow, and then select from theavailable options.6Click Create.56Dreamweaver creates the newpage and opens it.7Click the File menu, click Save,specify a name, and then clickSave.8If the Copy Dependent Files dialogbox appears, set the options youwant, and then click Copy.Chapter 2 Getting Started with Dreamweaver CS625
Saving a Web PageSave a Web Page1Web pages should be saved as soon as they're opened. Naming conventions should be according to a predefined list of names that youcreated during the planning stage of the project. It's important to savepages early, that way if there's any problem such as: the applicationlocking up, you will be able to start again from the last-saved version.Another important reason is error checking and validating. Web pagesmust be in a saved state before performing any validation.Local root siteClick the File menu, and thenselect from the following options: Save. If the file is new, you willbe prompted to enter a properfile name and location for thenew page. If the file has beenpreviously saved, Dreamweaver saves the file, using theoriginal file name and location(without prompting).SitefoldersTIMESAVER Press Ctrl S(Win) or A S (Mac). Save As. Use this option tomake a copy of a file; you willbe prompted to give the file anew name and location.TIMESAVER Press Ctrl Shift S(Win) or A Shift S (Mac). Save All. Use this option if youhave more than one file open,and you want to save all ofthem at the same time. If any ofthe files are new, you will beprompted to enter a file nameand location. Save All Related Files. Use thisoption to save web site relatedfiles, which includes externalCSS rules, server-side includes,external JavaScript files, parenttemplates files, library files, andiframe source files.26Chapter 2For Your InformationNaming Conventions for Files and ElementsWhen you name your files and elements in Dreamweaver, it’s important to use standard guidelines for naming to make sure your web siteworks properly on different server platforms, such as Windows orUNIX. Keep the following in mind: (1) Use underscores in place ofspaces and avoid special characters (colons, slashes, periods, andapostrophes), and (2) use shorter names; filenames on the Mac cannot be more than 31 characters.
Save As Template. Use this2option to save the opendocument as a template. Atemplate is a reusabledocument that containseditable regions.2Navigate to the drive and folderlocation where you want to savethe file.3Type a name for the file, or use thesuggested name.When naming files, avoid usingspaces and special characters, orpunctuation.4For this example, leave the otheroptions at their default levels.4Click Save to finalize the process.5Click Copy.3Did You Know?You can revert to the last saved version of a document. Click the Filemenu, click Revert, and then click Yesto revert to the previous version, orclick No to keep your changes. If yousave a document and then exitDreamweaver, you
Dreamweaver CS6 Introduction Adobe Dreamweaver CS6 is the industry leading web devel-opment tool for building web sites and applications. It pro-vides a combination of visual layout tools, application development features, and code editing support, enabling developers and designers at every skill level to create visu-