Transcription
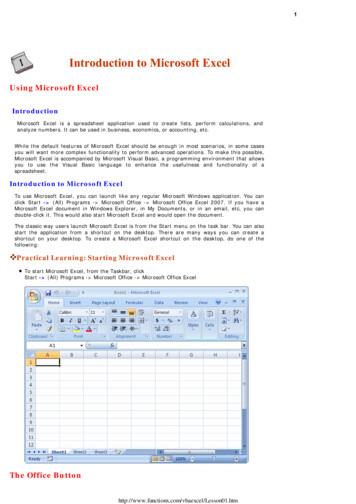
1Using Microsoft ExcelIntroductionMicrosoft Excel is a spreadsheet application used to create lists, perform calculations, andanalyze numbers. It can be used in business, economics, or accounting, etc.While the default features of Microsoft Excel should be enough in most scenarios, in some casesyou will want more complex functionality to perform advanced operations. To make this possible,Microsoft Excel is accompanied by Microsoft Visual Basic, a programming environment that allowsyou to use the Visual Basic language to enhance the usefulness and functionality of aspreadsheet.Introduction to Microsoft ExcelTo use Microsoft Excel, you can launch like any regular Microsoft Windows application. You canclick Start - (All) Programs - Microsoft Office - Microsoft Office Excel 2007. If you have aMicrosoft Excel document in Windows Explorer, in My Documents, or in an email, etc, you candouble-click it. This would also start Microsoft Excel and would open the document.The classic way users launch Microsoft Excel is from the Start menu on the task bar. You can alsostart the application from a shortcut on the desktop. There are many ways you can create ashortcut on your desktop. To create a Microsoft Excel shortcut on the desktop, do one of thefollowing:Practical Learning: Starting Microsoft ExcelTo start Microsoft Excel, from the Taskbar, clickStart - (All) Programs - Microsoft Office - Microsoft Office ExcelThe Office tm
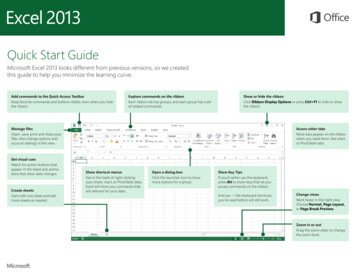
Introduction2When Microsoft Excel opens, it displays an interface divided in various sections. The top sectiondisplays the title bar which starts on the left side with the Office Buttonmouse on it, a tool tip would appear:. If you position theThe Options of the Office ButtonWhen clicked, the Office Button displays a menu:As you can see, the menu of the Office Button allows you to perform the routine Windowsoperations of a regular application, including creating a new document, opening an existing file, orsaving a document, etc. If you right-click the office button, you would get a short menu:We will come back to the options on this menu.The Quick Access ToolbarIntroductionThe Quick Access Toolbaris on the right side of the Office Button. It displays ahttp://www.functionx.com/vbaexcel/Lesson01.htm
few buttons. If you right-click the Quick Access toolbar, a menu would appear:To hide the Quick Access toolbar, you can right-click it and click Remove Quick Access Toolbar. Ifyou position the mouse on a button, a tool tip would appear.In the beginning, the Quick Access toolbar displays only three buttons: Save, Undo, and Redo. Ifyou want more buttons than that, you can right-click the Quick Access toolbar and click CustomizeQuick Access Toolbar. This would display the Excel Options dialog box:To add a button to the Quick Access toolbar, on the left list of Add, click an option and click Add.After making the selections, click OK.To remove a button from the Quick Access toolbar, right-click it on the Quick Access toolbar andclick Remove From Quick Access Toolbar.The Quick Access ButtonA button with a down-pointing arrow displays on the right side of the Quick Access toolbar. Youcan click or right-click that button to display its menu:The role of this button is to manage some aspects of the top section of the Microsoft Excelinterface, including deciding what buttons to display on the Quick Access toolbar. For example,instead of using the Customize Quick Access Toolbar menu item as we saw previously, you canclick an option from that menu and its corresponding button would be added to the Quick tm3
toolbar. If the options on the menu are nor enough, you can click either Customize Quick AccessToolbar or More Commands. This would open the Excel Options dialog box.The main or middle area of the top section displays the name of the application: Microsoft Excel.You can right-click the title bar to display a menu that is managed by the operating system.On the right side of the title bar, there are three system buttons that allow you to minimize,maximize, restore, or close Microsoft Access.Under the title bar, there is another bar with a Help button on the right side.The RibbonIntroductionUnder the title bar, Microsoft Excel displays the Ribbon:By default, the Ribbon displays completely in the top section of Microsoft Excel under the title bar.One option is to show it the way the main menu appeared in previous versions of Microsoft Excel.To do this:Right-click the Office Button, the Quick Access toolbar, or the Ribbon itself, and click Minimizethe RibbonClick or right-click the button on the right side of the Quick Access toolbar:This would display the Ribbon like a main menu:To show the whole Ribbon again:Right-click the Office Button, the Quick Access toolbar, or one of the Ribbon menu items, andclick Minimize the Ribbon to remove the check mark on itClick or right-click the button on the right side of the Quick Access toolbar and click Minimizethe Ribbon to remove the check mark on itDouble-click one of the menu items of the RibbonChanging the Location of the RibbonBy default, the Quick Access toolbar displays on the title bar and the Ribbon displays under it. Ifyou want, you can switch their locations. To do that, right-click the Office Button, the QuickAccess toolbar, or the Ribbon, and click Show Quick Access Toolbar Below the htm4
5To put them back to the default locations, right-click the Office Button, the Quick Access toolbar,or the Ribbon, and click Show Quick Access Toolbar Above the Ribbon.The Tabs of the RibbonThe ribbon is a type of property sheet made of various property pages. Each page is representedwith a tab. To access a tab:You can click its label or button, such as Home or CreateYou can press Alt or F10. This would display the access key of each tab:To access a tab, you can press its corresponding letter on the keyboard. For example, whenthe access keys display, if you press Home, the Home tab would displayIf your mouse has a wheel, you can position the mouse anywhere on the ribbon, and role thewheel (on the mouse). If you role the wheel down, the next tab on the right side would beselected. If you role the wheel up, the previous tab on the left side would be selected. You cankeep rolling the wheel until the desired tab is selectedTo identify each tab of the Ribbon, we will refer to them by their names.The Sections of a TabEach tab of the ribbon is divided in various sections, each delimited by visible borders of verticallines on the left and right. Each section displays a title in its bottom side. In our lessons, we willrefer to each section by that title. For example, if the title displays Font, we will call that section,"The Font Section".Some sections of the Ribbon display a buttonwould open a dialog box or a window. If you see such a button, you can click it. ThisThe Buttons of the RibbonSince there are various buttons and sometimes they are unpredictable, to know what a particularbutton is used for, you can position your mouse on it and a tool tip would appear:You can also use context sensitive help in some cases to get information about an item.You can add a button from a section of the Ribbon to the Quick Access toolbar. To do that,right-click the button on the Ribbon and click Add to Quick Access .htm
6Remember that, to remove a button from the Quick Access toolbar, you can right-click it on theQuick Access toolbar and click Remove From Quick Access Toolbar.The More Buttons of the RibbonIn some sections of the Ribbon, on the lower-right corner, there is a button:That button is used to display an intermediary dialog box for some actions.The Size of the RibbonWhen Microsoft Excel is occupying a big area or the whole area of the monitor, most buttons ofthe Ribbon appear with text. Sometimes you may need to use only part of the screen. That is, youmay need to narrow the Microsoft Excel interface. If you do, some of the buttons may display partof their appearance and some would display only an icon. Consider the difference in the followingthree screenshots:In this case, when you need to access an object, you can still click it or click its arrow. If the itemis supposed to have many objects, a new window may appear and display those .htm
From this:7To this:The Work AreaThe Name BoxUnder the Ribbon, there is a white box displaying a name like A1 (it may not display A1.), thatsmall box is called the Name Box:The Insert Function ButtonOn the right side of the Name box, there is a gray box with an fx button. That fx button is calledthe Insert Function button.The Formula BarOn the right side of the Insert Function button is a long empty white box or section called theFormula Bar:You can hide or show the Formula Bar anytime. To do this, on the Ribbon, click View. In theShow/Hide section:To hide the Formula Bar, remove the check mark on the Formula Bar check boxTo show the Formula Bar, check the Formula Bar check boxThe Column HeadersUnder the Name Box and the Formula bar, you see the column headers. The columns are labeledA, B, C, etc:http://www.functionx.com/vbaexcel/Lesson01.htm
8There are 255 of columns.The Row HeadersOn the left side of the main window, there are small boxes called row headers. Each row header islabeled with a number, starting at 1 on top, then 2, and so on:The CellsThe main area of Microsoft Excel is made of cells. A cell is the intersection of a column and a row:A cell is identified by its name and every cell has a name. By default, Microsoft Excel appends thename of a row to the name of a column to identify a cell. Therefore, the top-left cell is named A1.You can check the name of the cell in the Name Box.The Scroll BarsOn the right side of the cells area, there is a vertical scroll bar that allows you to scroll up anddown in case your document cannot display everything at a m
9In the lower right section of the main window, there is a horizontal scroll bar that allows you toscroll left and right if your worksheet has more items than can be displayed all at once:Sometimes the horizontal scroll bar will appear too long or too narrow for you. If you want, youcan narrow or enlarge it. To do this, click and drag the button on the left side of the horizontalscroll bar:The Sheet TabsOn the left side of the horizontal scrollbar, there are the worksheet tabs:By default, Microsoft Excel provides three worksheets to start with. You can work with any ofthem and switch to another at any time by clicking its tab.The Navigation ButtonsOn the left side of the worksheet tabs, there are four navigation buttons:If you happen to use a lot of worksheets or the worksheet names are using too much space, whichwould result in some worksheets being hidden under the horizontal scroll bar, you can use thenavigation buttons to move from one worksheet to another.The Status BarUnder the navigation buttons and the worksheet tabs, the Status Bar provides a lot of informationabout the job that is going on.Microsoft Excel File OperationsSaving a FileA Microsoft Excel file gets saved like any traditional Windows file. To save a file:You can press Ctrl Shttp://www.functionx.com/vbaexcel/Lesson01.htm
On the Quick Access Toolbar, you can click the Save buttonYou can click the Office Button and click SaveTwo issues are important. Whenever you decide to save a file for the first time, you need toprovide a file name and a location. The file name helps the computer identify that particular fileand register it.A file name can consist of up to 255 characters, you can include spaces and dashes in a name.Although there are many characters you can use in a name (such as exclamation points, etc), tryto avoid fancy names. Give your file a name that is easily recognizable, a little explicit. Forexample such names as Time Sheets, Employee's Time Sheets, GlobalEX First Invoice are explicitenough. Like any file of the Microsoft Windows operating systems, a Microsoft Excel file has anextension, which is .xls but you don't have to type it in the name.The second important piece of information you should pay attention to when saving your file isthe location. The location is the drive and/or the folder where the file will be saved. By default,Microsoft Excel saves its files in the My Documents folder. You can change that in the Save Asdialog box. Just click the arrow of the Save In combo box and select the folder you want.Microsoft Excel allows you to save its files in a type of your choice. To save a file in anotherformat:Press F12 or Shift F12You can click the Office Button and position the mouse on Save As and select the desiredoption:On the Quick Access Toolbar, you can click the Save button . Then, in the Save As dialogbox, click the arrow of the Save As Type combo box and select a format of your choiceThere are other things you can do in the Save As dialog 10
11Saving under a Different Name and New FolderYou can save a file under a different name or in another location, this gives you the ability towork on a copy of the file while the original is intact.There are two primary techniques you can use to get a file in two names or the same file in twolocations. When the file is not being used by any application, in Windows Explorer (or in MyComputer, or in My Network Places, locate the file, right-click it and choose Copy. To save the filein a different name, right-click in the same folder and choose Paste. The new file will be namedCopy Of. You can keep that name or rename the new file with a different name (recommended).To save the file in a different location, right-click in the appropriate folder and click Paste; in thiscase, the file will keep its name.In Microsoft Excel, you can use the Save As dialog box to save a file in a different name or savethe file with the same name (or a different name) in another folder. The Save As dialog box alsoallows you to create a new folder while you are saving your file (you can even use this techniqueto create a folder from the application even if you are not saving it; all you have to do is createthe folder, click OK to register the folder, and click Cancel on the Save As dialog box).Opening a FileThe files you use could be created by you or someone else. They could be residing on yourcomputer, on another medium, or on a network. Once one of them is accessible, you can open itin your application.You can open a document either by double-clicking its icon in Windows Explorer, in My Computer,from the Find Files Or Folders window, in My Network Places, or by locating it in the Open dialogbox. To access the open dialog box, on the main menu, click File - Open. You can also click theOpen button on the Standard toolbar.A shortcut to call the Open dialog box is Ctrl O.Files PropertiesEvery file has some characteristics, attributes, and features that make it unique; these are itsproperties. You can access a file's properties from three main areas on the computer:If the file is saved on the desktop and/or it has a shortcut on the desktop, if you open MyComputer, Windows Explorer, or the folder (as a window) where the file is stored, right-clickthe file and click Properties. If the file were saved on the desktop, you would see only some ofits properties, the most you can do there is to assign a Read-Only attribute. In My Computerand Windows Explorer, you will be able to change the file's properties.Before opening a file or while in the Open dialog box, you can view some of the file'sproperties although you won't be able to change them.When the file is opened in Microsoft Excel, you can click the Office Button, position the mouseon Prepare, and click Properties. This would display some of the most common attributes ofthe m
12To change an item, you can click its text box and edit or replace the content. To get moreoptions, you can click the Document Properties button and click Advanced Properties.A file's properties are used for various reasons. For example, you can find out how much size thefile is using, where it is located (the hosting drive and/or folder), who created the file, or who wasthe last person to access or modify it. The Properties dialog box is also a good place to leavemessages to other users of the same file, about anything, whether you work as a team or yousimply want to make yourself and other people aware of a particular issue regarding the file.Practical Learning: Closing Microsoft ExcelTo close Microsoft Excel, click the Office Button and click Exit Excel.If you are asked whether you want to save the file, click NoHomeCopyright 2009-2010 FunctionX, Next
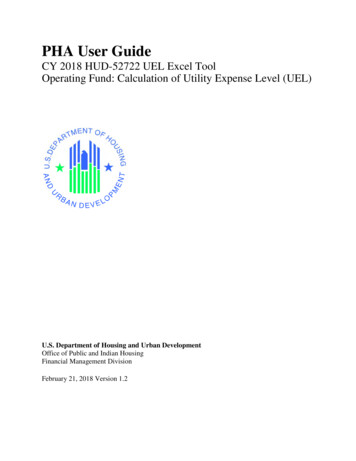
13Microsoft Visual Basic FundamentalsIntroductionMicrosoft Excel is a spreadsheet application that provides simple to advanced means of creatingand managing any type of list. To enhance it beyond its default function, it ships with a languagecalled Microsoft Visual Basic or simply Visual Basic.Microsoft Visual Basic for Applications (VBA) is a computer language based on Microsoft VisualBasic. It allows you to write code that can automatically perform actions on a document and/orits content. When using that language, you write pieces of code, using an external environment.Microsoft Visual Basic is a programming environment that gets automatically installed when yousetup Microsoft Excel. It stays apart because most people would not need or use it. This meansthat, if you want to use the Microsoft Visual Basic programming environment that ships withMicrosoft Excel, you must ask for it, which can be easily done.Launching Microsoft Visual BasicIn our lessons, we will learn how to use both Microsoft Excel and Microsoft Visual Basic to createand manage spreadsheets. The Microsoft Visual Basic programming environment we will usedepends on Microsoft Excel. As a result, to use Microsoft Visual Basic, you must first openMicrosoft Excel. Then, to write code, you must open Microsoft Visual Basic. There are various waysyou can do this, depending on your intention.Before using code, you should add a new tab, the Developer tab, to the Ribbon. To do this, youcan click the Office Button and click Excel Options. In the Excel Options dialog box, click the ShowDeveloper tab in the Ribbon check box and click OK. The Ribbon would become equipped with anew tab:From the Developer tab of the Ribbon, to launch Microsoft Visual Basic, you can click the VisualBasic button.Practical Learning: Starting Microsoft Visual Basic1. Start Microsoft Excel2. Click the Office Button and click Excel Options3. In the Excel Options dialog box, click the Show Developer tab in the Ribbon check box:http://www.functionx.com/vbaexcel/Lesson02.htm
144. Click OK5. In the Code section of the Developer tab of the Ribbon, to launch Microsoft Visual Basic, clickVisual Basic:The Microsoft Visual Basic InterfaceIntroductionWhen it opens, like any regular Windows application, Microsoft Visual Basic displays a title bar inthe top section. Under the title bar, the application displays a menu, followed by a Standardtoolbar.To assist you with your development, Microsoft Visual Basic can display various windows.The Project ExplorerThe Project Explorer window shows a list of the code segments that are available to yourworksheet. It is usually available whenever you open Microsoft Visual Basic. It is usuallypositioned in the top-left section. If it is not present, to display it, on the main menu of MicrosoftVisual Basic, you can click View - Project Explorer. To close it, you can click its Close button.You can move the Project Explorer to another section of the interface. To do this, click its title barand drag it away it from tm
15To put the window back where it was previously, you can double-click its title bar.The Project ExplorerThe Properties window is usually positioned in the bottom-left section of the screen. When it doesnot appear, to display it, on the main menu, click View - Properties Window:The Properties Window shows the characteristics of an object that is selected. Like any otherwindow, to move the Properties window from its position, drag its title bar:The main area of Microsoft Visual Basic uses a gray background. This area is gray because, inreality, Microsoft Visual Basic is a multiple document interface (MDI) that can be used to displayvarious windows at the same time. At times, this gray area will be occupied with other windows.ModulesA module is a blank window that resembles a piece of paper on which you write code. When youuse Microsoft Excel and work on a document, a default module is automatically allocated for it,whether you use it or not. You can also create a module that is independent of any 02.htm
To create a module, on the main menu of Visual Basic, you can click Insert - Module.Practical Learning: Creating a Module1. On the main menu of Microsoft Visual Basic, click Insert - Module2. Notice that a blank window with a blinking caret appearsThe Immediate WindowTo help you test code, Microsoft Visual Basic provides a special window called the ImmediateWindow. To display it, on the main menu of Microsoft Visual Basic, you can click View - Immediate Window.Practical Learning: Displaying the Immediate Window1. To display the Immediate Window, on the main menu of Visual Basic, click View - ImmediateWindow2. Notice that a window with an Immediate title bar appears at the bottom with a blinking caret3. To return to Microsoft Excel, on the Standard toolbar of Visual Basic, click the View MicrosoftExcel button4. To close Microsoft Visual Basic, on the main menu, click File - Close and Return to MicrosoftExcelVBA in Visual BasicIntroductionIn the spreadsheet you will create, you use Microsoft Excel to create normal documents using thedefault settings of the application. To apply some advanced features to a spreadsheet, you can useMicrosoft Visual Basic that is automatically installed with Microsoft Excel.To create a spreadsheet with functionality beyond the defaults, you write code. Microsoft tm16
Basic is a programming environment that uses a computer language. That language is calledVisual Basic for Applications (VBA). Although VBA is a language of its own, it is in reality derivedfrom the big Visual Basic computer language developed by Microsoft. In our lessons, we will learnhow to use VBA in Microsoft Excel.To take advantage of the functionalities of the Microsoft Visual Basic environment, there are manysuggestions you can use or should follow. Because VBA is normal computer language, there arevarious rules you must follow for the language to work.Using VBAIn our lessons, we will use the word VBA sometimes but most of the time, we use the expression"Visual Basic Language". When we use "Visual Basic language", we refer to a concept that isrecognized by all child languages of Visual Basic, including VBScript and VBA. When we will usethe word VBA, we refer to a concept that either is proper to VBA as a language and is notnecessarily applied to some other flavors of Visual Basic, or to the way the Visual Basic languageis used in Microsoft Excel. For example, the word String is used in all Visual Basic languages butthe word Variant is not used in the 2008 version of the Visual Basic language.MacrosCreating a MacroTo launch Microsoft Visual Basic using the default installation of Microsoft Excel and launchingfrom a macro:On the Ribbon, you can click View. In the Macros section, click the arrow under the Macrosbutton and click Record a Macro:Click Developer. In the Code section, click the Record Macro buttonIn each case, the Record Macro dialog box would come up:On the Record Macro dialog box, accept or enter a name for the macro. As an option, you can typea description of the macro in the bottom text box. Once you are ready, click OK. This would bringyou to the document in Microsoft Excel where you can do what you want.After doing what is necessary, to end the creation of the macro, on the Ribbon:Click View. In the Macros section, click the the arrow of the Macros button and click StopRecording:Click Developer. In the Code section, click the Stop Recording buttonPractical Learning: Creating a m17
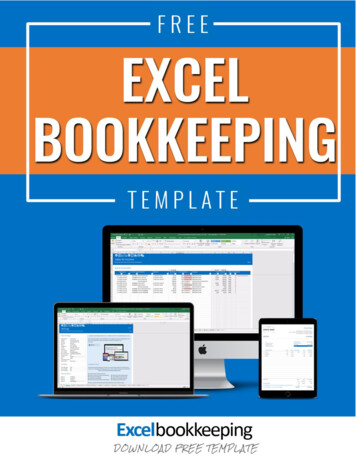
1. Start Microsoft Excel182. On the Ribbon, click Developer.In the Code section, click Record Macro3. Set the Name of the macro as Variables4. Click OK5. In the document, whatever box is selected (don't click any), type 26. On the Formula Bar, click the Enter button7. In the Code section of the Ribbon, click Stop RecordingThe Skeleton Code of a MacroWhen you create a macro, skeleton code is generated for you. To access the code generated for amacro, on the Ribbon:Click View. In the Macros section, click Macrosbutton and click View Macrosor click the the arrow of the MacrosClick Developer. In the Code section, click the Macros buttonAny of these actions would open the Macros dialog box that would display the list of macros in thecurrent document:To see the code of a macro, click its name and click m
Practical Learning: Viewing the Code of a Macro1. To open Microsoft Visual Basic, in the Code section of the Ribbon, click Macros2. In the Macros dialog box, make sure Exercise1 is selected and click EditVBA in a MacroWe will try to reduce as much as possible the code that will be written for you. Still, there aresome lines and words we will keep or use but will ignore them for now. As we move on in ourlessons, you will understand what everyone of those words means. The code generated in theabove Practical Learning section was:Sub Exercise()ActiveCell.FormulaR1C1 " 2"End SubThe first line of code has the word Sub. We will introduce it later on. Exercise1 is the name of themacro we created. We will come back to names in a few sections in this lesson. We will also comeback to the role of parentheses. The section of code ends with the End Sub line. We will comeback to it when we study the procedures. For now, consider the Sub Exercise1() and End Sublines as the minimum requirements we need as this time, that we don't need to be concernedwith, but whose roles we can simply ignore at this time.The most important line of our code, and the only line we are concerned with, is:ActiveCell.FormulaR1C1 " 2"This line has three main sections: ActiveCell.FormulaR1C1, , and " 2". For now, understandthat the ActiveCell.FormulaR1C1 expression means "whatever box is selected in the document".The sign is called the assignment operator. As its name indicates, the assignment operator isused to assign something to another, to give a value to something, or more precisely to storesomething somewhere.The thing on the right side of is called a value. Therefore, " 2" is a value. Based on this, theexpression ActiveCell.FormulaR1C1 " 2" means "Assign the thing on the right side of tothe thing on the left side of ." Another way to put it is, "Store the value on the right side of theassignment operator to the selected box on the left side of the assignment operator." For now,until indicated otherwise, consider that that's what that line of code means.Using a MacroAfter creating a macro, you can use it to see its result. This is also referred to as executing amacro or running a macro.To execute a macro, on the Ribbon:Click View. In the Macros section, click Macrosbutton and click View Macrosor click the the arrow of the MacrosClick Developer. In the Code section, click the Macros buttonIn the Macro dialog box, click the name of the macro and click Run.Writing CodeCode IndentationIndentation is a technique that allows you to write easily readable code. It consists of visuallyshowing the beginning and end of a section of code. Indentation consists of moving code to theright side.The easiest and most common way to apply indentation consists of pressing Tab before typingyour code. By default, one indentation, done when pressing Tab, corresponds to 4 characters. Thiscan be automatically set using the Tab Width text box of the Editor property page in the Optionsdialog box. To change it, on the main menu of Microsoft Visual Basic, you can click Tools - Options and click the Editor 19
20If you don't want the pressing of Tab to be equivalent to 4 characters, change the value of the TabWidth text box to a reasonable value and click OK. Otherwise, it is (strongly) suggested that youkeep to its default of 4 characters.CommentsA comment is a piece of text in code that would not be considered when reading your code. Assuch, a comment can be written any way you want.In the Visual Basic language, the line that contains a comment can start with a single quote. Hereis an example:This line will not be considered as part of the codeAlternatively, you can start a comment with the Rem keyword. Anything on the right side of rem,Rem, or REM would not be read. Here is an example:' This line will not be considered as part of the codeRem I can write anything I want on this lineComments are very useful and you are strongly suggested to use them regularly.The code that was generated in our Practical Learning section contains a few lines of comment:Sub Exercise1()'' Exercise1 Macro''ActiveCell.FormulaR1C1 " 2"End SubPractical Learning: Closing Microsoft Excel1. To close Microsoft Visual Basic, on the main menu, click File - Close and Return to MicrosoftExcel2. To close Microsoft Exc
click Start - (All) Programs - Microsoft Office - Microsoft Office Excel 2007. If you have a Microsoft Excel document in Windows Explorer, in My Documents, or in an email, etc, you can double-click it. This would also start Microsoft Excel and would open the document. The classic way users launch Microsoft Excel is from the Start menu on the .