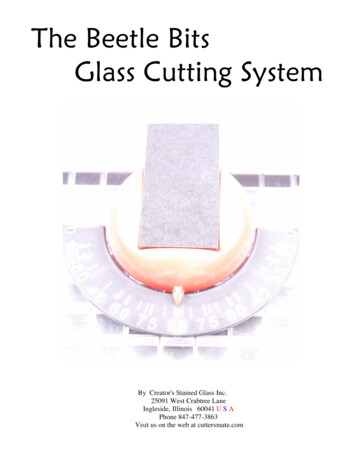
Transcription
By Creator's Stained Glass Inc.25091 West Crabtree LaneIngleside, Illinois 60041 U S APhone 847-477-3863Visit us on the web at cuttersmate.com
SET UPSet up is very easy with the Beetle Bits Glass Cutting System. Simply plug themodules into the Waffle Grid as shown below.If you are not using all of the modules, it is a good practice to leave them plugged inalong one edge of the Waffle Grid. Close enough to be in reach, but out of the way.RULER CALIBRATIONThe first thing you will need do is plug in and calibrate the ruler.After plugging in the ruler to your desired location, plug in the compass and the pivot pointer,exactly in that order. The pivot pointer has a lip on the underside that will locate the ruler thesame as the ruler stabilizer. To calibrate the ruler for squareness, all you need to do is loosen thered thumbscrew, press the ruler firmly aginst the ruler stabilizer and pivot pointer, then retightenthe red thumbscrew.To calibrate the ruler to your glass cutter, simply line up the glass cutter compensator to theorigin point you have selected on the ruler.You will need to loosen and retighten the red thumbscrew to do this also.Right AnglePositionerTadpole AngleAdjusterStraight EdgeMulti-DirectionalGlass StopOil WellThumb ScrewRuler AdjusterCutterCompensatorRulerPivot PointerCompassMAIN SET UP FIGURERulerStabilizer
Page 2STRIPSThe following is an example for cutting 1 INCH STRIPS:1. Place the glass on the ruler. (figure 1) Any number canbe your point of origin. Let's use the number 5 on theruler as our point of origin. If we slide the glass right tothe number 6 and make a score, we will have a 1 INCHstrip.2. You may continue making consecutive scores bysliding the glass along the ruler to the next desired width.HINT: It is much easier to look at the corner edge ofthe glass than to look at a score-line. Sometimes thescore-line may not be visible.figure 1SQUARESThe following is an example for cutting 3 INCH SQUARES:1. Place the glass on the ruler. Any number can be your point of origin. Let's use the number 5on the ruler as our point of origin. If we slide the glass right to the number 8 and make a score,we will have a 3 INCH STRIP. (figure 1)2. Run your score and turn the glass 90 degrees. (figure 2)Or you may continue making consecutive scores for moresquares by sliding the glass along the ruler to the nextdesired width.figure 1figure 23. Using the number 5on the ruler as our pointof origin, slide the glassright to the number 8and make a score, wewill have a 3 INCHSQUARE. You maycontinue sliding the glassto desired numbers formore squares.(figure 2)Finished Square
TRIANGLESPage 3The following is an example for cutting a 3 inch high triangle:1. Cut a 3 inch strip of glass. (figure 1)2. Place the strip of glass on the ruler.Set the straight edge bar to the 60 degreemark on the compass. (figure 2)Make the first score along the straight edge.Run and break off the score.figure 13. Shift the straight edge to the other 60degree angle mark on the compass.Line up the point of the first score to theglass cutter and score. (figure 3)figure 24. The result will be an equal sided triangle.(figure 4)figure 3figure 4
DIAMONDSPage 4The following is an example of a pattern diamond 4 inches high by 2 inches wide:1. Using the Diamond Master sheet. (included AND downloadable at cuttersmate.com), draw andcut out your desired diamond. (figure 1)2. To determine the width of the piece ofglass you will need, place the cut-out onthe ruler as shown below. (figure 2)3. Lock your glass stopto that position. Thencut your glass to thatwidth. (figure 3)figure 14. Now place the cut-out onthe cutting surface and alignthe straight edge to the properangle. Tighten the tadpolestraight-edge holder. Place theglass stop at the end of yourpaper diamond cut-out andtighten. (figure 4)5. Make your orientation cut onyour strip of glass. (figure 5)figure 5figure 2figure 3figure 46. Break off your first score and put the new edge against theglass stop. Score again and you will have your diamond. Repeatas many times as needed. (figures 6 and 7)figure 6figure 7
MOSAICSPage 5The following is an example for cutting 1 inch mosaics.1. Place the glass on the ruler.Any number can be your pointof origin. Let's use the number7 on the ruler as our point oforigin. figure 1figure 13. Now, turn the glass overand rotate it 90 degrees.Use the number 7 on the ruleras our point of origin. figure 4figure 42. If we slide the glass right to the number 8 and make ascore, we will have a 1 INCH STRIP. Keep doing this atconsecutive inch marks. Such as 9, 10, 11 etc.figures 2 and 3figure 2figure 34. If we slide the glass right to the number 8 and makea score, we will have a 1 INCH SQUARE. Keep doingthis at consecutive inch marks. Such as 9, 10, 11 etc.figures 5 and 6figure 5figure 65. Run all of the strips on one side of the glass.Turn over the glass and run all of theSQUARES on the other side. figure 7By doing this, the corners will be cleaner andsharper. Also, there will be less wear on yourcutting head. See note below.Note, with textured glass, you may not be able to turn theglass over. You may only be able to rotate it 90 degrees.figure 7
By Creator's Stained Glass Inc. 25091 West Crabtree Lane Ingleside, Illinois 60041 U S A Phone 847-477-3863 Visit us on the web at cuttersmate.com Set up is very easy with the Beetle Bits Glass Cutting System. Simply plug the modules into the Waffle Grid as shown below. If you are not using all of the modules, it is a good practice to leave .