Transcription
Interactive BIOS simulatorHP Z4 G4 WorkstationWelcome to the interactive BIOS simulator for theHP Z4 G4 WorkstationHere’s how to use it BIOS Utility Menus: (Click the link to navigate to the individual menus)On this page you will find thumbnail images of each of the product’s BIOS utility menus. To view a specific menu in greater detail, simply click thatthumbnail. Just as in the live BIOS, on each menu, you can select the tab of each of the other utility menus to navigate directly to that menu.Menu options:While the menu options cannot be toggled, many of them offer item specific information about that option. To view this information, use thecursor to rollover the option and the information will present in a pane on the right of the BIOS screen.That’s it!On every page there is a link that brings you back to either this Welcome page or the BIOS Utility Menus page enabling you to navigate towhatever BIOS option you wish to review.
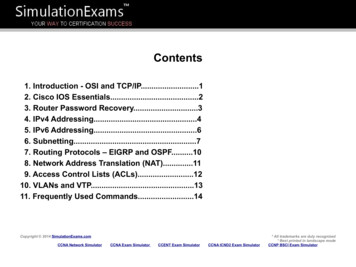
BIOS Utility MenusBack to Welcome PageMainSecurityAdvancedUEFI Drivers
MainSecurityAdvancedUEFI DriversHP Computer Setup System Information System Diagnostics Update System BIOS Change Date and Time Set Machine Unique Data System IDs Replicated SetupSave Custom DefaultsApply Custom Defaults and ExitApply Factory Defaults and ExitIgnore Changes and ExitSave Changes and ExitSuppress POST ErrorsItem Specific Help
MainSecurityAdvancedUEFI DriversHP Computer Setup BASIC SYSTEM INFORMATIONItem Specific Help Show Advanced System InformationProduct NameProcessor 1Memory SizeSystem BIOSHP Z4 G4 WorkstationGenuine Intel(R) CPU 0000%@8 GB ECC RDDR4P61 v01.07 11/13/2017SERVICE ---------------------------------------------Born On DateSerial NumberSKU NumberUniversally Unique Identifier (UUID)Asset Tracking EBSC5013CHelp
MainSecurityAdvancedUEFI DriversHP Computer Setup ADVANCED SYSTEM INFORMATIONItem Specific Help Show Basic System InformationProduct NameMemory SizeMemory SpeedHP Z4 G4 Workstation16384 MB2133 MHzPROCESSOR 1 ssorTypeCache Size (L1/L2/L3)Processor SpeedMicroCode RevisionProcessor U0-DIMM5CPU0-DIMM6CPU0-DIMM7CPU0-DIMM8Genuine Intel(R) CPU 0000% @256 KB / 4 MB / 8448 KB2400 MHz8000003428 GB HynixEmptyEmptyEmptyEmptyEmptyEmptyEmptyNext Help
MainSecurityAdvancedUEFI DriversHP Computer Setup Item Specific Help Show Basic System InformationFIRMWARE ystem BIOSME Firmware VersionME Firmware ModeReference Code RevisionSuper I/O Firmware VersionP61 v01.07 11/13/201711.11.50.1422AMT Disabled147R0156.3.3 PreviousNext Help
MainSecurityAdvancedUEFI DriversHP Computer Setup Item Specific Help Show Basic System InformationSERVICE -Born On Date00/00/0000Serial NumberSKU Number1JP11AVUniversally Unique Identifier (UUID)SCC5E2BA-2E08-B220-E2C9-2A2EBSC5013CAsset Tracking NumberFeature ByteBuild IDProduct Family103C 53335X HP WorkstationSystem Board ID81C5System Board CT NumberCOMMUNICATION -Embedded LAN Controller (AMT) MAC AddressIntel I210 Embedded LAN Port MAC Address3C-52-82-DB-7A-27A0-8C-FD-DD-D4-49 PreviousHelp
HP PC Hardware Diagnostics UEFIPlease select a oleesti keelSuomiFrancaisHrvatskiMagyar
MainSecurityAdvancedUEFI DriversHP Computer Setup Item Specific HelpUpdate System BIOSCurrent System BIOS Version:Current BIOS Release Date:Installation Date of Current BIOS:Most Recent Update Check:1. Check HP.com for BIOS UpdatesChecks for the latest BIOS release revisionon the network, and lets the user decidewhether to download the BIOS image andupdate System.P61 V01.0711/13/201701/01/2016Never ---------------------------------------------3. BIOS Update PreferencesSets the configurations to perform BIOS updates through the network. Check HP.com for BIOS Updates 1BIOS Rollback Policy Minimum BIOS versionAllow BIOS Updates Using a Network 22. Allow BIOS Updates Using a NetworkEnable/Disable automatic BIOS updatesthrough the network in a scheduled basis.Unrestricted Rollback to older BIOSRestricted Rollback to older BIOS BIOS Update Preferences3 Network Configuration SettingsHelp
Network BIOS Update MS Windows Bitlocker Drive Encryption (BDE) may be enabled on your system.HP requires that BDE be suspended temporarily before the BIOS is flashed andthat you obtain your BDE recovery password or recovery PIN before suspending BDE.After the BIOS is updated, BDE can be resumed.ContinueCancel
Minimum BIOS Version Current Minimum BIOS Version: 00.00.00Minimum BIOS Version:
MainSecurityAdvancedUEFI DriversHP Computer Setup Item Specific HelpBIOS Update PreferencesCheck for Update on Next RebootBIOS Source Edit Custom URL1. Check for Update on Next RebootEnable/Disable an automatic BIOS check onnext reboot.1HP.com2. BIOS SourceChoose one of the available options.Click on the field to see the options.2Custom URLAutomatic BIOS Update SettingChoose one of the available options.Click on the field to see the options.Automatic BIOS Update SettingDo not update3BIOS Update FrequencyDailyCheck for BIOSDownloadand updatesupdatesbut letautomaticallymeautomaticallydecide whether to install them43. BIOS Update FrequencyChoose one of the available options.MonthlyWeeklyHelp
Configure Update Source There is no custom URL configured.BIOS Update source can be changed to a CUSTOM URL instead of HP.com.This is only recommended for systems in a managed IT /pathhttp://192.168.0.1/pathPress ESC to CANCELType the System MAC Address and press ENTER to SAVE
MainSecurityAdvancedUEFI DriversHP Computer Setup Item Specific HelpNetwork Configuration Settings1. Proxy ServerEnable/Disable the use of a proxy server.Proxy Server 1 Edit Proxy Server Test Network Connection 2IPv4 Configuration IPv4 Address IPv4 Subnet Mask IPv4 GatewayDNS Configuration DNS AddressesData transfer timeoutForce HTTP no-cache 5Automatic2. Test Network ConnectionCheck the network connection using currentBIOS update configuration.Click on the field to see the options.3Manual3. IPv4 ConfigurationSetup for static IPv4 address.Click on the field to see the options.Automatic4. DNS ConfigurationConfigure a list of DNS addresses.45. Force HTTP no-cacheDisable HTTP caching.Manual100Help
Test Network Connection Your network server connection is working.IPV4 Configuration: AutomaticIPV4 Address: 192.168.0.106IPV4 Subnet Mask: 255.255.255.0IPV4 Gateway: 192.168.0.1DNS Configuration: AutomaticPrimary DNS: 75.75.75.75Secondary DNS: 75.75.76.76MAC Address: EC:B1:D7:63:65:DECurrent Proxy:Current Custom Source URL: HP.COMOK
MainSecurityAdvancedUEFI DriversHP Computer Setup Item Specific HelpChange Date And TimeSet Date (MM/DD/YYYY)Set Time (HH:MM):08 / 07 / 201723 : 05Help
MainSecurityAdvancedUEFI DriversHP Computer Setup Item Specific HelpSystem IDs Feature ByteBuild IDSerial NumberSKU NumberProduct FamilySystem Board CT NumberProduct NameHelp
Feature ByteCurrent Setting:
Build IDCurrent Setting:Press the space key followed by the enter key to clear current setting
Serial NumberCurrent Setting:Press the space key followed by the enter key to clear current setting
SKU NumberCurrent Setting: 1JP11ABPress the space key followed by the enter key to clear current setting
Product FamilyCurrent Setting: 103C 53335X HP WorkstationPress the space key followed by the enter key to clear current setting
System Board CT NumberCurrent Setting:Press the space key followed by the enter key to clear current setting
Product NameCurrent Setting: HP Z4 G4 WorkstationPress the space key followed by the enter key to clear current setting
MainSecurityAdvancedUEFI DriversHP Computer Setup Item Specific HelpSystem IDs Asset Tracking Number Ownership TagHelp
Asset Tracking NumberCurrent Setting:Press the space key followed by the enter key to clear current setting
Ownership TagCurrent Setting:Press the space key followed by the enter key to clear current setting
MainSecurityAdvancedUEFI DriversHP Computer Setup Item Specific HelpReplicated Setup Backup current settings to USB device Restore current settings from USB deviceHelp
Replicated Setup The file cannot be accessed. Please insert a USB storage device and try again.OK
MainSecurityAdvancedUEFI DriversHP Computer Setup Are you sure you want to save custom defaults and exit? Yes NoItem Specific Help
MainSecurityAdvancedUEFI DriversHP Computer Setup Are you sure you want to apply custom defaults and exit? Yes NoItem Specific Help
MainSecurityAdvancedUEFI DriversHP Computer Setup Are you sure you want to apply factory defaults and exit? Yes NoItem Specific Help
MainSecurityAdvancedUEFI DriversHP Computer Setup Are you sure you want to ignore changes and exit? Yes NoItem Specific Help
MainSecurityAdvancedUEFI DriversHP Computer Setup Are you sure you want to save changes and exit? Yes NoItem Specific Help
MainAdvancedSecurityUEFI DriversHP Computer SetupAdministrator Tools Create BIOS Administrator Password Create POST Power-On Password Password Policies1Security Configuration TPM Embedded Security BIOS Sure Start System SecurityUtilities Hard Drive UtilitiesAbsolute Persistence Module Current StateActivation Status : InactiveAbsolute Persistence Module Permanent Disable : NoSystem Management Command Restore Security Settings to Factory DefaultsItem Specific Help1. Create BIOS Administrator PasswordThe Administrator password controls accessto the following features: Setup Menu (F10) 3rd Party Option ROM Management (F3) Update System ROM WMI Commands that change systemsettings BIOS Configuration Utility (BCU) Alternative Power-On Password
BIOS Administrator Password Enter BIOS Administrator Password
POST Power-On Password Enter POST Power-On Password
Password Policies Password Maximum Length89and7654320 User passwordsAt least one symbol is required in Administrator1At least one number is required in Administrator and User passwordsAt least one upper case character is required in Administrator and User passwordsAt least one lower case character is required in Administrator and User passwordsAre spaces allowed in Administrator and User passwords?Clear Password JumperHonorIgnore
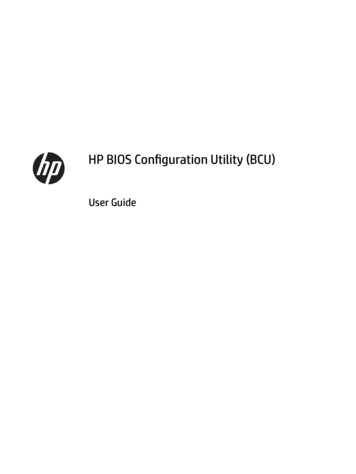
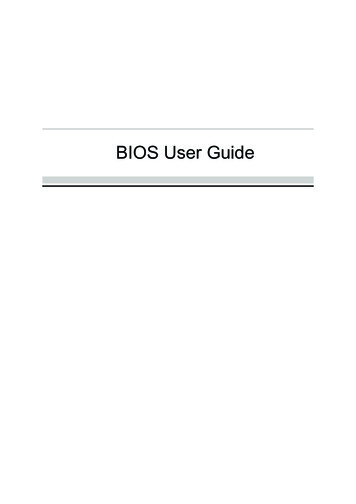
MainSecurityAdvancedUEFI DriversHP Computer Setup Item Specific HelpTPM Embedded SecurityTPM Specification VersionTPM DeviceTPM State22.0AvailableClear TPMHiddenNoTPM Activation PolicyAllow user to rejectOn Next BootF1 toNopromptsBoot11. TPM DeviceExposes the integrated Trusted PlatformModule (TPM) for use.Click on the field to see the options.TPM StateEnables the integrated Trusted PlatformModule (TPM).
MainAdvancedSecurityUEFI DriversHP Computer Setup Item Specific HelpItem Specific HelpBIOS Sure Start1. Sure Start BIOS Settings ProtectionWhen enabled, HP Sure Start will lock all critical BIOS settings and provideenhanced protection for these settings via the HP Sure Start non-volatile (flash)memoryVerify Boot Block on every bootBIOS Data Recovery PolicySure Start BIOS Settings ProtectionAutomatic1- The BIOS administrator credentials must be set to enable this setting- See HP Sure Start documentation for details on which BIOS settings areprotectedManualRequires BIOS Administrator Password to be setEnhanced HP Firmware Runtime Intrusion and DetectionSure Start Security Even Policy2Log Event OnlyLog Event and powernotify useroff system32. Enhanced HP Firmware Runtime Intrusion and Detection- Enables monitoring of HP system firmware executing out of main memory whilethe user Operating System is running.- Any anomalies detected in HP System firmware that is active while the user operating system is running will result in a Sure Start Security Event being generated.Click on the field to see the options.3. Sure Start Security Event PolicyThis setting controls HP Sure Start behavior upon identifying a critical securityevent (any modification to HP firmware) during OS runtime.- Log event only - HP Sure Start will log all critical security events m the HP SureStart Audit log within the HP Sure Start non-volatile (flash) memory- Log Event and notify user: In addition to logging all critical security events. HPSure Start will notify the user within thr operating system that a critical event hasoccurred- Log Event and power off system: In addition to logging all critical events. HP SureStart will power off the system upon detecting a HP Sure Start Security Event. Dueto the potential for data loss, use of this setting is only recommended in situationswhere security integrity of the system is a higher priority than the risk of potentialdata loss
MainSecurityAdvancedUEFI DriversHP Computer Setup System SecurityVirtualization Technology (VTx)Virtualization Technology for Directed I/O (VTd)Trusted Execution Technology (TXT)TXT cannot be enabled unless VTx, VTd, and TPM are enabled first.Item Specific Help
MainSecurityAdvancedUEFI DriversHP Computer Setup Item Specific HelpHard Drive UtilitiesSave/Restore MBR of the system hard drive is only available with drives that have a Master Boot Record.Save/Restore MBR of the system hard drive is only available with drives that have a Master Boot Record.Save/Restore GPT of the system hard drive is only available with drives that have a GUID Partition table. DriveLock/Automatic DriveLock Secure EraseAllow OPAL Hard Drive SID AuthenticationHelp
MainSecurityAdvancedUEFI DriversHP Computer Setup Item Specific HelpSelect a Drive1. SATA0: ST500LX025-1U717D-SSHDSet HDD Password SATA0: ST500DMM002-15B10AHelp
MainSecurityAdvancedUEFI DriversHP Computer Setup Item Specific HelpDriveLock Security OptionsAllow OPAL Hard Drive SID AuthenticationA BIOS Administrator Password must be defined before you can enable Automatic Drivelock. Set Drivelock Master Password Enable DrivelockHelp
Set DriveLock Master Password Please exercise caution when using DriveLock.Losing the passwords will render a drive permanently unusable.Please be aware these settings take place immediately: save not necessary.Enter Drivelock Master Password.
Set DriveLock User Password Please exercise caution when using DriveLock.Losing the passwords will render a drive permanently unusable.Please be aware these settings take place immediately: save not necessary.Enter Drivelock User Password.
MainSecurityAdvancedUEFI DriversHP Computer Setup Item Specific HelpSelect a Drive SATA0: TOSHIBA MQ02ABF050HHelp
Secure Erase This operation will erase all data on the hard drive.Please make sure the computer is connected to AC power during this process.ContinueAbort
MainSecurityAdvancedUEFI DriversHP Computer Setup Are you sure you want to restore settings to default? Yes NoItem Specific Help
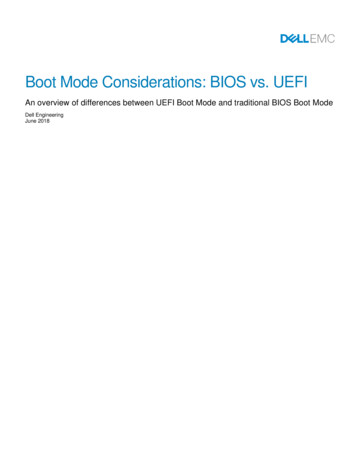
MainSecurityAdvancedUEFI DriversHP Computer Setup Display Language Scheduled Power-On Boot OptionsSecure Boot ConfigurationSystem OptionsBuilt-In Device OptionsPort Options 1Option ROM Launch PolicyPower Management Options Performance Options Remote Management Options Slot SettingsRemote HP PC Hardware Diagnostics Settings 2 Execute Remote HP PC Harware Diagnostics 3Item Specific Help1. Port OptionsEnable/Disable Port Settings2. SettingsSet the configuration for Remote HP PCHardware Diagnostics, including the URLsused for download and upload, thescheduled execution frequency, etc.3. Execute Remote HP PC HarwareDiagnosticsImmediate execution of Remote HP PC Hardware Diagnostics based on the configurations is Settings option. Note that any unsaved BIOS settings are lost.
MainSecurityAdvancedUEFI DriversHP Computer Setup Item Specific HelpDisplay LanguageSelect LanguageEnglishSelect Keyboard utsch
SecurityMainAdvancedUEFI DriversHP Computer Setup Item Specific HelpScheduled Power-OnSunday1. DaysEnable the days of the week to turn the system on. This feature wakes the system upfrom a powered off yHourMinute00
MainSecurityAdvancedUEFI DriversHP Computer Setup Item Specific HelpBoot OptionsStartup Delay (sec.)Fast BootCD-ROM BootUSB Storage BootNetwork (PXE) Boot1. After Power LossDetermine the system’s state after power islost to the unit.01056045403530252015Network (PXE) Boot ConfigurationIPv4 Before IPv6After Power LossPower OffIPv6 DisabledIPv4Before IPv41Prompt on Memory Size ChangePower OnStatePreviousNumLock on at bootUEFI Boot Order----------------------------------------USB DrivesCD/DVD DrivesSATA0: Hard DriveNew Mass StorageNETWORK BOOT: IPV4 Network - Intel(R) Ethernet Connection (2) 1219-LMNETWORK BOOT: IPV4 Network - Intel(R) 1210 Gigabit Network ConnectionNETWORK BOOT: IPV6 Network - Intel(R) Ethernet Connection (2) 1219-LMNETWORK BOOT: IPV6 Network - Intel(R) 1210 Gigabit Network Legacy Boot OrderEnable legacy boot, save settings & exit, then return to setup.-----------------------------------------
MainSecurityAdvancedUEFI DriversHP Computer Setup Item Specific HelpSecure Boot ConfigurationConfigure Legacy Support and Secure BootLegacy Support Enable and Secure Boot DisableSecure Boot Key ManagementImport Custom Secure Boot keysClear Secure Boot keysReset Secure Boot keys to factory defaultsEnable MS UEFI CA keyLegacy Support Disable and Secure Boot DisableEnableReady BIOS for Device Guard UseDo nothingRequires BIOS Administrator Password to be configured and Secure Boot to be enabled.11. Ready BIOS for Device Guard UseWhen set to “Configure on Next Boot“, theBIOS will change the feature listed below totheir suggested Device Guard states, on theboot after saving changes and exit.Virtualization features will be enabled.Removable and network boot devices willbe disabled (for example, USB boot, CD-ROMboot, Thunderbolt boot, etc.).MS UEFI CA Key will be disabled.When set to “Clear Configuration on NextBoot“, the BIOS will set the listed featuresto their Custom Default state if custom defaults have been saved. If custom defaultshave not been saved, the BIOS will restorethe listed features to their factory defaultstates.
Main SecurityAdvancedUEFI DriversHP Computer SetupSystem OptionsItem Specific HelpSATA ControllerSATA Controller RAID Mode1 TB Memory cap1 TB Memory capAutoPCIE MMIO Assignment Mode32 BitEnableDisableDisable64 BitAutoPCIe Training ResetEnable
SecurityMain UEFI DriversAdvancedHP Computer SetupBuilt-In Device OptionsEmbedded LAN ControllerWake On LANIntel I210 Embedded LAN PortAudio Device1Item Specific HelpDisabledBoot to NormalNetworkHardDriveBoot OrderInternal SpeakersLAN / ALAN Auto SwitchingIncrease Idle Fan Speed(%)0Increase PCIe Idle Fan 01. Audio DeviceHides the Audio device from OS
Main SecurityAdvancedUEFI DriversHP Computer SetupPort OptionsFront USB PortsRear USB PortsInternal USB PortsMedia Card ReaderSATA0SATA1SATA2SATA3SATA4SATA5SATA6SATA7Item Specific bleDisable
Main SecurityUEFI DriversAdvancedHP Computer SetupOption ROM Launch PolicyItem Specific HelpConfigure Option ROM Launch PolicyAll UEFIMini OROM DisplayEnableAll UEFILegacyExcept VideoDisable11. Configure Option ROM Launch PolicyConfigure the launching of EFI versus LegacyOption ROM’s
Main SecurityAdvancedUEFI DriversHP Computer SetupPower Management OptionsItem Specific Help1. Runtime Power ManagementEnables Runtime Power Management.Runtime Power Management 1Hardware P-States2OS Control EPBPerformanceBIOSControl EPBNormalBalanced PowerPowerPerformanceNormal with Enhanced Halt State disabledExtendedEnergy/Performance Bias ControlBIOS Energy/Performance BiasIdle Power SavingsS5 Maximum Power Savings 3SATA Power ManagementPCI Express Power ManagementUnique Sleep State Blink Rates42. Extended Idle Power StatesIncreases the OS’s Idle Power Savings.3. SS Maximum Power SavingsEnabling this feature reduces the power of thissystem as much as possible in the SS state.Power is removed from the wake up circuit, theexpansion slots and any management featureswhile in SS.4. PCI Express Power ManagementEnabling this option permits the PCI Expresslinks to use Active State Power Management(ASPM) to enter low power states while not inuse.
MainSecurityUEFI DriversAdvancedHP Computer Setup Item Specific HelpPerformance OptionsActive CPU Cores Per ProcessorSub-NUMA ClusteringAllIsoc ModeOneFourTwoDisableWorkload ConfigurationBalancedEnableI/O Focused
Main SecurityAdvancedUEFI DriversHP Computer SetupRemote Management OptionsItem Specific Help1. Intel Active Management Technology (AMT)This option allows for a user to enable Intel Active Management Technology, which istied to all ME-regulated remote managementfunctions. Disabling AMT will still allow for MEfirmware updates, which are recommended forreceiving platform stability fixes.Intel Management Engine (ME)Intel Active Management Technology (AMT) 1USB Key Provisioning SupportUSB Redirection SupportSOL Terminal Emulation ModeVerbose Boot MessagesWatchdog Timer 2OS Watchdog Timer (min.)BIOS Watchdog Timer (min.)CIRA Timeout (min)ANSI2. Watchdog TimerEnable/Disable WatchDog Timer.VT10055252015101 min252015102 mins34Never333. OS & BIOS Watchdog TimerSet OS Watching timer (Minutes).
Main SecurityAdvancedUEFI DriversHP Computer SetupSlot SettingsSlot 1 PCI Express x 16Option ROM downloadCurrent PCIe SpeedLimit PCIe SpeedBifurcationSlot 2 PCI Express x 4Option ROM downloadCurrent PCIe SpeedLimit PCIe SpeedSlot 3 PCI Express x 16Option ROM downloadCurrent PCIe SpeedLimit PCIe SpeedBifurcationSlot 4 PCI Express x 4Option ROM downloadCurrent PCIe SpeedLimit PCIe SpeedItem Specific HelpEnableEnableDisableGen1 (2.5Gbps)DisableAutoAutoGen1 DisableGen1 n1 (2.5Gbps)DisableAutoAutoGen1 DisableGen1 (2.5Gbps)DisableEnableDisableNext
Main SecurityAdvancedUEFI DriversHP Computer SetupSlot SettingsSlot 5 PCI Express x 8Option ROM downloadCurrent PCIe SpeedLimit PCIe SpeedBifurcationM.2 SSDOOption ROM downloadCurrent PCIe SpeedLimit PCIe SpeedM.2 SSD1Option ROM downloadCurrent PCIe SpeedLimit PCIe SpeedItem Specific HelpEnableEnableDisableGen1 (2.5Gbps)DisableAutoAutoGen1 DisableGen1 (2.5Gbps)DisableAutoEnableGen1 (8Gen2Gen3(2.5(5Gbps)Gbps)EnableDisableGen1 (2.5Gbps)DisableAutoGen1 (8Gen2Gen3(2.5(5Gbps)Gbps)
Main SecurityAdvancedUEFI DriversHP Computer SetupSettingsItem Specific HelpDiagnostics Download URL Custom Download AddressHP.com12. Custom Upload AddressConfigure a URL for diagnostics logs upload.Custom URLDiagnostics Logs Upload URL Custom Upload Address Username 3 Password 43. UsernameConfigure the username for uploadingdiagnostics logs to the server, ifauthentication is required.2Scheduled WeeklyExecute On Next Boot Last Execution Result1. Diagnostics Download URLSelect between HP server URL and a customserver URL.Enable564. PasswordConfigure the password for uploadingdiagnostics logs to the server, ifauthentication is required.5. FrequencySelect the frequency for scheduledexecution of Remote HP PC HardwareDiagnostics.6. Execute On Next BootEnable/disable the execution on next boot.The flag will be disabled after thediagnostics have run.
Custom Upload URL There is no Custom Upload URL configured.Type a new Custom Upload URL and press ENTER to save.Press ESC to CANCEL
Upload Server Username There is no Username configured.Type a new Username and press ENTER to save.Press ESC to CANCEL
Upload Server Password There is no Upload Server Password configured.Type a new Upload Server Password and press ENTER to save.Press ESC to CANCEL
Remote HP PC Hardware Diagnostics Result Remote HP PC Hardware Diagnostics was never executed.OK
Remote HP PC Hardware Diagnostics Execution Status of last attempt to execute: Could not detect network link or network cable is unpluggedOK
MainSecurityAdvancedUEFI DriversHP Computer Setup Network DevicesDevices List IPv4 Network Configuration IPv6 Network Configuration Intel(R) RSTe Intel(R) RSTe SATA Controller Intel(R) Virtual RAID on CPUItem Specific Help
Main SecurityAdvancedUEFI DriversHP Computer Setup IPv4 Network Configuration IPv6 Network Configuration VLAN Configuration Intel(R) Ethernet Connection (2)1219-LM-88:88:88:88:87:88 IPv4 Network Configuration IPv6 Network Configuration VLAN Configuration Intel(R) I210 Gigabit Network Connection - AO:8C:FD:DD:D4:49Item Specific Help
Main SecurityAdvancedUEFI DriversHP Computer SetupConfigured Save Changes and ExitItem Specific Help
MainSecurityAdvancedUEFI DriversHP Computer Setup Are you sure you want to save changes and exit? Yes NoItem Specific Help
MainSecurityAdvancedUEFI DriversHP Computer Setup Enter Configuration MenuItem Specific Help
MainSecurityAdvancedUEFI DriversHP Computer Setup Interface Name:Interface Type:MAC address:Host addresses:Route Table:Gateway addresses:DNS addresses:Interface ID:DAD Transmit Count:Policy Save Changes and E88:8788/64FE80::/64 em Specific Help
MainSecurityAdvancedUEFI DriversHP Computer Setup Enter Configuration MenuItem Specific Help
MainSecurityAdvancedUEFI DriversHP Computer Setup Create New VLANVLAN IDPriority Add VLANConfigured VLAN List Remove VLANItem Specific Help000000
MainSecurityAdvancedUEFI DriversHP Computer Setup Item Specific HelpPORT CONFIGURATION MENU NIC ConfigurationBlink LEDsPORT CONFIGURATION INFORMATIONUEFI Driver:Adapter PBA::Chip Type:PCI device ID:PCI address:Link Status:MAC Address::0000Intel(R) Gigabit 0.0.17FFFFFF-0FFIntel PCH ted
MainSecurityAdvancedUEFI DriversHP Computer Setup Link Speed:Auto NegotiatedWake On LAN:Enabled10 Mbps100MbpsFullHalfHalfFullDisabledItem Specific Help
MainSecurityAdvancedUEFI DriversHP Computer Setup Enter Configuration MenuItem Specific Help
MainSecurityAdvancedUEFI DriversHP Computer Setup Interface Name:eth0Interface Type:EthernetMAC address:A0-8C-FD-DD-D4-49Host addresses:Route Table:Gateway addresses:DNS addresses:Interface ID:AZ-8C-FD-FF-FE-DD-D4-49DAD Transmit Count:00000001AutomaticPolicy Save Changes and ExitManualItem Specific Help
MainSecurityAdvancedUEFI DriversHP Computer Setup Item Specific Help NIC ConfigurationBlink LEDs0000UEFI Driver:Adapter PBA::Device Name:Chip Type:PCI device ID:PCI address:Link Status:MAC Address::Virtual MAC Address::Intel(R) PRO/1000 7.5.11 PCI-E000400-000Intel(R) I210 Gigabit Network ConnectionIntel(R) cted00:00:00:00:00:00
MainSecurityAdvancedUEFI DriversHP Computer Setup Enter Configuration MenuItem Specific Help
MainSecurityAdvancedUEFI DriversHP Computer Setup Interface Name:Interface Type:MAC address:Host addresses:Route Table:Gateway addresses:DNS addresses:Interface ID:DAD Transmit Count:Policy Save Changes and E88:8788/64FE80::/64 em Specific Help
MainSecurityAdvancedUEFI DriversHP Computer Setup UUID00000000000000000D82F7F6A00000000Card NameIntel(R) RSTe SATA ControllerManufacturer IntelSerial NumberN/APart NumberN/AModelN/ACard SKUN/AFoD UIDN/AMax Data Width00000000OnboardConnector LayoutOnboardPackage TypeOther Package TypeAIM Spec VersionUMC Version Firmware Information Intel(R) RSTe Controller InformationN/A2.02.0Item Specific Help
MainSecurityAdvancedUEFI DriversHP Computer Setup Firmware Name:Intel(R) RSTeVersion String5.3.0.1052DescriptionN/ARelease DateN/AManufacturer IntelFirmwareClassificationSoftware ID80862826Item Specific Help
MainSecurityAdvancedUEFI DriversHP Computer Setup Port Information 0Item Specific Help
MainSecurityAdvancedUEFI DriversHP Computer Setup Port NumberPort TypeController Name Disk Drive Information 0 Disk Drive Information 1 Disk Drive Information 2 Disk Drive Information 3 Disk Drive Information 4 Disk Drive Information 5 Disk Drive Information 6 Disk Drive Information 700UnknownUnknown ControllerExternalInternalIntel(R) RSTe sSATASATA ControllerControllerItem Specific Help
MainSecurityAdvancedUEFI DriversHP Computer Setup LocationDrive TypeMedia Type With Rotation RateLenovo BS FRU PNLenovo BS L2 PNLenovo BS SNModel NumberUniversal IdentifierManufacturerFW VersionDrive CapacityDisk SizeDisk StatusLogical Block Sizebay MissingIncompatibilityFormatFormattingOccure
TPM Device Exposes the integrated Trusted Platform Module (TPM) for use. Click on the field to see the options. TPM State Enables the integrated Trusted Platform Module (TPM). TPM State TPM Specification Version 2.0 TPM Device TPM Embedded Security Clear TPM TPM Activation Policy 1 2.