Transcription
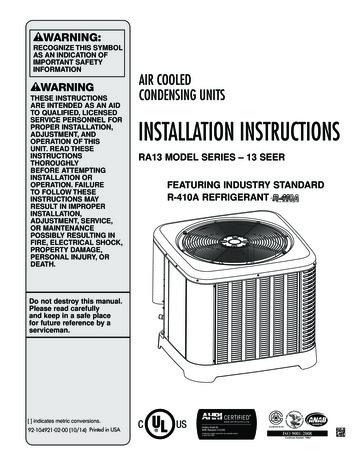
WARNING:RECOGNIZE THIS SYMBOLAS AN INDICATION OFIMPORTANT SAFETYINFORMATIONWARNINGTHESE INSTRUCTIONSARE INTENDED AS AN AIDTO QUALIFIED, LICENSEDSERVICE PERSONNEL FORPROPER INSTALLATION,ADJUSTMENT, ANDOPERATION OF THISUNIT. READ THESEINSTRUCTIONSTHOROUGHLYBEFORE ATTEMPTINGINSTALLATION OROPERATION. FAILURETO FOLLOW THESEINSTRUCTIONS MAYRESULT IN IMPROPERINSTALLATION,ADJUSTMENT, SERVICE,OR MAINTENANCEPOSSIBLY RESULTING INFIRE, ELECTRICAL SHOCK,PROPERTY DAMAGE,PERSONAL INJURY, ORDEATH.AIR COOLEDCONDENSING UNITSINSTALLATION INSTRUCTIONSRA13 MODEL SERIES – 13 SEERFEATURING INDUSTRY STANDARDR-410A REFRIGERANTearth friendly refrigerantDo not destroy this manual.Please read carefullyand keep in a safe placefor future reference by aserviceman.ST-A1226-01-00[ ] indicates metric conversions.92-104921-02-00 (10/14) Printed in USA
CONTENTSImportantSafety Information 3ContentsGeneral Information 4-6Checking Product Received 4Application 4Electrical and Physical Data 5Specifications 6Proper Installation 6Installation 7-17Choosing a Location 7-8Operational Issues 7Corrosive Environment 7For Units WithSpace Limitations 8Customer Satisfaction Issues 8Unit Mounting 8Factory-PreferredTie-Down Method 8Tools and Refrigerant 9Tools Required for Installing andServicing R-410A Models 9Specifications of R-410A 9Quick-ReferenceGuide for R-410A 9Replacement Units 10Indoor Coil 10Location.10Interconnecting Tubing 10-20Vapor and Liquid Lines 10Maximum Length of Lines 10Outdoor Unit InstalledAbove or Below Indoor Coil 13-15Tubing Installation 18-19Tubing Connections 19-20Leak Testing 20Wiring. 21-22Control Wiring 21Conventional 24 VACThermostat Control Wiring 21Thermostat Wiring Diagrams 21-22Power Wiring 22Grounding 222Start-Up.23–27Start-Up.23Checking Airflow 23Evacuation Procedure 24Final Leak Testing.24CheckingRefrigerant Charge 25-27Charging UnitsWith R-410A Refrigerant 25Confirm ID Airflowand Coils Are Clean 25Measurement Device Setup 25Charging by Weight 25Gross Charging by Pressures 26Final Charge by Subcooling 26Finishing Up Installation 27Components and Controls 28-29CompressorCrankcase Heat (CCH) 28High- and Low-PressureControls (HPC and LPC) 28Hard-Start Components 29Accessories 29Time-Delay Control 29Hard Start Components 29Low Ambient Control (LAC) 29Diagnostics. 30-38Cooling MechanicalChecks Flowchart 30General Troubleshooting Chart .32Service Analyzer Charts 33-37Cooling/Heating Tips 38Wiring Diagrams 39-40
IMPORTANT SAFETY INFORMATIONWARNINGS:CAUTIONS: R -410A systems operate at approximately 60%higher pressures (1.6 times) than R-22 systems. Donot use R-22 service equipment or components onR-410A equipment. Use appropriate care when usingthis refrigerant. Failure to exercise care may result inequipment damage or personal injury. O nly match this outdoor unit with a matched indoorcoil or air handler approved for use with this outdoorunit per the unit manufacturer’s specification sheet.The use of unmatched coils or air handler will likelyresult in a charge imbalance between the coolingand heating modes which can cause unsatisfactoryoperation including a high-pressure switch lockoutcondition. O nly use indoor coils approved for use on R-410Asystems. An R-22 coil will have a TXV or fixedrestrictor device that is not designed to operateproperly in an R-410A system and will result inserious operational issues. The R-22 coil could alsocontain mineral oil which is incompatible with thePOE oil used in R-410A systems and could result inreliability issues with the compressor and TXVs. W hen coil is installed over a finished ceiling and/orliving area, it is required that a secondary sheet metalcondensate pan be constructed and installed underthe entire unit. Failure to do so can result in propertydamage. T he compressor has an internal overload protector.Under some conditions, it can take up to 2 hours forthis overload to reset. Make sure overload has hadtime to reset before condemning the compressor.Safety T hese instructions are intended as an aid toqualified, licensed service personnel for properinstallation, adjustment, and operation of thisunit. Read these instructions thoroughly beforeattempting installation or operation. Failure tofollow these instructions may result in improperinstallation, adjustment, service, or maintenancepossibly resulting in fire, electrical shock,property damage, personal injury, or death. The unit must be permanently grounded. Failureto do so can cause electrical shock resulting insevere personal injury or death. Turn off electric power at the fuse box or servicepanel before making any electrical connections. Complete the ground connection before makingline voltage connections. Failure to do so canresult in electrical shock, severe personal injury,or death. Disconnect all power to unit before startingmaintenance. Failure to do so can causeelectrical shock resulting in severe personalinjury or death. Never assume the unit is properly wired and/orgrounded. Always test the unit cabinet with anoncontact voltage detector available at mostelectrical supply houses or home centers beforeremoving access panels or coming into contactwith the unit cabinet. Do not use oxygen to purge lines or pressurizesystem for leak test. Oxygen reacts violently withoil, which can cause an explosion resulting insevere personal injury or death. T he top of the scroll compressor shell is hot.Touching the compressor top may result in seriouspersonal injury. T he manufacturer’s warranty does not coverany damage or defect to the unit caused by theattachment or use of any components, accessories,or devices (other than those authorized by themanufacturer) into, onto, or in conjunction withthe heat pump. You should be aware that theuse of unauthorized components, accessories,or devices may adversely affect the operationof the heat pump and may also endanger lifeand property. The manufacturer disclaims anyresponsibility for such loss or injury resultingfrom the use of such unauthorized components,accessories, or devices.3
GENERAL INFORMATIONWARNING:General InformationImproper installation, or installation not made inaccordance with these instructions, can resultin unsatisfactory operation and/or dangerousconditions and can cause the related warrantynot to apply.The condensing unit is designed to operate withstandard 24 VAC thermostats and air handlers orgas furnaces.This installation instruction manual containscomplete instructions for installation and setupusing conventional 24 VAC controls. Please referto the manufacturer’s specification sheets forcomplete performance data, thermostat, andaccessory listings.The information contained in this manual hasbeen prepared to assist in the proper installation,operation, and maintenance of the air conditioningsystem.Read this manual and any instructions packagedwith separate equipment required to make up thesystem prior to installation. Homeowner shouldretain this manual for future reference.To achieve optimum efficiency and capacity,the matching indoor cooling coils listed in themanufacturer’s specification sheet should be used.Checking Product ReceivedUpon receiving unit, inspect it for any shippingdamage. Claims for damage, either apparent orconcealed, should be filed immediately with theshipping company. Check model number, electricalcharacteristics, and accessories to determine if theyare correct. Check system components (indoor coil,outdoor unit, air handler/furnace, etc.) to make surethey are properly matched.4ApplicationBefore specifying any air conditioning equipment,a survey of the structure and a heat gaincalculation must be made. A cooling heat gaincalculation determines the amount of heat neededto be removed. A heat gain calculation alsocalculates the extra heat load caused by sunlightand by humidity removal. These factors must beconsidered before selecting an air conditioningsystem to provide year-round comfort. The AirConditioning Contractors of America (ACCA)J Manual method of load calculation is onerecognized procedure for determining the heatingand cooling load.After the proper equipment combination hasbeen selected, satisfying both sensible andlatent requirements, the system must be properlyinstalled. Only then can the unit provide thecomfort it was designed to provide.There are several factors that installers mustconsider. O utdoor unit location I ndoor unit blower speed and airflow P roper equipment evacuation S upply and return air duct design and sizing R efrigerant charge S ystem air balancing D iffuser and return air grille location and sizing
GENERAL INFORMATIONElectrical and Physical DataELECTRICALCompressorModel NumberVoltagePhaseLockedRotorAmperes(LRA)Fan Motor MinimumFull LoadCircuitAmperes Ampacity Minimum Maximum(FLA)Amperes Amperes AmperesOutdoor CoilFaceArea Sq.Ft [m]No.RowsWeightCFM [L/s]Refrig.PerCircuit(oz.) [g]Net Lbs.[kg]ShippingLbs. [kg]RA1318AJ1NA208-23019.746.00.701320/2020/205.9 [.55]12038 [962]56 [1587]120 [54.4]127 .06 [.84]12325 [1097]66 [1871]122 [55.3]129 .06 [.84]12796 [1320]78 [2211]133 [60.3]140 2.15 [1.13]12898 [1368]92 [2608]143 [64.3]150 14.18 [1.32]12466 [1164]111 [3146]166 [75.3]173 14.82 [1.38]12652 [1252]112 [3175]175 [79.4]182 18.84 [1.7513868 [1835]155 [4394]185 [83.9]192 [87.1]General InformationRatedLoadAmperes(RLA)PHYSICALFuse or HACR CircuitBreakerUNIT MODEL NUMBER EXPLANATIONR A 13 24 AJ 1 N AMINOR SERIESTYPEN - NON-COMMTYPE1 - SINGLE STAGEVOLTAGEJ 1 PH, 208-230/60C 3 PH, 208-230/60D 3 PH, 460/60Y 3 PH, 575/60MAJOR SERIESCAPACITY18 18,000 BTU/HR [5.28 kW]24 24,000 BTU/HR [7.03 kW]30 30,000 BTU/HR [8.79 kW]36 36,000 BTU/HR [10.55 kW]42 42,000 BTU/HR [12.31 kW]48 48,000 BTU/HR [14.07 kW]60 60,000 BTU/HR [17.58 kW]SEERCONDENSERBRAND5
GENERAL mm][1524mm]CLEARANCEOF CLEARANCEAIRGeneral Information“W”DISCHARGE“L”“H”SERVICE PANELS/INLET CONNECTIONS /SERVICE&PANELS/HIGHLOW VOLTAGEINLET CONNECTIONS / HIGH & LOWACCESSALLOWVOLTAGE ACCESSALLOW24"24” [[610610 mm]CLEARANCEmm]OFOFCLEARANCEAIRLOUVERSALLOW ALLOWAIRINLETINLETLOUVERS6” [152mm] Min. OF CLEARANCE ALL SIDES6" [152 mm] OF CLEARANCE ALL12” [305mm] RECCOMMENDED12" [305 mm] RECOMMENDEDSIDESST-A1226-02-00DIMENSIONAL DATACONDENSING UNIT MODELRA13LENGTH “H” INCHES [mm]LENGTH “L” INCHES [mm]WIDTH “W” INCHES [mm]0 36818,/03742486025 [635]27 [686]2723"[686]2729"[686]31 [787]11335.75 [908]29.7529.7529.75 [756]33.7535 [756]2"40 [756]2""44 ]35.75 [908]24 4"31 2"31 2"27 8"Proper InstallationProper sizing and installation of this equipment iscritical to achieve optimal performance. Use theinformation in this Installation Instruction Manualand reference the applicable manufacturer’sspecification sheet when installing this product.IMPORTANT: This product has beendesigned and manufactured to meet ENERGYSTAR criteria for energy efficiency when matchedwith appropriate indoor components. However,proper refrigerant charge and proper airflow arecritical to achieve rated capacity and efficiency.Installation of this product should follow themanufacturer’s refrigerant charging and airflowinstructions. Failure to confirm proper chargeand airflow may reduce energy efficiency andshorten equipment life.624, 30MATCH ALL COMPONENTS: OUTDOOR UNIT INDOOR COIL INDOOR AIR HANDLER/FURNACE REFRIGERANT LINES INDOOR THERMOSTAT
INSTALLATIONChoosing a LocationIMPORTANT: Consult local andnational building codes and ordinances for specialinstallation requirements. Following locationinformation will provide longer life and simplifiedservicing of the outdoor unit.NOTICE: These units must be installedoutdoors. No ductwork can be attached, orother modifications made, to the discharge grille.Modifications will affect performance or operation.Operational Issuesin a manner that will not prevent, impair, orcompromise the performance of other equipmentinstalled in proximity to the unit. Maintain allrequired minimum distances to gas and electricmeters, dryer vents, and exhaust and inletopenings. In the absence of national codes ormanufacturers’ recommendations, local coderecommendations and requirements will takeprecedence. Refrigerant piping and wiring should be properlysized and kept as short as possible to avoidcapacity losses and increased operating costs. Locate the unit where water runoff will not createa problem with the equipment. Position the unitaway from the drip edge of the roof wheneverpossible. Units are weatherized, but can beaffected by the following: Water pouring into the unit from the junctionof rooflines, without protective guttering.Large volumes of water entering the unit whilein operation can impact fan blade or motorlife, and coil damage may occur if moisturecannot drain from the unit under freezingconditions. Closely follow the clearance recommendationson page 8. 24" [61.0 cm] to the service panel access 60" [152.4 cm] above fan discharge (unit top)to prevent recirculation 6" [15.2 cm] to coil grille air inletswith 12" [30.5 cm] minimum recommendedThe metal parts of this unit may be subject torust or deterioration if exposed to a corrosiveenvironment. This oxidation could shorten theequipment’s useful life.Corrosive elements include, but are not limited to,salt spray, fog or mist in seacoast areas, sulphur orchlorine from lawn watering systems, and variouschemical contaminants from industries such aspaper mills and petroleum refineries.If the unit is to be installed in an area wherecontaminants are likely to be a problem, specialattention should be given to the equipmentlocation and exposure. Avoid having lawn sprinkler heads spray directlyon the unit cabinet. In coastal areas, locate the unit on the side ofthe building away from the waterfront. Shielding provided by a fence or shrubs maygive some protection, but cannot violateminimum airflow and service access clearances. Elevating the unit off its slab or base enough toallow air circulation will help avoid holding wateragainst the base pan.LocationIMPORTANT: Locate the unitCorrosive EnvironmentWARNING:Disconnect all powerto unit before starting maintenance. Failure to doso can cause electrical shock resulting in severepersonal injury or death.Regular maintenance will reduce the buildup ofcontaminants and help to protect the unit’s finish. Frequent washing of the cabinet, fan blade, andcoil with fresh water will remove most of the saltor other contaminants that build up on the unit. Regular cleaning and waxing of the cabinet witha good automobile polish will provide someprotection. A good liquid cleaner may be used several timesa year to remove matter that will not wash offwith water.7
INSTALLATIONChoosing a Location (cont.)For Units With SpaceLimitationsLocationIn the event that a space limitation exists, we willpermit the following clearances:Single-Unit Applications: Side clearances below 6"[15.2 cm] will reduce unit capacity and efficiency.Do not reduce the 60" [152.4 cm] discharge or the24" [61.0 cm] service clearances.Multiple-Unit Applications: When multiplecondenser grille sides are aligned, a 6" [15.2cm] per unit side clearance is recommended fora total of 12" [30.5 cm] between two units. Twocombined clearances below 12" [30.5 cm] willreduce capacity and efficiency. Do not reduce the60" [152.4 cm] discharge or 24" [61.0 cm] serviceclearances.ALLOW 60” [1524 mm]OF CLEARANCE12” Min. (305 mm) 24”[610 MM]RECOMMENDEDAIR INLET LOUVERS ALLOW6” [152 mm] Min. OFCLEARANCE ALL SIDES12” [305 mm] RECOMMENDEDSERVICE PANELS/INLET CONNECTIONS/ HIGH & LOWVOLTAGE ACCESSALLOW 24” [ 610 mm] OFCLEARANCEST-A1226-04-00Customer Satisfaction Issues T he unit should be located away from the living,sleeping, and recreational spaces of the ownerand those spaces on adjoining property. To prevent noise transmission, the mounting padfor the outdoor unit should not be connected tothe structure and should be located a sufficientdistance above grade to prevent ground waterfrom entering the unit.Unit MountingWARNING:Secure an elevated unitand its elevating stand in order to prevent tipping.Failure to do so may result in severe personalinjury or death.8 I f installing a unit on a flat roof, use 4" x 4"[10.2 cm x 10.2 cm] or equivalent stringerspositioned to distribute unit weight evenly andprevent noise and vibration.Factory-Preferred Tie-DownMethod for High Wind orSeismic LoadsIMPORTANT: The manufacturer-approved/recommended method is a guide tosecuring equipment for wind and seismic loads.Other methods might provide the same result, butthe manufacturer method is the only one endorsedby the manufacturer for securing equipment wherewind or earthquake damage ca
installation or operation. failure to follow these instructions may result in improper installation, adjustment, service, or maintenance possibly resulting in fire, electrical shock, property damage, personal injury, or death. installation instructions. ra13 model series – 13 see