Transcription
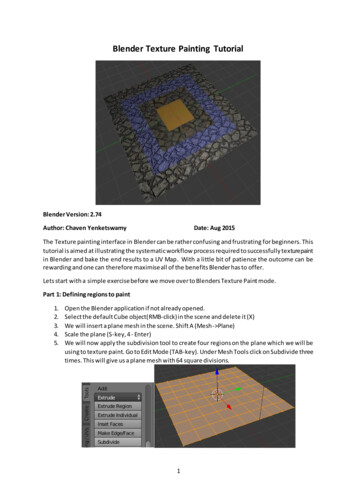
Blender Texture Painting TutorialBlender Version: 2.74Author: Chaven YenketswamyDate: Aug 2015The Texture painting interface in Blender can be rather confusing and frustrating for beginners. Thistutorial is aimed at illustrating the systematic workflow process required to successfully texture paintin Blender and bake the end results to a UV Map. With a little bit of patience the outcome can berewarding and one can therefore maximise all of the benefits Blender has to offer.Lets start with a simple exercise before we move over to Blenders Texture Paint mode.Part 1: Defining regions to paint1.2.3.4.5.Open the Blender application if not already opened.Select the default Cube object(RMB-click) in the scene and delete it (X)We will insert a plane mesh in the scene. Shift A (Mesh- Plane)Scale the plane (S-key, 4 - Enter)We will now apply the subdivision tool to create four regions on the plane which we will beusing to texture paint. Go to Edit Mode (TAB-key). Under Mesh Tools click on Subdivide threetimes. This will give us a plane mesh with 64 square divisions.1
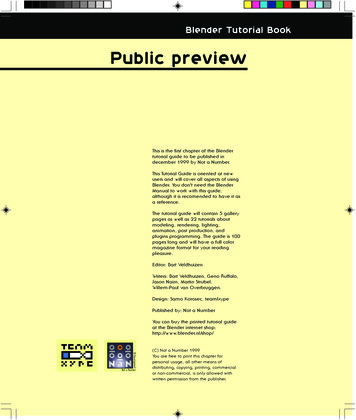
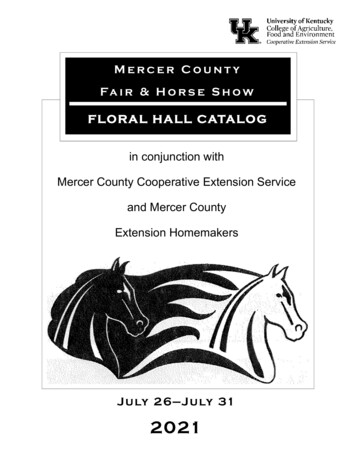
6. Exit Edit Mode and return to Object Mode (Tab-key). In the Outliner view, select the planeobject and go to the material tab.We will create four separate materials for this plane. Press the plus button on the right fourtimes. Select each material slot press, ‘New’ button and rename each material SingleDiffuse,FlatImage, ImageNormals, TexturedImage.Change the diffuse colour for each material. This will help us identify the different regionsofthe plane that we will be painting.7. We will now assign different materials to selected regions of the plane object, gotoeditmode(TAB-key). Click on Face Select or press Ctrl-Tab and select Face.8. Use Shift and RMB-click to select faces. In the outliner select a material and click the Assignbutton then click Deselect. You should have a layout similar to this.2
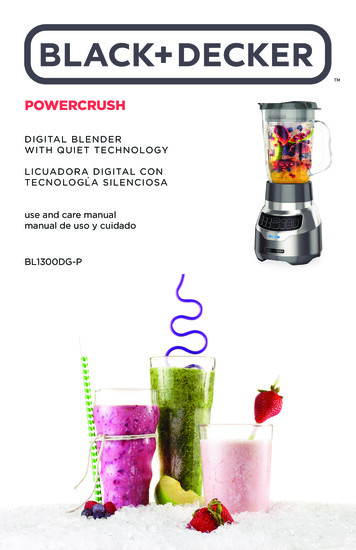
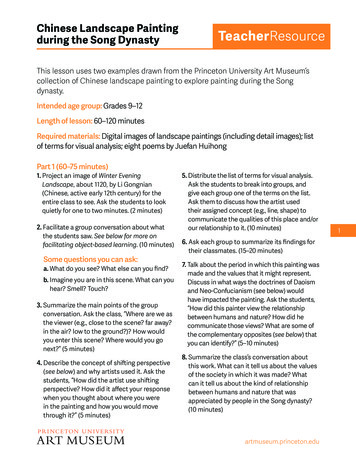
Part 2: Mesh UnwrappingNB Texture painting will only work if you have an unwrapped UV mesh and an image to paint on.1. Split the screen in two views 3D View and UV/Image Editor.2. In the UV/Image Editor, click on new and set the background colour to white. Name the newImage UVMap.3. In 3D View select Edit Mode (TAB) and press A-key to select all vertices of the plane object.Press U-key to unwrap. The unwrapped mesh will be displayed in the UV/ImageEditor.3
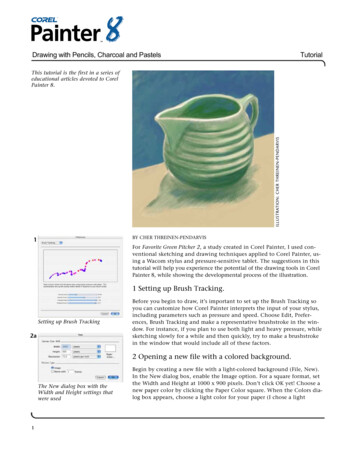
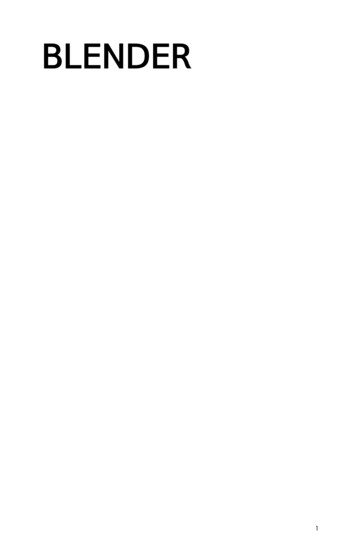
You will have noticed that the UVMap image we created in step 2 above has vanished. Click on theBrowse Image to be linked drop down box in the UV/ImageEditor and reselect the UVMap. The meshwill now be overlayed against the UVMap Image as follows.4. In the Outlier view check that the Plane object is selected. Go to the Render Tab and scrolldown to the Bake section. Change ‘Bake Mode’ to Full Render and click on Bake.4
The materials will baked to the UVMap which can be saved to a file. We will use this sameprocedure later in this tutorial.Part 3: Texture PaintingThis is the tricky part and needs to be followed closely.1. In the 3D View change to Texture Paint Mode. You will immediately notice on the left Toolpanel a missing data message. For this tutorial we will keep the central region of the planeobjects region the same brown colour. We will instead paint a flat image to the white region.So in the materials Tab of the Outliner, select the FlatImage material we created earlier.Under the Missing Data, select Add Paint Slot and select a Diffuse Color as we will only be paintingthis region of the Plane with the diffuse colors of the Image. Click Ok.5
The Slots panel will now show your materials for this Plane Object as well as the paint s lots assignedto each Material. As you can see, the FlatImage material now has a paint slot called FlatImage DiffuseColor. For the ImageNormals material add one paint slot of type Normals as we will only be paintingthe Normals of the image source. Add two paint slots for the TexturedImage material viz of typeDiffuse and Normals as this outer region will contain a painted texture with both diffuse and normalcomponents.2. We will now select an image file which will be used as the Brush for painting the differentregions of the Plane object. You can use any image here which has some variegated colour.To import your image, select the FlatImage material in the Outliner View. Go to the TexturesTab. Click New, select Type Image or Movie then click Open. Browse to import your image file.Rename the file eg RockTexture.6
The image will be displayed in the Preview.3. In the TexturePaint Mode view, change the Painting Mode to Image as we will be paintingwith the image. Under Canvas Image select FlatImage Diffuse Color as we will be paintingthesecond inner most region of the Plane with the image diffuse colors.7
4. In the TexturePaint Mode view, go to the Tools Tab and change the Brush type to F Clone.Check Clone from image/UV map. Select the Source Clone Image. You can change the Strengthvalue to 1.00 or leave it at its default setting.5. In the TexturePaint Mode view, change the Viewport Shading to Material. Paint overthe plane.You will notice that only the second region gets painted which is what we want.8
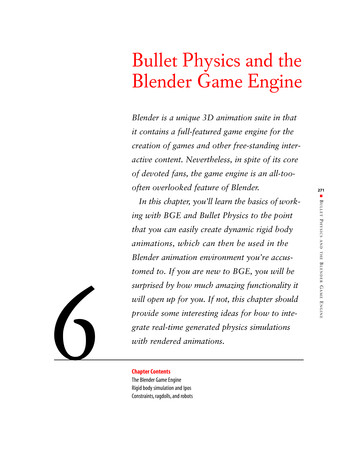
6. For the third region, go back to the Slots Tab and change the Canvas Image to ImageNormalsNormal. If you paint over the Plane Object only the third region gets painted but with theNormals of the image.7. For the outermost region, change the Canvas image to the TexturedImage Diffuse Color andpaint. Paint again but with the Canvas selected to TexturedImage Normal.Part 4: UV Map BakingNow that we have painted our texture it can be baked to the UVImage.1. As in Part 2 section 4 above, Bake your textures as separate Normals, Textures or Full Renderas desired and save to file.9
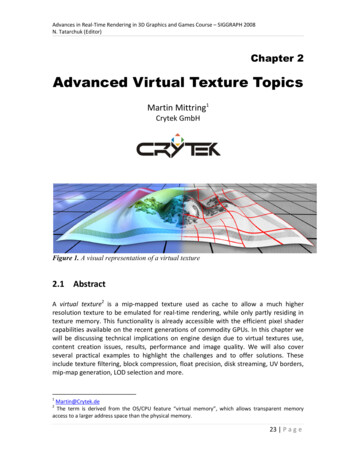
a) Full Render Bakeb)Textures Bakec) Normal Bake10
Blender Texture Painting Tutorial Blender Version: 2.74 Author: Chaven Yenketswamy Date: Aug 2015 The Texture painting interface in Blender can be rather confusing and frustrating for beginners. This tutorial is aimed at illustrating the systematic workflow process required to successfully texture paint in Blender and bake the end results to a .