Transcription
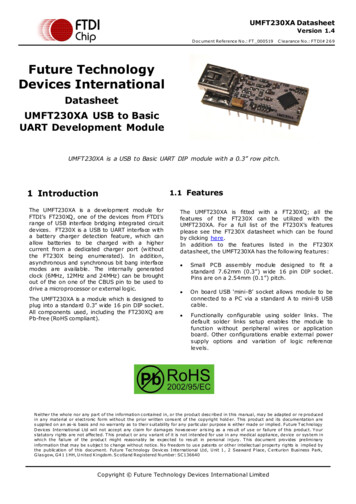
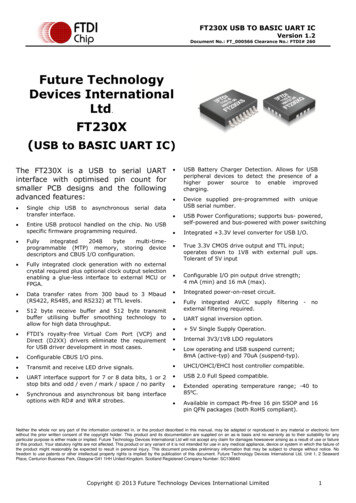
Gravity: UART OBLOQ IoT ModuleSKU: TEL0118The core of IoT is user experience. It integrates embedded system technology, mobile technologyand network technology all together, making up a smart system. It unifies hardware, software andnetwork services, makes them become a whole.Gravity: UART OBLOQ module is a WiFi to Serial device. It faces to non-professional developers,supports standard MQTT protocol IOT service such as Microsoft Azure IOT. By OBLOQ module, youcan quickly build the IoT applications without having a complex background knowledge of IoT. In thisway, makers can really focus on the purpose of creating interesting things on the IoT.OBLOQ is designed based on ESP8266 WiFi chip, it has compact size, low price, simple interface,plug and play feature, and it works stably under the 3.3V 5V control system.Specifications Supply Voltage: 3.3 5.0VOperating Current: 240mAInterface Type: Gravity UART 4PINBaud rate: 9600 bpsWireless mode: IEEE802.11b/g/nEncryption type: WPA WPA2/WPA2–PSKWireless frequency: 2.4GHzProduct Size: 35mm * 32mm / 1.38inch * 1.26inchBuilt-in agreement: TCP/IP Protocol stackWeight:16g
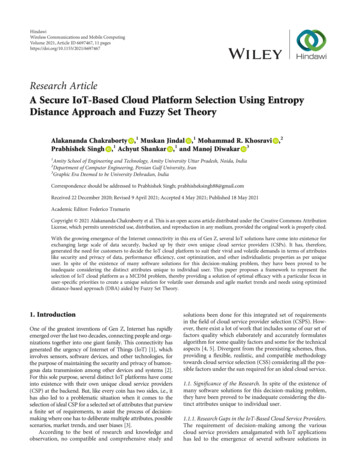
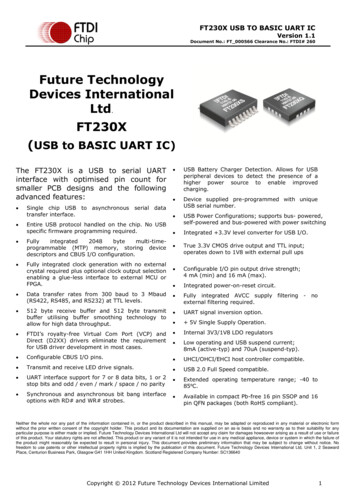
Board OverviewOBLOQ pin DescriptionPin definitionNum1234LabelTXRXGNDVCCDescriptionSerial port senderSerial port receiverGNDPower (3.3/5V)Arduino OBLOQ TutorialOBLOQ module has two basic functions: send data to IoT and receive IoT data. Here's anexperimental demonstration of OBLOQ connecting Azure IOT device and sending data to AzureIOT. The Arduino reads data from temperature sensor LM35 and sends the data to the Azure IOT device viathe OBLOQ module.
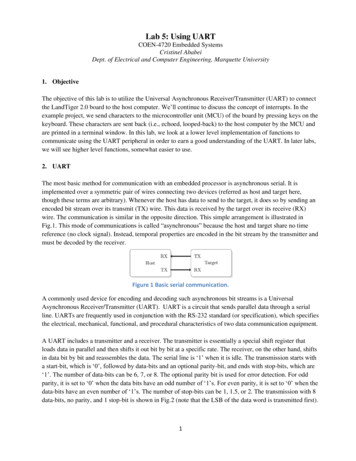
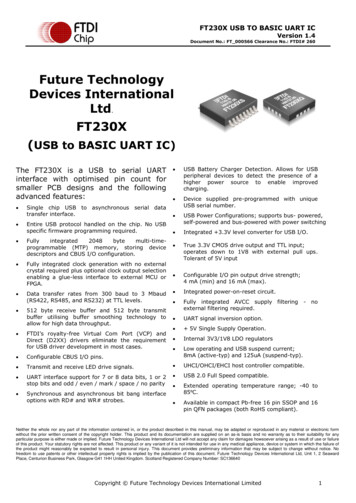
Requirements HardwareDFRduino UNO R3 (or similar) x 1Gravity: Analog LM35 Temperature Sensor For Arduino x11 x OBLOQ modulesome connecting wires SoftwareArduino IDE, Click to Download Arduino IDE from Arduino Create Azure IOT deviceRegister a device in the IoT hub for your deviceMake a note of the primary key of the connection string.Device Explorer tool and how to use itConnection DiagramArduino OBLOQ and LM35 Module Connection TX-Pin10,RX-Pin11A0-LM35GND-GNDVCC-VCC
Sample code Functions realized: Arduino reads temperature data from LM35, and sends the data to Azure IOTdevice via OBLOQ module.#include Arduino.h #include SoftwareSerial.h //wifi SSID and password#define WIFISSID "DFRobot-guest"#define WIFIPWD"dfrobot@2017"//Azure IOT device connection string, this string need modification when connect to different devicesconst String connectionString "HostName dfrobot.azure-devices.cn;DeviceId temperature;SharedAccessKey CR5gUclNaT7skX9WP e6oIB/BnkZnTIEReKBX870SNY ";const String separator " ";bool pingOn true;bool createIoTClientSuccess false;static unsigned long previoustGetTempTime 0;static unsigned long pingInterval 2000;static unsigned long sendMessageInterval 10000;unsigned long previousPingTime 0;String receiveStringIndex[10] {};//Disconnected wifi detection variablebool wifiConnect false;bool wifiAbnormalDisconnect false;SoftwareSerial softSerial(10,11);enum state{
************************************Function: sendMessageDescription : send message via serial portParams: message : message content, it is a stringReturn: d sendMessage(String message){softSerial.print(message Function: pingDescription : Check if the serial communication is normal. When Obloq serialport receives the pingcommand, it will return: 1 1 \rReturn: d ping(){String pingMessage F(" 1 1 **********************Function: connectWifi
Description : Connect wifi, once successfully connected Obloq returns: 2 3 ip \rParams: ssid : wifi SSIDParams: pwd :Return: Nonewifi /void connectWifi(String ssid,String pwd){String wifiMessage " 2 1 " ssid "," pwd *****************************Function: createIoTClientDescription : Create device client handle, once successfully created Obloq returns: 4 2 1 1 \rParams: connecttionStringReturn: Nonedevice connection oid createIoTClient(String connecttionString){String azureConnectMessage " 4 2 1 " connecttionString *************************************Function: subscribeDeviceDescription : Subscribe to device. Obloq returns message content after the device receives message.Params: NoneReturn: d subscribeDevice()
{String subscribeDeviceMessage " 4 2 2 ********************************Function: unsubscribeDeviceDescription : Unsubscribe to device. Once successfully unsubscribed, Obloq returns: 4 2 6 1 \rParams: NoneReturn: d unsubscribeDevice(){String unsubscribeDeviceMessage " 4 2 6 **********************************Function: publishDescription : Publish message. Before this command you must create device client handle first.Params: message: message content to publish, once successfully sent, OBloq returns : 4 2 3 1 \rReturn: d publish(String message){String publishMessage " 4 2 3 " message separator;sendMessage(publishMessage);}
n: disconnectDescription : destroy device client handle: 4 2 4 1 \rParams: NoneReturn: d distoryIotClient(){String distoryIotClientMessage " 4 2 4 *********************************Function: recreateIoTClientDescription : Recreate device client handle, once created successfully, Obloqreturns : 4 2 1 1 \rParams: NoneReturn: d recreateIoTClient(){String recreateIoTClientMessage " 4 2 5 **********************************Function: splitStringDescription : split a stringParams: data:save the cutted char arrayParams: str: the string that will be cuttedParams: delimiters: the delimiter that cut stringReturn: None
******************************************/int splitString(String data[],String str,const char* delimiters){char *s (char *)(str.c str());int count 0;data[count] strtok(s, delimiters);while(data[count]){data[ count] strtok(NULL, delimiters);}return Function: handleUartDescription : handle data received by serial portParams: NoneReturn: d handleUart(){while(softSerial.available() 0){String receivedata softSerial.readStringUntil('\r');const char* obloqMessage receivedata.c str();if(strcmp(obloqMessage, " 1 1 ") 0){Serial.println("Pong");pingOn false;obloqState PINGOK;}if(strcmp(obloqMessage, " 2 1 ") 0){if(wifiConnect)
{wifiConnect false;wifiAbnormalDisconnect true;}}else if(strstr(obloqMessage, " 2 3 ") ! 0 && strlen(obloqMessage) ! 9){Serial.println("Wifi ready");wifiConnect nect false;createIoTClientSuccess true;return;}obloqState WIFIOK;}else if(strcmp(obloqMessage, " 4 2 1 1 ") 0){Serial.println("Azure ready");createIoTClientSuccess true;obloqState *********Function: sendPingDescription : Check if serial port is communicating normallyParams: NoneReturn: d sendPing()
{if(pingOn && millis() - previousPingTime pingInterval){previousPingTime ***********Function: executeDescription : send different command according to different status.Params: NoneReturn: d execute(){switch(obloqState){case PINGOK: connectWifi(WIFISSID,WIFIPWD); obloqState WAIT; break;case WIFIOK: createIoTClient(connectionString);obloqState WAIT; break;case AZURECONNECT : obloqState WAIT; break;default: *Function: getTempDescription : Get temperature measured by LM35Params: NoneReturn: **********************************************/
float getTemp(){uint16 t val;float dat;val analogRead(A0);//Connect LM35 on Analog 0dat (float) val * (5/10.24);return nction: checkWifiStateDescription : Callback function of receiving messageParams: message: message content string that receivedReturn: d checkWifiState(){static unsigned long previousTime 0;if(wifiAbnormalDisconnect && millis() - previousTime 60000)ct once per minute after wifi abnormally disconnect{previousTime millis();createIoTClientSuccess false;connectWifi(WIFISSID,WIFIPWD);}}void }void loop()// reconne
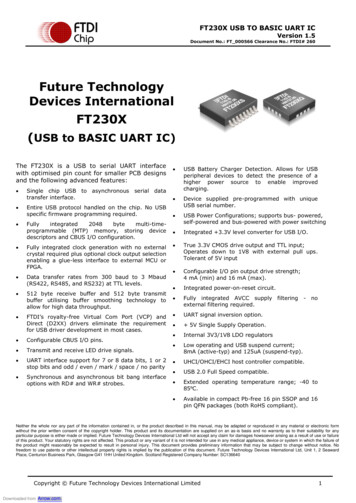
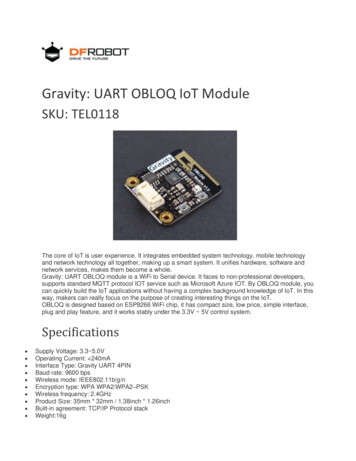
);//Sending data every 5 secondsif(createIoTClientSuccess && millis() - previoustGetTempTime 5000){previoustGetTempTime millis();//Get data from temperature sensorfloat temperature tln(temperature);}}Result demostrationAfter successfully uploading the program to Arduino, reset both OBLOQ module and Arduino. Whennot connected to the wifi, OBLOQ shows red light, but once connected, OBLOQ shows green light.Use the tool Device explorer, in menu "Data", select the device that you are going to send messageto, then monitor it. You will see the uploaded message in the EventHub Data window.
Results show More DocumentsSample : UART OBLOQ IoT Module SKU: TEL0118 2-6-18
Arduino OBLOQ Tutorial OBLOQ module has two basic functions: send data to IoT and receive IoT data. Here's an experimental demonstration of OBLOQ connecting Azure IOT device and sending data to Azure IOT. The Arduino reads data from temperature sensor LM35 and sends the data to the Azure IOT device via the OBLOQ module. Pin definition