Transcription
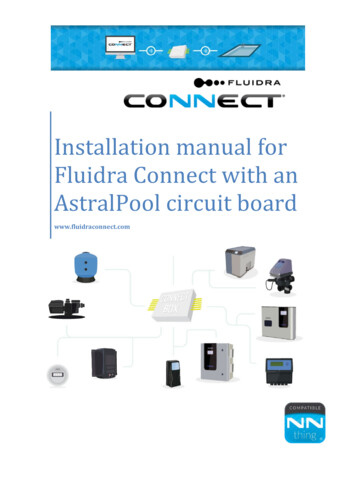
Installation manual forFluidra Connect with anAstralPool circuit boardwww.fluidraconnect.com
Installation manual for Fluidra Connect with an AstralPool circuit boardCONTENTSInstallation manual. 1A.Connect Box set-up in the workshop . 2Part 1: Connect Box set-up . 2Part 2: Filling in the installation form. 4Part 3: GPIO SCAN . 8Part 4: Creating virtual devices . 10B.Onsite installation . 18Part 1: Connecting the power supply and Ethernet cable to the Connect Box circuit board 18Part 2: Setting up a Fluidra Connect in-line Modbus connection. . 21Part 3: Scanning compatible Fluidra Connect devices. . 22Part 4: Matching physical and virtual devices. 23C.Default apps . 25Part 1: Filtration. . 25Part 2: Sensors. . 27Part 3: Silent mode. 28. 28D.End-user access using the app . 29Part 1: App download and installation. 30E.Appendix 1: Wi-Fi connection . 31Part 1: Connect Box Wi-Fi connection . 31Part 2: Search for the Wi-Fi network that you wish to use for the Connect Box connection 32Part 3: Connecting to Wi-Fi . 33Part 4: Rebooting the Connect Box Wi-Fi connection . 36F.Appendix 2: Diagram of the circuit board . 37
Installation manual for Fluidra Connect with an AstralPool circuit boardInstallation manualCongratulations on your purchase of Fluidra Connect!Fluidra Connect is a system that uses the latest technology for controlling pools. Toensure proper installation, it must be fitted by a pool service engineer or a qualifiedelectrician, who must follow the instructions in this manual.The AstralPool circuit board will facilitate installation and reduce the time required todo so.The service engineer/electrician should make the connections to the terminal block inthe same way as any conventional circuit board.Should you have a three-phase power supply, jumper wires must be removed asrequired.Tip: Check the Internet connection that is to be used.See Part 1: Connecting the power supply and Ethernet cable to the Connect Box circuitboard.Tip: Ensure you note down the information given (serial number and control digit) onthe Connect Box label.Tip: Have your username 1 and password at hand that were created to access theFluidra Connect platform.Serial numberControl digitFigure 1: Connect Box label1Should you not have a service engineer/electrician username, please contact us at vguiot@Fluidra.es.Page 1
Installation manual for Fluidra Connect with an AstralPool circuit boardA. Connect Box set-up in the workshopPart 1: Connect Box set-up1. Wire the circuit board in order to update Connect Box in the 411551166117711881199220022112222Bomba FiltraciónFocosLNSalidas GPIOEntradas GPIOModulador Lumiplus/PulsadorMarcha filtración forzadaParo filtración forzado230 VACLGND (T)N230V TTTBorneroFigure 2: Fluidra Connect terminal blockAGNAGN2. Check that there is a working Internet connection.3. Set up an Internet connection to Connect Box using the Ethernet cable and ensure thatConnect Box is switched on.Ethernet cableFigure 3: Internet connectionPage 2
Installation manual for Fluidra Connect with an AstralPool circuit board4. Check that it is connected to the server so that it can be properly updated.When Connect Box is connected to the power supply and the Internet for the firsttime, the LEDs will flash on and off for a few seconds. After a few minutes, the serverLED will light up, as shown in Figure 4: Connect Box.When a stable connection to the server has been established, the LED will remain insolid green.Server LEDFigure 4: Connect BoxPage 3
Installation manual for Fluidra Connect with an AstralPool circuit boardPart 2: Filling in the installation formOnce Connect Box has been updated, it must be configured. To do so, go to thePlatform at http://www.fluidraconnect.com and enter your username 2 and password.The Connect Box circuit board must be switched on and Connect Box connected to theInternet.Once you have accessed the platform, you should complete the following steps:1. Click on the "COMUNIDAD" (Community) icon to access the platform.COMMUNITY iconFigure 5: Menu on the Fluidra Connect portal.2. Access it by entering your username and password on the platform's login screen. Theusername is the service engineer/electrician's email, whilst the password will havebeen chosen by the service engineer/electrician during the registration process.Figure 6: The platform's login screen2Should have been obtained beforehand. Should you not have a service engineer/electrician username,please contact us at vguiot@Fluidra.es.Page 4
Installation manual for Fluidra Connect with an AstralPool circuit board3. Click on "INSTALACIONES" (Installations) under the main menu.INSTALLATIONSMain menuFigure 7: Installations4. Click on “GESTIONAR INSTALACIONES” (Manage installations).MANAGE INSTALLATIONSFigure 8: List of installations on the Fluidra Connect platform5. Click on “AÑADIR NUEVA INSTALACIÓN” (Add a new installation).ADD A NEW INSTALLATIONFigure 9: Manage installations screenPage 5
Installation manual for Fluidra Connect with an AstralPool circuit board6. Fill in the installation form.Serial numberControl digitFigure 10: Installation form7. Click on “GUARDAR BORRADOR” (Save draft) to continue the installation.8. Click on “CONSULTA LA WIKI” (Consult the wiki) under the main menu (optional).Main menuFigure 11: Consult the wiki9. Search for latest software update (optional).Figure 12: WikiPage 6CONSULT THE WIKI
Installation manual for Fluidra Connect with an AstralPool circuit board1. Place the cursor on the Connect Box serial number to check that the software has beenupdated. The Connect Box update takes less than 2 hours 3 (optional).Figure 13: Software version of Connect Box2. Click on "Acceder" (Access) under the “Gestionar Instalaciones” (Manage installations)menu to see the "Access" button of an installation process that has been started.AccessFigure 14: Access button3. The service engineer/electrician may set up as many installations as she/he likes byrepeating the previous steps.3Updates take less than 2 hours in 95% of cases, whilst the remaining 5% will depend on your bandwidth or the stability of your Internet connection.Page 7
Installation manual for Fluidra Connect with an AstralPool circuit boardPart 3: GPIO SCANHaving reached this point, you will be in a position to scan any compatible FluidraConnect devices included on the Connect Box circuit board (1 GPIO).1. Click on the button "Acceder" (Access) of the installation to be configured on the“Gestionar Instalaciones” (Manage installations) screen.AccessFigure 15: ACCESS button2. The Connect Box window will open.3. Click on the “DISPOSITIVOS” (Devices) icon under the Main menu.4. Click on the "ESCANEAR" (Scan) button.Main menuDevices menu iconScan buttonFigure 16: Connect Box screenPage 8
Installation manual for Fluidra Connect with an AstralPool circuit board5. By clicking on "SIGUIENTE" (Next), the scan will begin. This process can take a fewminutes.Figure 17: Scan6. If the scan has been successfully completed, the icon of all of the compatible FluidraConnect devices connected using a Modbus cable (pre-installed GPIO) will appear onthe screen.GPIO iconFigure 18: Devices screen7. By clicking on a device's icon, its screen will pop up.8. The options on a device's screen can be changed by clicking on the bottom tabs, seeFigure 19: GPIO screen.Bottom tabsFigure 19: GPIO screenPage 9
Installation manual for Fluidra Connect with an AstralPool circuit boardPart 4: Creating virtual devicesA virtual device is one that although not compatible with Fluidra Connect, it can becontrolled through a compatible device, in this case the GPIO.In order to distinguish them on the platform, they are called "virtual" as they are notscanned nor do they have Modbus characteristics.This section explains how to link up devices added to the Connect Box circuit board inthe GPIO inputs and outputs.1. Click on the “DISPOSITIVOS” (Devices) icon under the Main menu.Main menuDevices menu iconFigure 20: Connect Box main menu2. Click on the button “CREAR DISPOSITIVO VIRTUAL” (Create a virtual device).CREATE A VIRTUAL DEVICE buttonFigure 21: Devices screenPage 10
Installation manual for Fluidra Connect with an AstralPool circuit board3. The virtual device configuration screen will open.Figure 22: Virtual device configuration screen4. Create pump status (optional).A virtual device option can be added that will show whether or not the pump has asystem failure.4.1Click on the button “CREAR DISPOSITIVO VIRTUAL” (Create a virtual device)(optional).Figure 23: Generic input: Pump failure4.2Give the device the name "Pump failure" (optional).Page 11
Installation manual for Fluidra Connect with an AstralPool circuit board4.3Under the type of device, select “entrada genérica on/off” (generic inputon/off) (optional).4.4Under the generic category, select “Sistema (System – a magnetic starterin this case) (optional).4.5Select Guardamotor (Magnetic starter) under the product subcategory(optional).4.6Under visibility of the device for the end user, select "No visible" (Notvisible) (optional) 4 .4.7Click on "SIGUIENTE" (Next) (optional).4.8Link up the status of the virtual device to intuitive names (optional).Figure 24: Status4.9Select input 1 as this is the GPIO input wired to the pump's power supply(optional).Figure 25: Input selected4.104Click on "SIGUIENTE" (Next) (optional).Visible devices can be accessed by the end user from the app.Page 12
Installation manual for Fluidra Connect with an AstralPool circuit board4.11On the devices screen, the new virtual device created will pop up(optional).5. Create filtration status.Under "CREAR DISPOSITIVO VIRTUAL” (Create a virtual device), the input linked up tothe filtration pump's contactor will be displayed.5.1Click on the button “CREAR DISPOSITIVO VIRTUAL” (Create a virtualdevice)”.Figure 26: Generic input: Filtration status55.2Give the device the name "Filtration status".5.3Under the type of device, select “entrada genérica on/off” (generic inputon/off).5.4Under the generic category, select “Sistema (System – a contactor in thiscase) (optional).5.5Select "Other" under the product subcategory.5.6Under visibility of the device for the end user, select "No visible" (Notvisible). 55.7Click on "SIGUIENTE" (Next).5.8Link up the status of the virtual device to intuitive names.Visible devices can be accessed by the end user from the app.Page 13
Installation manual for Fluidra Connect with an AstralPool circuit boardFigure 27: Status5.9Select input 2 as this is the GPIO input wired to the filtration pump.Figure 28: Input selected5.10Click on "SIGUIENTE" (Next).5.11On the devices screen, the new virtual device created will pop up.6. Create filtration pump.The way to create a virtual device as an output linked up to the filtration pump isexplained below.6.1Page 14Click on the button “CREAR DISPOSITIVO VIRTUAL” (Create a virtualdevice)”.
Installation manual for Fluidra Connect with an AstralPool circuit boardFigure 29: Pump (Single speed)6.2Give the device the name "Filtration pump".6.3Under "SELECCIONE TIPO DE DISPOSITIVO VIRTUAL" (Select type of virtualdevice), select “Bomba (1 velocidad)” (Pump (single speed)). 66.4Under the generic category, select “Sistema” (System).6.5Under the product subcategory, select Filtration pump.6.6Under visibility of the device for the end user, select "No visible" (Notvisible).6.7Select RL1 as this is the GPIO output wired to the pumps connection.Figure 30: Output selected6.8Click on "SIGUIENTE" (Next).6.9On the devices screen, the new virtual device created will pop up.6The filtration pump is a specific type of output.Page 15
Installation manual for Fluidra Connect with an AstralPool circuit board7. Create spotlights.The way to create a virtual device as an output linked up to the pool's lighting isexplained below.7.1Click on the button “CREAR DISPOSITIVO VIRTUA
Connect devices included on the Connect Box circuit board (1 GPIO). 1. Click on the button "Acceder" (Access) of the installation to be configured on the “Gestionar Instalaciones” (Manage installations) screen. 2. The Connect Box window will open. 3. Click on the “DISPOSITIVOS” (Devices) icon under the Main menu. 4. Click on the "ESCANEAR" (S can) button. Figure 16: Connect Box