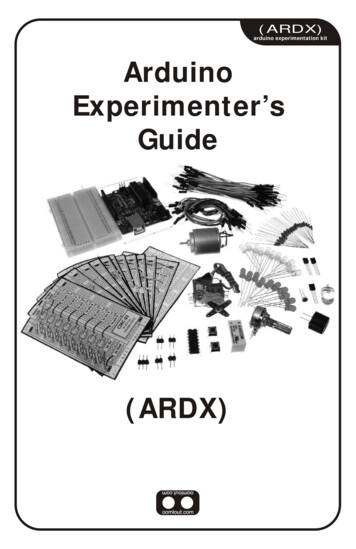
Transcription
The Book of I²C (Sample Chapter) 2022 by Randall Hyde8A R D U I N O I 2C P R O G R A M M I N GThis first chapter on I2C programming willstart by discussing the Arduino platform,since it’s probably safe to say that more lines2of I C code have been written for the Arduinothan for any other.This chapter covers the following information: An introduction to basic I2C programmingA discussion of the Wire programming model that the Arduino libraryand IDE usesArduino I2C read and write operationsAccessing multiple I2C ports on various Arduino devicesThis book tends to use Arduino sketches (programs) as the basis forgeneric examples, so a good understanding of Arduino I2C programmingwill be invaluable as you continue through subsequent chapters.502468book.indb 1316/7/22 10:02 PM
The Book of I²C (Sample Chapter) 2022 by Randall HydeTHE MCP4725 DIGITAL-TO -ANALOG CON V ERTERThis book uses the MCP4725 DAC to demonstrate programming various controldevices (SBCs), since the MCP4725 is easy to program and understand. It hasthe following features: 12-bit resolution On-board nonvolatile memory (EEPROM) External A0 address pin Normal or power-down mode Single-supply operation: 2.7 V to 5.5 V Standard (100 kbit/sec), fast (400 kbit/sec), and high (3.4 Mbit/sec) speeds Eight available I2C addresses (though any given MCP4725 IC supportsonly two different addresses, a full range of eight addresses is possiblesince there are four different variants of the MCP4725, each supporting adifferent pair of addresses)2For Part III of this book, there are two I C operations of interest: writinga 12-bit digital value to the DAC and reading the current DAC output andEEPROM values from the chip.The MCP4725 will respond to one of the following I2C addresses:0x60/0x61, 0x62/0x63, 0x64/0x65, or 0x66/0x67. An address pin on theMCP4725 provides the LO bit (bit 0) of this address. Bits 1 and 2 are determined by the particular IC you purchase. For example, the Adafruit MCP4725breakout board uses an IC that responds to addresses 0x62 and 0x63; theSparkFun variant responds to addresses 0x60 and 0x61. If you purchaseboards from Adafruit and SparkFun, you can put four of these boards on the22same I C bus without having to resort to using an I C multiplexer. (There is asneaky way to hook more of these boards to the same bus by using theaddress selection bit as a “chip select” line; see g-multiple-mcp4724s-in-same.html for an example.) Ifyou want to use chips with addresses 0x64/0x65 or 0x66/0x67, you couldsearch for various boards on Amazon or build your own breakout board.Both Adafruit and SparkFun have made their boards open hardware viathe Creative Commons license, so you could build these boards and substitutein the appropriate MCP4725 IC. Note that these designs use surface-mountedparts and are not easy to assemble by hand. Check out the Adafruit andSparkFun designs at https://github.com/sparkfun/MCP4725 Breakout/tree/v14 and https://github.com/adafruit/Adafruit-MCP4725-PCB. For more information about the MCP4725, see Chapter 15.132502468book.indb 132Chapter 86/7/22 10:02 PM
The Book of I²C (Sample Chapter) 2022 by Randall Hyde8.1 Basic I2C ProgrammingIn Chapter 2, you learned that an I2C transmission begins with the outputof a start condition followed by an address-R/W byte, followed by zero ormore bytes of data, and, finally, end with a stop condition. The controllerplaces these data bytes on the I2C bus, either by bit banging or by somehardware registers.The only parts of this transmission that are common to all I2C devicesare the start condition, the very first address byte, and the stop condition.Any bytes the controller transmits after the address byte until a stop condition comes along are specific to the peripheral responding to the addressin the address byte.The MCP4725 supports several command formats based on data youtransmit immediately after the address byte. The programming examplesin this part of the book will use only one of those commands: the Fast Mode2Write command. This command requires 3 bytes on the I C bus, as shown inTable 8-1.Table 8-1: Fast Mode Write CommandFirst byteSecond byteThird byteAddressHO DAC valueLO DAC valueaaaa aaax0000 hhhhllll llllIn Table 8-1, the aaaa aaa bits are the MCP4725 address. These will be1100cba where bits c and b are hard-coded into the IC itself and a comesfrom the address line on the chip. This corresponds to addresses 0x60through 0x67. (Keep in mind that the I2C protocol shifts these addressbits one position to the left and expects the R/W bit in bit 0. For thisreason, the address byte will actually contain the values 0xC0 through0xCF, depending on the IC address and the state of the R/W line.) Thehhhh llll llll bits are the 12 bits to write to the digital-to-analog conversion circuitry. The HO 4 bits of the second byte must contain zeros (theyspecify the Fast Mode Write command and power-down mode). Assuminga 5-V power supply to the chip, the 3-byte sequence 0xC0, 0x00, 0x00 (the3 bytes from Table 8-1) will write the 12-bit value 0x000 to the DAC ataddress 0x60, which will cause 0 V to appear on the DAC’s output. Writingthe 3-byte sequence 0xC0, 0x08, 0x00 will put 2.5 V on the output pin.Writing the 3-byte sequence 0xC0, 0x0F, 0xFF will put 5 V on the analogoutput pin. In general, a value between 0x000 and 0xFFF (linearly) mapsto a voltage between 0 V and 5 V on the DAC analog output. All you needis some way of placing these 3 bytes on the I2C bus.Whereas the DAC uses the HO 4 bits of the second byte to specify thecommand (0b0000 is the Fast Mode Write command), the DAC read command is simpler still. The R/W bit in the address byte is all the MCP4725needs to determine how to respond. It responds by returning 5 bytes: theArduino I2C Programming502468book.indb 1331336/7/22 10:02 PM
The Book of I²C (Sample Chapter) 2022 by Randall Hydefirst is some status information (which you can ignore until Chapter 15,where I discuss the MCP4725 in detail), the second byte contains the HO 8bits of the last value written to the DAC, and the third byte contains the LO4 bits of the last value written in bits 4 through 7 (and bits 0 through 3 don’tcontain any valid data). The fourth and fifth bytes contain some statusinformation and the 14 bits held in the on-chip EEPROM (see Chapter 15for more information about the EEPROM).How you place bytes on the I2C bus and how you read data from the2I C bus entirely depends on the system, library functions, and operatingsystem (if any) you’re using. This chapter discusses I2C on the Arduino;therefore, we’re going to consider how to read and write data on the I2C bususing the Arduino library code.8.2Basic Wire ProgrammingThe Arduino library responsible for I2C communication is the Wire library.I 2C communication functions are not built into the Arduino language(which is really just C with some default include files). Instead, you haveto enable the Arduino I2C library code by including the following statementnear the beginning of your program’s source file:#include Wire.h Note that Wire.h must have an uppercase W on certain operating systems (Linux, in particular).The Wire.h header file creates a singleton class object named Wire thatyou can use to access the class functions. You do not have to declare thisobject in your programs; the header file automatically does this for you.The following sections describe the various available Wire functions.8.2.1Wire Utility FunctionsThe Wire.begin() function initializes the Arduino Wire (I2C) library. You mustcall this function once before executing any other functions in the Wirelibrary. The convention is to call this function in the Arduino setup() function.Without a parameter, Wire.begin() will initialize the library to work asa controller device on the I2C bus. If you specify a 7-bit integer as an argument, this will initialize the library to operate as a peripheral device onthe I2C bus.The Wire.setClock() function allows you to change the I2C clock frequency,supplied as an integer parameter. This call is optional; the default clockspeed is 100 kHz. Most Arduino boards will support 100,000 or 400,000 asthe argument. A few high-performance boards might support 3,400,000(high-speed mode). A few will also support 10,000 (low-speed mode on theSMBus).Keep in mind that all peripherals and CPU(s) on the I2C bus must becapable of supporting the clock speed you select. That is, you must set a clockspeed that is no faster than the slowest peripheral on the bus.134502468book.indb 134Chapter 86/7/22 10:02 PM
The Book of I²C (Sample Chapter) 2022 by Randall Hyde8.2.2 Wire Read OperationsThe Wire.requestFrom() function reads data from an I2C peripheral device.There are two forms of the Wire.requestFrom() function call:Wire.requestFrom( address, size )Wire.requestFrom( address, size, stopCond )In each of these calls, address is the 7-bit peripheral address, size isthe number of bytes to read from the device, and the optional stopCond argument specifies whether the function issues a stop condition (if true) afterreceiving the bytes. If false, then the function sends a restart condition.If the optional stopCode argument is not present, the function uses true asthe default value (to issue a stop condition after receiving the data).NOTEThe Arduino library maintains a 32-byte buffer for incoming I2C data reads. Because2Wire.requestFrom() reads all incoming data before returning to its caller, an I Cperipheral can transfer a maximum limit of 32 bytes in one operation using this call.Once the controller receives the data from the peripheral, an application can read that data using the Wire.read() and Wire.available() functions.The Wire.available() function returns the number of bytes left in the internal receive buffer, while the Wire.read() function reads a single byte fromthe buffer. Typically, you would use these two functions to read all the datafrom the internal buffer using a loop such as the following:while( Wire.available() ){char c Wire.read(); // Read byte from buffer// Do something with the byte just read.}There is no guarantee that the peripheral will actually transmit thenumber of bytes requested in the call to the Wire.requestFrom() function—the peripheral could return less data. Therefore, it is always importantto use the Wire.available() function to determine exactly how much datais in the internal buffer; don’t automatically assume it’s the amount yourequested.The peripheral determines the actual amount of data it returns to thecontroller. In almost all cases, the amount of data is fixed and is specified inthe datasheet for the peripheral (or by the peripheral’s design). In theory,a peripheral could return a variable amount of data. How you retrieve suchdata is determined by the peripheral’s design and is beyond the scope ofthis chapter.To read data from a peripheral device, a controller must transmitthe peripheral address and an R/W bit equal to 1 to that peripheral. TheWire.requestFrom() function handles this. After that, the peripheral willArduino I2C Programming502468book.indb 1351356/7/22 10:02 PM
The Book of I²C (Sample Chapter) 2022 by Randall Hydetransmit its data bytes. The Arduino controller will receive those bytes andbuffer them to be read later. Note, however, that the full read operationtakes place with the execution of the Wire.requestFrom() function.8.2.3 Wire Write OperationsA controller can write data to a peripheral using the Wire.beginTransmission(),Wire.endTransmission(), and Wire.write() functions. The beginTransmission()and endTransmission() functions bracket a sequence of write operations.The Wire.beginTransmission() function takes the following form:Wire.beginTransmission(address)where address is the 7-bit peripheral address. This function call builds thefirst byte of the data transmission consisting of the address and a clearR/W bit.There are three forms of the Wire.write() function:Wire.write( value )Wire.write( string )Wire.write( data, length )The first form appends a single byte to an internal buffer for transmission to the peripheral. The second form adds all the characters in a string(not including the zero-terminating byte) to the internal buffer for transmissionto the peripheral. The third form copies some bytes from a byte array to theinternal buffer (the second argument specifies the number of bytes to copy).NOTEIn addition to its aforementioned 32-byte buffer for incoming I2C data reads, theArduino library maintains a 32-byte buffer for outgoing I2C writes. Although you canhave multiple calls to the various write functions between a Wire.beginTransmission()call and a Wire.endTransmission() call, the cumulative length must be 32 bytes or less.The Wire.endTransmission() function takes the address byte and databytes from the internal buffer and transmits them over the I2C bus. Thisfunction call takes two forms:Wire.endTransmission()Wire.endTransmission( stopCond )The first form transmits the data in the internal buffer and followsthat transmission with a stop condition. The second form uses the singleBoolean argument to determine whether it should send a stop condition(true) after transmitting the data (the function transmits a restart ifstopCond is false).Remember that the actual data transmission does not take place untilthe execution of the Wire.endTransmission() function call. The other callssimply build up an internal buffer for later transmission.136502468book.indb 136Chapter 86/7/22 10:02 PM
The Book of I²C (Sample Chapter) 2022 by Randall Hyde8.2.4 Wire Peripheral FunctionsThe Arduino functions up to this point have assumed that the Arduino isacting as an I2C bus controller device. You can also program an Arduino toact as a peripheral device. The Arduino library provides two functions forthis purpose:Wire.onReceive( inHandler )Wire.onRequest( outHandler )In the first function, inHandler is a pointer to a function with the following prototype: void inHandler( int numBytes ). In the second, outHandler is apointer to a function with the following prototype: void outHandler().The Arduino system will call outHandler whenever the (external) controller device requests data. The outHandler function will then use theWire.beginTransmission(), Wire.endTransmission(), and Wire.write() functionsto transmit data from the peripheral back to the (external) controller. TheinHandler function will use the Wire.begin(), Wire.available(), and Wire.read()functions to retrieve data from the controller device.8.3Arduino I2C Write ExampleThe program in Listing 8-1 demonstrates using the I2C bus to talk to aSparkFun MCP4725 DAC breakout board. This program was written forand tested on a Teensy 3.2, though it should work with any compatibleArduino device (with slightly different timings).The program generates a continuous triangle wave by continuouslyincrementing the DAC output from 0x0 to 0xfff (12 bits) and then decrementing from 0xfff back to 0x0. As you will see in the oscilloscope output,this program produces a triangle wave with slightly less than a 2.4-secondperiod (around 0.42 Hz) when running on my setup (your mileage mayvary). This frequency is determined by the amount of time it takes to write8,189 12-bit values to the DAC. Since each transmission requires 3 bytes(address, HO byte and command, and LO byte), plus start and stop condition timings, it takes around 35 bit times at 100 kHz (10 µsec per bit time)to transfer each value.// Listing8-1.ino//// A simple program that demonstrates I2C// programming on the Arduino platform.#include Wire.h // I2C address of the SparkFun MCP4725 I2C-based// digital-to-analog converter.#define MCP4725 ADDR 0x60void setup( void )Arduino I2C Programming502468book.indb 1371376/7/22 10:02 PM
The Book of I²C (Sample Chapter) 2022 by Randall Hyde{Serial.begin( 9600 );delay( 1000 );Serial.println( "Test writing MCP4725 DAC" );Wire.begin(); // Initialize I2C library}void loop( void ){// Send the rising edge of a triangle wave:for( int16 t dacOut 0; dacOut 0xfff; dacOut ){// Transmit the address byte (and a zero R/W bit):1 Wire.beginTransmission( MCP4725 ADDR );////////Transmit the 12-bit DAC value (HO 4 bitsfirst, LO 8 bits second) along with a 4-bitFast Mode Write command (00 in the HO 2 bitsof the first byte):2 Wire.write( (dacOut 8) & 0xf );Wire.write( dacOut & 0xff );// Send the stop condition onto the I2C bus:3 Wire.endTransmission( true );// Uncomment this delay to slow things down// so it can be observed on a multimeter:// delay( 5 );}// Send the falling edge of the triangle wave:for( int16 t dacOut 0xffe; dacOut 0; --dacOut ){// See comments in previous loop.Wire.beginTransmission( MCP4725 ADDR );Wire.write( (dacOut 8) & 0xf );Wire.write( dacOut & 0xff );Wire.endTransmission( true );// Uncomment this delay to slow things down// so it can be observed on a multimeter:// delay( 5 );}}Wire.beginTransmission() initializes the Wire package to begin acceptingdata for (later) transmission on the I2C bus 1. The Wire.write() functioncopies data to transmit to the internal Wire buffers for later transmission138502468book.indb 138Chapter 86/7/22 10:02 PM
The Book of I²C (Sample Chapter) 2022 by Randall Hydeon the I2C bus 2. After that, Wire.endTransmission() instructs the device toactually begin transmitting the data in the internal Wire buffers onto theI2C bus 3.Figure 8-1 shows one of the DAC 3-byte transmissions appearing on theI2C bus during the execution of the program in Listing 8-1 (this particulartransmission was writing 0x963 to the DAC).Figure 8-1: Sample I2C output during triangle wave transmissionAs you can see in the oscilloscope output appearing in Figure 8-2,it takes approximately 2.4 seconds for a full cycle (one rising edge andone falling edge) of the triangle wave. Using the logic analyzer, I wasable to determine that each 3-byte transmission took slightly less than300 µsec, which roughly matches what you see on the oscilloscope outputin Figure 8-2. Note that the timing between transmissions isn’t constantand will vary by several microseconds between transmissions. This means300 µsec is not a hard transmission time for 3 bytes.The maximum frequency this software can produce based on a 100-kHzbus speed is approximately 0.4 Hz. To produce a higher frequency value,you would need to run the I2C bus at a higher clock frequency (for example,400 kHz) or reduce the number of values you write to the DAC per unittime (for example, you can double the frequency by incrementing the loopcounter by two rather than one).Figure 8-2: Triangle wave output from MCP4725The code in Listing 8-1 gives up the I2C bus after each DAC transmission.If there were other controllers on the same bus talking to different peripherals, this would further reduce the maximum clock frequency of the triangleArduino I2C Programming502468book.indb 1391396/7/22 10:02 PM
The Book of I²C (Sample Chapter) 2022 by Randall Hydewave (not to mention that it would add some distortion to the triangle waveif there were many pauses in the output sequence to the DAC). In theory, youcould prevent this distortion by refusing to yield the I2C bus during the transmission; however, given the vast number of transmissions required here, theonly reasonable solution to producing an undistorted triangle wave would beto ensure that the MCP4725 was the only device on the I2C bus.8.4 Arduino I2C Read ExampleFundamentally, a DAC is an (analog) output-only device. You write avalue to the DAC registers and an analog voltage magically appears on theanalog output pin. Reading from a DAC doesn’t make much sense. Thatsaid, the MCP4725 IC does support I2C read operations. A read commandreturns 5 bytes.To read a value from the MCP4725, simply place the device’s address onthe I2C bus with the R/W line high. The MCP4725 will respond by returning 5 bytes: the first byte will be status information, the next two will be thelast DAC value written, and the last pair of bytes will be the EEPROM value.The EEPROM stores a default value to initialize the analog output pin whenthe device powers up, before any digital value is written to the chip. SeeChapter 15 for more details.The program in Listing 8-2 demonstrates an I2C read operation.//////////////////Listing8-2.inoThis is a simple program that demonstratesI2C programming on the Arduino platform.This program reads the last written DAC valueand EEPROM settings from the MDP4725. It waswritten and tested on a Teensy 3.2, and it alsoruns on an Arduino Uno.#include Wire.h // I2C address of the SparkFun MCP4725 I2C-based// digital-to-analog converter.#define MCP4725 ADDR 0x60#define bytesToRead (5)void setup( void ){inti ];Serial.begin( 9600 );delay( 1000 );Serial.println( "Test reading MCP4725 DAC" );140502468book.indb 140Chapter 86/7/22 10:02 PM
The Book of I²C (Sample Chapter) 2022 by Randall HydeWire.begin();// Initialize I2C libraryWire.requestFrom( MCP4725 ADDR, bytesToRead );while( Wire.available() ){if( i bytesToRead ){input[ i ] Wire.read();}}// Status byte is the first one received:Serial.print( "Status: " );Serial.println( input[0], 16 );// The previously written DAC value is in the// HO 12 bits of the next two bytes:DACvalue (input[1] 4) ((input[2] & 0xff)Serial.print( "Previous DAC value: " );Serial.println( DACvalue, 16 );4);// The last two bytes contain EEPROM data:EEPROMvalue (input[3] 8) input[4];Serial.print( "EEPROM value: " );Serial.println( EEPROMvalue, 16 );while( 1 ); // Stop}void loop( void ){// Never executes.}The following is the output from the program in Listing 8-2. Note thatthe output is valid only for my particular setup. Other MCP4725 boardsmay have different EEPROM values. Furthermore, the previous DAC valueoutput is specific to the last write on my particular system (this was probablythe last output written from Listing 8-1, when I uploaded the program inListing 8-2 while the previous program was running).Test reading MCP4725 DACStatus: C0Previous DAC value: 9BEEPROM value: 800The only thing interesting in this output is that I had programmed theMCP4725’s EEPROM to initialize the output pin to 2.5 V on power-up (thehalfway point with a 5-V power supply).Arduino I2C Programming502468book.indb 1411416/7/22 10:02 PM
The Book of I²C (Sample Chapter) 2022 by Randall Hyde8.4.1Arduino I2C Peripheral ExampleThe previous two sections described read and write operations from theperspective of a controller device. This section describes how to create anArduino system that behaves as an I2C peripheral device. In particular, thesource code appearing in Listing 8-3 simulates an MCP4725 DAC deviceusing a Teensy 3.2 module. The Teensy 3.2 has an on-board, 12-bit DACconnected to pin A14. Writing a value between 0x000 and 0xfff produces avoltage between 0 V and 3.3 V on that pin. The code in Listing 8-3 associates rcvISR (and ISR) with the data received interrupt. When data arrives,the system automatically calls this routine and passes it the number ofbytes received on the I2C bus.The rcvISR interrupt service routine (ISR) fetches the bytes transmittedto the peripheral from the controller, constructs the 12-bit DAC output valuefrom those bytes, and then writes the 12 bits to the DAC output (using theArduino analogWrite() function). Once the output is complete, the codewaits for the next transmission to occur. Just like a debug and test feature,this program writes a string to the Serial output every 10 seconds so youcan verify that the program is still This program demonstrates using anArduino as an I2C peripheral.This code runs on a Teensy 3.2module. A14 on the Teensy 3.2 isa true 12-bit, 3.3-V DAC. This programturns the Teensy 3.2 into a simpleversion of the MCP4725 DAC. It readsinputs from the I2C line (correspondingto an MCP4725 fast write operation)and writes the 12-bit data to theTeensy 3.2's hardware DAC on pin A14.#include Wire.h // I2C address of the SparkFun MCP4725 I2C-based// digital-to-analog converter.#define MCP4725 ADDR 0x60// Interrupt handler that the system// automatically calls when data arrives// on the I2C lines.void rcvISR( int numBytes ){byte LObyte;byte HObyte;word DACvalue;142502468book.indb 142Chapter 86/7/22 10:02 PM
The Book of I²C (Sample Chapter) 2022 by Randall Hyde// Expecting 2 bytes to come// from the controller device.if( numBytes 2 && Wire.available() ){HObyte Wire.read();if( Wire.available() ){LObyte Wire.read();DACvalue ((HObyte 8) LObyte) & 0xfff;analogWrite( A14, DACvalue );}}}// Usual Arduino initialization function:void setup( void ){Serial.begin( 9600 );delay( 1000 );Serial.println( "I2C peripheral test" );// Initialize the Wire library to treat this// code as an I2C peripheral at address 0x60// (the SparkFun MCP4725 breakout board):Wire.begin( MCP4725 ADDR );// Set up the Teensy 3.2 DAC to have// 12-bit resolution:analogWriteResolution(12);// Define the I2C interrupt handler// for dealing with incoming I2C// packets:Wire.onReceive( rcvISR );}void loop( void ){Serial.println( "MCP4725 emulator, waiting for data" );delay( 10000 ); // Delay 10 seconds}I connected the SCL, SDA, and Gnd pins of two Teensy 3.2 devicestogether (using a Teensy and an Arduino also works). On one of the units, Iprogrammed the DAC output code similar to that found in Listing 8-1. Onthe other, I programmed the code in Listing 8-3. I put an oscilloscope onthe A14 pin on the Teensy running the peripheral code (Listing 8-3). TheArduino I2C Programming502468book.indb 1431436/7/22 10:02 PM
The Book of I²C (Sample Chapter) 2022 by Randall Hydeoutput appears in Figure 8-3. Note that the peaks on the triangle waves arebetween 0.0 V and 3.3 V (rather than 0 V and 5 V in Figure 8-2) because theTeensy is a 3.3-V device.Figure 8-3: Triangle wave output from the Teensy 3.2A14 pinFigure 8-4 shows a small section of the output when some clock stretching occurs.Figure 8-4: A stretched clock signal reduces the triangle wave frequency.As you can see in Figure 8-4, the clock is stretched to 8.4 µsec after thetransmission of the byte.8.5 Multiple I2C Port ProgrammingThe standard Arduino library assumes that only a single I2C bus is on theboard (based on the hardware of the Arduino Uno). Many Arduinocompatible boards provide multiple I 2C buses. This allows you to spreadyour I2C devices across multiple buses, allowing them to run faster, or to,perhaps, include two devices with the same address without having to resortto using an I2C bus multiplexer.2The standard Arduino library does not support multiple I C buses; however, devices that do provide them will often provide some special library codethat lets you access the additional I2C buses in the system. The Arduino convention when there are multiple instances of a device is to use a numeric suffix after the name to designate a particular device. In the case of the I2C bus,those device names are Wire (for the first, or 0th, port), Wire1, Wire2, and so on.144502468book.indb 144Chapter 86/7/22 10:02 PM
The Book of I²C (Sample Chapter) 2022 by Randall HydeFor example, to write a sequence of bytes to the second I2C port, youmight use code like the following:Wire1.beginTransmission( 0x60 );Wire1.write( (dacOut 8) & 0xf );Wire1.write( dacOut & 0xff );Wire1.endTransmission( true );The mechanism for achieving this is hardware and system specific. Checkthe documentation for your particular SBC to see how this is done.8.6Chapter SummaryThe Arduino library provides the Wire object to support I2C bus transactions.This chapter described the basic Wire functions available in the Arduino library,including those to initialize the I2C library, choose the I2C clock frequency, initiate a read from an I2C peripheral, read peripheral data placed in the internalbuffer, initialize a buffer for transmission to a peripheral, and more.This chapter also included several real-world examples of I2C communication using the SparkFun MCP4725.FOR MORE INFORMATIONTo learn more about Wire programming on the Arduino, you should first stopat the Arduino Wire library reference page: https://www.arduino.cc/en/Reference/Wire.Of course, you can find about a bazillion different websites with Arduino I2C programming examples. A quick web search for “Arduino I2C examples” will probablyturn up more hits than you are willing to read.Simon Monk’s book, Programming Arduino Next Steps: Going Further withSketches, 2nd edition (McGraw-Hill Education TAB, 2018), contains a chapter2on Arduino I C programming.Adafruit tutorials on Arduino I2C programming: c-and-spi/i2c-devices22SparkFun I C tutorials on Arduino I C programming: eets for the MCP4725 DAC: dfMore information about the Teensy 3.2: https://www.pjrc.com/store/teensy32.htmlArduino I2C Programming502468book.indb 1451456/7/22 10:02 PM
The Book of I²C (Sample Chapter) 2022 by Randall Hyde502468book.indb 1466/7/22 10:02 PM
A discussion of the Wire programming model that the Arduino library and IDE uses Arduino I. 2. C read and write operations Accessing multiple I. 2. C ports on various Arduino devices. This book tends to use Arduino . sketches (programs) as the basis for generic examples, so a good understanding of Arduino I2C programming