Transcription
Created 04/14 12:09 PM Modified 04/14 12:17 PMTitle:Compilation of Tutorials and Tips on Making DAPTemplates (AOP) by Mary WarnerBefore getting started on your own template adventure, I would advise downloading a copy of JPEX ( or any otherjpeg extractor utility which you might find ). The aforementioned one can be found here:http://www.zexersoft.com/download/jpegex.zip I believe it is shareware but it doesn't seem to be crippled in anyway.First, be sure to look at the DAP Help File accessed from the DAP Help Menu under "Tutorials". Oscar hasprovided a fairly detailed description on creating templates starting on page 23 of the current version ("Section3.12 Templates"). The section is copied here for your convenience .
In addition , there is a post in the DAP forum from Oscar with some additional details (extracted below for yourconvenience ) found here :http://www.mmbforums.com/ipb/index.php?showtopic 22594&view findpost&p 133567The current way of jpg templates is a bit temporary solution as I am planning to create morestraighforward way with access to the brushes one by one.A good template is harder task to do - I spent few days on each template and created many of them thenselected the best ones.I will quickly describe what I do:I always use the template 50/50, that is first 50 are underpaint large brushes, next are small tiny foroutlines and dark areas. (there is setting in AOP for that)From a painting(s):I took a picture I liked (some are paintings i have at home) then looked at the colors, selected significiantpatches of colors and place them in the first 50 spaces of the grid. Then i created new layer, took wacomtablet and created masks (brush strokes) by painting white over the patches. New layer below it - fillwith black.if the color patches already have some visible brush patterns then I duplicate layer. then selected firstpatch with rectangle - then Black and white and make the brush strokes stand out by moving the colorsliders (for example darkening blue and lightening red), then levels and make it contrasty - move theblack towards middle and white towards the middle.i did this for every patch so I got another layer of brush strokes.So now i have color layer, black fill, my white brushes and another layer with extracted brush strokesfrom the original. I will set this last layer to darken my brush strokes and change the transparency so itaffect my brush strokes - but not too much.Now look at the colors - if they are all too regular - this will create too cartoony look, so i would createlayer above, rectangle select the area, then gradient - BW gradient from one side to another. Then set thatgradient layer as overlay, screen or even difference for crazy color changes. transparency to adjust. Suchpatches with gradients will then result in a smooth blend. you can choose only some of them as a painterwould - for example only blue so a sky will be smooth but the rest will be more defined.Gradients:
Normal:Reduced 47%1504 x 300 (58.46K)Add gradient layerReduced 47%1504 x 300 (37.18K)Set it as overlayReduced 47%1504 x 300 (58.82K)Painted by you:the preset like chalk or pastels are actually all painted - I took paper, got black crayon from my kids anddraw like 20 different patterns and crosshatches. (With the kids looking worried if I finally got mentaland play with crayons again) Scanned. this will then become my mask layer - bit work with levels andinverse to make it good black and white (white brush on black background). I repeated the same patternsfew times etc, so no need for 50 different ones.
Then colors are simply colors squares, then I applied gradient to some of them as described above.Simple color patches on Chalk
A different one, yet could be used with the same mask
In both ways the fifty patterns are from big ones to medium sized. the big ones will be used first. if I likeparticular color like blue, i will for example create big blue pattern then lighter blue smaller pattern - thiswill go to sky and will blend nicely.Each color should be a bit different - so not the smae blue but perhaps darker or lighter shade.The way you go from for ex. light large patterns to darker smaller patterns determine the style of painting- if it starts with lighter underpaint and then progress to darker details or vice versa.The detail brushes:next 50 brushes are for details - I spent most of the time on them as it is easy to create mess at this stage- this is crucial for well balanced image.usually very fine tiny black strokes with various shapes. Sometimes I added a little largersemi-transparent white or light patch there which will then "remove" color at this stage. But mostbrushes are different shades of dark color, some tiny strokes are also white in some styles and sometimesprimary color - flourishes like bright red specs, bright yellow brushes etc (ex. monet). But at his momentall are small.The transparency - the system disregards any brush stroke that has no pixels with 200 or more ofbrightness (0-255) so if a brush has no pixels in mask above 200 - it doesn't exist and will not be used.So you should design the mask where at least part of it has white.God thing is that if you produce a pattern that has good detail brushes you can use them elsewhere withlittle modifications (perhaps colors etc.)Now you do that and run it - watch what it does - some patterns will be not looking good - then you haveto work on its mask and color more.Now look at the color balance, see if there is some color group missing - does it create blue sky etc?think what style and what type of image is this for (landscape? still life?) each ghas different color needs.You may then replace some big brushes colors with others to balance the result.For example my inititial benson was yellow - brown as I actually folowed the colors of a bensonpainting. looked ok but nothing really extra. I started replacing colors, put some blue, red increasedsaturation - untill the result looked as I wanted - bright bold colors. Granted it is far from where I startedand the beson name just stuck even that it has now different qualities - and it is one I like maybe most.I worked on the benson on and off for maybe 3 days. Refining it etc. So don't expect to be ready in 30min.Each templates can be refined to better look, just need time.Eacfh style is different so look what the painter does, does he use large underpaint then starts usingdarker small strokes to bring out details? Or (like monet) he doesn't use dark small brushes at all - heuses bright small brushes so any shading has to be done on the underpaint level?
If you use the Rez Smart 50/50 setting then first 50 brushes are larger, last 50 brushes are smaller. Itdoesn't matter within the 50 the size of them, it just happened that I put larger on top row then smaller onnext etc. but they could mix within the 50. This is my modification, arcimbolder used all 100 brushes atsame time, you can also do that when you specify rez-smart none.It does take time to fine tune preset so don't be discouraged. All the presets look weird at first.This was my posting in the forum when I first began making templates , primarily about the details of creatingthe brush and color grids :NOTE: This tutorial is located here in the MMB forum :http://www.mmbforums.com/ipb/index.php?showtopic 22663&view findpost&p 133881here: http://www.mmbforums.com/ipb/index.php?showtopic 22663&view findpost&p 133893 and pic 22663&view findpost&p 133917I have been experimenting and have made several. First off, if you haven't looked at this page, it will behelpful. AOP File Details and Grid Template Be sure to download the grid template. I used Photoshopto create my templates. Open a new 3000 x 3000 file. Paste the grid you download in as a second layer.For my "color" file, I actually found a Greytag Macbeth color chart knockoff and cut and pasted 300 x300 squares from it onto the color template. I duplicated these squares several times in several differentrows. Then I used adjustment layers to lighten, darken, change hue, saturation, etc. to get a goodcross-section of colors. I have since made several of these color templates with different colorarrangements. Then I made a composite layer (Ctrl, Alt, Shift E on the PC). Then I used various plugins-- especially the free Paint Engine plugin -- to further modify these color squares. I'm sure you could dothe same with built-in filters in Photoshop as well. This provides color variations in your squares. I thenexperimented with adding layer styles incorporating patterns (I obtained some interesting results withcanvas brushstroke patterns). Play with the opacity of the pattern for different effects. Save your .psdfor further experimentation and do a "save as" to create a .jpg file which will be used for your .AOPfile.For the brushes, I created another 3000 x 3000 file and copied the grid png in as a second layer. Then Icreated a third layer and set my colors to the default black foreground, white background. Iexperimented with some free high res watercolor brushes I downloaded from various places on the 'net.Put one brush stroke per grid block. From my experimentation, it appears that the largest brushstrokesget used first and most often. Use much smaller strokes near the bottom of the grid (preferably overblacks, whites and a few accent colors), as these will be used to provide the detail. Once you get the
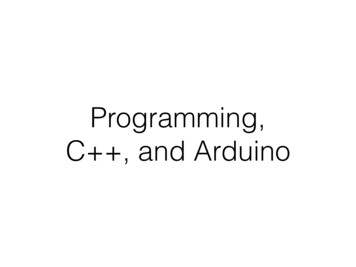
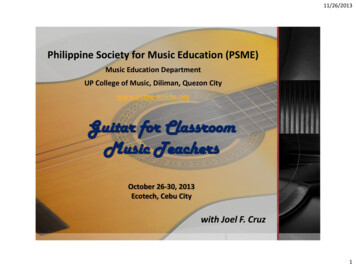
strokes looking like you want them, invert that layer (the brushstrokes become white and disappearuntil you do the next step). Add a new layer in between the grid and the brushstroke layer and fill thatlayer with black. Your brushstrokes will now be visible again. Save your .psd for furtherexperimentation and do a "save as" to create a .jpg file which will be used for your .AOP file.I would also suggest that you keep track of your naming conventions for the files and make notes ofthose that you use to create particular templates. I actually tried to incorporate the file names into the.aop file name. The reason for this is that once you have created an .aop, unless you go back to itimmediately in the same session, there is no way to get a listing for the files you used to create aparticular template. I learned that the hard way in the beginning.Here are samples of both a color chart and a brushes chart. I did not apply any layer styles or textureeffects to either file in case anybody wants to embellish them in creating their own templates. Have funexperimenting and please share any additional tips you come up with.
3000 x 3000 (116.98K)
3000 x 3000 (377.48K)
And finally , this was from a tutorial that I never quite got finished on additional details from making AOPTemplates :
Let me preface this by saying that I don't know enough about artists and "real" painting to be trying to emulate anyparticular artist. I am simply trying to create AOPs that are useful to me for making relatively believeable paintingsfrom photographs I have taken. That means fairly similar colors and enough detail to actually be able to tell whatthe picture is supposed to be.These tips by saying that my tips are observations based on my experience . Without definitive confirmation fromthe programmer, my observations may not be 100% correct in every respect. But since I have spent some timemaking notes so that I would remember this information the next time I sit down to create some AOPs , I thought Iwould share it so that others may not have to spend so much time.Thus, I use a pretty colorful palette. If I use multiple palettes, it usually has to do with texturization rather thancolor. If I want really different colors than I find in a photo, I just find another photo that has colors I would prefer toemulate and pick the Impression or Impression palette and select that photo as the palette. To me, it saves a lotof time in creating color palettes.One thing that I have found is the largest brushes get used the most. They use not only the color that matchestheir location in the color palette, but shades of that color and sometimes even other colors as well .I do think that the colors are used "top down" and as far as I can tell, the choice made in the "Rez Smart" boxmakes a difference on the middle rows. The top 4 (or 5 rows) of brushes are used first, no matter the colors. Thebottom 4 or 5 are used second. A brush needs to have at least one spot of pure white in it to be used, so if thereare more "gray" brushes that don't have at least one pixel of 255, that brush gets skipped altogether.My experience (somewhat patterned on examining the palettes in the original AOPs supplied by Oscar and by alot of trial and error), is that only the top 4 or 5 rows of brushes will be used during underpainting . If you use dryreveal, brush size doesn't seem to matter a great deal, but if you don't want the dry reveal step, then smallerbrushes at the bottom are better, particularly if you want the painting to have a lot of detail . You can mitigate theactual size or mix of brushes top to bottom somewhat by the settings used in the AOP for minimum and maximumbrush sizes.Regarding colors, my experience is that an all-over mix works best. I believe that you need a good mix of colors inthe last 4 rows, including a couple of blacks, for the best detail. I also try to have at least a row of very pale colors(yellow, red, green and blue particularly) for detail accents.Anyway, that's what I have experienced. And the bottom line really is that creating AOPs is a very subjectiveprocess and pretty much of a crap shoot that can suck away large amounts of your time . While it would be nice forOscar to chime in, I seem to remember that he has said before that a lot of it is trial and error . If you haven'talready done so, the best way to educate yourself is to take existing AOPs that have looks that you like and pickthem apart. Go into the AOP template maker and import them and study the settings. Likewise, use the program"jpegex" previously recommend here (or any program that provides the same functionality) and pull out the jpgs forboth the brushes and color templates from existing AOPs to see what Oscar and others have done . Most of all,have fun!!From the manual: (MW note: not sure if this applies if Dry Reveal is set to always runPreserve reveal Layer during Detail Paint/Min-MaxIf set the Dry reveal part will be preserved under the mask during detail paint - that means the detail paintwill paint less over the masked portrait area and more over the unmasked area (background). The Maxspecify how strong will be the detail brush outside Portrait mask area and the Min will specify howstrong will be painted inside the mask.This one drove me crazy for a while but the number of "Strokes Count" number in the "Default Template Settings"section of the Create AOP Template box equates to the "Nr. of Strokes" number WHEN THE CANVAS IS SET TO"STANDARD RESOLUTION 2.5 MPIX". If you change the canvas resolution to "Medium.", "High .", or
"UltraHigh .", that number will change correspondingly.
Modify the saturation level to make your colors "pop" (or to provide a more pastel feel).
The number in the box to the right of the saturation slider seems to equate to the number ( 100) in the Saturationbox under the "Default Template Settings" section of the Create AOP Template box.Changing levels appears to use more or less color from your underlying photo . Open a photo and from the mainDAP menu choose "Adjust\Levels". Moving the RIGHTHAND left and/or right side of the slider to alter thehistogram will give you some idea of the effect you might achieve by modifying the two levels parameters in the"Levels" section under the "Default Template Settings" section. You can experiment with the look you mightachieve by first going into the "Adjust\Levels" menu item and moving the left and right sliders. The numbers youset will equate to the Levels boxes under the "Default Template Settings" section of the Create AOP Templatebox.
The following settings/information apply to using the Dry Reveal step itself or to allowing it to be used if the usercreates a Mask:The opacity setting for Dry Reveal in the AOP equates to the slider available by right -clicking when Dry reveal isrunning in a painting
Clicking on the slider shows what reveal opacity you have selected . The left side of the slider (and lower numbersfor opacity in the AOP template maker) will bring back less detail . Conversely, higher numbers and clicking onthe right side of the slider brings back maximum detail .
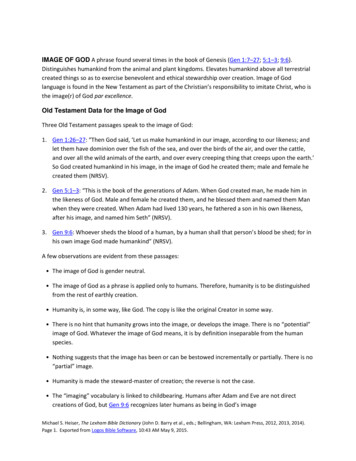
For the "Smooth" numbers, higher numbers appear to be more smooth (with less detail) -- picture below top isSmooth 10, Picture at bottom is Smooth 200. See more below
Below top is set on smooth 255, bottom is set on smooth 10 (much more detail).
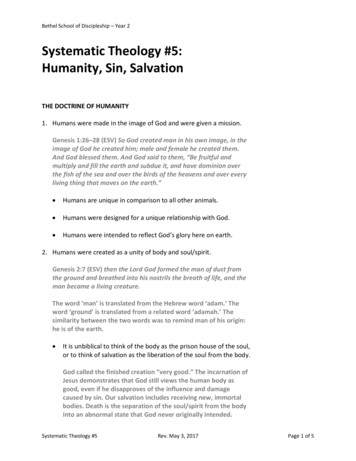
For the overlay setting, higher numbers will make the painting much darker .Top below is overlay 255, bottom is overlay 10
Happy Template Making!
Each color should be a bit different - so not the smae blue but perhaps darker or lighter shade. The way you go from for ex. light large patterns to darker smaller patterns determine the style of painting - if it starts with lighter underpaint and then progress to darker details or vice versa. The detail brushes: