Transcription
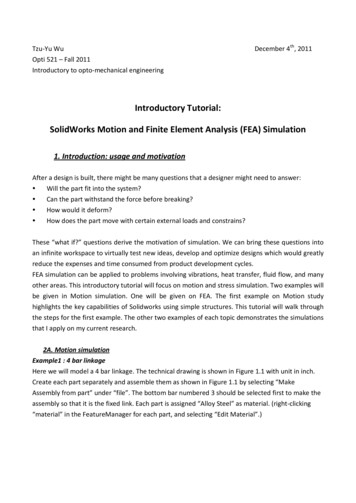
How to Prepare Your Cards for Press Using InDesignThis Tutorial is Divided into Sections:What do I Need?1.What do I Need? What is InDesign?2.How to start a new document with InDesign(the template explained)This basic tutorial will offer you some advice on how to useInDesign to create your content and prepare print-ready PDF filesfor DriveThruCards. It will address how to set up one digital file sothat both sides of the card are printed in full color.3.What you need to know before you begin(more about recommended file specifications)4.Getting to Know Your Workspace5.Adding Text with InDesign6.Formatting Text and Making Style Sheets7.Adding Art with InDesign8.Creating Master Pages with InDesign9.Exporting your InDesign file as print-ready color PDFThe screenshots shown in the tutorial use InDesign CS 5.5 forMac OS. If you are using a different version of the software someof the instructions and screenshots may be slightly different, buthopefully you can find the right feature in your software version.What is InDesign?InDesign is a desktop publishing application which is availablealone or as a component of the Adobe Creative Suite. It isindustry-standard softwear and is available for both Windowsand Mac OS.InDesign is available for purchase from Adobe. Abobe doeshave educational discounts on its software, if you are ableto take advantage of them. You can also gain access to itssoftware by subscribing to the Adobe Creative Cloud, which ispaid for by monthly fee.10. Packaging your Work for Archiving11. Tips and Things to Remember12. I need more help!Adobe: http://www.adobe.comAdobe Creative htmlAdobe Creative html1
How to start a new document with InDesignThis is the beginning of the step-by-step process for creating a new document for your cardsPlease note: For your convenience, we have created a templatefile to make your work easier. You can find this template under theCard Printing section of your Publisher Menu, on your Accountpage at DriveThruCards.bleed areaStarting your new file from a template This is required.The bleed mustmeasure ⅛” (0.125”)past the trim line onall four sides.First, open InDesign. Then, in the File pull-down menu, selectOpen and then navigate to where you have saved yourdownloaded template file. Open it.Click the Windows pull-down and open the Properties window. Including the bleed,your final size shouldmeasure 2¾” by 3¾”(2.75” by 3.75”).Let’s take a look at this template. What are all these lines? The blue area edged by the dotted black line is the safe areafor your text, logos and any important images. If any of theseelements run outside of this area, it risks being trimmed off whenthe cards are cut after printing. If your art does notbleed, include a whiteor black area that willextend to this edge. Do not set a die-cut forround corners in thelayout. The final PDF file mustnot have crop marks.trim line The edge of the blue area is the trim line. Literally, this isapproximately where the paper will be cut or trimmed offafter the cards are printed. The trim area shouldmeasure 2½” by 3½”(2.5” by 3.5”). The pink space is the bleed area. Background images or colormust extend to this line in the file, which you can see is outside ofthe paper trim line. This ensures that there is no unprinted whitemargin around the edges of your finished cards. Every thing outside thedotted line will be cut off.safe area The safe area should All text, importantimages, and logosmeasure ⅛” (0.125”)should remain insideinside the trim linethis pink area.on all four sides.The total safe areameasures 2¼” by 3¼”(2.25” by 3.25”).2
What you need to know before you beginMore about the recommended specificationsThe order of your document pages for correct back-to-front printingpage 1CARDBACKPlease create one file for your entire deck of cards. The order of the cards in the final PDF will be theorder of the finished cards in their packages.To set up your file, you must order the pages with one card back and then one card front for eachcard in the deck. See the screenshot to the right for a sample view of what your multi-page documentshould begin to look like.Understanding the document order of card backs and fronts is important. This will make it veryeasy to design and apply master pages for the correct card back and front pages, which we willcover next in this tutorial.page 2CARDFRONTCards do not need to have a common border color between their backs and fronts.Your image files need to be high resolutionThe images you will be using for your cards, regardless of front or back placement, need to be highresolution, which is at least 300 dpi. The physical size of the image at 300 dpi needs to be at leastthe same size as the printed card or larger.For example, if your background image is 300 dpi with a physical size of 3” by 4”, you are good to gosince that is larger than the card. If your background image is 300 dpi but measures 1½” (1.5”) by 2”,then you have a problem. To scale up this image to meet the size of the actual printed card, your imagewill be degraded because the physical size of the image is not large enough.page 3CARDBACKpage 4CARDFRONTpage 5CARDBACK72 dpi120 dpi300 dpi3
Getting to Know Your WorkspaceAdding Text with InDesignThis is just a few words to orient you to your workspace. You willuse the Toolbar, the Control Bar at the top of your workspace,and various palettes throughout your document production. Whatremains open in your workspace is customizable. Be sure toexplore the Window drop-down menu to see what palettes youmay need to make your work faster.First, click to select and use the Rectangle Frame Tool in the Toolbar.Your cursor will become crosshairs. Click and drag on the page toplace a text frame on your master page. You can set the size andframe properties in the Control Bar, or you can manually resize it byclicking and dragging the blocks or handles on the Frame box edges.control bartoolbarpaletteshandlespasteboardHere’s a tip!This is the area outsideof the page and bleed.If you select Snap toGuides from the Viewmenu, under Grids &Guides, the box you drawshould automaticallyalign (or snap) right to theguides already set up inthe template for the safearea, trim, or bleed.As you become familiar with yourneeds, you’ll be able to hide, show,or combine the palettes mostrelevant to your production process.4
Adding Text (continued)Then, select the Type Tool from the Toolbar and click into the frameon the page. Your cursor will become a blicking text cursor insidethe box. Now, you’ll also notice the Control Bar has also changedto reflect your use of the Type Tool. Paragraph and CharacterFormatting options are now available.To place text, open the file with your text content, select the textyou want to place, and copy it. Go back to your InDesign file andclick inside the text box, right-click or control-click and then choosePaste to import and place all of the selected text. (Paste withFormatting may be an available option, but it’s not advisable.)Paste with Formatting?Why not?Paste with Formatting doesn’twork with all text sources. Italso only copies local, “hard”formatting. It’s better to format textusing style sheets in InDesign.This will allow you to makedocument-wide, “global” changeslater with one simple command.What does that mean?If you paste more text than the textframe can hold, a little crossed redbox will appear in the lower rightcorner to alert you.5
Adding Text (continued)Another way to place text, which is helpful if you have a lot of textto import, is to use the Place command under the File pull-downmenu. You can import Word documents, text files, and rich textfiles. Navigate to the document you’d like to import. Make sureShow Import Options is checked at the bottom of the dialog box.The dialog box that appears next will give you some control overhow the imported text is handled. Make sure Typographer’sQuotes are turned on. Although you can preserve the styling onthe imported text, it’s better to remove them and reassign thoseattributes in InDesign.6
Formatting Text andMaking Style SheetsAdding Text (continued)If the amount of text you have imported is too much for the frameto contain, you will see the small, crossed red box in the lowerright-hand corner. If you click that icon and then click outside theframe, a new text box is added and the overflow text will appear.To view the link threads between these boxes, turn on Show TextThreads under Extras in the View pull-down menu.Style sheets are templates for fonts and their formatting. You cancreate styles with specific attributes, save them, and then apply themdocument-wide with a few mouse clicks. InDesign lets you specifyboth Paragraph and Character Styles; Paragraph Styles can beapplied to a paragraph or a range of paragraphs, while CharacterStyles are applied to single words or a string of words.7
Formatting Text and Making Style Sheets (continued)First, we’ll tackle Paragraph Styles. Select the text you would liketo change. You can style the text initially in the Control Bar usingoptions available through the Character and Paragraph icons.When it’s close to how you would like it, select the text you have justaltered, and then expand the icon in the upper right-hand corner ofthe Paragraph Styles palette, and choose New Paragraph Style.Name the Paragraph Style something that will easily identify it later.Now look at the Style Settings. You’ll notice it has already picked upthe attributes of the text you fixed and selected. You can further alterthe current Paragraph Style in this dialog box. When you’re done,click OK to save it. Afterward, make sure to apply this style to youraltered paragraph when the style is saved.8
Formatting Text and Making Style Sheets (continued)Things to avoid as you style text in your document:Similarly, Character Styles may be made, saved and applied. Usethis to italicize or bold words, make words a different color, orunderline certain words. To change fonts or attributes, just update your Style Sheets.ghout your document.The changes will be made globally throughoutWidows: One single word or line at the bottom of a column of textOrphans: One single word or line at the top of a column of textHyphens between columns of textSuggestedParagraphStyle attribute:Choose Left Justifyunder Indents andSpacingSuggestedParagraphStyle attribute:Choose for legibility!Specify Keep withNext: 2 Lines underKeep Options.Your body text will be small, so use afont that is easy to read and withoutmany flourishes. Industry standardfor size is 10 to 12 points withleading set to auto or no less than2 points more than the font size.This will help youavoid widows andorphans in longertext passages.9
Adding Art with InDesignStart by adding a Rectangle Frame the same way you did whenyou previously added a frame for text. To turn this frame into anImage Frame, click to select the frame using the black arrow, orSelection Tool, from the toolbar. Then, open the File drop-downg youymenu and select Place. Navigate to the location of the imagewould like to insert on the page.If you take a look at your Control Bar, you can see that the imagewas imported at 100% of its size and was placed in the center ofthe Image Frame. It was placed in the center because this wasthe Reference Point assigned to it in the Control Bar. Most of theimported image is outside of the Image Frame’s viewable area, sononow we’re going to fix that by scaling the picture to the box.There are 2 different arrows in the Toolbar:The black arrow, the Selection Tool, will select theoutside frame of your image box. The smaller, whitearrow, the Direct Selection Tool, will select the graphicobject placed inside the image box.10
Adding Art (continued)Fill Frame Proportionally: Under the Object pull-down menu, if youchoose Fitting, then Fill Frame Proportionally, the image will autofitin proportion to the largest measure of the box. See the outline ofthe image in the Image Frame below.Fit Content Proportionally: Under the Object pull-down menu, if youchoose Fitting, then Fit Frame Proportionally, the image will autofit inproportion to the smallest measure of the box. If you choose to usethis, use the Fit Frame to Content command next. Your image framewill autofit to the size of the newly scaled graphic image.11
Adding Art (continued)Fit Content to Frame: If you choose Fit Content to Frame, theimage will autofit out of proportion to the measurements of thebox. It is not recommended to scale your images out of proportionmore than 2%, especially when the images are people or figures.They will look noticably stretched.Here is an example of a graphic stretched out of proportion. You’llnotice the broken chain icon to the right of the proportion fields inthe Control Bar. This lets you know that if the image is scaled, itwill not be constrained proportionally.What you should know.Images should be placed at 100%or less. If they must be scaledup, it should never be more than102%. Any more than this couldresult in image degradation.12
Creating Master Pages with InDesignMaster Pages allow you to place borders, text and other informationjust once in the file. Then those elements will appear on all of thepages you select, in the exact same spot. It’s very useful for recurringitems, like repeating card backs.Then, name your new Master something easy to recognize.Make sure to select Based on Master: A-Master when you makea new Master Page in your downloaded template document. Thisway, the correct measurements for the safe area are applied toyour new Master Page.First, open your Pages Palette and select New Master.If you can’t find your Pages palette,look under the Window pull-downmenu. You can open multiplepalettes at once and customize yourworkspace for maximum efficiency.13
Creating Master Pages (continued)Click on the Master Page you just made to make sure you’reactually working on that page. It will highlight in the PagesPalette. Now, begin your work by adding text, images, orgraphics. When you are done, you’ll be ready to apply thistemplate page to your document.With your Master Page highlighted in the Pages Palette, expandthe pull-down menu from the icon in the upper right-hand corner.Select Apply Master to Pages.If you’re not sure what page you’reon, this corner will tell you.14
Creating Master Pages (continued)In the dialog box that pops up, you can list the page numbers youwould like to apply this Master Page to.Now, as with text Style Sheets, if you need to make changes torecurring elements in your document, you can just update yourMaster Page. The changes automatically update throughout yourdocument, on all of the pages styled with that Master.Alternately, with your Selection Tool, you can grab the Master Pageicon from the Pages Palette and drag it on top of the page you wishto apply it to. It will automatically apply the Master to that one page.15
Exporting Your InDesign File as a Print-Ready Color PDFWhen your work is complete, do a quick check to make sure thereare no errors in the document, like missing fonts or broken imagelinks. Look at the lower left-hand corner of your workspace. Preflightwill automatically give you the number of errors that will need fixing.Double-click to open the Preflight panel and correct any errors.After you’ve fixed your document, you’re now ready to export yourInDesign file as a print-ready PDF.Go to the File pull-down menu and select Export.16
Exporting as a Print-Ready Color PDF (continued)Next, in the Export dialog box, name your PDF and then choose aplace to save it. Click the Save button.The Export Adobe PDF dialog box will open next. The default viewwill be the General options tab. Click the Adobe PDF Preset pulldown menu and select PDF/X-1a:2001. This sets the PDF standardto PDF/X-1a:2001 for print. Modify this preset by checking the boxnext to Optimize for Fast Web View under Options.Make sure the Adobe PDF (Print) format is selected.17
Exporting as a Print-Ready Color PDF (continued)This next step is very important. Please follow it carefully.Click the Marks and Bleeds tab in the Export Adobe PDF dialog boxto view the options. Click to select Use Document Bleed Settings.Make sure the bleeds are set to 0.125” on all four sides. Do not checkany other boxes or fill out any other information on this page.Next, click the Export button to make your PDF. It will beprocessed and saved to the location you have indicated.That’s it! You have created a print-ready color PDF of your card deck!What do I do next?Once you have your finished print-ready PDF of your entire carddeck, it’s time to upload them! Go to the CARD PRINTING sectionof your publisher menu on the Account page at DriveThruCards.Use the “Upload and Manage printed card products” tool. This toolwill walk you through the process of uploading your print PDF fileand ordering a physical proof of your cards.When you are done with your card layout and have made anduploaded your PDF, you may also want to Package your file forarchiving. This is a very good idea because it collects all of thelinked images and file fonts into one tidy and convenient file. If youever have to go back for updates or alterations later, you won’t haveto search for missing linked images or fonts.18
Packaging Your Work for ArchivingFirst, make sure your file has no errors in the Preflight panel in thebottom left-hand corner of your workspace. Then, select Packagefrom the File pull-down menu. The Package dialog box will opennext. The Summary tab gives you an overview of your file. It alsolists anything missing, or modified but not updated. Click thePackage button, and then click past the next few windows.When the Create Package Folder dialog box appears, choose alocation to save your package. Rename the folder, if you chooseto. Make sure Copy Fonts, Copy Linked Graphics, and UpdateGraphic Links are all checked. Then, click the Package button inthe lower right-hand corner of the dialog box. InDesign will collectall of your file bits into one place for you.19
Tips and Things to RememberI Need More Help!About SpecificationsI have questions that aren’t covered here.All images must be 300 dpi/ppi resolution. The physical size ofthe image should at least be the size as it appears on the card.To contact Publisher Services, please email brian@onebookshelf.com.Brian will do his best to help you and answer any questions youhave that are not covered in this tutorial. Your questions will help usimprove this tutorial, so it answers more questions for everyone.All images should be CMYK. Do not use RGB or Lab colors.The colors may shift unpredicably during the export to printready PDF process. Preferred image formats are TIFF or EPS files. Refrain from usingJPG or PNG files, which are more suitable for web publishing. Header fonts shouldn’t be ridiculously large. The optimal rangeis 24 pts to 14 pts. Body Fonts should be 10 pts to 12 pts. Linespacing or leading is usually 2 points more than the font size. In making your text fit into small spaces, avoid Tracking your textmore or less than 20%. It will look too squished or too loose. Avoid widows and orphans: leaving a single word at the end of aparagraph or a single line at the top or bottom of a column of text. Black text should be made with a 100% black swatch, with totalCMYK values of 0% Cyan (C), 0% Magenta (M), 0% Yellow (Y),and 100% Black (K). Black elements should NOT be built in “Registration” black orwith the 100% black swatch used for text. They should be builtout of “Rich” black. For best results, we recommend the CMYKvalues of 60% Cyan (C), 40% Magenta (M), 40% Yellow (Y), and100% Black (K). CMYK total value should NOT exceed 240%. Text should be at least 0.125” from the trim edge. Embed all fonts used in the document (all font families used,including all screen and printer fonts). Do not add information or printer marks such as crop marks,web-press comments, etc.If you have decided that you don’t care to do your own file layout, youcan find people with professional skills and contract them to createyour print files. The cost of this work depends on how much of thework you do yourself before handing it over.We can recommend someone for layout if you would like. Pleasecontact Publisher Services for details.You can also find freelance layout professionals at sites likewww.elance.com.20
7. Adding Art with InDesign 8. Creating Master Pages with InDesign 9. Exporting your InDesign fi le as print-ready color PDF 10. Packaging your Work for Archiving 11. Tips and Things to Remember 12. I need more help! What do I Need? This basic tutorial will offer you some advice on how to use InDesign to create your content and prepare print .
