Transcription
MODEL 3 TANKLESS ELECTRIC WATER HEATERUser Manual & Installation GuideVersion 02162022ALWAYS read and follow thisguide before installing or using theMODEL 3. Save for future reference.Scan to ensure you have the mostrecent version of this User Manual& Installation Guide.
TABLE OF CONTENTSINTRODUCTIONpg 04About your MODEL 3 Water Heaterpg 04Registering Your Unitpg 04IMPORTANT SAFETY INFORMATIONpg 04TECHNICAL DATApg 08TROUBLESHOOTINGpg 08INSTALLATION GUIDEpg 09Intended Usepg 09What’s Included in the Boxpg 09Before Installationpg 09Mounting Information & Instructionspg 11Plumbing Information & Instructionspg 14Electrical Information & Instructionspg 16MAINTENANCEpg 21MODEL 3 MENU SETTINGSpg 22Adjusting the Setpoint Temperaturepg 22Main & Settings Menu Flowchartpg 23Settings Menupg 24Changing From Fahrenheit to Centigradepg 24Determining Your Unit’s Firmware Versionpg 24Adjusting the Amperagepg 24Accessing the Maximum Current Menupg 25Accessing the Voltage Menupg 25Accessing the Wi-Fi Settings Menupg 26FCC RULESpg 27Breaker must remain OFF until installation is complete.
DOWNLOADING THE HEATWORKS APP AND CONNECTING YOUR UNIT TO WI-FIpg 28Helpful App Tipspg 31Eco-wise Subscription App Featurespg 32LIMITED WARRANTY AND LEGALpg 34www.myheatworks.com 3
INTRODUCTIONABOUT YOUR MODEL 3 WATER HEATERThe MODEL 3 Water Heater is a tankless electric water heater which provides endless hot water fora house, apartment, or a point-of-use. Unlike a conventional storage type water heater, the MODEL3 does not store a large volume of hot water. Instead, water is heated instantaneously as it flowsthrough the unit using Ohmic Array Technology . This patented process replaces metal heatingelements found in other water heaters with a precisely engineered array of graphite electrodes anda digital control system to provide unlimited hot water on demand.REGISTERING YOUR UNITIf you purchased the MODEL 3 directly from Heatworks or via an online verified third-partyreseller: You must register your unit within 90 days from date of sale to activate the 6-year full unitreplacement warranty from the date of registration and/or be eligible for the extended warranty. Ifyou do not activate your warranty within 90 days, your MODEL 3 Water Heater will be covered fromthe date it was manufactured. Once registered within the 90 day window, you will then have theoption to purchase a 4-year full unit replacement extended warranty. To complete the registrationprocess, go to www.myheatworks.com/pages/registration.If the MODEL 3 was just installed by a verified third-party reseller or if you have just moved intonew construction with a MODEL 3 already installed: You must register your unit within 90 daysfrom date of install or property purchase to activate the 6-year full unit replacement warrantyfrom the date of registration and/or be eligible for the extended warranty. If you do not activateyour warranty within 90 days, your MODEL 3 Water Heater will be covered from the date it wasmanufactured. Once registered within the 90 day window, you will then have the option to purchasea 4-year full unit replacement extended warranty. To complete the registration process, go to www.myheatworks.com/pages/registration.NOTE: Should a replacement unit be required, the 6-year full unit replacement warranty (andextended 4-year warranty, if purchased) does NOT restart. The original warranty (whether it wasstarted from the registration date or manufacturing date) remains in effect.IMPORTANT SAFETY INFORMATIONWhen using electrical appliances, basic safety precautions to reduce the risk of fire, electric shock,or injury to persons should be followed, including:1.READ ALL INSTRUCTIONS BEFORE USING THIS WATER HEATER.2. This water heater must be grounded. Connect only to a properly grounded electrical supply.See “ELECTRICAL INSTALLATION INSTRUCTIONS” found in the Electrical Information &Instructions section.3. Install or locate this water heater only in accordance with the provided installation instructions.4. Use this water heater only for its intended use as described in this manual.5. Do not add chromates, boiler seal or any other chemicals to the system that could contaminatethe potable water supply.4 www.myheatworks.comBreaker must remain OFF until installation is complete.
6. As with any appliance, close supervision is necessary when used by children.7.Do not operate this water heater if it has been damaged or dropped, if it is not workingproperly or if the wiring is damaged.8. This water heater should be serviced only by qualified service personnel.SAVE THESE INSTRUCTIONS.MODEL 3 electric water heaters are NOT suitable for use in manufactured (mobile) homes.CALIFORNIA PROP 65WARNING: This product can expose you to chemicals including unspecified leadcompounds, which are known to the State of California to cause cancer and birth defectsor other reproductive harm. For more information, go to P65Warnings.ca.gov.CERTIFIED TO ANSI UL STANDARD 499.TESTED AND CERTIFIED TO NSF/ANSI 372, DRINKING WATER SYSTEMCOMPONENTS - LEAD CONTENT.WATER TEMPERATURE SAFETYWater temperature over 125 F (52 C) can cause severeburns instantly or death from scalds.Children, disabled, and elderly are at highest risk of beingscalded.See instruction manual before setting temperature atwater heater.Feel water with your elbow before bathing or showering.Temperature limiting valves are available, see manual.Water temperatures over 125 F (52 C) can cause severe burns instantly or death from scalding. Ahot water scalding potential exists if the thermostat on the appliance is set too high.Households with small children, disabled, or elderly persons may require that the thermostat be setat 113 F (45 C) or lower to prevent possible injury from hot water.Never leave small children, disabled or elderly persons unattended in a bathtub or shower.The thermostat was set at 120 F (49 C) at the factory. As shown in the table on the next page, hotwater can cause first degree burns within seconds depending on the temperature.www.myheatworks.com 5
SAFETY MESSAGESThroughout this manual DANGER, WARNING, CAUTION, NOTICE and the Safety Alert Symbol willbe used.This is the Safety Alert Symbol. It is used to alert you to potential personal injury hazards.Obey all safety messages that follow this symbol to avoid possible serious injury or death.This Safety Alert Symbol precedes any safety message about risk of personal injury. It mayalso be accompanied by one of the following signal words.DANGER: Indicates a hazardous situation that if not avoided will result indeath or serious injury.WARNING: Indicates a hazardous situation that if not avoided couldresult in death or serious injury.CAUTION: Indicates a hazardous situation that if not avoided could resultin minor or moderate injury.NOTICE: Indicates information considered important, but not hazardrelated (e.g. messages relating to property damage).6 www.myheatworks.comBreaker must remain OFF until installation is complete.
SYMBOL INDEXHot Water Hazard. Water temperature over 125 F (52 C) can cause severeburns instantly or death from scalds.Electric Shock Hazard.Earth; ground.Read manual.www.myheatworks.com 7
TECHNICAL INFORMATIONPRODUCT INFORMATIONSizeWeightConnectionsDigital ControlsWarranty11”x16.5”x10” (Includes PRV)35 lbs3/4” NPT male connectionsLED panel, Full Wi-Fi connectivity,Mobile app6-year full unit exchange, 4-yearextended warranty availableOPERATING RANGESVoltageFrequencyPowerWorking PressureRequired WaterConductivityCurrent208 V, 220 V, 240 V50/60 Hz6.2-24 kW30-75 psi (2.06-5.17 bar) 206-517 kPa80-2000 μS30-100 ATROUBLESHOOTINGIf your MODEL 3 Water Heater display blinks red and displays an error code, please call our supportteam at 888-506-2821 or visit our support page at www.myheatworks.com.ALWAYS turn OFF the circuit breaker supplying power to your MODEL 3 and call 888-506-2821 ifyou experience any abnormal operation.Any attempt to service your MODEL 3, including but not limited to, opening the caseworkof the unit or the pressure vessel will void your warranty and deem the unit nonrefundable.8 www.myheatworks.comBreaker must remain OFF until installation is complete.
INSTALLATION GUIDEINTENDED USEThe only approved use of this appliance is to heat potable water for residential purposes andsupplying one or more draw-off points. It is not appropriate to use the MODEL 3 for any otherpurpose. If you are unsure about your intended application or installation, please call 888-506-2821or visit our support page at www.myheatworks.com.WHAT’S INCLUDED IN THE BOXBefore removing the old tank water heater and beginning installation of the new unit, unbox theMODEL 3 and check that you have the following: One (1) MODEL 3 Water Heater with pressure relief valve One (1) mounting bracket with two (2) pre-installed mounting bracket screws One (1) MODEL 3 Water Heater Quick Start Guide Two (2) 3/4” brass nipples One (1) water pressure regulator preset to 50 psi with o-ring and plumbing unionBEFORE INSTALLATIONIn general, the MODEL 3 can be installed in the same location where the old tank water heater waslocated or depending local codes, in a more centralized location in your home. However, to ensure safeperformance and keep the warranty in effect, the following precautions must be observed:ALWAYS read this manual thoroughly and completely prior to installation & use. Failure to followinstructions could cause property damage, serious personal injury, or death.A licensed plumber and a licensed electrician are required to install the unit and the installationmust comply with all national, state, and local plumbing and electric codes. Proper installation is theresponsibility of the installer.Always read this manual before installing the MODEL 3. If you do not follow the Important SafetyInformation or the instructions outlined in this manual, your MODEL 3 may not operate properly and itcould cause property damage, serious bodily injury and/or death. Heatworks will not be liable for anydamage because of failure to comply with the installation and operating instructions in this manual.The installer should leave these instructions with the consumer after installation and demonstration.By installing this product, you acknowledge the terms of the manufacturer’s warranty. Once the heateris installed, do not return product to the place of purchase.If you have any questions regarding the installation, use or operation of this water heater, please callour customer support team at 888-506-2821 or visit com 9
SELECT INDOOR MOUNTING LOCATIONONLY install INDOORS to prevent fire, serious injury, death or property damage.MODEL 3 electric tankless water heaters are NOT approved by the U.S. Departmentof Housing and Urban Development (HUD) for use in manufactured or mobile homes.To install MODEL 3 water heaters in manufactured or mobile homes, a manufacturerwould need to request and obtain HUD approval through an Alternative Constructionletter in accordance with 24 CFR § 3282.14 of HUD’s Manufactured Home Procedural andEnforcement Regulations.MODEL 3 electric tankless water heaters may be installed in modular homes if and only ifthe modular homes are built following state and local codes. The MODEL 3 is listed as UL499 compliant.FREEZE PREVENTIONThe MODEL 3 should never be exposed to freezing conditions. Damage to the water heater asa result of freezing will not be covered under the warranty. The use of chemical agents such asantifreeze are not allowed and may damage the internal components of the water heater.To prevent fire, serious injury, death or property damage: DO NOT install this product in a location where it may be subjected to freezing temperatures. If the water inside your tankless water heater freezes, it can cause severe and permanentdamage that is not covered under your warranty. DO NOT power water heater on if you suspect it may be frozen. Wait until the unit hascompletely thawed before turning unit on.MOUNTING CONSIDERATIONS Locate the water heater in an area that provides easy access for any service or maintenance Insulate hot water pipes below 36 (0.9 m) to reduce the risk of burns for children. Make sure thewater heater and hot water outlet pipe are out of reach of children, so children are not able totamper with the temperature controls or injure themselves by touching the hot water outlet pipe.The outlet water pipe can get very hot. This product does NOT require venting. DO NOT install in direct sunlight. AVOID installing your tankless water heater in a location prone to excessive humidity, moisture, ordust, or in an area where it may be splashed with water or other liquids. DO NOT install under water pipes or air conditioning lines that might leak or condense moisture10 www.myheatworks.comBreaker must remain OFF until installation is complete.
that could then drip onto the heater. DO NOT install above electrical boxes or junctions. Your water heater must be located in an area where leakage from the unit or the connections will notresult in damage to the area adjacent to the water heater or to lower floors of the structure. Where suchareas cannot be avoided, it is recommended a suitable catch pan that is connected to an adequate drain,be installed under the water heater. Make sure to follow all code requirements for such installations asrequired for your area. Alternatively, you could install an active water leak detector and shutoff valve designed to turn off yourwater supply if a leak is detected.MOUNTINGYour tankless water heater should be secured to the mounting surface using the mounting bracket with two (2)pre-installed mounting bracket screws. ONLY mount heater in a vertical position with the water fittings locatedon the bottom of the heater.CORRECTINCORRECTINCORRECTRECOMMENDED MINIMUM CLEARANCES 12” (305 mm) above and below the heater 12” (305 mm) in front of and to the sides of the heaterFlammable materials should be kept at least 24” (610 mm) away from your water heater and the hotwater outlet pipe.See measurements of the MODEL 3 unit on the next page.www.myheatworks.com 11
FRONT VIEW16.5”11.0”14.6”13.2”12” MINCLEARANCECOLD INLET3/4” NPTHOT OUTLET3/4” NPTSIDE VIEW10.0”L1GROUNDL2ELECTRICAL STRAINRELIEF NOT INCLUDED.DIAMETERS - 1.35”, 1.7”12 www.myheatworks.comBreaker must remain OFF until installation is complete.
MOUNTING INSTRUCTIONSSTEP 1The mounting bracket is attached to the back of the unit. Remove by unscrewing the two (2)mounting screws located underneath the unit.Mounting bracketMODEL 3 rear viewSTEP 2Make sure to allow to access the service access panel on the right side of the unit, as well as thefitting connections located on the bottom of the unit.Using the appropriate hardware (not included), mount the bracket to wall studs, a structuralmember, or with wall anchors able to support 40 pounds and appropriate for the type of wallsurface if there are no wood studs behind the surface.Make sure the mounting surface is solid and secure, and ensure that the mounting bracket is levelprior to securing.STEP 3The MODEL 3 unit has one (1) large slot on its back panel that will fit on the two (2) tabs locatedtowards the top of the mounting bracket.Lift the MODEL 3 unit flush with the mounting bracket, slightly above tabs. Slowly lower downuntil it is resting on the mounting bracket tabs.Line up the screw holes on the bottom of the unit with the corresponding holes on the lower lip ofthe mounting bracket. Slide unit left or right on the tabs if necessary.Secure the MODEL 3 to the mounting bracket lip using the two (2) screws removed in Step 1.www.myheatworks.com 13
PLUMBING INSTALLATIONHeatworks requires this product be installed by a licensed and qualified plumber in accordancewith all applicable national, state, provincial, and local plumbing codes.INSTALLING TWO OR MORE MODEL 3 UNITS IN SERIES VERSUS PARALLELIf considering installing two MODEL 3’s next to one another in a dwelling, we recommendinstalling MODEL 3’s in series instead of in parallel. In our experience, it is difficult to balance flowperfectly if installing MODEL 3’s in parallel.SAND FILTER FOR WELL WATERHeatworks recommends installing a sand filter on the water supply line when using a well watersupply or other water supply that may have sediment.WATER PRESSURE REGULATORThe MODEL 3 comes with a water pressure regulator. To reduce the risk of water pressurefluctuations that can go unnoticed by the homeowner, Heatworks recommends installing thispressure regulator on the COLD INLET side of the MODEL 3. Ensure the plumber’s tape stays clearof the first inlet thread to avoid tape entering the inlet. Place the included O-ring in the recessedportion of the pressure regulator and thread the regulator into the union. If possible, lube theo-ring before installation.The regulator is factory preset to 50 psi (345 bar), 345 kPa. To adjust pressure setting, loosen thelock nut and turn the adjusting bolt clockwise to increase pressure, counter clockwise to decreasepressure.Any time a reducing valve is adjusted, use a pressure gauge to verify the correct pressure setting.Do not bottom out the adjusting screw on spring cage.WATER CONNECTIONS DO NOT install a check valve within 10 feet of the inlet. DO NOT apply heat or solder to any connections or pipe if they are already connected to theMODEL 3. Heat from soldering may damage the MODEL 3 and void the warranty. ONLY use Teflon tape on pipe threads. DO NOT use pipe dope. The pressure relief valve must remain installed. Removal of or tampering with the pressurerelief valve will void the warranty. A suitable alternative temperature and pressure reliefvalve may be required to meet installation codes in your area. If one is required, installthe temperature and pressure relief valve in accordance with local codes and check itoperates correctly and that air is purged from the valve prior to installing the water heater.When connecting to Flex or High Temperature CPVC pipe, Heatworks recommends using atemperature and pressure valve for added safety.NOTE: Installations in the Commonwealth of Massachusetts requires a pressure relief valveinstalled on the COLD INLET water side by a licensed plumber. Please check your local installationcodes for any special requirements.14 www.myheatworks.comBreaker must remain OFF until installation is complete.
The maximum operating pressure for the MODEL 3 pressure vessel is 75 psi (5.17 bar, 517 kPa).If water pressure is higher, a pressure regulator or reducer (included in packaging) must beinstalled on the inlet side of the unit. The pressure relief valve (PRV) installed on the MODEL 3outlet is rated at 75 psi. While the included pressure relief valve is rated at 75 psi, in order toreduce the likelihood of false PRV discharges, Heatworks recommends not exceeding anincoming water pressure of 70 psi to the inlet of the MODEL 3. Any time a reducing valve isadjusted, use a pressure gauge to verify the correct pressure setting. Do not bottom out theadjusting screw on spring cage. Flexible water heater hoses are recommended (minimum of 18” in length) that are easilydetachable, such as braided steel flexible water heater connectors. Standard IEC 60335-2-35,Clause 7.12.1 requires this appliance be permanently connected to the water main and notconnected by a hose-set. Water heater connection hoses are excluded from this requirement aslong as a new set is used for the installation. DO NOT use plastic piping within three feet of heater. Heatworks does not recommendinstalling PEX or PVC direct to their products. When installing PEX or PVC piping, pleasecontact material manufacturer for recommendations/requirements and ensure it is compliantwith your local plumbing codes. Heatworks recommends all the water pipes or hoses within3’ (1m) of the COLD INLET and HOT OUTLET connections be rated for high temperatureapplications with a 150 F (66 C) minimum. Manual shut-off valves (ball valve) should be installed on the COLD INLET and HOT OUTLETof the water heater. Check the pressure of the main water supply. To operate correctly, the heater needs theoperating pressure 30 psi, (2.07 bar), 206.84 kPa.INSTALLATION INSTRUCTIONSALWAYS flush the lines to eliminate all plumbing paste or residue in the lines caused by anywelding or soldering before connecting pipes to the water heater. Failure to flush the lines maydamage the MODEL 3 and void the warranty.Before proceeding with the installation: Flush cold supply line Close the main water supply valve Open a water faucet to relieve the water pressure and then close the faucetSTEP 1Connect the HOT WATER supply line to the waterheater HOT OUTLET connection at the bottom ofthe Brass T fitting, located on the right side of theheater when facing the unit.www.myheatworks.com 15
STEP 2Connect the inflowing cold water supply to the COLD INLET connection on the unit.NOTE: Ensure the plumber’s tape stays clear of the first inlet thread to avoid it entering the COLD INLET.When connecting the inlet water pipe to the unit, use a wrench to hold the unit’s connection, andanother wrench to tighten. Serious internal damage to the water heater can occur if the COLD INLET and HOT OUTLET connections are over tightened or if solder connections were made.STEP 3After tightening both fittings at the water heater, open several hot water faucets and allow waterto run though the water heater for at least three minutes. This process purges all the air from thewater lines and MUST be performed prior to turning on the main power to the unit.If any maintenance is performed on the water heater or the home’s plumbing system that mayintroduce air into the plumbing pipes, it is important to turn the power off to the water heaterand purge the air out of the water lines before allowing the unit to power up.STEP 4ALWAYS inspect all connections, unions, and the pressure relief valve for leaks beforeproceeding to electrical installation.After flushing and filling the heater with water, (with power off) disconnect the COLD INLETconnection and inspect the filter screen for any debris that may have been flushed through thesystem.ELECTRICAL INFORMATIONElectric Shock Hazard. To prevent SERIOUS INJURY or DEATH, ALWAYS disconnect power supplybefore installing or servicing.Heatworks requires this product be installed and wired by a licensed and qualified electrician.BEFORE installing this product, make sure the home has sufficient electrical power availableto handle the amperage load of the MODEL 3 decided on after referencing the sizing tables onpage 18. Depending on the region of the country, the temperature of the water supply can varybetween 40 F in winter to 80 F in summer, with an average of 58 F. The output temperature atmaximum flow of the heater is dependent on inlet water temperature.In the United States, water heaters must be electrically grounded and the electrical installationmust comply with the current National Electrical Code (NFPA 70) and all applicable local codes.Please refer the regulations that are applicable in your country.When the heater is not within sight of the electrical circuit breakers, a circuit breaker lockout oradditional local means of disconnect for all non-grounded conductors must be provided that iswithin sight of the appliance. (Refer to National Electrical Code 422.31.)16 www.myheatworks.comBreaker must remain OFF until installation is complete.
Your MODEL 3 is an electrically powered high voltage and high current device. You should NEVERattempt to install, repair or disassemble this water heater without first disconnecting the powersupply to the unit directly at the fuse or breaker box. Failure to do so could result in propertydamage and/or personal injury, and void your warranty.ELECTRICAL SERVICEThe MODEL 3 only draws power when hot water is used and is considered a non-continuous load(draw power for periods shorter than three hours).The MODEL 3 amperage draw to total household amp draw is considered to be 40% of itsmaximum nameplate rating of 100 amps, or 40 amps (see NEC sections 220-82 (new buildings)or 220-83 (existing buildings). 40% of the nameplate rating for a conventional 4.5 kW electrictank water heater is 7.5 A. One MODEL 3 will add 32.5 A (40 A minus 7.5 A) additional amps to theservice. This relatively small increase in design service entrance amp draw can sometimes beaccommodated by modifying sizes of other loads on the system, such that no service entrancewiring upgrade is necessary.The installer should determine what the existing design amperage load is on the house as theremay already be excess current carrying capacity at the service entrance. If not, one option would beto set the MODEL 3 to a lower maximum current draw capability so no increase in service entranceamp draw would exist.DISCONNECTS AND SUBPANELSElectrical disconnect devices do not contain circuit breakers and are not required by the NEC forresidential appliances such as the MODEL 3 or any appliance rated less than 300 volts. Electricalsubpanels or parallel panels, containing circuit breakers, may be used with appliances such as theMODEL 3 in residential applications. A load analysis by a licensed professional is recommended todetermine if a subpanel, with a single breaker rated for the entire load of the water heater, can beinstalled off the main panel.BREAKERSEach MODEL 3 should be wired to its own, dedicated breaker. The dedicated branch circuit breakermust be rated to the same current value selected on the MODEL 3 and marked on the maximumcurrent setting label.NEVER wire a single MODEL 3 to multiple breakers.WIRE SIZINGTo prevent serious injury, death and property damage: NEVER set the maximum current setting on the MODEL 3 to a value higher than the maximumamperage rating of the wiring supplying the unit. ONLY use a breaker with the appropriate voltage rating and a maximum amperage rating nohigher than the wire’s maximum amperage rating to protect the power supply wiring.Unlike other water heaters, the MODEL 3 can be adjusted from 30 to 100 amps and 208-240 voltsupon installation, depending on your hot water needs and the existing wiring. The following chartshighlight temperature rises you can expect at the different voltages, amperages, and flow rates. Thehigher the amperage/power setting, the more hot water the unit can provide.www.myheatworks.com 17
Select settings based upon your home’s average demand. For example, two simultaneous showerstypically 3 GPM. Temperature rise is determined by the desired set point temperature minusgroundwater temperature. For example, 120 F - 66 F 54 F.18 www.myheatworks.comBreaker must remain OFF until installation is complete.
ELECTRICAL INSTALLATION INSTRUCTIONSALWAYS complete the plumbing installation and test to check there are no leaks and allfittings are properly installed BEFORE starting electrical installation.Installing Wire From Electrical PanelSTEP 1Check the wire gauge is appropriate for the intended voltage and amperage. The power supplywire must be connected to its own individual breaker.Amperage and Wiring TableCurrent (amps)Copper Wire Gauge(75 C 167 F)Aluminum Wire Gauge(90 C 194 P 2Connect the supply wire to a breaker (see wiring diagram). Make sure the breaker is connectedwith one black wire and one red wire.NOTE: ONLY supply power from a grounded system. A green terminal (or a wire connector marked“G”, “GR”, “GROUND”, or “GROUNDING”) is provided.To reduce the risk of electric shock, connect this terminal or connector to the grounding terminal ofthe electric service or supply panel with a continuous copper wire in accordance with the electricalinstallation code.STEP 3Using a suitable wire gauge that meets all applicable electrical codes for the size of the breakersused, run the supply wire from the home’s main breaker panel to the MODEL 3.NEVER wire a single MODEL 3 to multiple breakers.NOTE: Heatworks recommends using crimps on electrical leads when connecting electrical supplyto MODEL 3.www.myheatworks.com 19
Connecting Power Supply to MODEL 3Electric Shock Hazard. To prevent SERIOUS INJURY or DEATH, ALWAYS disconnect power supplybefore installing or servicing.In accordance with NEC 110.3(A), the information supplied in this manual, along with labels on theMODEL 3 (NEC 422.60(B)), allow suitability for installation and equipment use to be determinedand marked by a licensed electrician.STEP 1DOUBLE CHECK the electrical connections to make sure they are correct and that all wireconnections are tight and secure. Confirm again the correct breaker size and wire gauge has beenused and confirm the unit has been connected to a ground in accordance with applicable codes.STEP 2Confirm all the air has been purged from the water lines before energizing the breaker to supplypower to the unit. Refer to STEP 3 in the plumbing installation section.STEP 3Remove the service access panel cover located on the right bottom side of the unit by removingthe two (2) screws and carefully setting aside.STEP 4Verify all wiring (wire gauge) and circuit protection (breakers) comply with national and localelectrical codes.The MODEL 3 requires two (2) power conductors and one (1) grounding conductor.The power conductors should be Line 1 and Line 2 for a typical 208, 220, or 240 VAC single phaseinstallation.STEP 5Feed wire through the bottom of the unit and connect each of the individual wires as highlightedon the label in the service access area. Tighten each lug; make sure each connection is very snug.L1GL2L1 G L2This water heater must be grounded. Connect only to a properly grounded electrical supply. Thegrounding conductor should be connected to Earth Ground.20 www.myheatworks.comBreaker must remain OFF until installation is complete.
NOTE: Installer must circle
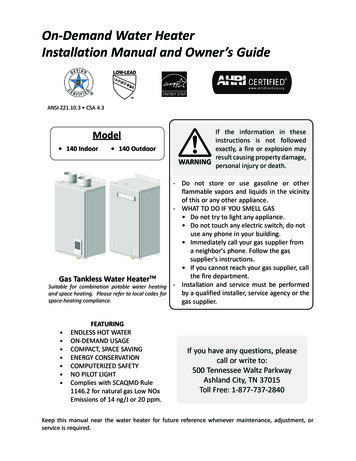
The MODEL 3 Water Heater is a tankless electric water heater which provides endless hot water for . a house, apartment, or a point-of-use. Unlike a conventional storage type water heater, the MODEL . or visit our support page at www.myheatworks.com. WHAT'S INCLUDED IN THE BOX. Before removing the old tank water heater and beginning .