Transcription
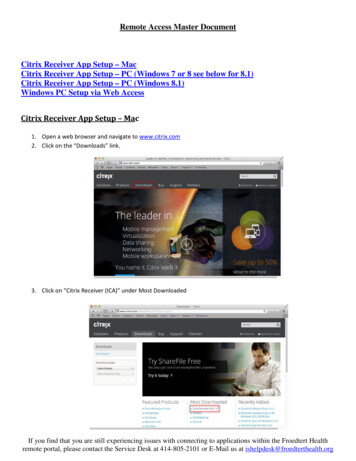
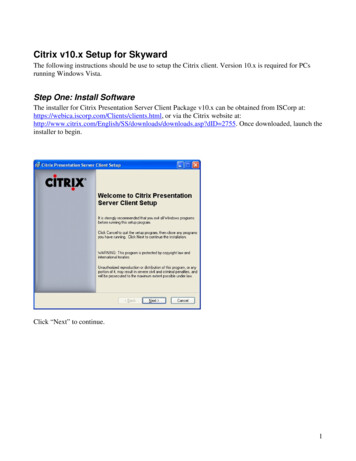
Citrix v10.x Setup for SkywardThe following instructions should be use to setup the Citrix client. Version 10.x is required for PCsrunning Windows Vista.Step One: Install SoftwareThe installer for Citrix Presentation Server Client Package v10.x can be obtained from ISCorp at:https://webica.iscorp.com/Clients/clients.html, or via the Citrix website loads.asp?dID 2755. Once downloaded, launch theinstaller to begin.Click “Next” to continue.1
Accept the licensing agreement and click “Next”.Disable the Program Neighborhood Agent. This functionality is not needed, and if installed preventsconnection to Skyward.Click “Next” to continue.2
Accept the default settings and click “Next”.Accept the default settings for client name and click “Next”.3
Select “No”, click “Next” to continue.Select these options based on your personal Desktop preferences, and click “Next” to continue.4
Verify your selections, and click “Next” to begin the setup.Wait for the Citrix install to complete.5
When Setup is complete, click “Finish”.Step Two: Citrix ConfigurationClick the “UP” button until you see the above screen. Double-click “Find New Application Set” tobegin Citrix configuration.6
Select “Local Area Network” (is default), and click “Next” to continue.Click on the “Server Location” button.7
Enter the following settings: Network Protocol: TCP/IPServer Group: PrimaryAddress List: Click “Add” and enterEDU4.ISCORP.COM andEDU5.ISCORP.COM.Click “Firewall”.Check “User alternate address for firewall connection”, click “OK” to accept.Click “OK” to continue.8
Click “OK” back to this screen. Enter in SKYWARD for both values. Click “Next” to continue.Select “Use Server Default” for both settings, click “Next” to continue.9
Click “Finish” to complete the setup.Double-click “SKYWARD” to log in.10
Enter your Citrix assigned User ID and password, and enter SKYWARD for the Domain. You cancheck “Save Password” as an option.11
connection to Skyward. Click "Next" to continue. 3 Accept the default settings and click "Next". Accept the default settings for client name and click "Next". 4 Select "No", click "Next" to continue. Select these options based on your personal Desktop preferences, and click "Next" to continue. 5