Transcription
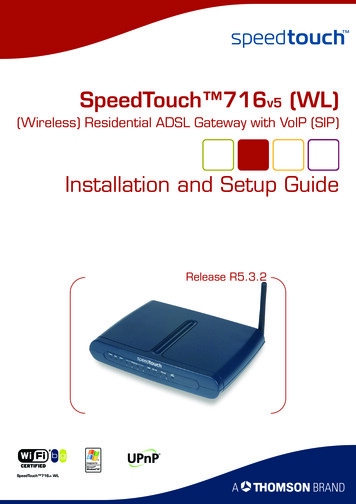
SpeedTouch 716v5 (WL)(Wireless) Residential ADSL Gateway with VoIP (SIP)Installation and Setup GuideRelease R5.3.2SpeedTouch 716v5 WL
SpeedTouch 716v5 (WL)Installation and Setup GuideR5.3.2
CopyrightCopyright 1999-2005 THOMSON. All rights reserved.Passing on, and copying of this document, use and communication of its contents is not permitted without written authorizationfrom THOMSON. The content of this document is furnished for informational use only, may be subject to change without notice,and should not be construed as a commitment by THOMSON. THOMSON assumes no responsibility or liability for any errors orinaccuracies that may appear in this document.Thomson Telecom BelgiumPrins Boudewijnlaan, 47B-2650 EdegemBelgiumwww.speedtouch.comTrademarksThe following trademarks are used in this document: SpeedTouch is a trademark of THOMSON. UNIX is a registered trademark of UNIX System Laboratories, Incorporated. Adobe, the Adobe logo, Acrobat and Acrobat Reader are trademarks or registered trademarks of Adobe Systems, Incorporated, registered in the United States and/or other countries. Netscape and Netscape Navigator are registered trademarks of Netscape Communications Corporation.Microsoft , MS-DOS , Windows and Windows NT are either registered trademarks or trademarks of Microsoft Corporation in the United States and/or other countries.Apple and Mac OS are registered trademarks of Apple Computer, Incorporated, registered in the United States andother countries.Ethernet is a trademark of Xerox Corporation.UPnP is a certification mark of the UPnP Implementers Corporation.Wi-Fi and the Wi-Fi logo are registered trademarks of the Wi-Fi Alliance. "Wi-Fi CERTIFIED", "Wi-Fi ZONE", "Wi-Fi Alliance", their respective logos and "Wi-Fi Protected Access" are trademarks of the Wi-Fi Alliance.Other products may be trademarks or registered trademarks of their respective manufacturers.Document InformationStatus: v2.0 (July 2005)Reference: E-DOC-CTC-20050401-0007Short Title: Installation and Setup Guide ST716v5 (WL) R5.3.2 (en)
ContentsContentsAbout this Installation and Setup Guide . 1E-DOC-CTC-20050401-0007 v2.01Introducing the SpeedTouch . 32Basic Installation . 52.1Setting Up your SpeedTouch . 62.2First Time Installation . 72.2.1Guided Installation. 82.2.2Manual Installation . 172.3The SpeedTouch Setup CD. 192.4SpeedTouch Connections Essentials. 212.5Connections Overview and Powering . 222.5.1Installing USB drivers. 232.5.2Wireless Setup . 252.6Basic Security . 263Web-Based User Interface. 29i
Contentsii4Internet Connection Troubleshooting. 314.1Checking the Hardware. 324.2LED Diagnostics . 334.3Web Diagnostics . 354.4SpeedTouch Setup CD Troubleshooting . 374.5Wireless Setup Troubleshooting . 404.6Easy Setup Troubleshooting . 41E-DOC-CTC-20050401-0007 v2.0
About this Installation and Setup GuideAbout this Installation and Setup GuideUsed symbolsA note provides additional information about a topic.A tip provides an alternative method or shortcut to perform an action.!TerminologyDocumentation andsoftware updatesA caution warns you about potential problems or specific precautions thatneed to be taken.Generally, the SpeedTouch 716v5(i) and the SpeedTouch 716v5(i) WL will bereferred to as SpeedTouch in this Installation and Setup Guide.THOMSON continuously develops new solutions, but is also committed to improveits existing products.For suggestions regarding this document, please contactdocumentation.speedtouch@thomson.net.For more information on THOMSON's latest technological innovations, documentsand software releases, visit us at:www.speedtouch.comE-DOC-CTC-20050401-0007 v2.01
About this Installation and Setup Guide2E-DOC-CTC-20050401-0007 v2.0
Chapter 1Introducing the SpeedTouch 1 Introducing the SpeedTouch IntroductionIn a minute you will be able to access the Internet using yourSpeedTouch 716v5(i) (WL) (Wireless) Residential ADSL Gateway with Voice over IP(VoIP).This Installation and Setup Guide will show you how to set up your SpeedTouch and how to connect a computer or a local area network (LAN) to the Internet.Identifying yourSpeedTouch The label on the bottom side of your SpeedTouch , informs you on theSpeedTouch ’s: Product name Model number Serial number Power requirements!DSL variantsDo not remove, nor cover the marking label.The SpeedTouch comes in two ADSL flavours: The ADSL POTS variant: The SpeedTouch 716v5 (WL) connects to ananalogue Plain Old Telephone Service (POTS) line. The ADSL ISDN variant: The SpeedTouch 716v5i (WL) connects to anIntegrated Service Digital Network (ISDN) line, enabling residences with anISDN line to use the ADSL service.The POTS variant supports ADSL, ADSL2, RE-ADSL, and ADSL2 . The ISDN variantsupports ADSL, ADSL2, and ADSL2 .You can easily identify your variant by checking the product name printed on thelabel on the bottom of your SpeedTouch .!E-DOC-CTC-20050401-0007 v2.0Use only the SpeedTouch variant which is appropriate for the DSL serviceprovided to your premises.3
Chapter 1Introducing the SpeedTouch SpeedTouch SetupCDYour SpeedTouch is delivered with a Setup CD.If you insert the CD on a Microsoft Windows PC or Mac OS X computer: The first time, an intuitive SpeedTouch Quick Installation Wizard will guideyou through the hardware setup of your SpeedTouch and will help you toconnect to the Internet.See “2.2 First Time Installation” on page 7 for more information. For future reference, the SpeedTouch CD Menu provides links to all contentsSee “2.3 The SpeedTouch Setup CD” on page 19 for more information.In case of another operating system a set of subdirectories allows you to easilybrowse for user documentation, SpeedTouch system software, service templates,etcetera.SpeedTouch HomeInstall WizardThe SpeedTouch Home Install Wizard has been designed to help you on theInternet in a flash.First, the wizard will try to detect your SpeedTouch . After connecting yourcomputer, the wizard will configure your SpeedTouch and - if necessary - yourcomputer.The Home Install Wizard was designed for Microsoft Windows operating systemsand Mac OS X - in the latter case provided you will use a wired connection to yourSpeedTouch .You can launch the SpeedTouch Home Install Wizard: Automatically from out the SpeedTouch Quick Installation Wizard when youinsert the SpeedTouch Setup CD in a computer for the first time.See “2.2 First Time Installation” on page 7 for more information. From the SpeedTouch CD Menu Home page, via Run Quick Installation. Thiswill in fact re-run the Quick Installation Wizard and subsequently start theHome Install Wizard as if you launch the Setup CD for the first time. From the SpeedTouch CD Menu Maintenance page, via Reconfigure mySpeedTouch .If you do not want to use the guided installation procedure, you can alsofully manual install and configure your SpeedTouch . See “2.2.2 ManualInstallation” on page 17 for more information.4E-DOC-CTC-20050401-0007 v2.0
Chapter 2Basic Installation2 Basic InstallationBefore you beginADSL serviceMake sure to read the safety instructions and regulatory notices first. The safetyinstructions can be found on the Setup CD (see “2.2 First Time Installation” onpage 7) and/or may also be provided as printed booklet.The ADSL service must be up and running on your telephone or ISDN line.If both telephone and ADSL service are simultaneously available from the samecopper pair, you will need a central splitter or distributed filters for decouplingADSL and telephone signals.Public telephone lines carry voltages that can cause electric shock. Only tryto set up splitter/filters that have been designed to be installed byunqualified personnel. For further assistance, contact your service provider.!Computer requirementsTo connect computer(s) via Ethernet, make sure the computer(s) are equipped withan Ethernet network interface card (NIC).To connect a computer via USB, you need a free USB port on the computer or aconnected USB hub.For wireless networking, you will need a wireless 802.11 b/g compatible clientadapter for each computer you intend to connect wirelessly.As wireless client adapter, you can:What you need fromyour ISPE-DOC-CTC-20050401-0007 v2.0 Use a provided SpeedTouch 110g CardBus. Use a provided SpeedTouch 120g USB adapter (with cable). Plug a provided SpeedTouch 121g adapter directly into your computer’s USBport (without cable). Use any other Wi-Fi certified WLAN client.Following configuration parameters are provided by your ISP: Your ISP’s connection service model (for example PPPoE) VPI/VCI (for example 8/35) Your user name and password to connect to the Internet5
Chapter 2Basic Installation2.1 Setting Up your SpeedTouch SpeedTouch housingWall mountThe SpeedTouch can be mounted on a wall, setup upright or simply be placed asa desktop.You can mount the SpeedTouch on a wall or other vertical surface:Proceed as follows:1Drill two holes in the wall or other vertical surface where you want to place theSpeedTouch .2Fasten two screws in the wall holes. The screws should protrude fivemillimetres from the surface of the wall.3Attach your SpeedTouch on the wall using the two mounting slots on thebottom side.If you install the SpeedTouch onto plasterboard, use dowels tosecure the screws. Otherwise the strain of the cables connected to theSpeedTouch rear panel connectors could pull the SpeedTouch from the wall.Stand-up6To setup the SpeedTouch in an upright position, use the provided cradle (ifavailable).E-DOC-CTC-20050401-0007 v2.0
Chapter 2Basic Installation2.2 First Time InstallationInternet connectivitysetupThere are different ways of setting up Internet connectivity on your SpeedTouch .The best way depends on your operating system.If you use followingoperating systemthe recommended way to setup yourSpeedTouch isMS Windows (98 SE,Millennium, 2000 or XP)the Home Install Wizard, as described in“2.2.1 Guided Installation” on page 8.Mac OS X, provided you willuse a wired connection toyour SpeedTouch Any operating system(provided you have IPconnectivity)Mac OS X, wirelesslyconnected to yourSpeedTouch and providedyou have IP connectivitythe Easy Setup, as described in “2.2.2 ManualInstallation” on page 17: Open your webbrowser, the SpeedTouch HTTP intercept willdo the rest.If you are using MS Windows XP, it is also be possible to use the MSWindows XP Internet Gateway Device (IGD) Control Agent for UPnP, asdescribed in the SpeedTouch User’s Guide.E-DOC-CTC-20050401-0007 v2.07
Chapter 2Basic Installation2.2.1 Guided InstallationIntroductionOn the CD a Quick Installation Wizard is provided that will guide you through thefirst installation and set-up of your SpeedTouch .The Quick Installation Wizard will: Provide important safety information and regulatory information. Show you how to make the necessary connections to your SpeedTouch . How to turn on your device. Prepare you to smoothly run the SpeedTouch Home Install Wizard.The subsequent SpeedTouch Home Install Wizard will then prepare yourSpeedTouch and your local computer(s) for connecting to the Internet.The Home Install Wizard will: Guide you through connecting your computer(s) to your SpeedTouch . Prepare the SpeedTouch for connecting to the Internet.To be able to run the applications on the Setup CD on an MS Windows 2000,an MS Windows XP operating system, or Mac OS X computer, you needadministrative rights.!IMPORTANT NOTICELaunching the CD forthe first timeDo not make any connections to your SpeedTouch until you are instructed to doso by the SpeedTouch Quick Installation Wizard and/or the SpeedTouch HomeInstall Wizard.To launch the SpeedTouch Setup CD Menu:1Insert the Setup CD in your computer's CD-ROM or DVD-ROM drive. On MS Windows: The CD should autostart.If not, refer to ”The SpeedTouch CD does not startautomatically” on page 37. On Mac OS X: Double-click Menu in the window with the content of theCD.2In the Choose Language window, select the language of your choice and clickOK.3The procedure continues with the SpeedTouch Quick Installation Wizard.Proceed with “ Quick Installation Wizard” on page 9.8E-DOC-CTC-20050401-0007 v2.0
Chapter 2Basic InstallationQuick InstallationWizardProceed as follows:1The SpeedTouch Quick Installation Wizard will guide you through the firstsetup of your SpeedTouch .On the Welcome page, click Next to continue.If you ran the CD on this computer before, the Quick InstallationWizard is not shown; instead the CD menu pops up.2Select your SpeedTouch product from the list of supported devices.To easily identify your SpeedTouch a product picture is shown. Ifyou are not sure what device you have, check the label on the bottomside of your SpeedTouch .Click Next to continue.E-DOC-CTC-20050401-0007 v2.09
Chapter 2Basic Installation3The SpeedTouch Safety Instructions and Regulatory Notices will bedisplayed. Scroll down to read all the instructions carefully. If you havecarefully read these Safety Instructions and Regulatory Notices, select I haveread and I fully understand the Safety Instructions and RegulatoryInformation to confirm your reading and click Next.Your SpeedTouch product is designed and tested to meet the latestsafety standards. However, to ensure safe use of this product, it isimportant that the Safety Instructions and Regulatory Notices shownand/or available in the Safety and Regulatory booklet are read, andcomplied with carefully, before installing the SpeedTouch product.!4Subsequent screens will guide you through the preliminary hardware setup ofyour SpeedTouch .Carefully follow all the instructions. Click Next each time your are ready toproceed.5As soon as all required preliminary connections to your SpeedTouch havebeen made, and your SpeedTouch is turned on and initialized, the final stepsin the Quick Installation Wizard will: Make sure that you have all information readily available to let the HomeInstall Wizard configure your SpeedTouch to connect to the Internet.See “ What you need from your ISP” on page 5for an overview ofinformation you must have readily available. Start the SpeedTouch Home Install Wizard.Click Setup my SpeedTouch to continue.6The procedure continues with the SpeedTouch Home Install Wizard.Proceed with “ Home Install Wizard” on page 11.10E-DOC-CTC-20050401-0007 v2.0
Chapter 2Basic InstallationHome Install WizardProceed as follows:1The SpeedTouch Home Install Wizard will guide you through your localnetwork connections and prepare the SpeedTouch for Internet connectivity.On the Welcome page, click Next to continue.2The Software License Agreement window appears.You must accept before continuing. Click Yes to accept.If you accepted this License Agreement in a previous configurationsetup, this window will not be shown.3The SpeedTouch Home Install Wizard will check your system and will inviteyou to connect the SpeedTouch to your computer.See “ SpeedTouch wiring” on page 21 for a comprehensiveoverview of all SpeedTouch connections.E-DOC-CTC-20050401-0007 v2.011
Chapter 2Basic Installation4Make one of following connections: Connect the yellow RJ-45 Ethernet cable to the yellow (indicated)Ethernet port on your SpeedTouch and the other end to the computer’sEthernet port. Connect the blue USB cable to the blue indicated USB port on yourSpeedTouch and the other end to the computer’s USB port.In case of problems or for advanced information, see“2.5.1 Installing USB drivers” on page 23. For wireless networking, plug a wireless card or adapter in yourcomputer.In case of problems or for advanced information, see“2.5.2 Wireless Setup” on page 25.5Once the hardware is installed successfully and you are connected to theSpeedTouch , the procedure continues with configuring your Internetconnection.If the wizard does not detect a connection, an error message will bedisplayed. Refer to “ The wizard does not detect a connection” onpage 37.Proceed with “ Configuring the Internet connection” on page 13.12E-DOC-CTC-20050401-0007 v2.0
Chapter 2Basic InstallationConfiguring the InternetconnectionProceed as follows:1If prompted, enter the User name and Password for your SpeedTouch security settings and click OK.The factory default user is ‘Administrator’. Its password is blank,meaning you do not have to enter anything in the password field. It isadvisable to specify another user name and password to protect yourSpeedTouch from security violation during the configurationprocedure (see “2.6 Basic Security” on page 26 for more information.2Select the appropriate Region, Provider and Service for your Internetconnection as specified by your service provider and click Next.!34If the service provider has included a separate disk with a dedicatedservice profile, click Have Disk. to browse to the location of theappropriate service profile template file.From here on the procedure might differ from the description below.The requested information will depend on the selected service profileand should be provided by your Service Provider. Subsequent screenswill guide you through the configuration setup of both theSpeedTouch and your computer. Enter the requested informationand click Next whenever requested.First your Internet connectivity will be set up: Select the VPI/VCI - and, if required, the Connection Type - as specifiedby your service provider and click Next. Enter the User Name and Password for your Internet account settings asspecified by your service provider and click Next.The procedure continues with some additional configurations.Proceed with “ Configuring the SpeedTouch (and your computer)” onpage 14.E-DOC-CTC-20050401-0007 v2.013
Chapter 2Basic InstallationConfiguring theSpeedTouch (and yourcomputer)Proceed as follows:1Depending on the selected service profile and your ISP’s requirements,additional settings may be requested to be filled in during the Home InstallWizard, like Dynamic DNS Service, Time Configuration or other.Enter the information provided by your ISP and click Next wheneverrequested.2To enable the Internet telephony service, enter following information asprovided by your service provider: IP address/domain name and port number (usually 5060) of theprovider’s SIP proxy server IP address/domain name and port number (usually 5060) of theprovider’s registrar SIP Telephone number or URI, User Name and Password; you canchoose to assign this phone number to a specific phone port (‘Port 1’ or‘Port 2’) or to both ports (‘COMMON’).Click Next to continue.314To protect your SpeedTouch from unauthorised access, you must provide auser name and password. Each time a user wants to access a SpeedTouch management interface, the user will be prompted to provide this user nameE-DOC-CTC-20050401-0007 v2.0
Chapter 2Basic Installationand password before access is granted.Click Next to continue.4To protect the wireless connections to your SpeedTouch , move the slidecontrol to the desired security mode.Following security modes to secure traffic between the SpeedTouch andconnected wireless stations are available: Low, which implies in fact that no security measures are taken at all Medium, implying that traffic is encrypted by means of a staticencryption key (WEP). High, providing the highest security standard available (WPA) forencrypting all wireless traffic.For an overview on all SpeedTouch wireless security features, see“ Securing your wireless network” on page 26.5The procedure continues with the final steps of configuring yourSpeedTouch and your computer.Proceed with “ Finishing the Home Install Wizard” on page 16.E-DOC-CTC-20050401-0007 v2.015
Chapter 2Basic InstallationFinishing the HomeInstall WizardProceed as follows:1The SpeedTouch Home Install Wizard will configure the SpeedTouch andyour computer according to the service profile. You can follow theconfiguration progress in following window:2Finally, click Finish to close the wizard.After some seconds, the PPP LED on your SpeedTouch will be lit green to indicateInternet connectivity. If not, refer to “4.2 LED Diagnostics” on page 33. If needed,you can test your Internet connection as described in “ Testing your InternetConnection” on page 35.The SpeedTouch CD Menu will be displayed. See “2.3 The SpeedTouch SetupCD” on page 19 for more information.You will be redirected to the embedded SpeedTouch pages automatically (unlessyou cleared the http://speedtouch.lan check box in the last window of the HomeInstall Wizard). These pages allow you to configure your firewall, device settings,your wireless access point settings, and so on. See the SpeedTouch User’s Guidefor more information.More on IP settingsThe computer’s networking interface, used during the Home Install Wizardprocedure, will be configured for obtaining its IP configuration dynamically in thevery most cases. This is the most convenient configuration and should not bechanged.For fixed or advanced IP configurations, please follow the instructions ofyour ISP.16E-DOC-CTC-20050401-0007 v2.0
Chapter 2Basic Installation2.2.2 Manual InstallationWeb-Based Easy SetupWith help of the Easy Setup, your Internet connection is set up in a few clicks.The Easy Setup is Operating System independent.PreconditionsMake sure that: Your SpeedTouch is correctly set up and powered on. Your computer is connected to the SpeedTouch . In case of a wirelessconnection, a wireless client adapter has to be installed on your computer andcorrectly configured to connect to your SpeedTouch .See “ SpeedTouch wiring” on page 21 for a comprehensiveoverview of all SpeedTouch connections. Your host computer is configured as DHCP client or is configured with a validfixed IP address.in case of problems, you can give the host computer a fixed IP addressin the same subnet as your SpeedTouch (If the SpeedTouch is inits default settings, that is an address between 192.168.1.1 and192.168.1.253). In case you use fixed IP addresses, the SpeedTouch has to be configured as DNS server (default). HTTP interceptYour web browser is not using a proxy server. For more information, see“ Disable proxy server” on page 41.Proceed as follows:1Open a web browser. Browse to an arbitrary web site, for instance http://www.speedtouch.com. As long as no Internet connection has been set up, youwill be automatically redirected to the SpeedTouch Welcome page.If you’re not redirected automatically, go to “ Launching the EasySetup wizard” on page 18E-DOC-CTC-20050401-0007 v2.02Click on Setup my SpeedTouch to launch the Easy Setup wizard.3Proceed with “ Setting up Internet connection” on page 18.17
Chapter 2Basic InstallationLaunching the EasySetup wizardSetting up InternetconnectionIt is always possible to launch the Easy Setup wizard from within the embeddedweb pages. Proceed as follows:1Browse to the SpeedTouch pages on http://speedtouch.lan or on its IPaddress, its default being 192.168.1.254.2In the menu click SpeedTouch.3In the Pick a task. list click Set Up.In the Easy Setup wizard:1Click Next to proceed. If for some reason you want to abort the wizard, clickCancel.2Choose the Service provided by your ISP (Router or Bridge); then click Next.3Select the appropriate VPI/VCI - and, if required, the Connection Type (PPPoEor PPPoA) - provided by your ISP; then click Next.4For a Routed service, fill in the Internet Account settings (PPP user name andpassword) provided by your ISP. Click Next.5Fill in the SpeedTouch Security user name and Password.The factory default user is ‘Administrator’. Its password is blank,meaning you do not need to enter anything in the password field. It isadvisable to specify another Administrator user name and passwordto protect your SpeedTouch from security violation, as described in“2.6 Basic Security” on page 26.186In the next screen you can review your settings, before to start theconfiguration of your SpeedTouch . If something is missing or incorrect, clickBack. To confirm the settings, click Start.7Please wait until the configuration has been done, and then click Finish. After awhile you will be returned automatically to the Welcome page. Click on thebottom link to go to the SpeedTouch pages or select Don’t show this page toaccess the Internet via your default home page.E-DOC-CTC-20050401-0007 v2.0
Chapter 2Basic Installation2.3 The SpeedTouch Setup CDIntroductionYour SpeedTouch is delivered with a Setup CD.If you insert the CD on a Microsoft Windows PC or Mac OS X computer, an intuitiveCD Menu guides you through the features and contents of the Setup CD.In case of another operating system a set of subdirectories allows you to easilybrowse for user documentation, SpeedTouch system software, service templates,etcetera.SpeedTouch CD menuThe SpeedTouch CD menu will pop up automatically each time you insert the CD,or after running the Quick Installation Wizard and subsequent Home Install Wizard:Select:E-DOC-CTC-20050401-0007 v2.0 Run Quick Installation to start the SpeedTouch Quick Installation Wizard. SpeedTouch Maintenance to: Reconfigure your SpeedTouch via the Home Install Wizard. Upgrade the software version on your SpeedTouch . Check for SpeedTouch upgrades on the Internet.19
Chapter 2Basic Installation Documentation and Help to: Consult user documentation for your SpeedTouch DSL Gateway. Consult user documentation for SpeedTouch networking products. See more information on SpeedTouch products and solutions. Visit the online support sections on www.speedtouch.com.In case you experience problems when viewing the SpeedTouch documentation, see “ SpeedTouch documentation cannot beviewed” on page 38. 20Open a new window to view the Setup CD contents.E-DOC-CTC-20050401-0007 v2.0
Chapter 2Basic Installation2.4 SpeedTouch Connections EssentialsSpeedTouch wiringThe figure below shows all possible types of connection to the SpeedTouch .The colour coded printing on the backpanel of your SpeedTouch willfacilitate matching the colour coded cables.Making connectionsIn most cases, the SpeedTouch Quick Installation Wizard and Home Install Wizardwill guide you through the process of making all required connections to yourSpeedTouch .It is recommended to wait to make any of these connections until the wizardwill ask you to do so. See “2.2 First Time Installation” on page 7 for moreinformation.In case you want to make the required connections yourself, see “2.5 ConnectionsOverview and Powering” on page 22 for more information.E-DOC-CTC-20050401-0007 v2.021
Chapter 2Basic Installation2.5 Connections Overview and PoweringIntroductionIn case you want to make the required connections yourself without using theguided installation procedure as recommended, you must: Make sure to read the safety instructions and regulatory notices first.The safety instructions can be found on the Setup CD (see “2.2 FirstTime Installation” on page 7) and/or may also be provided as printedbooklet. DSL ConnectionVoIP ConnectionsFollow the order as indicated below for making connections to yourSpeedTouch .Use the grey DSL cable to wire the SpeedTouch DSL port to your telephone walloutlet or distributed filter.The SpeedTouch allows you to make telephone calls over the Internet, using atraditional phone. To be able to use the VoIP service, your provider will give you atelephone number like Uniform Resource Identifier (URI), user name and password.Depending on your phone/VoIP contract, you can still make calls over the regulartelephone line, provided that you have connected the PSTN port of yourSpeedTouch .For more information, see the SpeedTouch User’s Guide.Powering theSpeedTouch Plug in the coaxial jack from the electric power supply adapter into theSpeedTouch power inlet port and the other end to the wall outlet.The SpeedTouch electrical power requirements are indicated on the labelon the bottom side of your SpeedTouch . In case you need to use anotherpower supply than the one provided, make sure that the spare supplycomplies with the SpeedTouch power requirements.!To power on the SpeedTouch , press the power button on the SpeedTouch rearpanel.During the start-up procedure, the power LED on the front panel is lit red for someseconds. As soon as the power LED is solidly lit green, your SpeedTouch is readyfor service. After another couple of seconds, also the DSL LED will light green.If these LEDs do not light, please refer to ”Checking the LEDs” on page 33. Acomprehensive LED overview can be found in the SpeedTouch User’s Guide.To power off your SpeedTouch , use the same button.Network connectionsYour SpeedTouch allows you to connect your computer(s) via: Ethernet USB Wireless networkingIt is recommended to use the Guided Installation procedure.See “2.2.1 Gu
The label on the bottom side of your SpeedTouch , informs you on the SpeedTouch 's: Product name Model number Serial number Power requirements DSL variants The SpeedTouch comes in two ADSL flavours: The ADSL POTS variant: The SpeedTouch 716 v5 (WL) connects to an analogue Plain Old Telephone Service (POTS) line.
